> For the complete documentation index, see [llms.txt](https://documentation.swing2app.com/llms.txt). Markdown versions of documentation pages are available by appending `.md` to page URLs; this page is available as [Markdown](https://documentation.swing2app.com/store/playstore/apptransfer.md).
# Transfer your app to another developer account on the Play Store
**How to move Play Store apps to another developer account (app transfer guide)**
There are times when you need to release an app to the Play Store and move the app you’re running to another Google developer account.
At this time, Google provides an app transfer service that allows you to move the released app to another account.
Please refer to the Swing2App article for instructions on how to transfer your app to another Google Developer account.
**★Instructions**
**-App developer account transfers can be moved when the app is released to the Play Store.**
**-You can’t move apps that are temporarily archived (apps that haven’t been published) or deleted apps!**
-App transfer must be done by the developer account owner, and Swing2App does not act on behalf of or on behalf of.
### **01. Google Developer Account App Transfer Site**
First, let ‘s go to the Google Developer App Transfer site, where you can transfer apps!
**\*Google App Transfer Site :** [**https://support.google.com/googleplay/android-developer/contact/appt**](https://support.google.com/googleplay/android-developer/contact/appt)
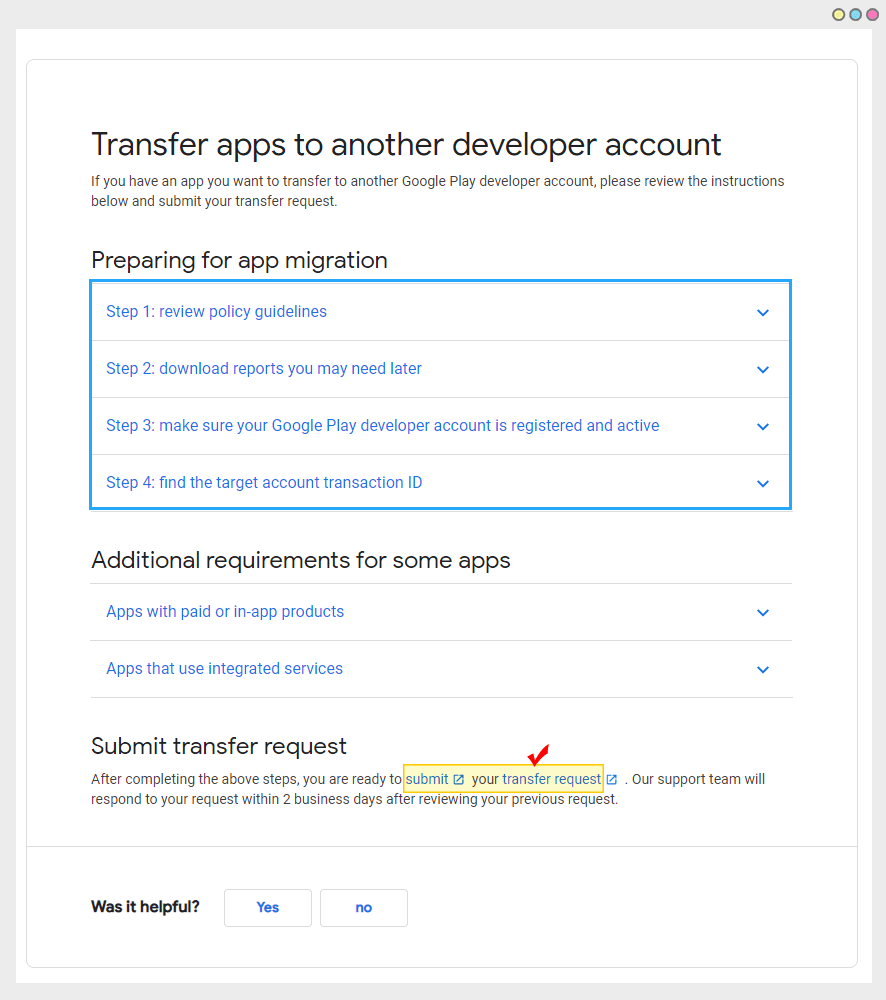
You should check all the contents of the 4 steps before the app migration.
\*You must know the existing account (ID, password) that the app was released to.
\*You should also be aware of the target account (ID, password) that you want to move the app to.
\*You must also have your target account transaction ID.
Once you’ve confirmed it, please select the blue letter **\[Submit transfer request]** in the previous request submission item.
### **02. Fill out the app transfer application**
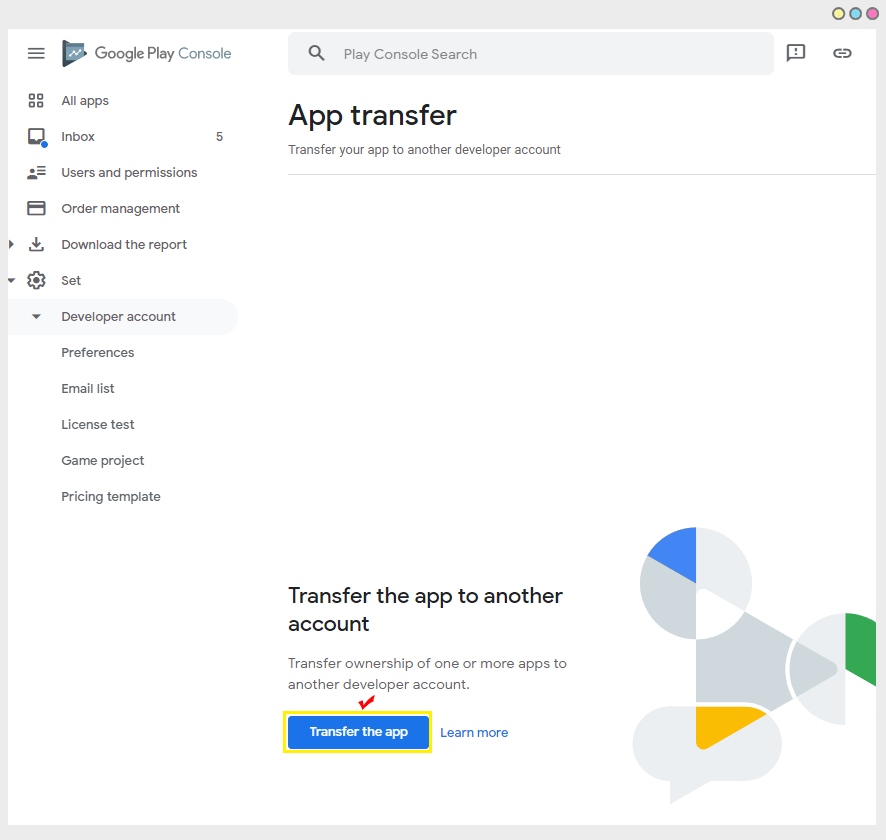
Click the **\[Transfer the app]** button to go to the application page.
\*When transferring an app, log in to the ‘existing’ account where the app was launched. If you do not know the existing account, you cannot transfer the app.
**\[Application Form]**
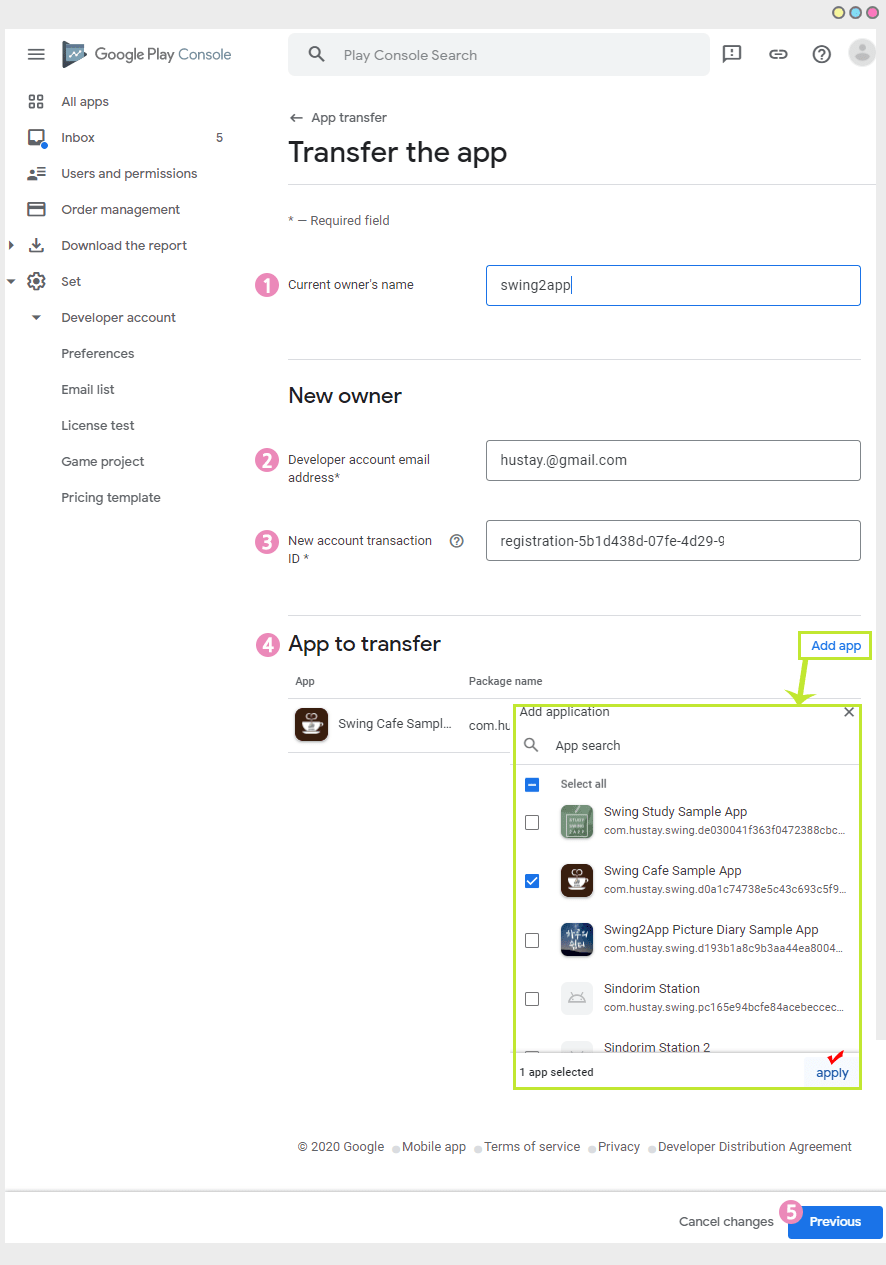
1\) Name: Enter the name of the current owner account.
2\)’New Owner’ Developer Account Email Address: Enter the Google developer account email address you want to transfer the app to.
3\)’New Owner’ New Account Transaction ID: Enter the order ID of the new account to which the app will be transferred.
**\*Order ID is the transaction ID you receive when you create a developer account. We will tell you how to check in the next step.**
4\) App to transfer: Select the app you want to transfer by clicking the **\[Add App]** button and then tap the Apply button.
\*If you have multiple apps in one account, you can transfer multiple apps at the same time. You can select and transfer only one app you want.
5\) Press the **\[Previous]** button to complete the submission.
### **03. Check Google Developer Account Order (Transaction) ID**

**\*\*Google Payment Center:** [**https://pay.google.com/payments/home**](https://pay.google.com/payments/home)
Go to the Google payment center when you connect to the site.
1\)Select Activity
2\) Select “Google Play Developer Token” from Activity
3\) You can find the **Deal ID** in the transaction details on the right.
Exclude the numbers from here. R**egistration- Please copy from the beginning and paste it in the ID box of the application order above.**
> The registration transaction ID format is mostly:
>
> 01234567890123456789.token.0123456789012345
>
> 0.G.123456789012345
>
> Registration-1234ab56-7c89-12d3-4567-8e91234567f8
>
> PDS.1234-5678-9012-3456
### **04. Completed the application transfer**

You have completed the app transfer application.
The message appears which says that the transfer request has been received and the transfer will take approximately two days.
### **05. Completed app transfer**
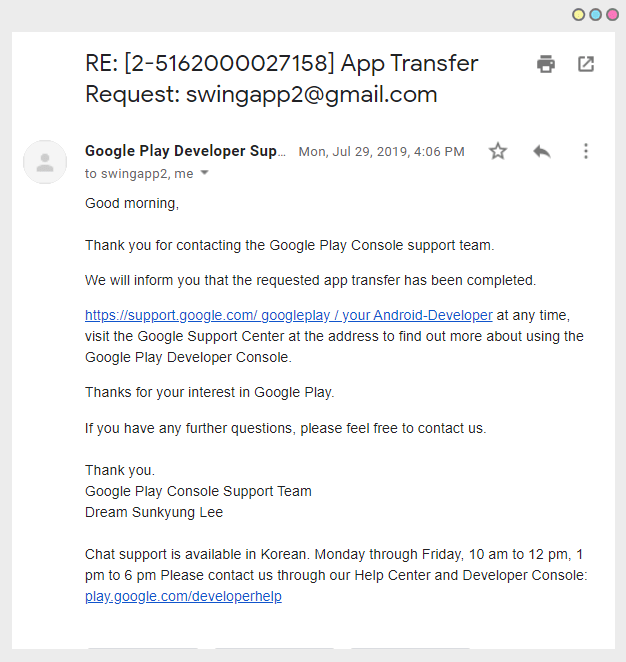
When the app transfer is complete, Google will send you an email saying the app transfer is complete.
When you receive the mail, you can access the changed developer account and run the app.
The app transfer are stated for 2 days, but they’re done sooner than that period.
Please take the time to apply for the transfer.
If you need to transfer the app to another account, please refer to the manual.