> For the complete documentation index, see [llms.txt](https://documentation.swing2app.com/llms.txt). Markdown versions of documentation pages are available by appending `.md` to page URLs; this page is available as [Markdown](https://documentation.swing2app.com/manual/appmanage/board/post-write.md).
# Bulletin Board – How to Enter Posts
There are many ways to write a post.
1. Manager -> Posts -> Select the Board you want to write a post in.
2. Run the app on your phone and write it on the bulletin board
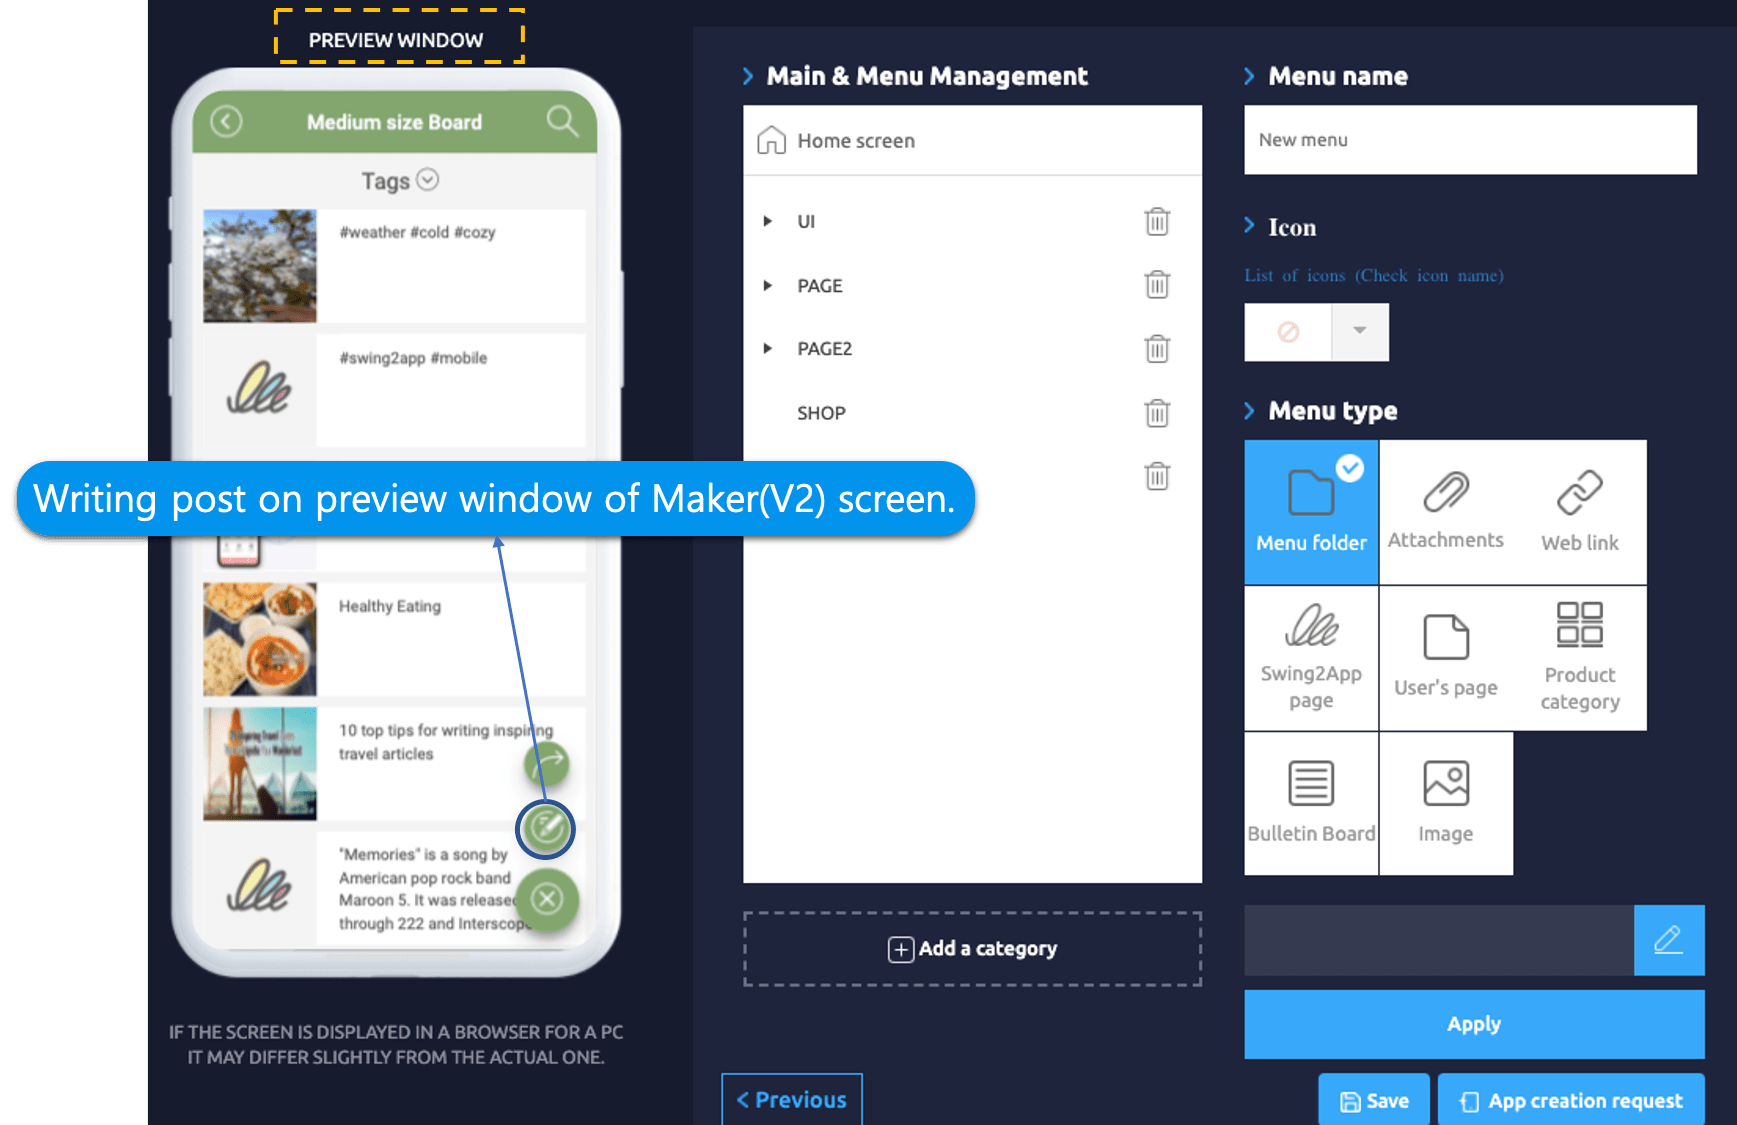
3. Maker(V2) -> Page Menu -> Write a post on Mobile screen by selecting the board in Preview Window
Please check the manual entry method below.
## STEP1. Creating a post on the app operation page (admin page)
1. Go to **Manager.**
2. Select **Posts.**
3. Click on **More Bulletin Boards.**
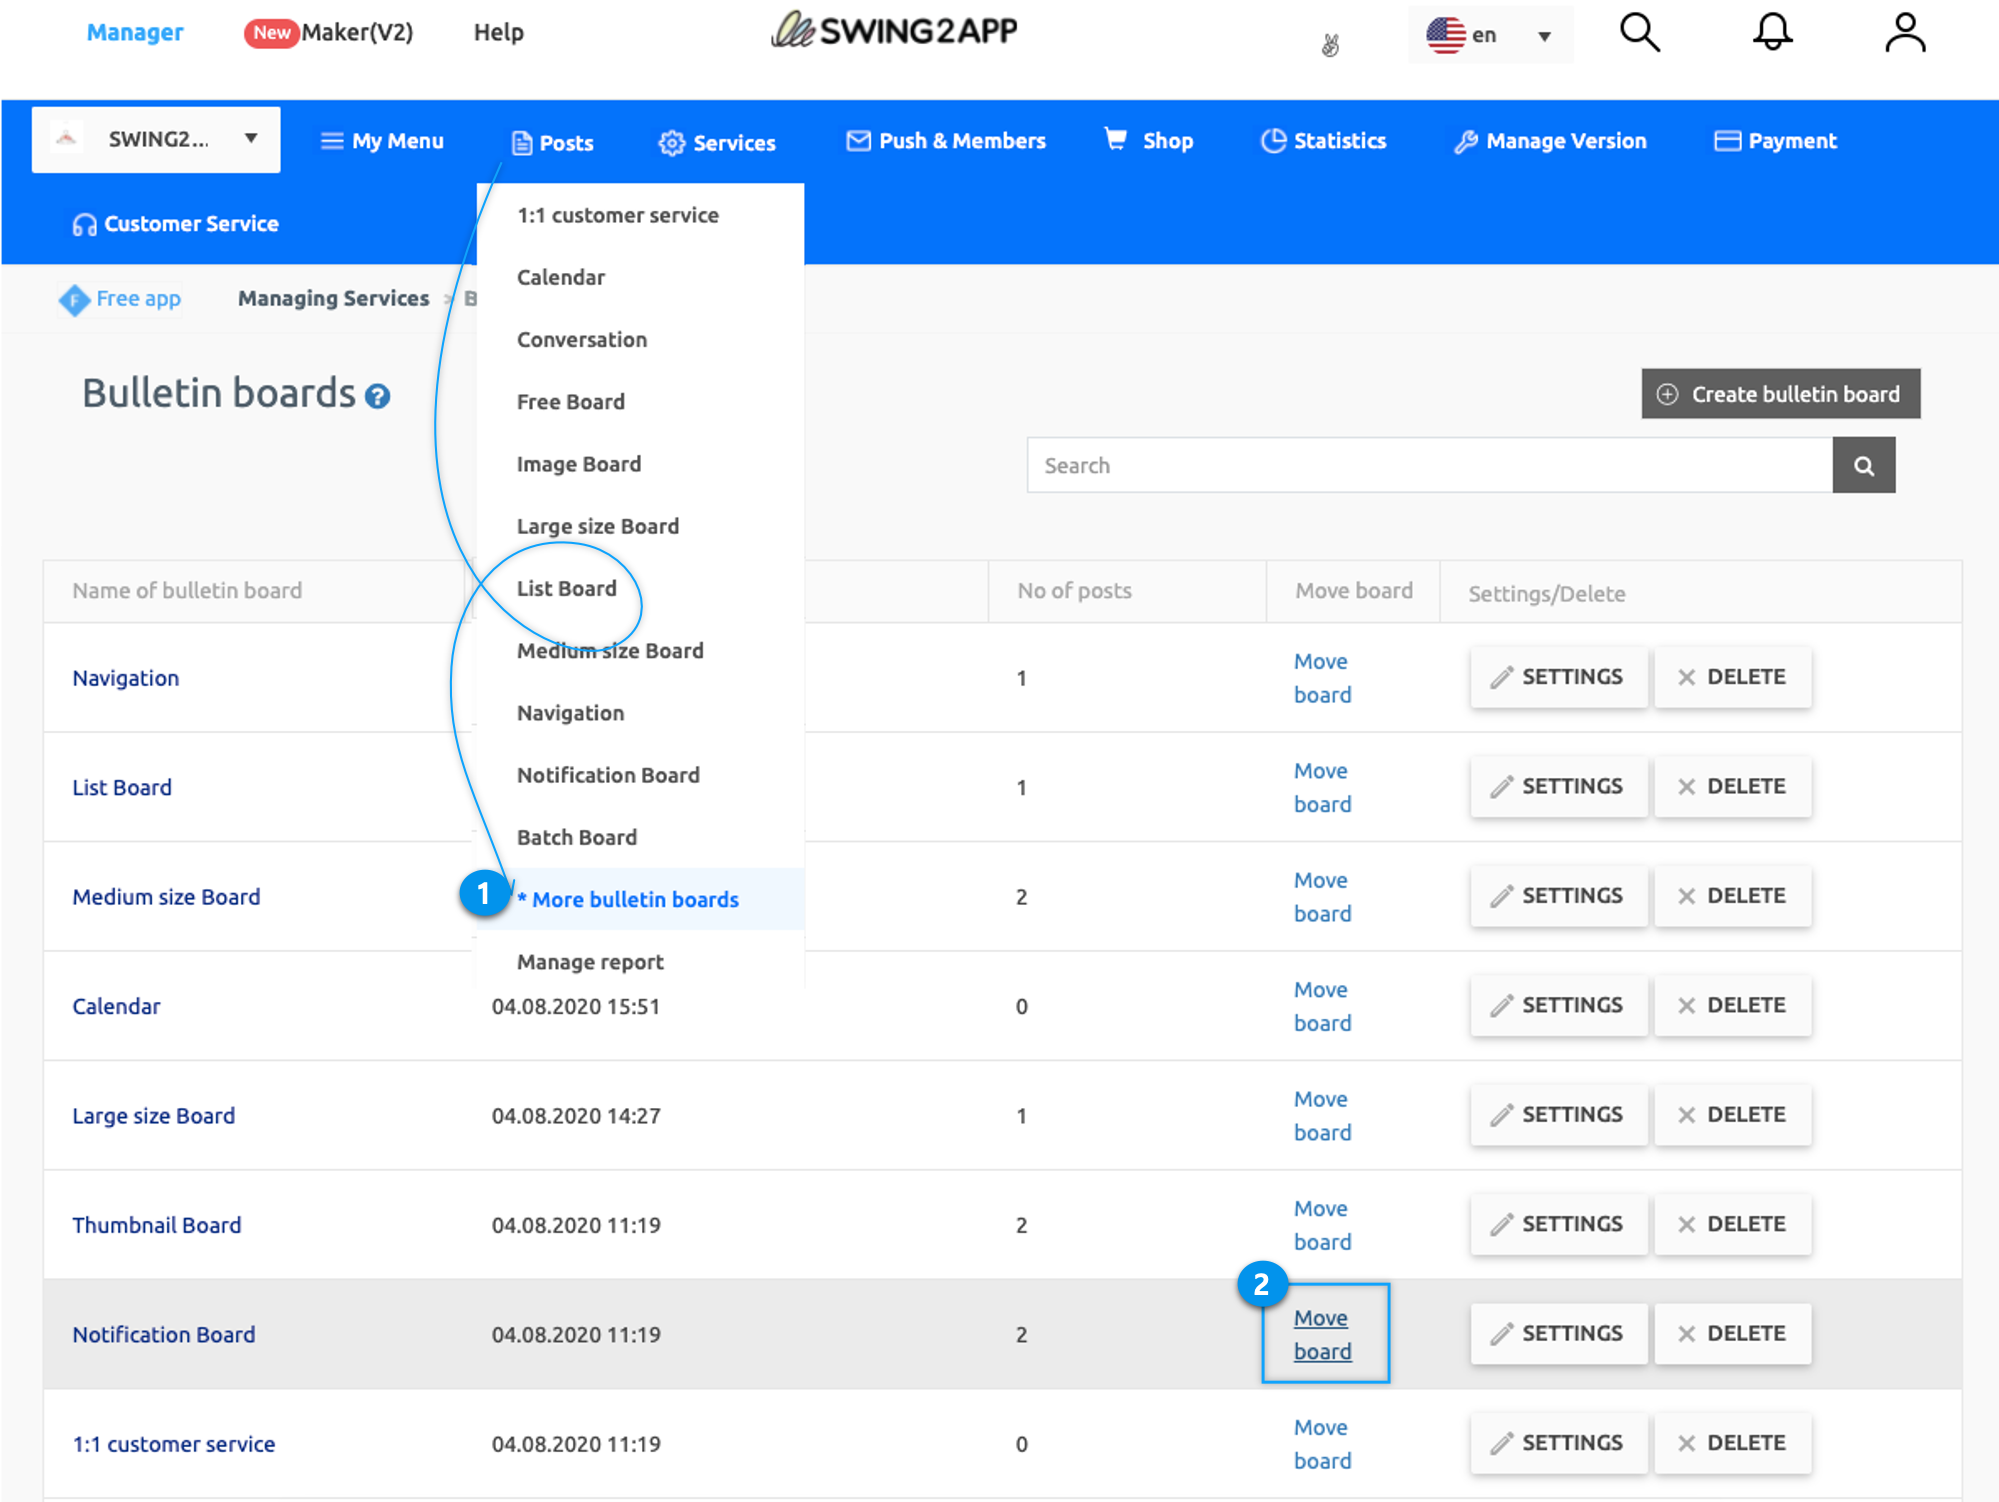
When you write on the admin page, go to Posts menu on the Manager page.
Post management is a list of the created bulletin board, select the bulletin board to write.
\*If there are a lot of bulletin boards, all bulletin boards will not be visible in post-management.In this case, you can check by going to **More bulletin board.**
### **1. Select Board and Write**
Posts offer 2 styles in Swing2App.
1. Writing in the normal way: You can write in the basic style without selecting the character style.
2. HTML Editor Writing: You can set the style and options of the text written in the title and body.\
You can select text size, text color, font, and enter options such as table input, image input, horizontal line, etc.
\*We will show you the difference between writing and editing in HTML Editor below.
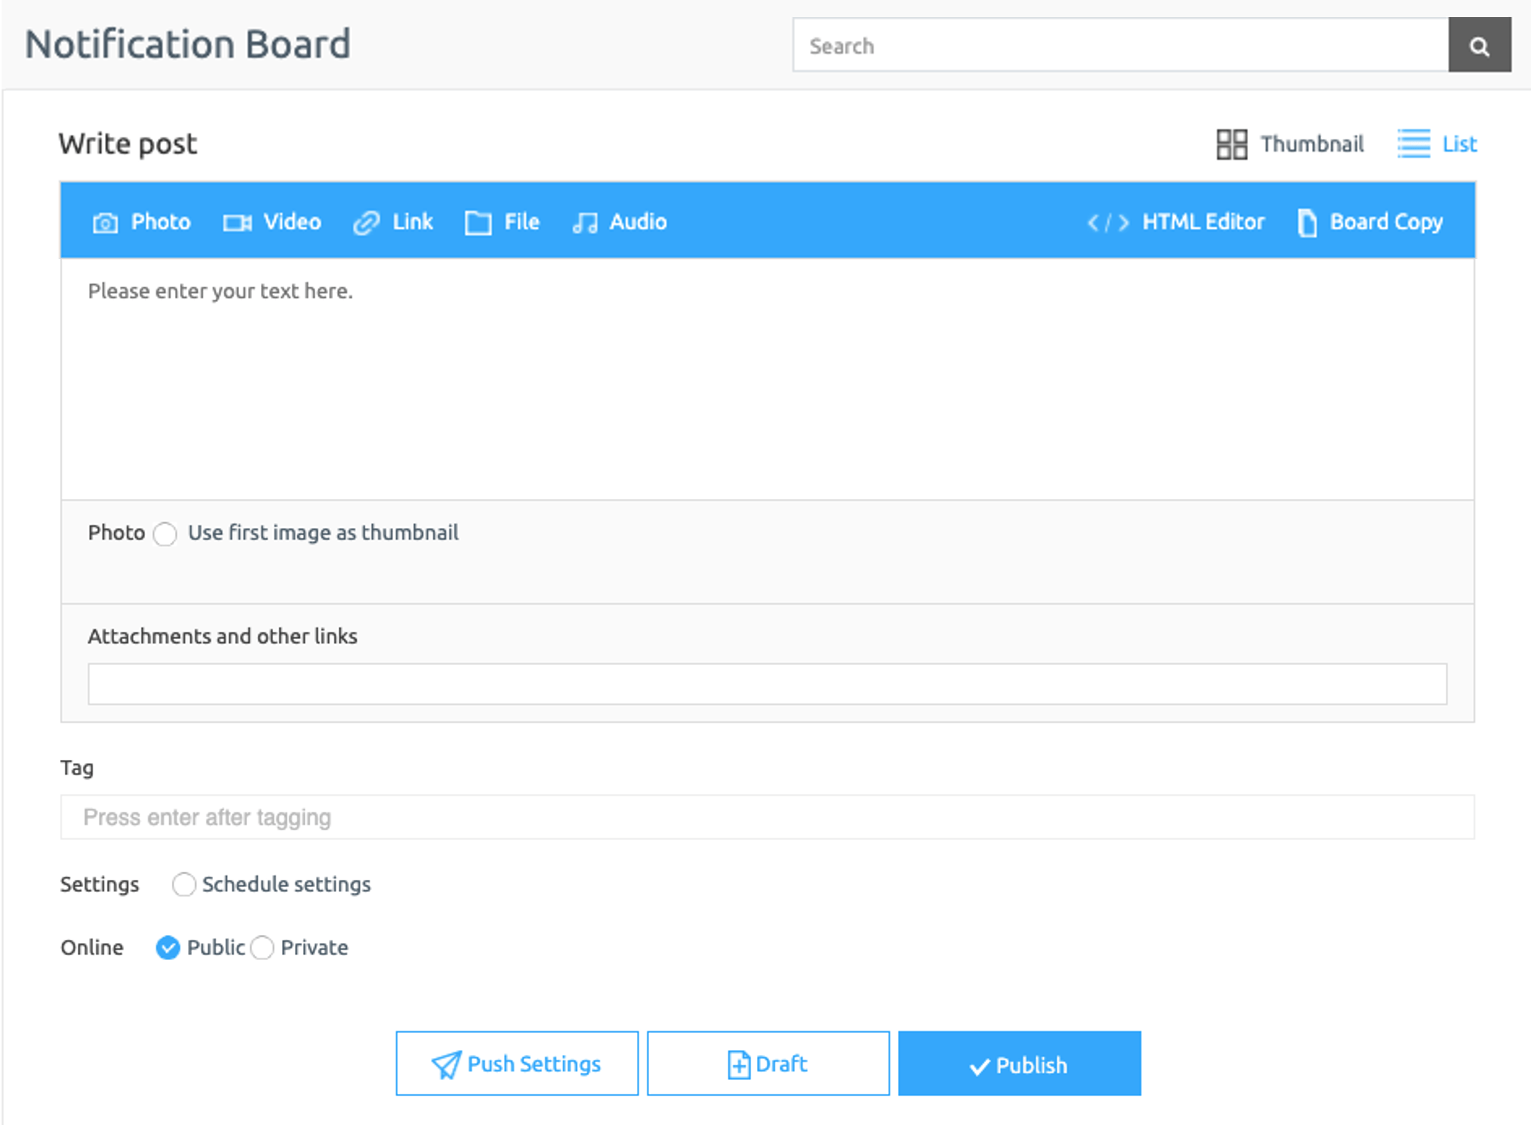
### **2. Writing in the usual way**
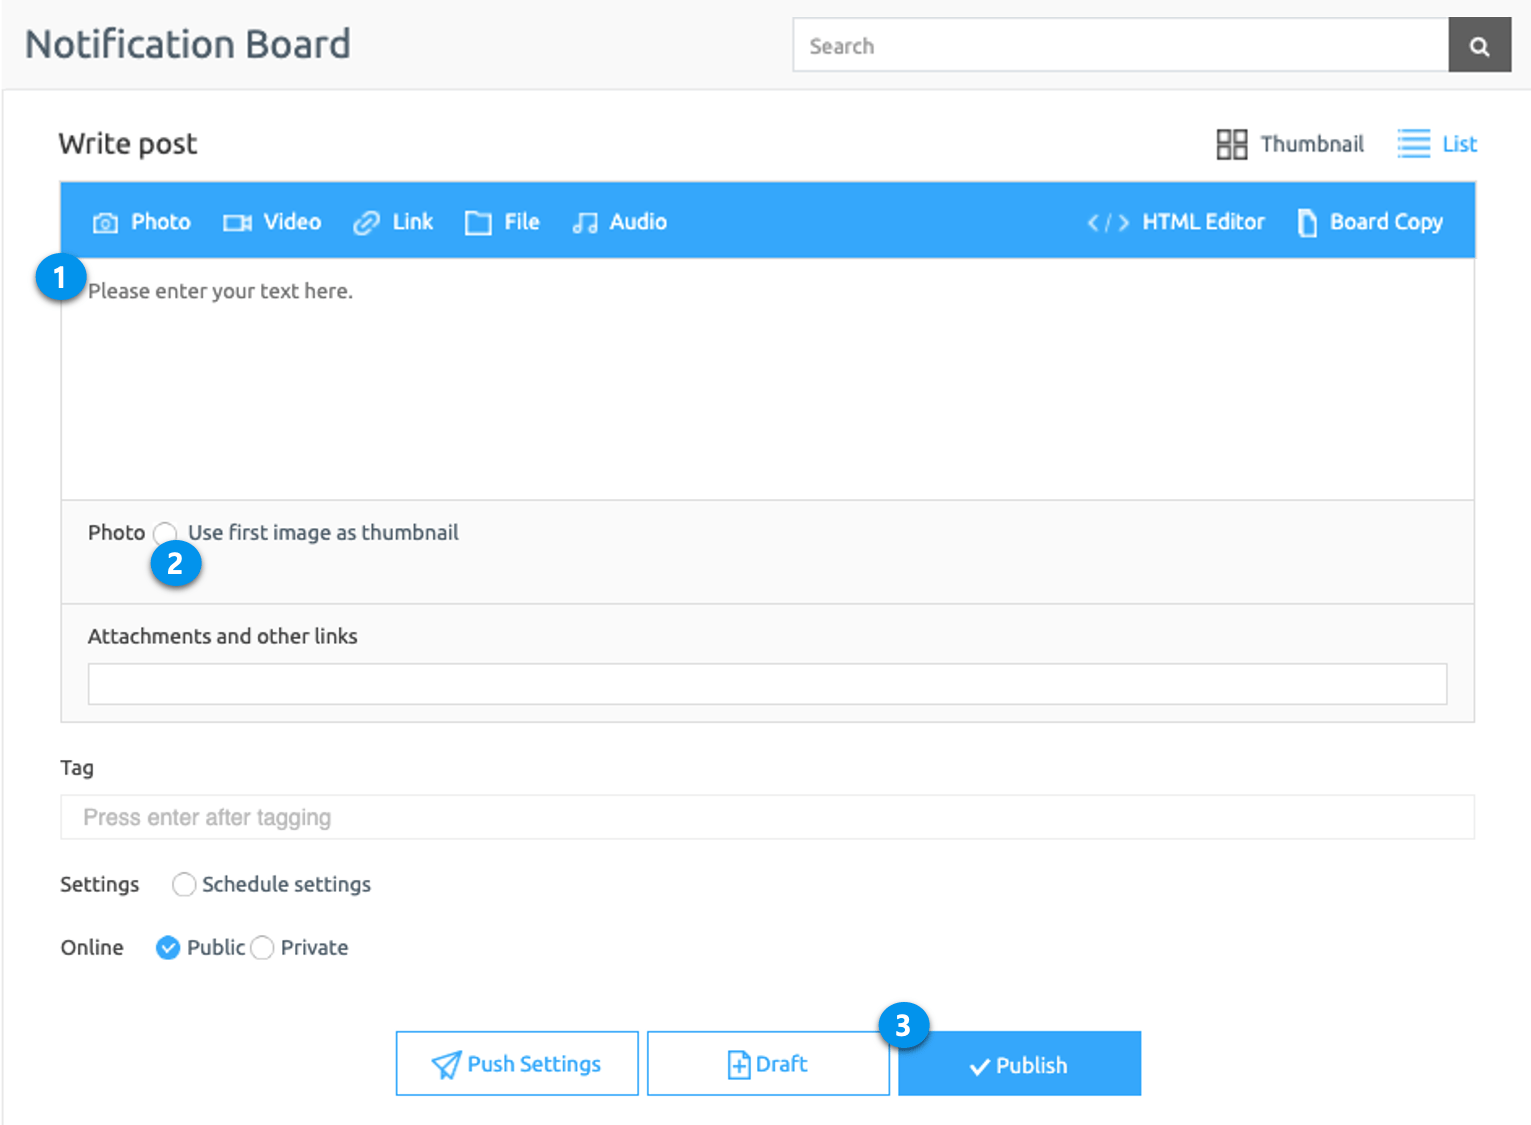
1. Enter Post: The first line is entered as the title, and the following lines are displayed as the body.
2. Attach Photo: You can attach an image by tapping the camera icon. \* Up to 100 images can be registered.
3. Press the **Publish** button to post.
### **3. Writing with the HTML Editor**
1. Enter Title: Enter the title to be displayed on the bulletin board.
2. Enter Post: Enter the content to be in the body.
3. Attach photo: You can attach an image by tapping the camera icon. \*Up to 100 images can be registered.
4. Press the **Publish.**
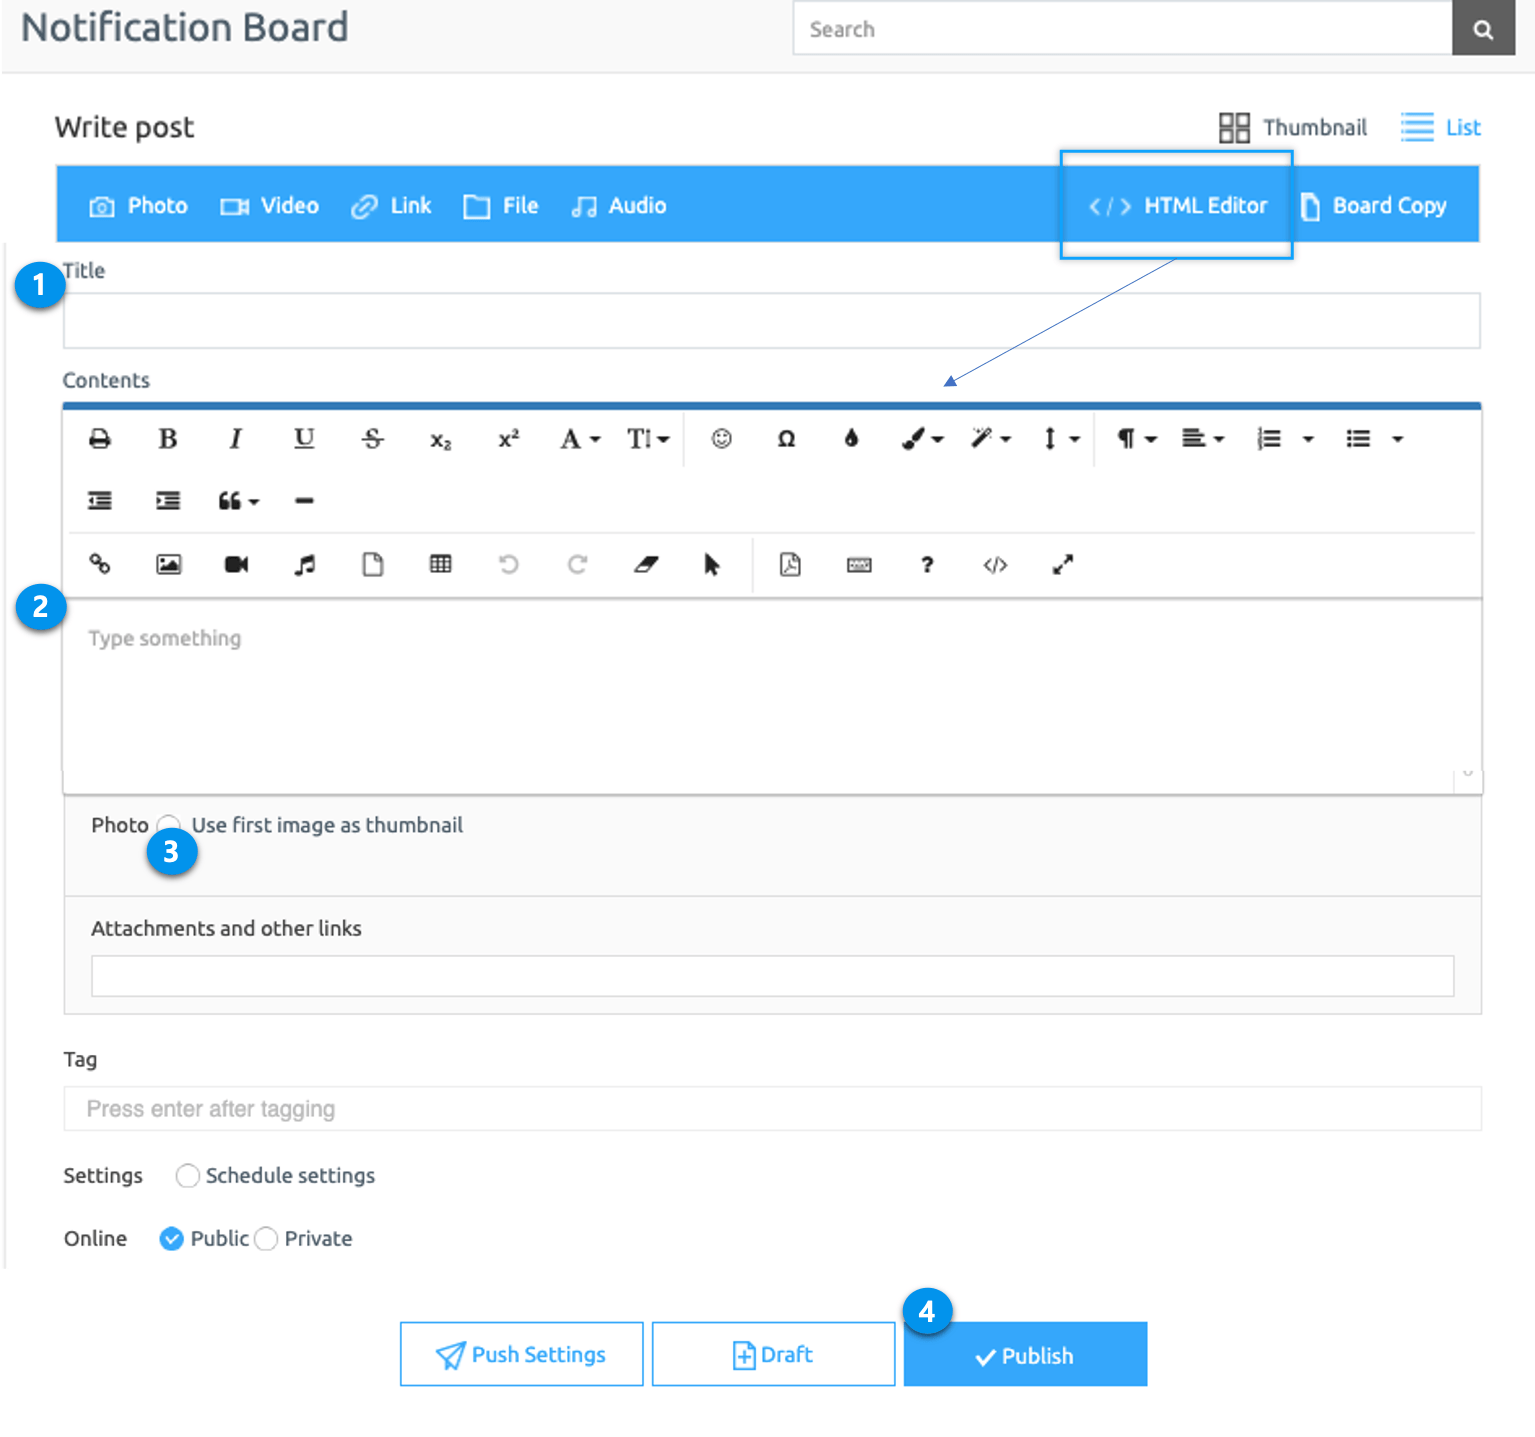
\*HTML Editor writing has various options in the writing window, so please check the options.
\*In addition to attaching a photo when writing bulletin board, you can attach a file, attach a video, attach a link (website URL), or attach a hashtag.
> We would recommend writing articles with HTML editor that can use many options.
>
> Please note that the mobile app can only writes general writing
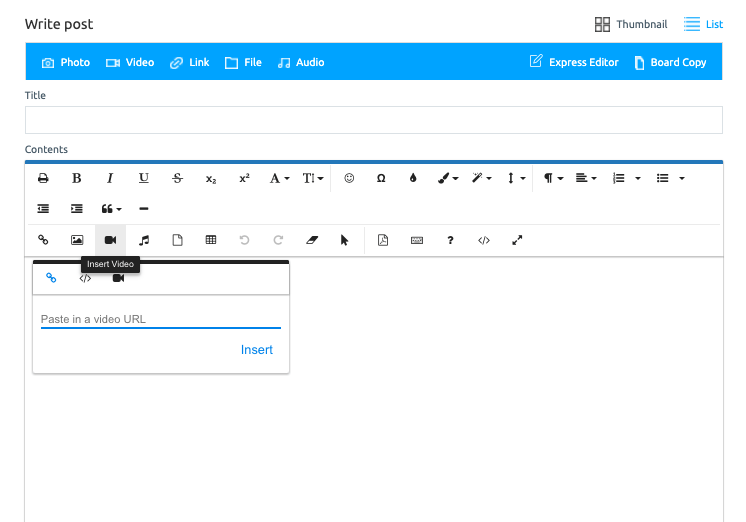
**3-1 Posting a video to a post**
If you press the Insert Video button provided in the HTML editor writing, you can attach a video.
In general, you can attach a video by copying and pasting a link to a video URL (video uploaded on YouTube, etc.)!
Paste the URL and press the insert button.
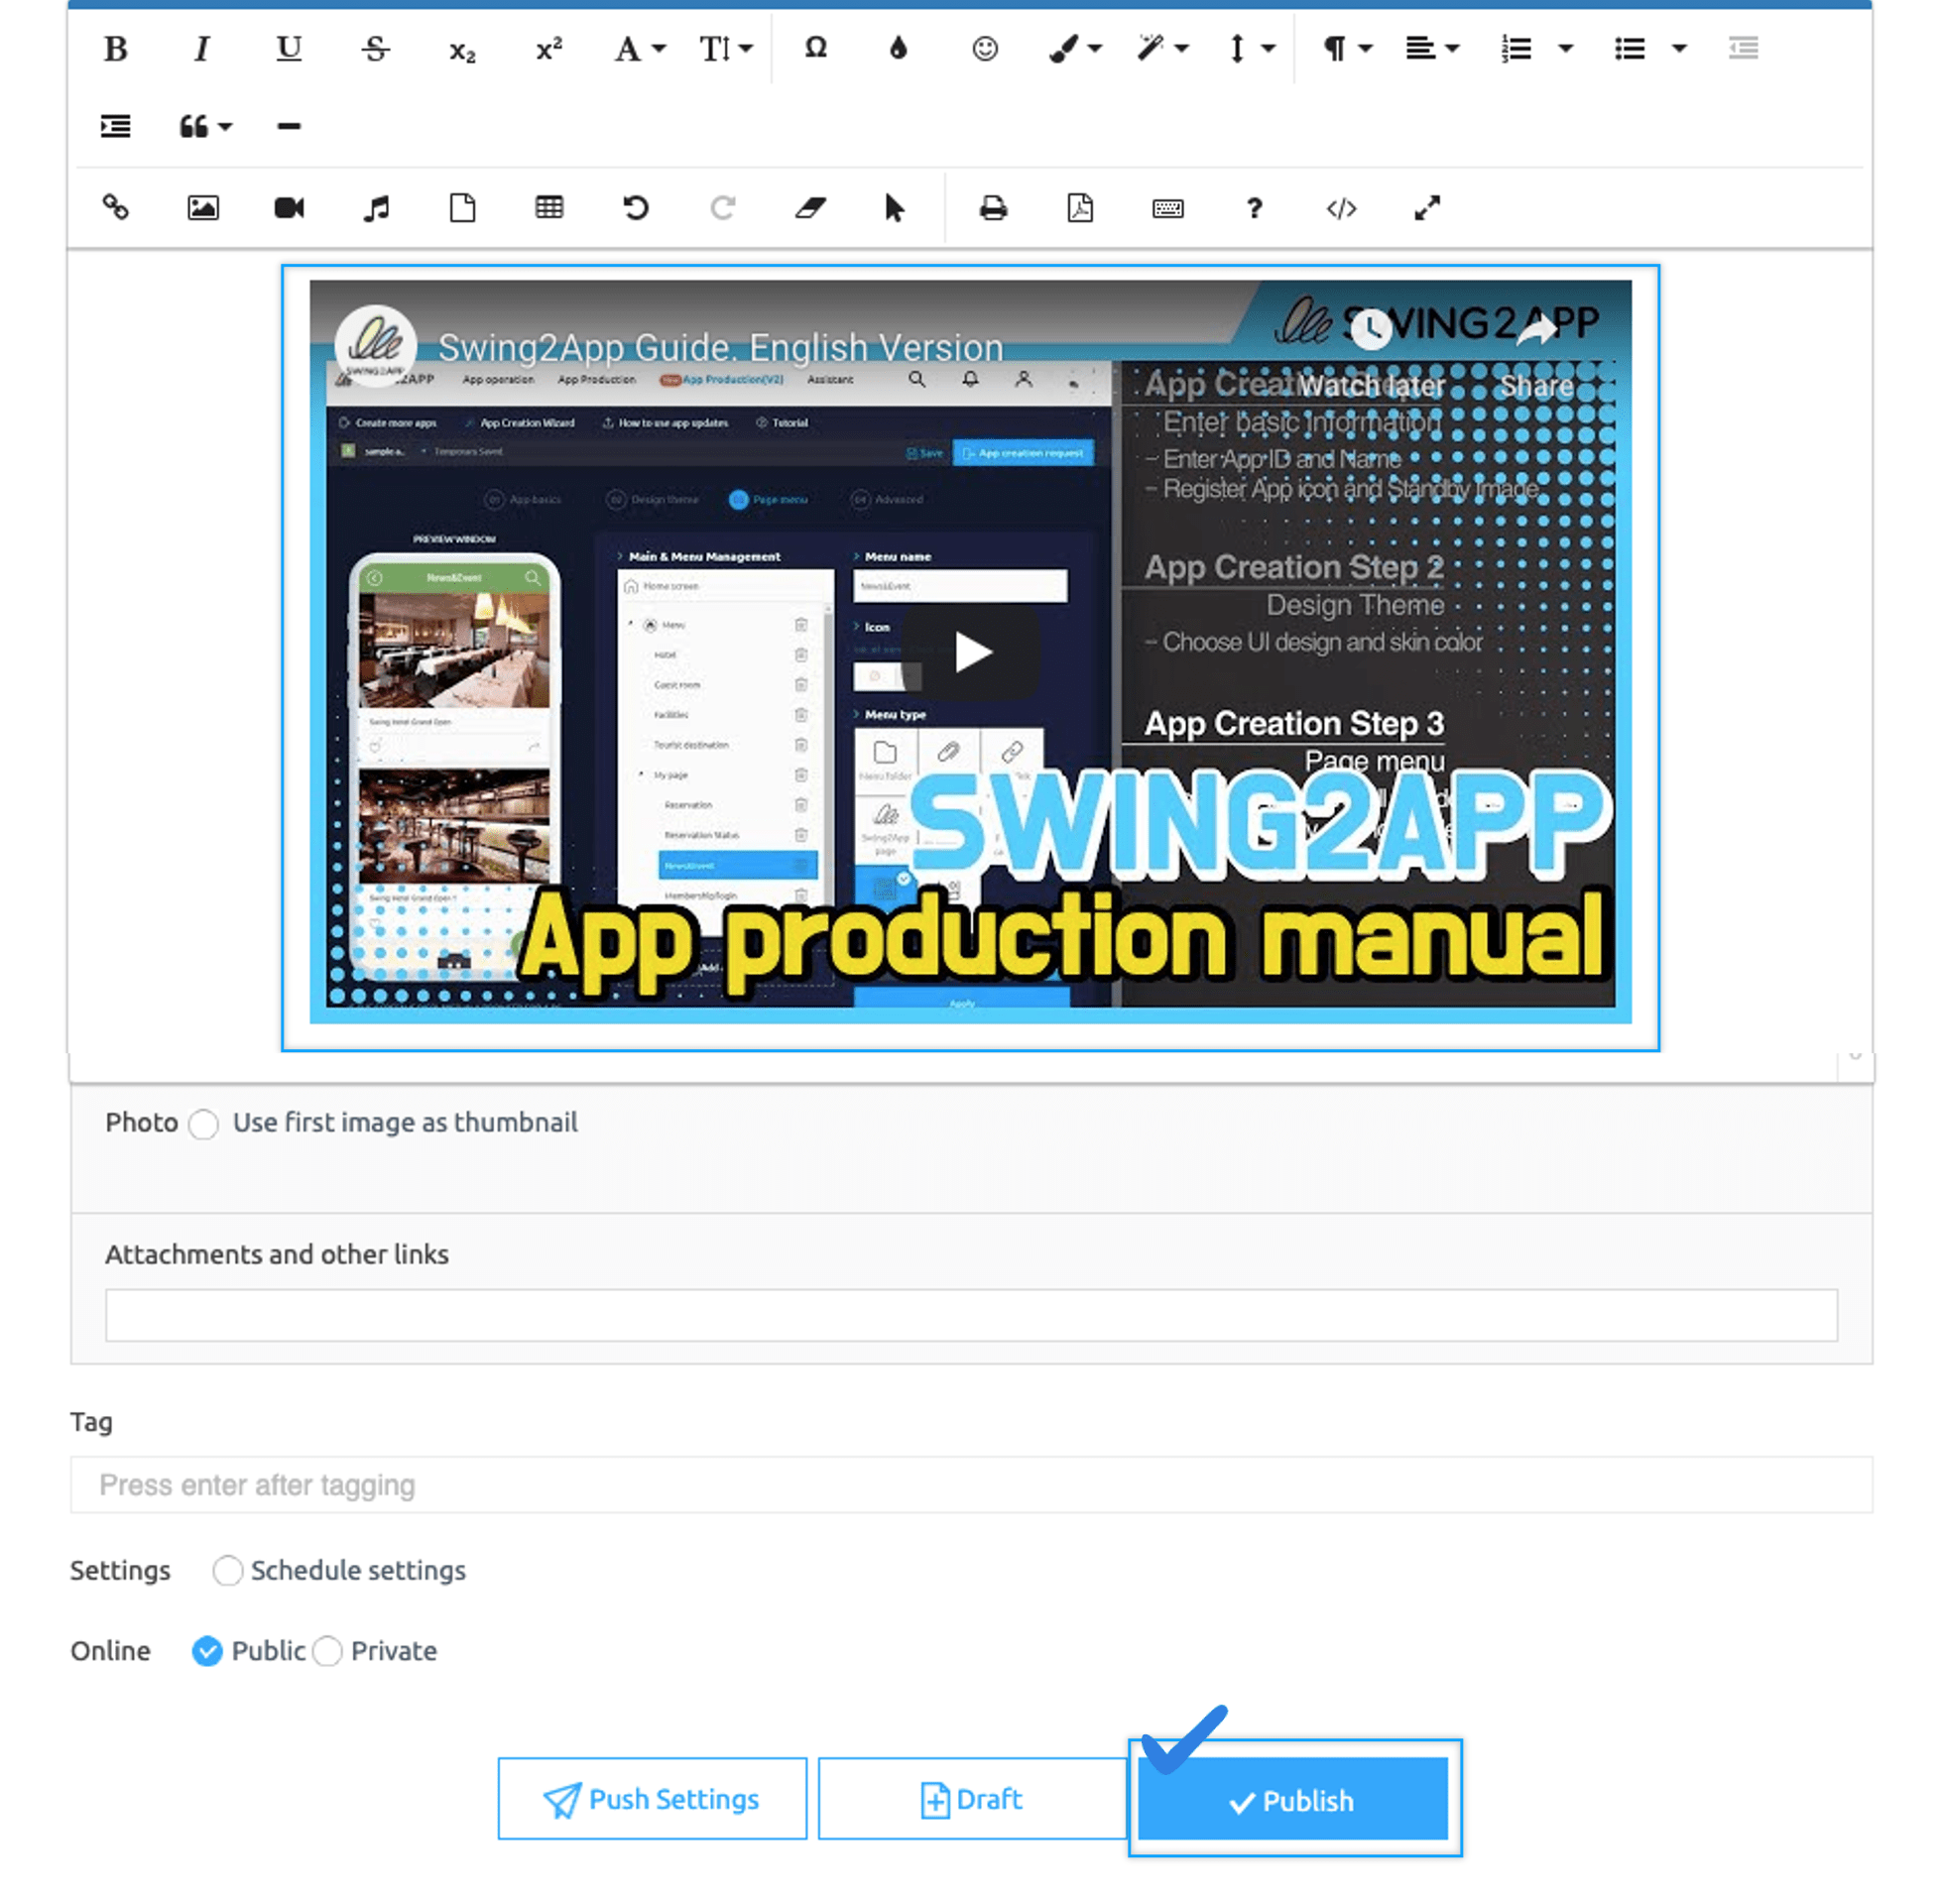
After confirming that the video is attached properly, attach the content and image, and then click the **Publish** button to complete.
### **4. List of posts written**
You can check the created post directly on the post-management page.
You can view the list of posts by selecting-Full screen view or List type.
Posts can be edited, deleted, and pushed.
\* Push: You can send the post as a push notification.
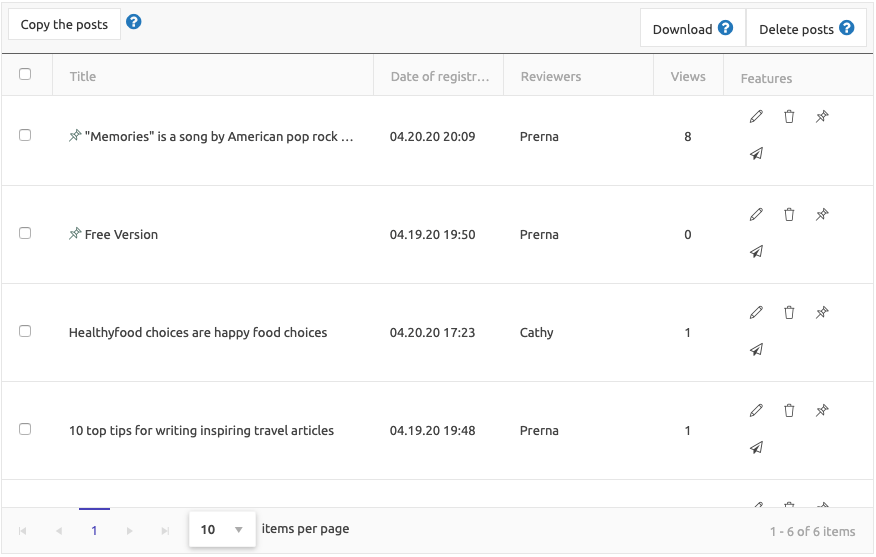
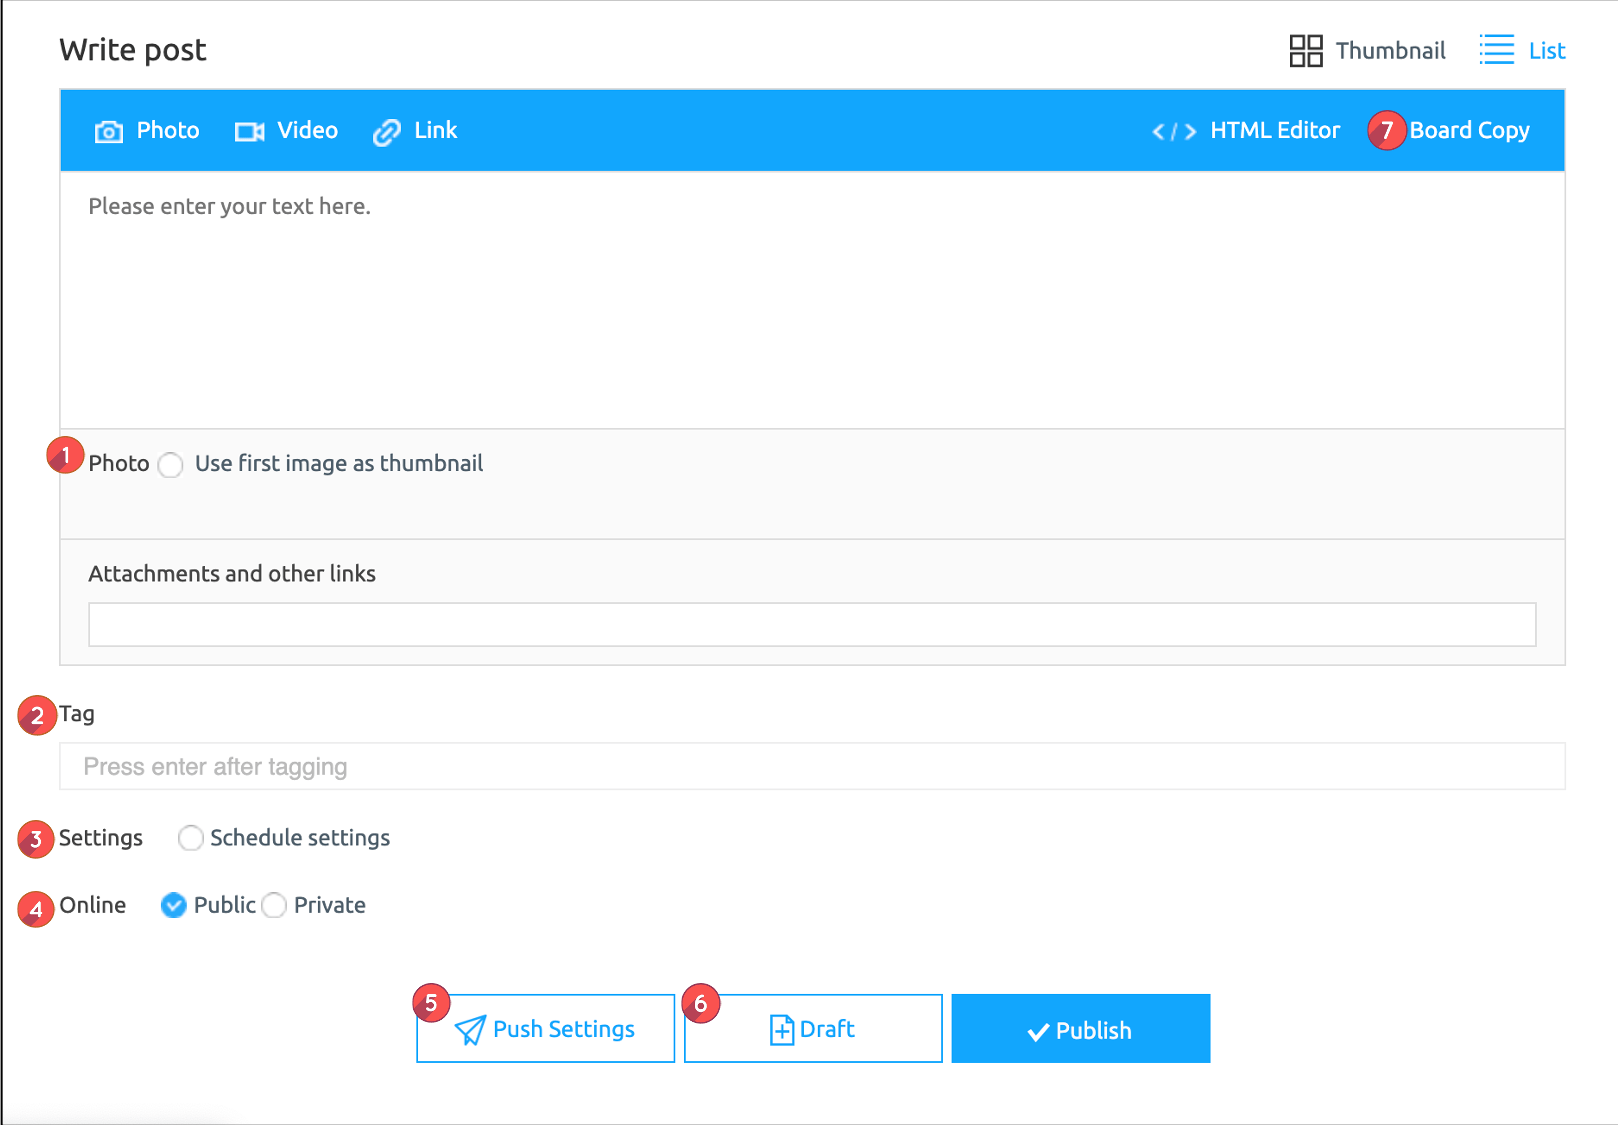
**▶ You can check it more easily if you look at the image.**
**1. Introduction of functions provided by post management**
1\) Attached picture \[Use first image thumbnail]: This function is to set the attached image to be displayed only as a thumbnail in the bulletin board list without being duplicated in the body.
For details on how to use, please refer to the posting below.
☞[**\[Go to see how to use post thumbnail images\]**](/manual/appmanage/board/thumbnail-image.md)
2\)Tag: Can be set when using the hashtag function. Please refer to the posting below for how to use the hashtag.
**☞**[**\[Go to see how to use the hashtag search option\]**](/manual/appmanage/board/hashtag-search.md)
3\) Reservation setting: Posts can be registered immediately, but reservations can be made according to the date and time you want.
4\) Whether to be public: Private or public can be set.
5\) Push settings: App writing can be pushed. You can proceed with push setting and sending by pressing the push setting button.
6\) Temporary Store: If you press the Temporary Save button while writing a post, you can safely save your post in case you don’t know.
7\) Copy bulletin board: This is a function to copy the bulletin board to another bulletin board.
Please refer to the posting below for details on how to use it.
**☞**[**\[Go to see how to use the bulletin board copy\]**](/manual/appmanage/board/copy-board.md)
**2. Important Post Management Information**
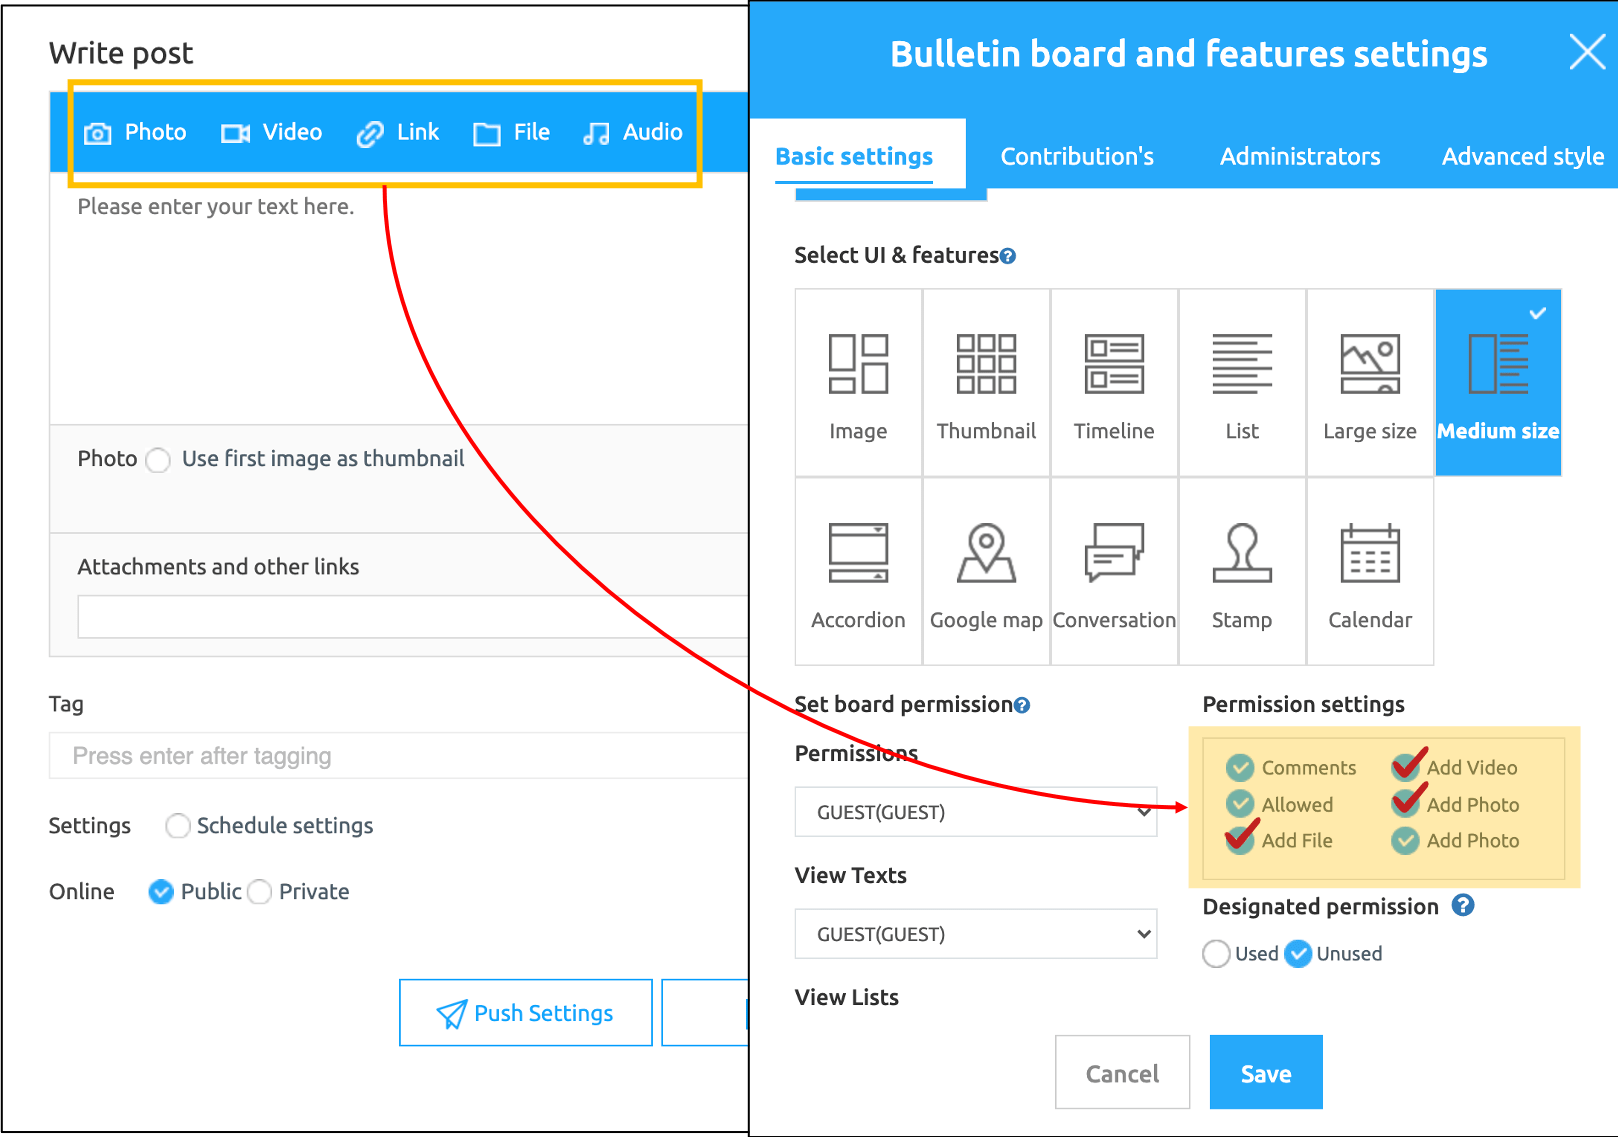
When writing a post, you can see options such as \[Photo, Video, File].
In some bulletin boards, you can’t see the above functions. You can do it.
The reason is that the above functions can be set manually by each user when creating a bulletin board as an optional feature.
If you don’t see the features, go to \[Board Management] and press the Bulletin Board \[Settings] button to edit the allowable range settings.
Bulletin board and function setting window – Please check the \[Allowed] setting.
You can choose video attachment, photo attachment, or file attachment.
**-Photo = Attach photo**
**-Video= Video**
**-File, music = Attach file (If you select Attach file, the file and music functions are created together)**
**-Link is a fixed function.**
\* Attaching comments, likes, and comment photos is not a function used in post-management, but a function used in a comment window within the app.
\*The functions applied to post management are three functions: video attachment, file attachment, and photo attachment!
## STEP2. Write a post in the app
* If you confirmed how to write a post on the app operation page, this time I will tell you how to write a post in the app!
* You can install the free version of the app as well as the apps released on the App Store and Play Store with your phone (Android phone available) or check with a preview.
### **1. App Bulletin Board – Writing Posts**
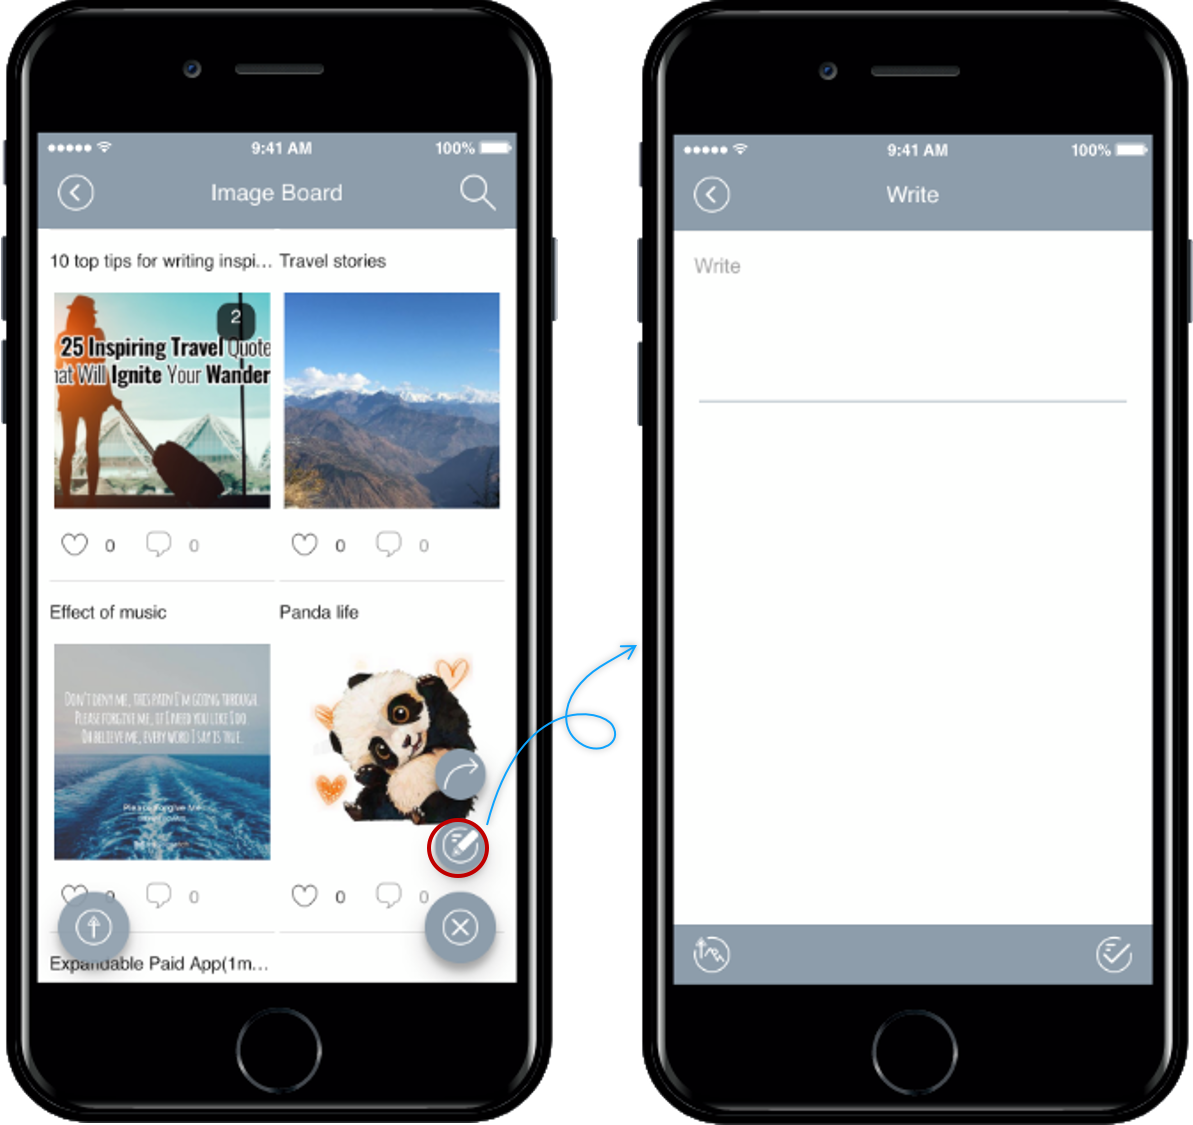
If you select the right button at the bottom of the bulletin board, the **\[Write icon]** button will appear.
If you select the button, the post page opens like the image attached to the right.
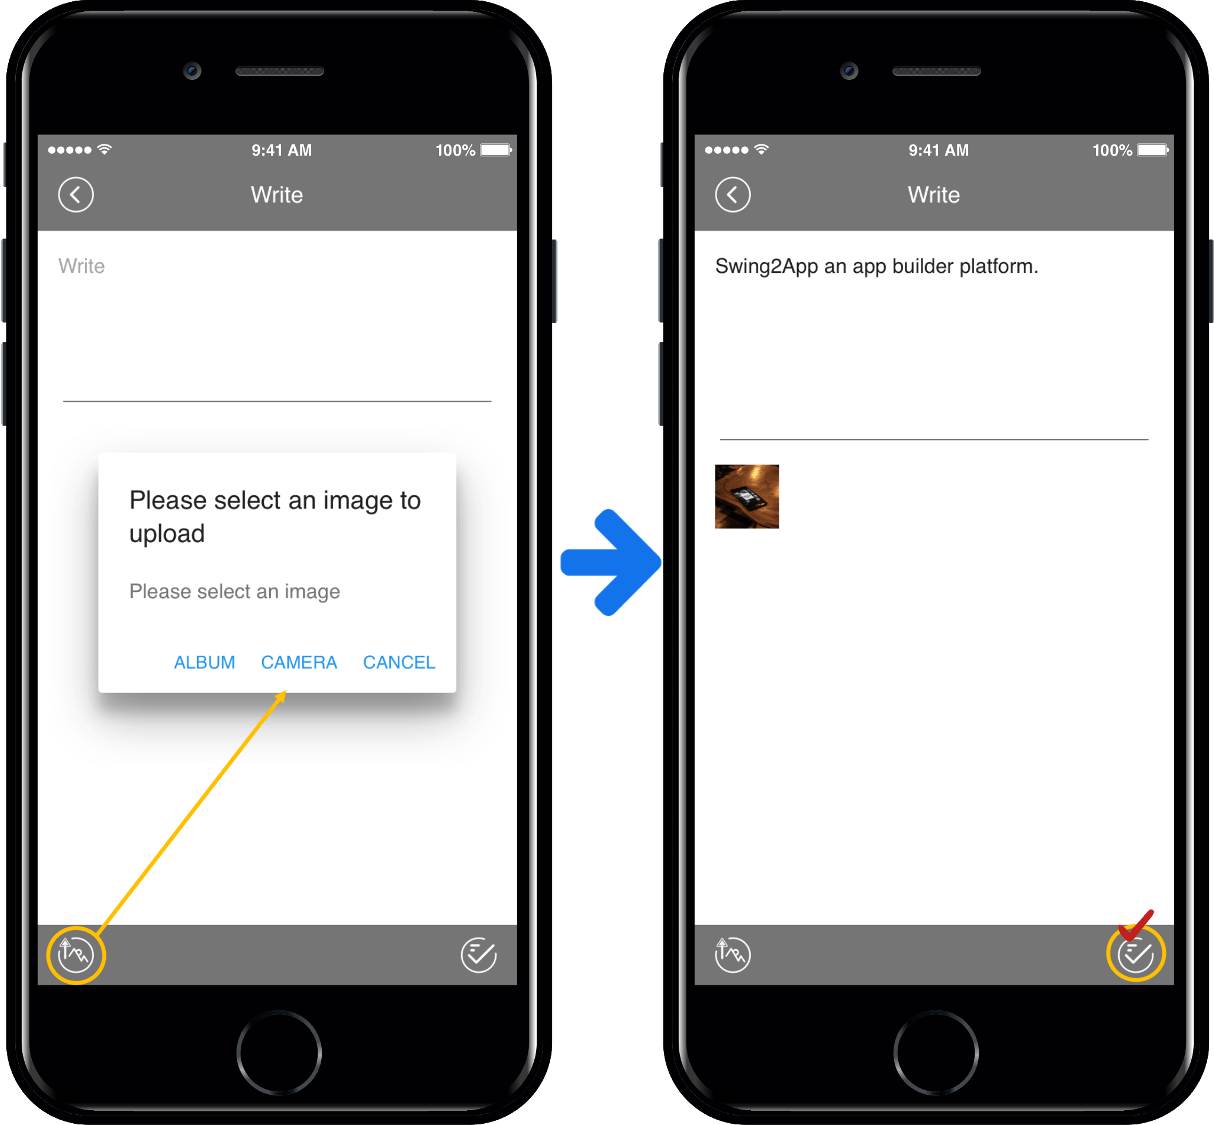
You can write a body text and attach an image by selecting the left button at the bottom.
When writing is completed, select the bottom right button to complete saving.
**\*Instructions**
When attaching images in the app, you can only select 5 images at a time.
On the web’s app operation page, you can select all 100 at a time, but on a mobile phone, the photos are very large and it takes a long time to load the app.
Therefore, we limit the number of uploads to one at a time to speed uploading.
Similarly, you can attach up to 100 post-attached images, so if you need to attach more than 5, please register your images by dividing them into 5 images.
### **2. Edit, delete, and share posts**

Posts created in the app can also be edited and deleted.
You can check the edit, delete, and share functions by selecting the top three dot buttons on the post detail view page.
You can also share the post with other applications – katok, mail, and more.
## STEP3. App production page – creating in the virtual machine
* **You can write on the bulletin board in the virtual machine.**
After applying the bulletin board in the app production page, go to the bulletin board in the virtual machine.
**\*The virtual machine is the same as the app, so the post input is the same as the app.**
Select the post writing icon at the bottom.
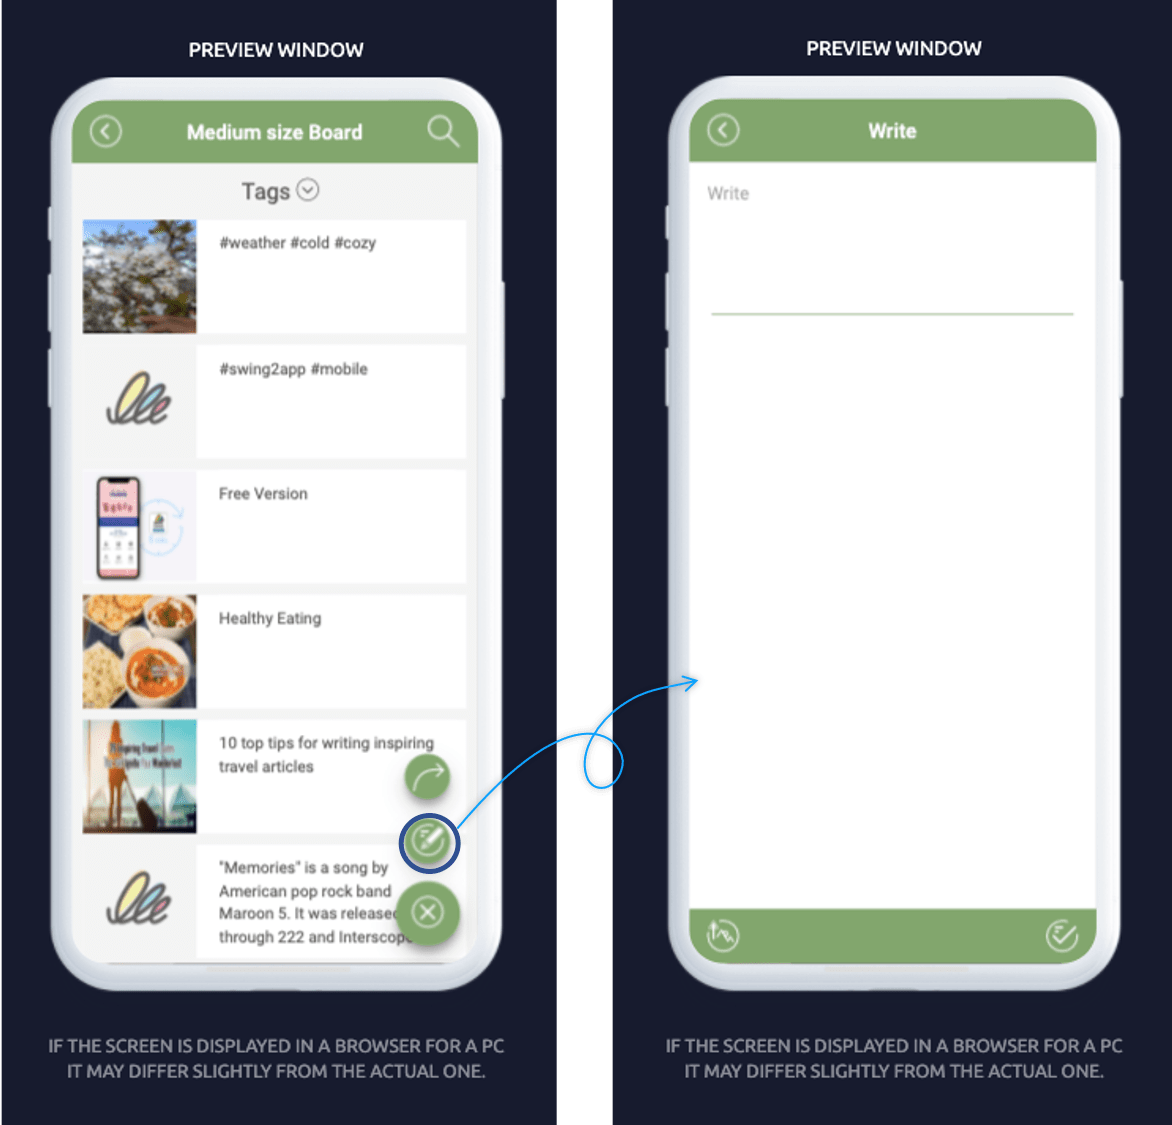
Enter the content, attach the image, and press the Save button at the bottom to complete.
**▶ If you look at the animated image, you can check more easily.**

So that’s 3 ways to enter a bulletin board post.
**1. Write in the app operation page → post management**
**2. Run the app and write it directly in the app**
**3. App production page → Write a post on the web virtual machine**
There are many ways to enter a post on the bulletin board, so swing users are encouraged to enter a post in a convenient way.