> For the complete documentation index, see [llms.txt](https://documentation.swing2app.com/llms.txt). Markdown versions of documentation pages are available by appending `.md` to page URLs; this page is available as [Markdown](https://documentation.swing2app.com/manual/swingshop/shop-info.md).
# Swing2App Page-shopinfo

**How to use shopping mall information**
We will inform you how to apply the’Shopping Mall Information’ among the pages provided by Swing Shop to the app.
The shopping mall information is a screen that shows the contents set in the store basic information.
From customer center information to operating hours introduction, etc. are displayed.
It can be used on the Swing page, and the page can be applied together when using the Swing Shop.
**Shopping mall information app execution screen**
### **STEP.1 Basic information setting**
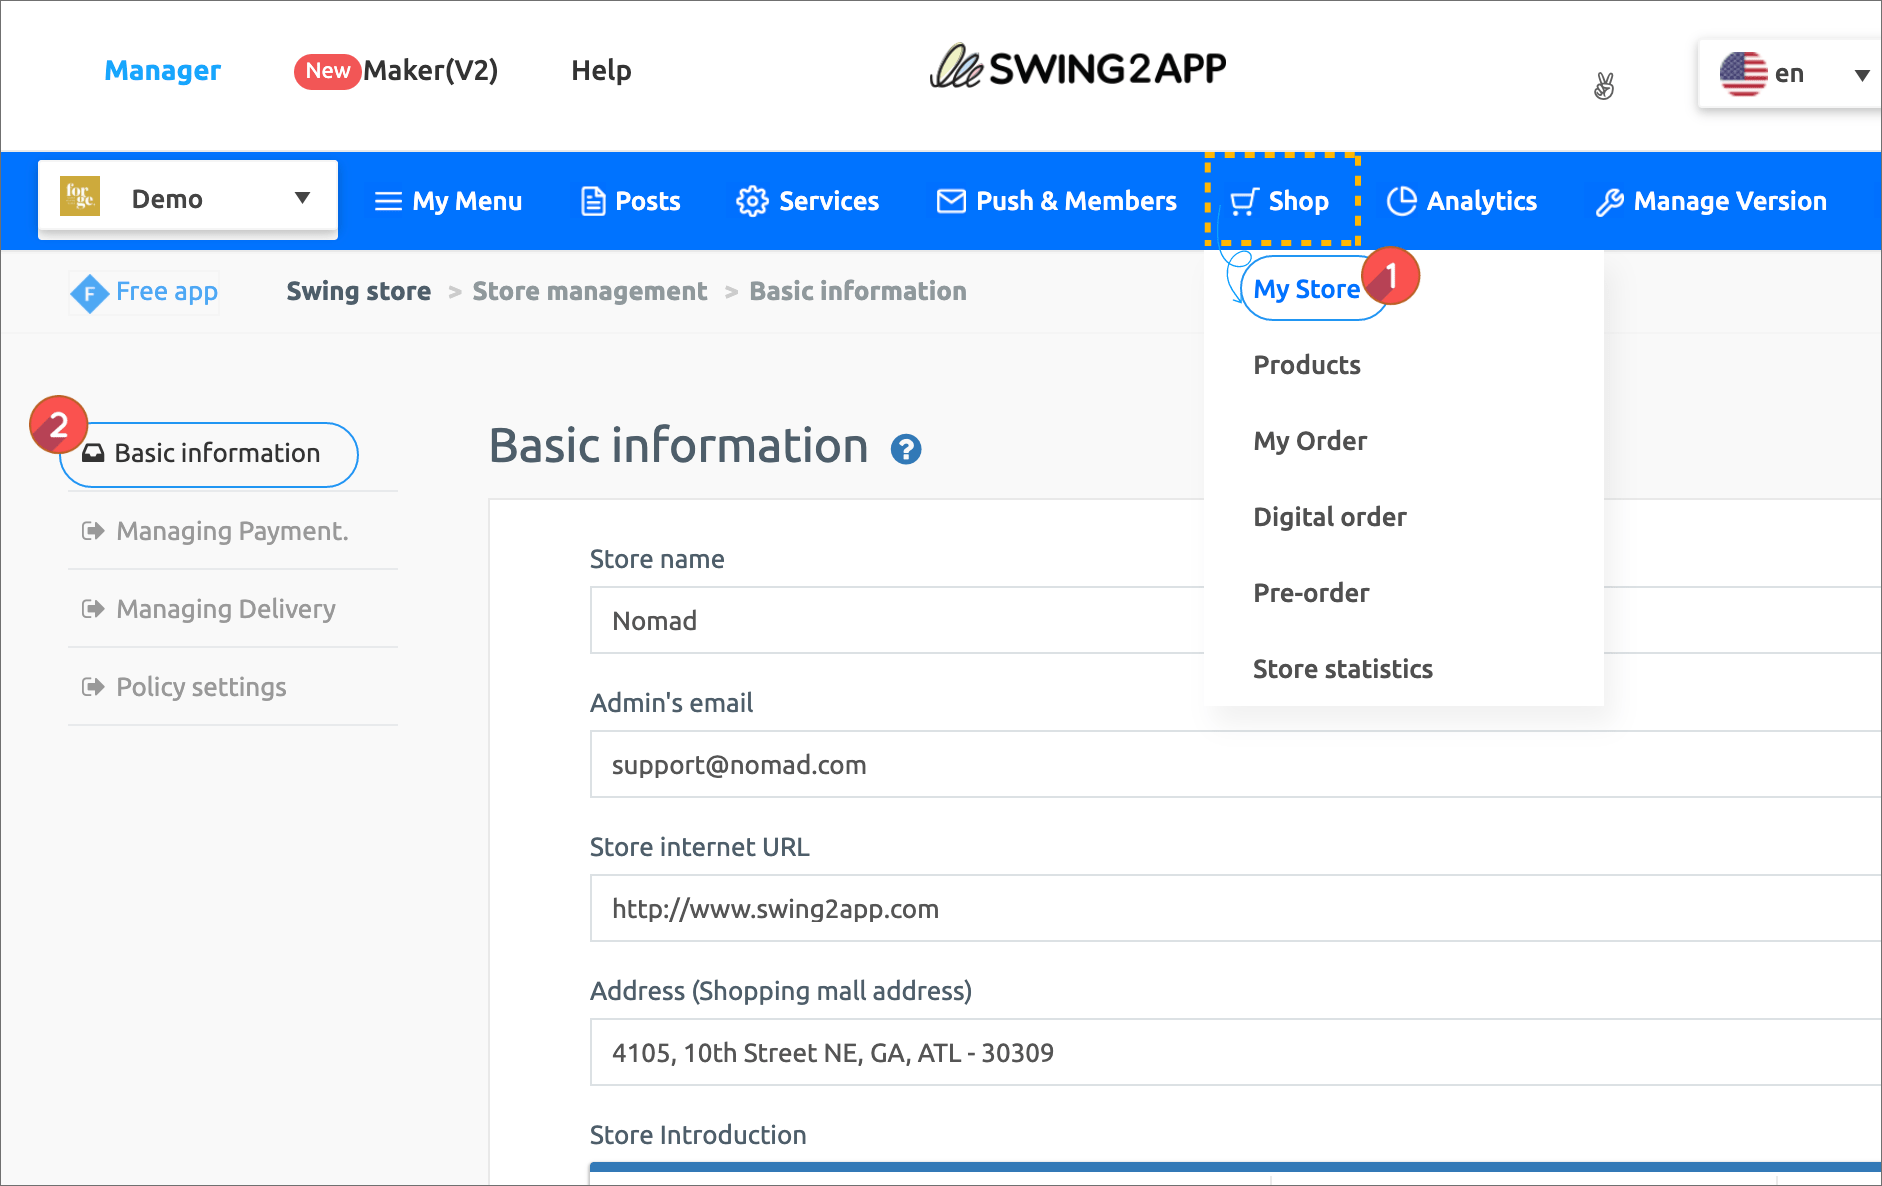
Swing Shop [1) My Store – 2) Basic Information](https://www.swing2app.com/view/store_info_basic_setting) setting menu.
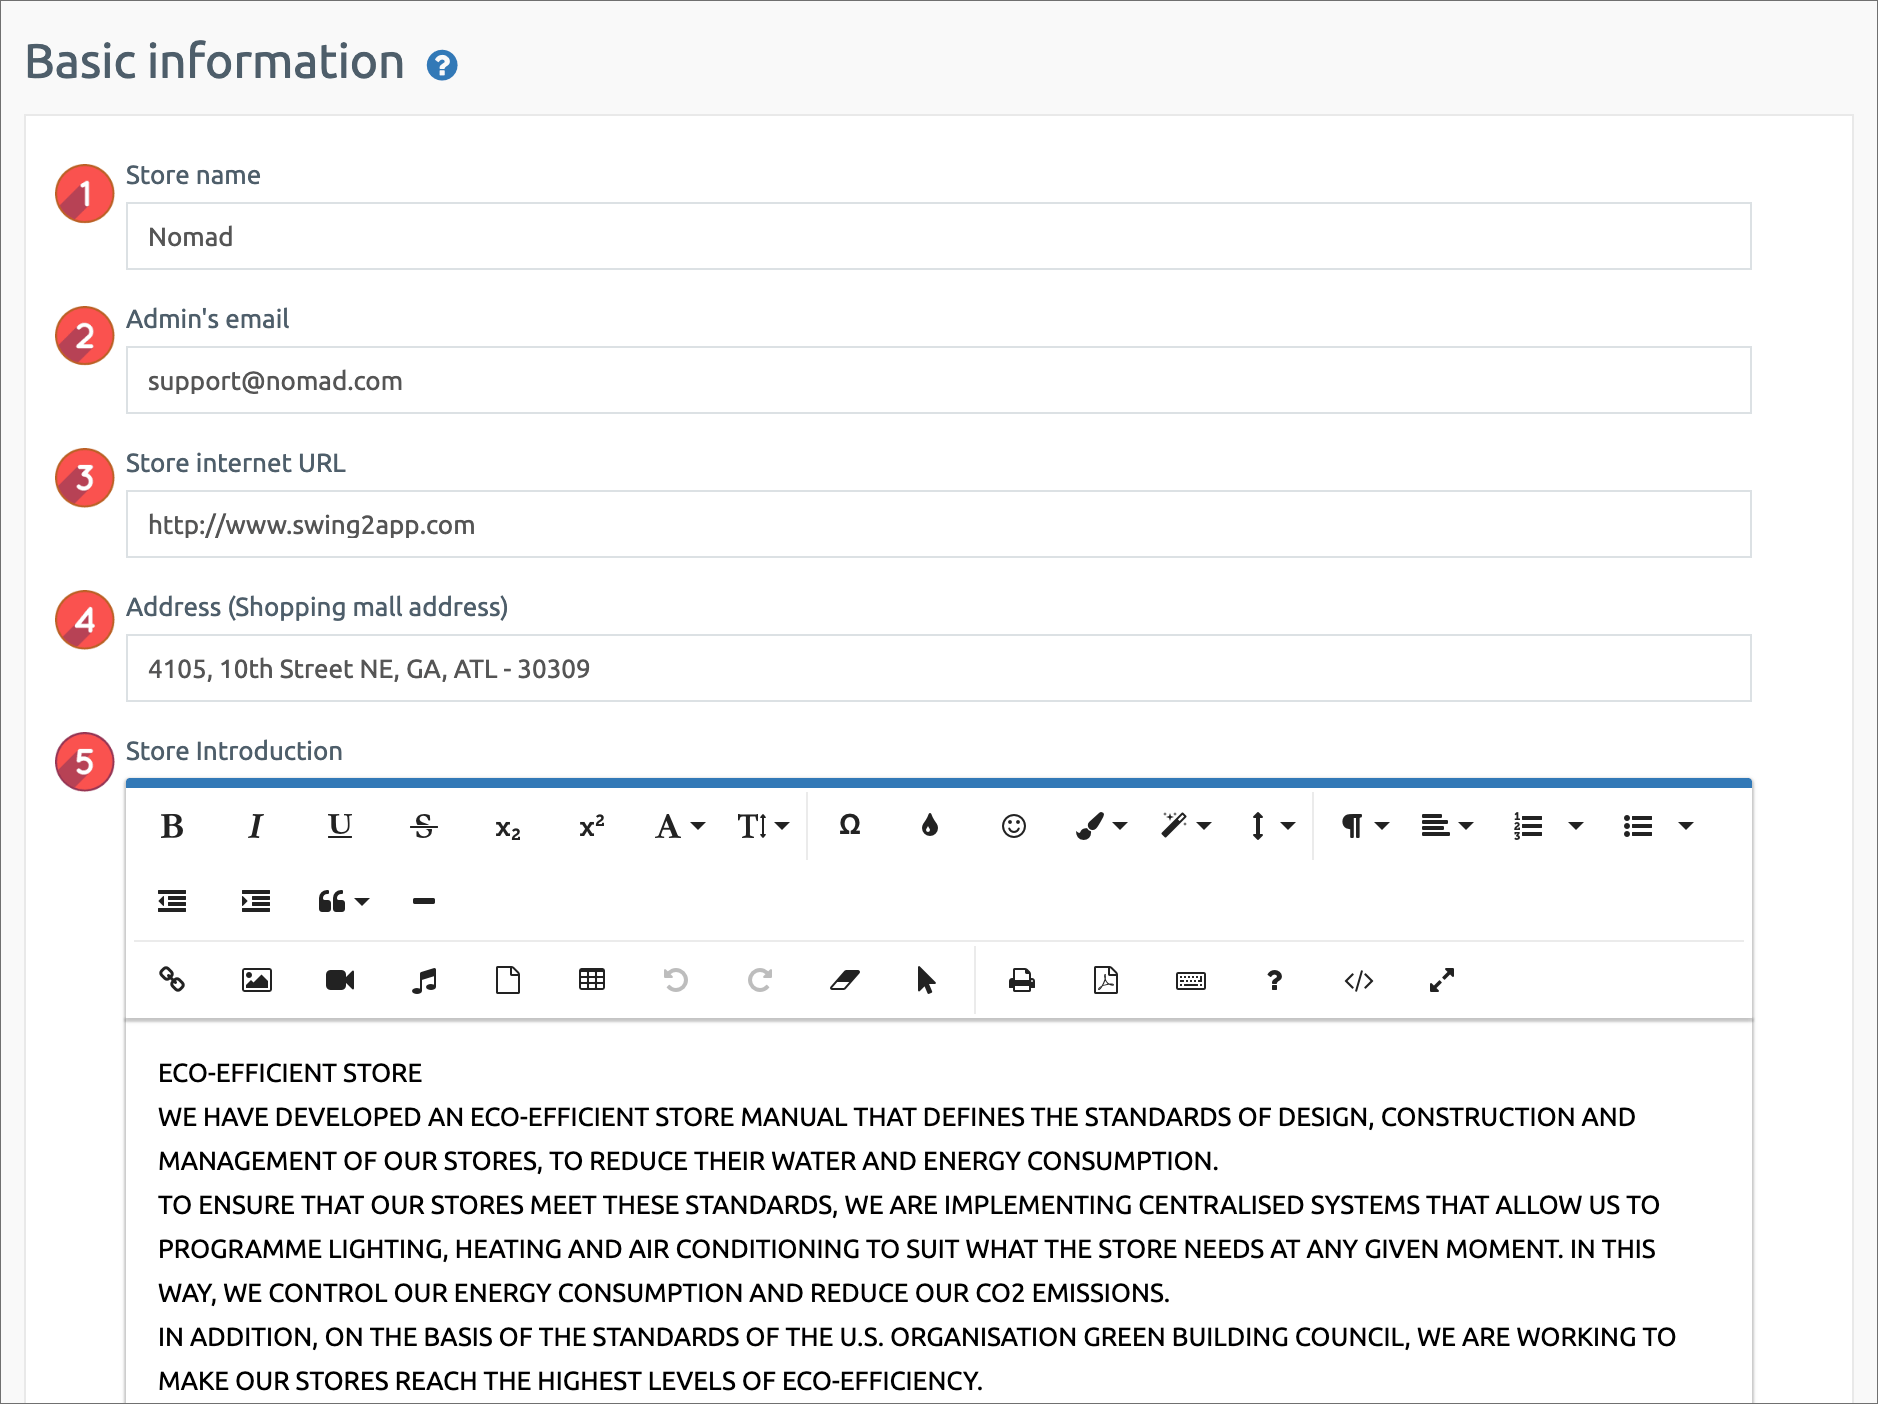
1\. Store Name: Enter the shopping mall name.
2\. Administrator Email: Enter the administrator email.
3\. Store Internet URL (shopping mall address): If there is a site, enter it, and if there is no, it is okay not to enter it.
4\. Address (shopping mall address): Please write the location (address) of the shopping mall.
5\. Store introduction: Simply enter the shopping mall introduction.
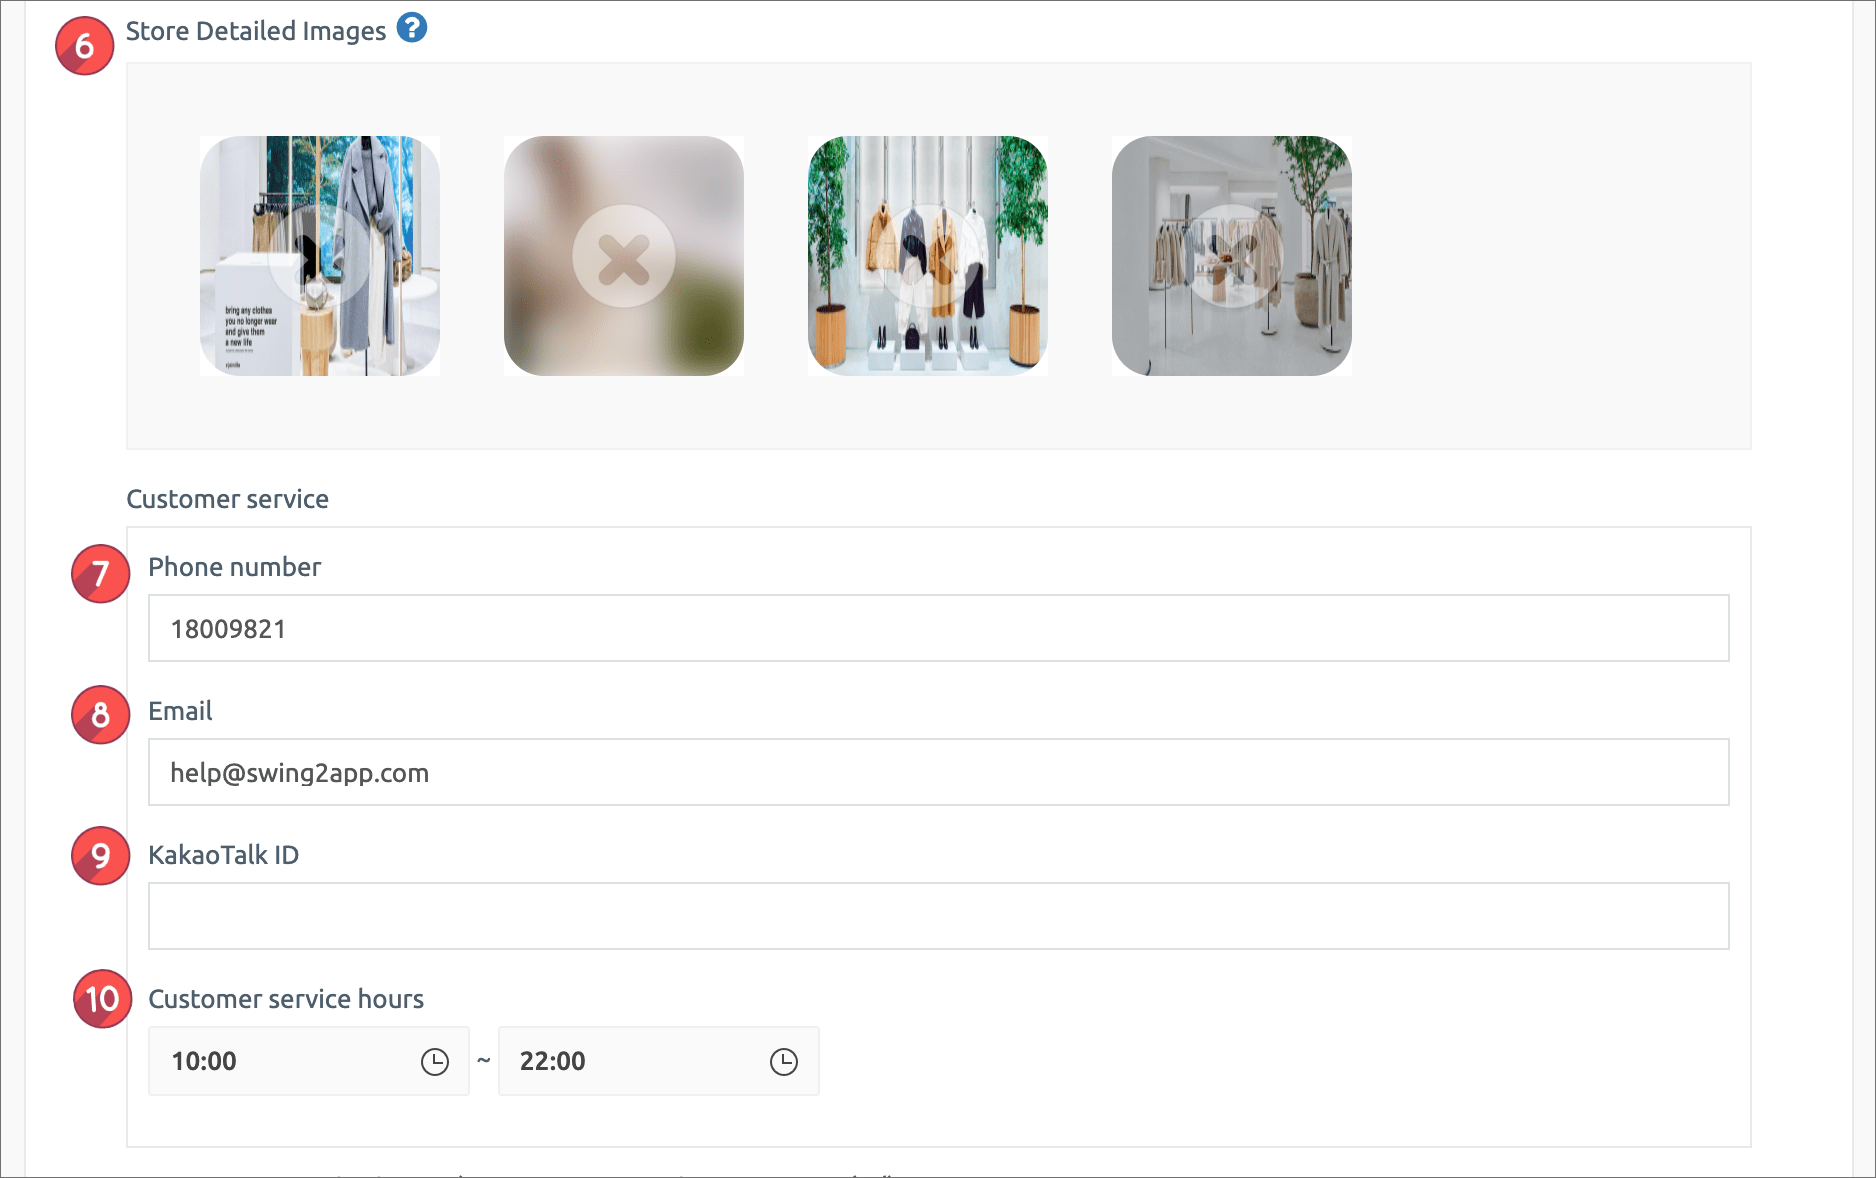
6\. Store detailed image: Please register an image to enter the shopping mall main screen.
※ This image is displayed on the shopping mall main screen, and the information page is not displayed.
**You can put only one representative image. If you register multiple images, the images are displayed as sliding.**
**\[Customer Center Information 7\~10]**
7.Phone number: Please enter your phone number.
\*\*Required\***\*** You must enter your phone number. At the time of payment, an SMS will be sent to verify the phone number.
8\. Email: Please enter the administrator email address
9\. KakaoTalk ID: KakaoTalk ID is optional. If you don’t have one, you don’t need to enter it.
\*Katalk is not currently linked to the Swing Shop menu. If you wait a bit, we will add it\~!!
10\. Customer Center Operating Hours: Set the customer center operating hours with the hour button.
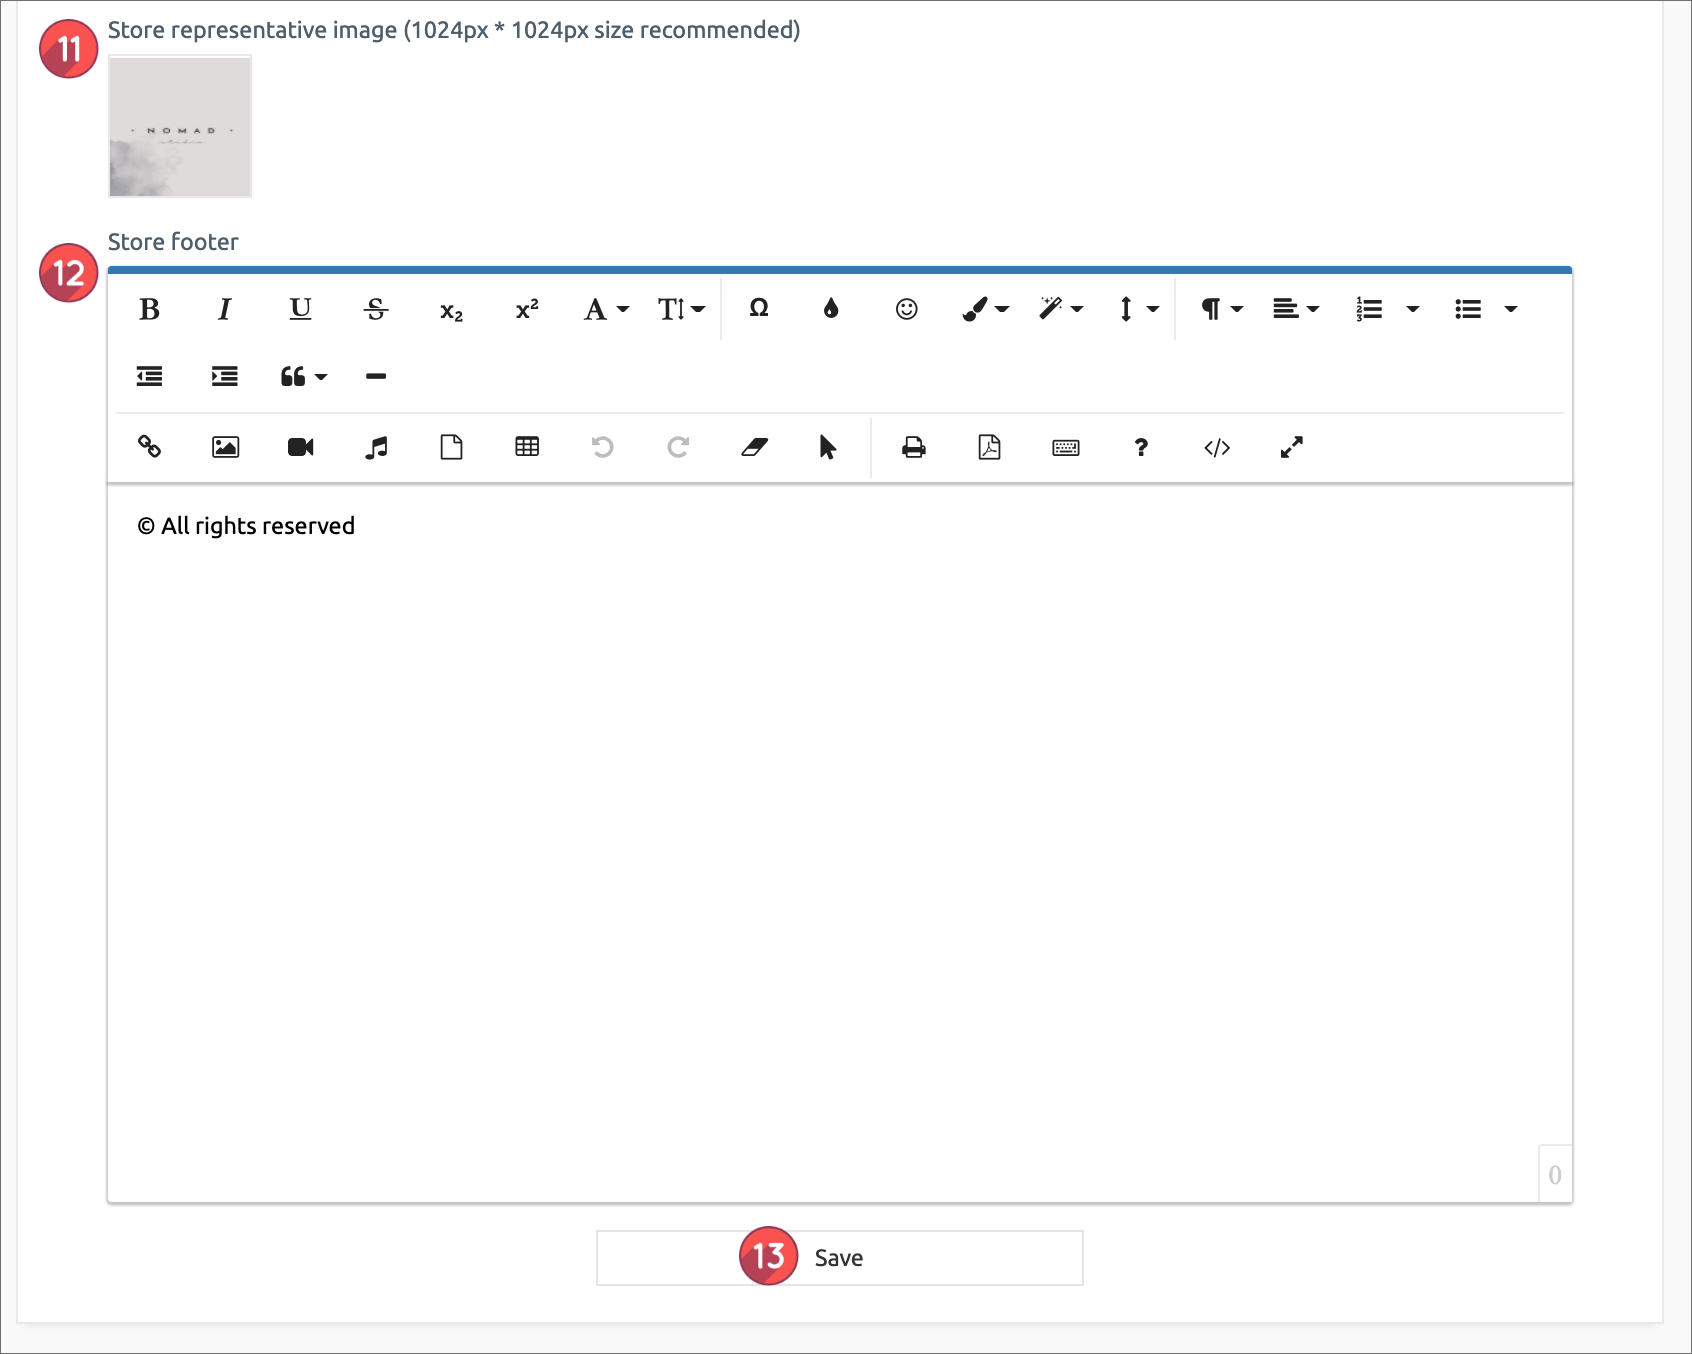
11\. Store representative image: The representative image is displayed as the main icon image on the shopping mall information page.
It is the same size as the app icon. You can also put the app icon image. (You can edit the image you want later)
12\. Store Footer: Please enter the text that goes at the bottom of the shopping mall.
13\. After all contents are entered, click the \[Save] button to complete the basic information setting input.
When the basic information setting input is complete, you will be directed to the app creation page.
### **STEP.2 Applying the shopping mall information menu to the app**

Maker(V2) Page → Move to Step 3 Page Menu
1. Select Home screen and click **Add a Category.** A new menu item will appear.
2. Select the new menu item and change the name in **Menu Name.**
3. Select **Swing2App Page.**
4. Click on the **Link Wizard** icon.
5. The **Link Wizard** pop-up window will open. Select a \[SHOP INFO] from the list , Clich on **Reflect**
6. Click on **Apply.**
7. Click on **Save.**
### **STEP.3 App execution screen**
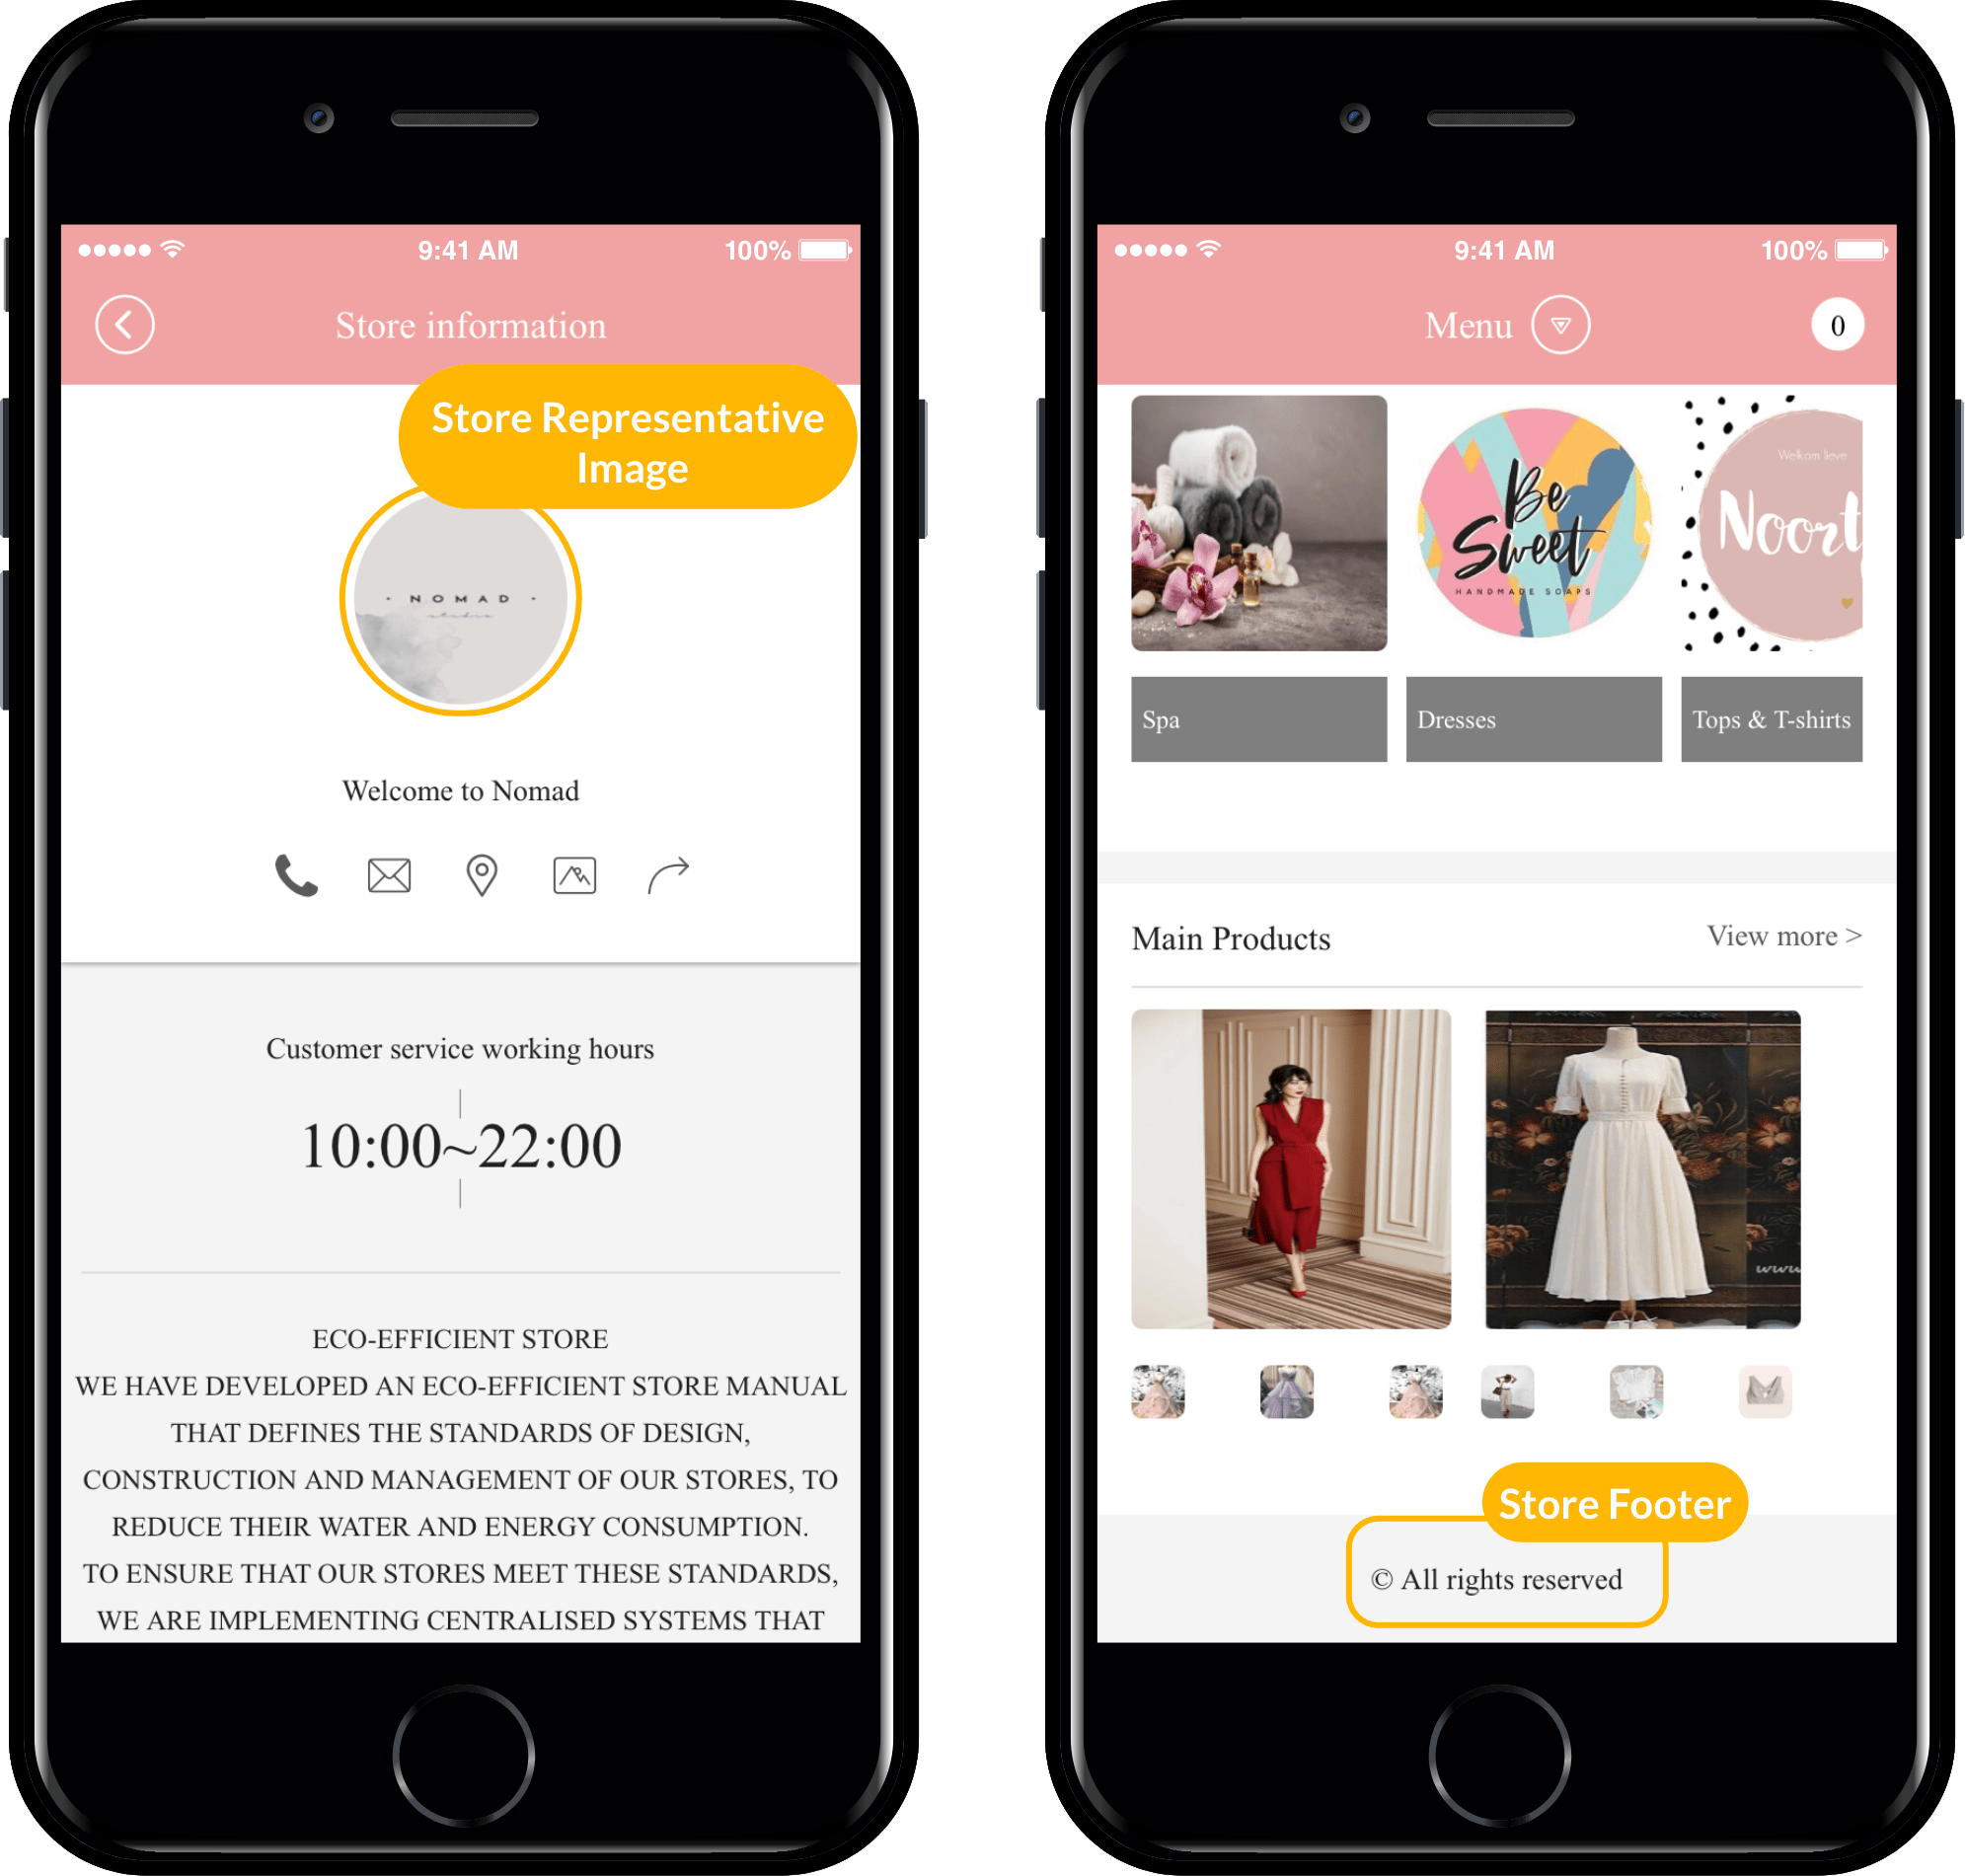
This is the app execution screen to which the shopping mall information page is applied.
The contents entered in the basic information setting above are displayed on the information setting screen.
Store representative image, store name, customer center information, operating hours, and store introduction are displayed.