> For the complete documentation index, see [llms.txt](https://documentation.swing2app.com/llms.txt). Markdown versions of documentation pages are available by appending `.md` to page URLs; this page is available as [Markdown](https://documentation.swing2app.com/store/admob/admob-register.md).
# How to join AdMobs, create an Ad Unit ID
**How to sign up for AdMob and how to create an AdMob Ad Unit ID**
\*\*▶ \*\***What is Google AdMob?**
AdMob is an advertising platform provided by Google that allows you to place ads in your app.
You can monetize your ads by applying the ad platform to your app.
\*\*▶ \*\***How do I apply AdMob to my app?**
In the ad mob plug-in settings provided by Swing to App, the app operator can set up the advertisement with the app that I created.\
\*AdMob setting is available only when you purchase an AdMob Plug-in product or AdMob Power Package.
\*\*▶ \*\***What should the user do?**
1\)Please subscribe to the Google ad-mob official website. (Login in if you have an account)
2\) After adding an app to apply the advertisement, create an advertising unit ID.(BANNER+Front)
3\) Please enter the ad-mob payment information (it is listed on the ad-mob dashboard, and if it is not written, post an ad X)
4\)Advertisement management checks if there are any unreviewed or blocked advertisements.
5\)If you’re done making it, you can save it by entering the advertising unit ID, app ID, and ad exposure pattern created in the ad mob plug-in settings.
If you re-produce the app and check the updated version again, you can check the screen with the advertisement.
**You can check the ad-mob plug-in setting advertisement setting in detail in the manual below.**
**☞** [**Go to see how to set AdMob plug-in ads**](/store/admob/admob-plugin-apply.md)
**▶ Why create an ad unit ID?**
To add ads to your app, you need the **app’s unique ad unit ID**.
There is a unique ID that applies to Android phones and iPhones.
There are also IDs depending on the type of advertisement.
This allows users to create their ad unit IDs and apply them to the app to make their ads look normal.
**+Android banner, front ad ID**
**+iPhone banner, front ad ID**
+**Android App ID, iPhone App ID**
Find out how to sign up on the Google AdMob site and how to create an app ad unit ID.
### **STEP.1 Sign up for AdMob**
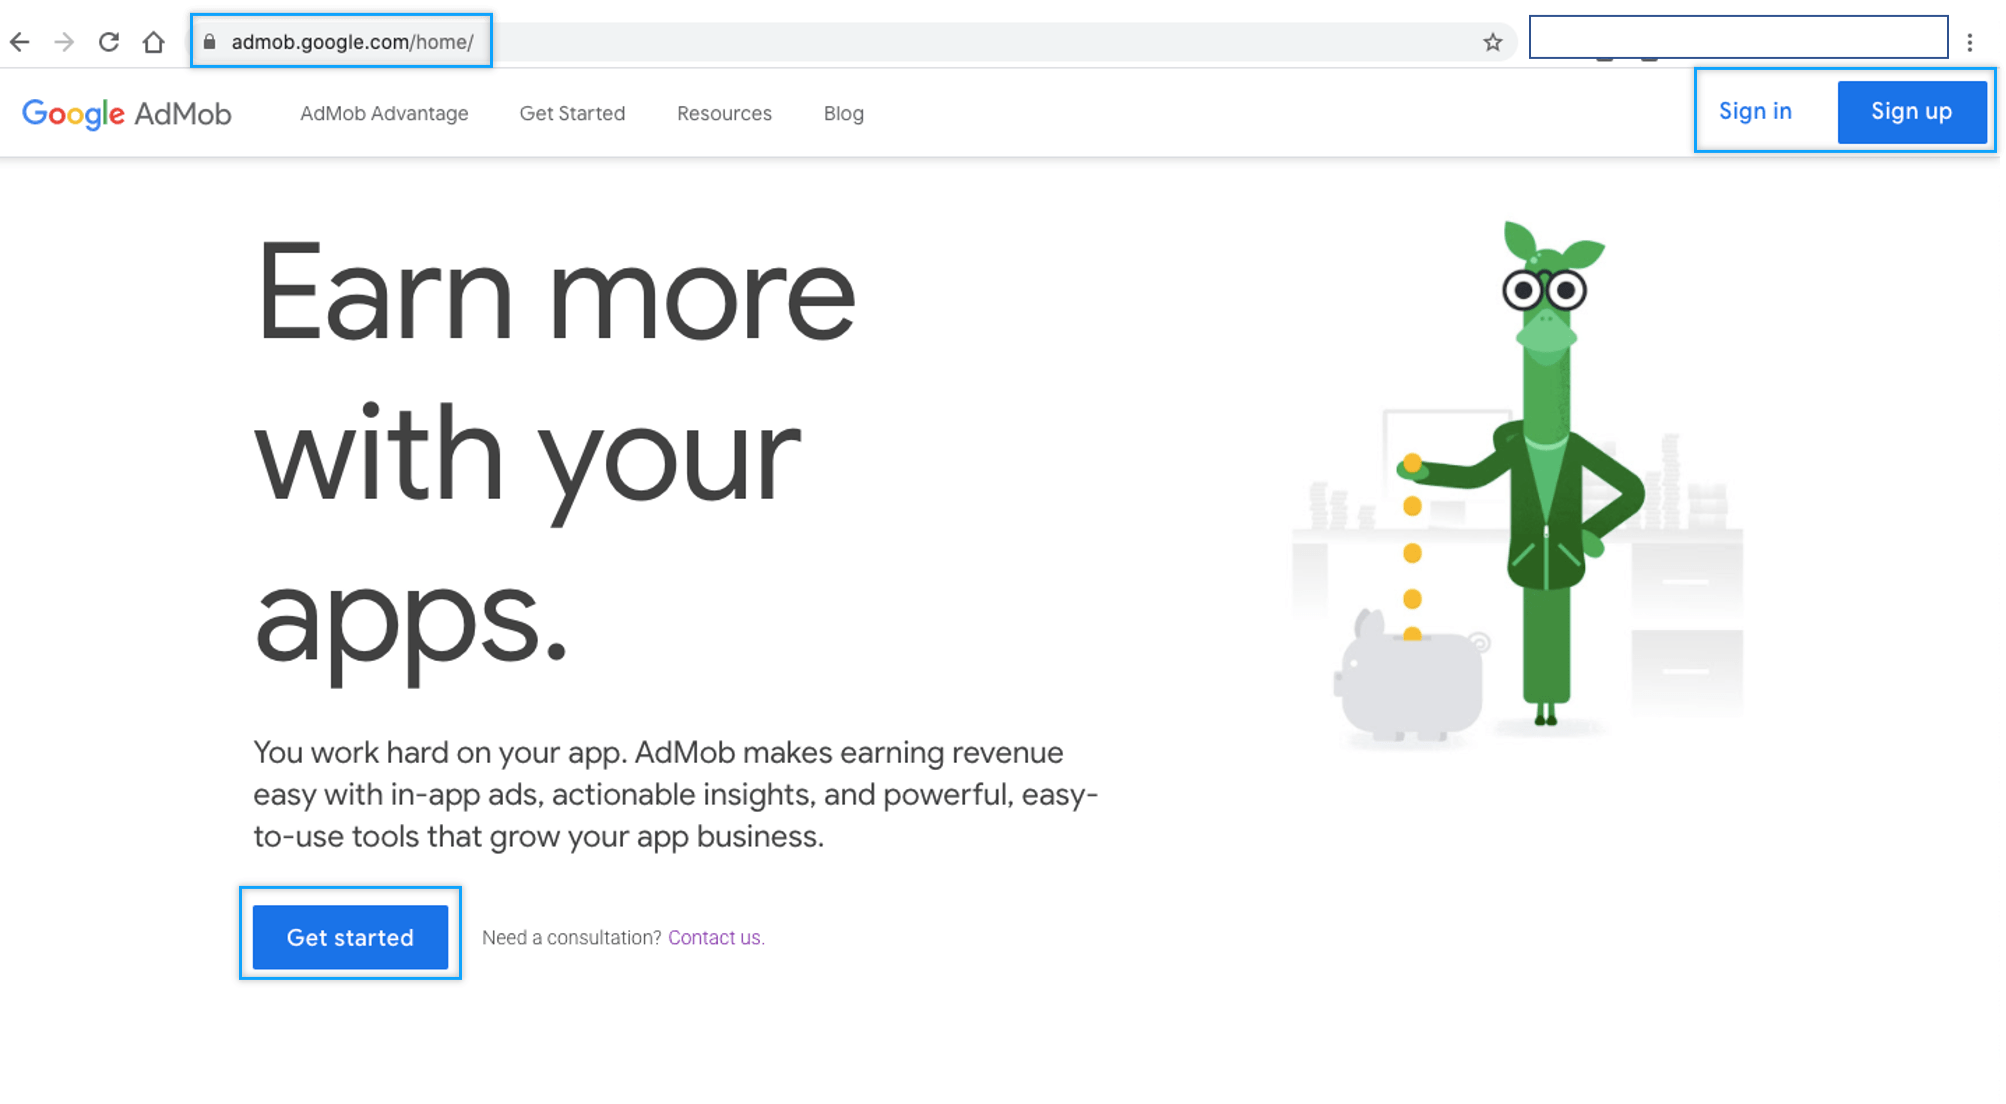
1\. Go to the AdMob site [**https://admob.google.com/home/**](https://admob.google.com/home/) and select the **\[Sign up]** button.
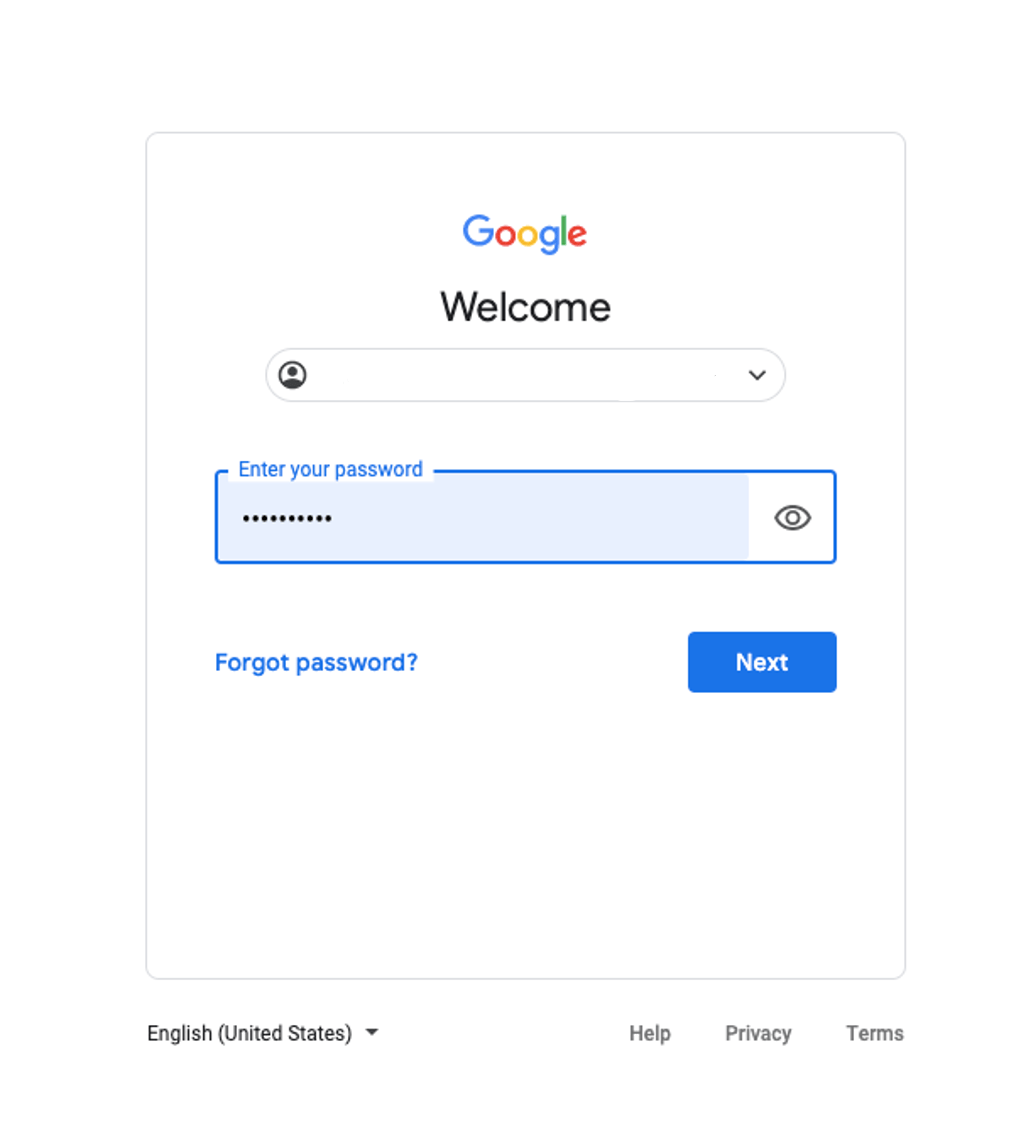
2\. Enter your Google email address and password and select the Next button.
3\. Enter the information required for your account after signing up.
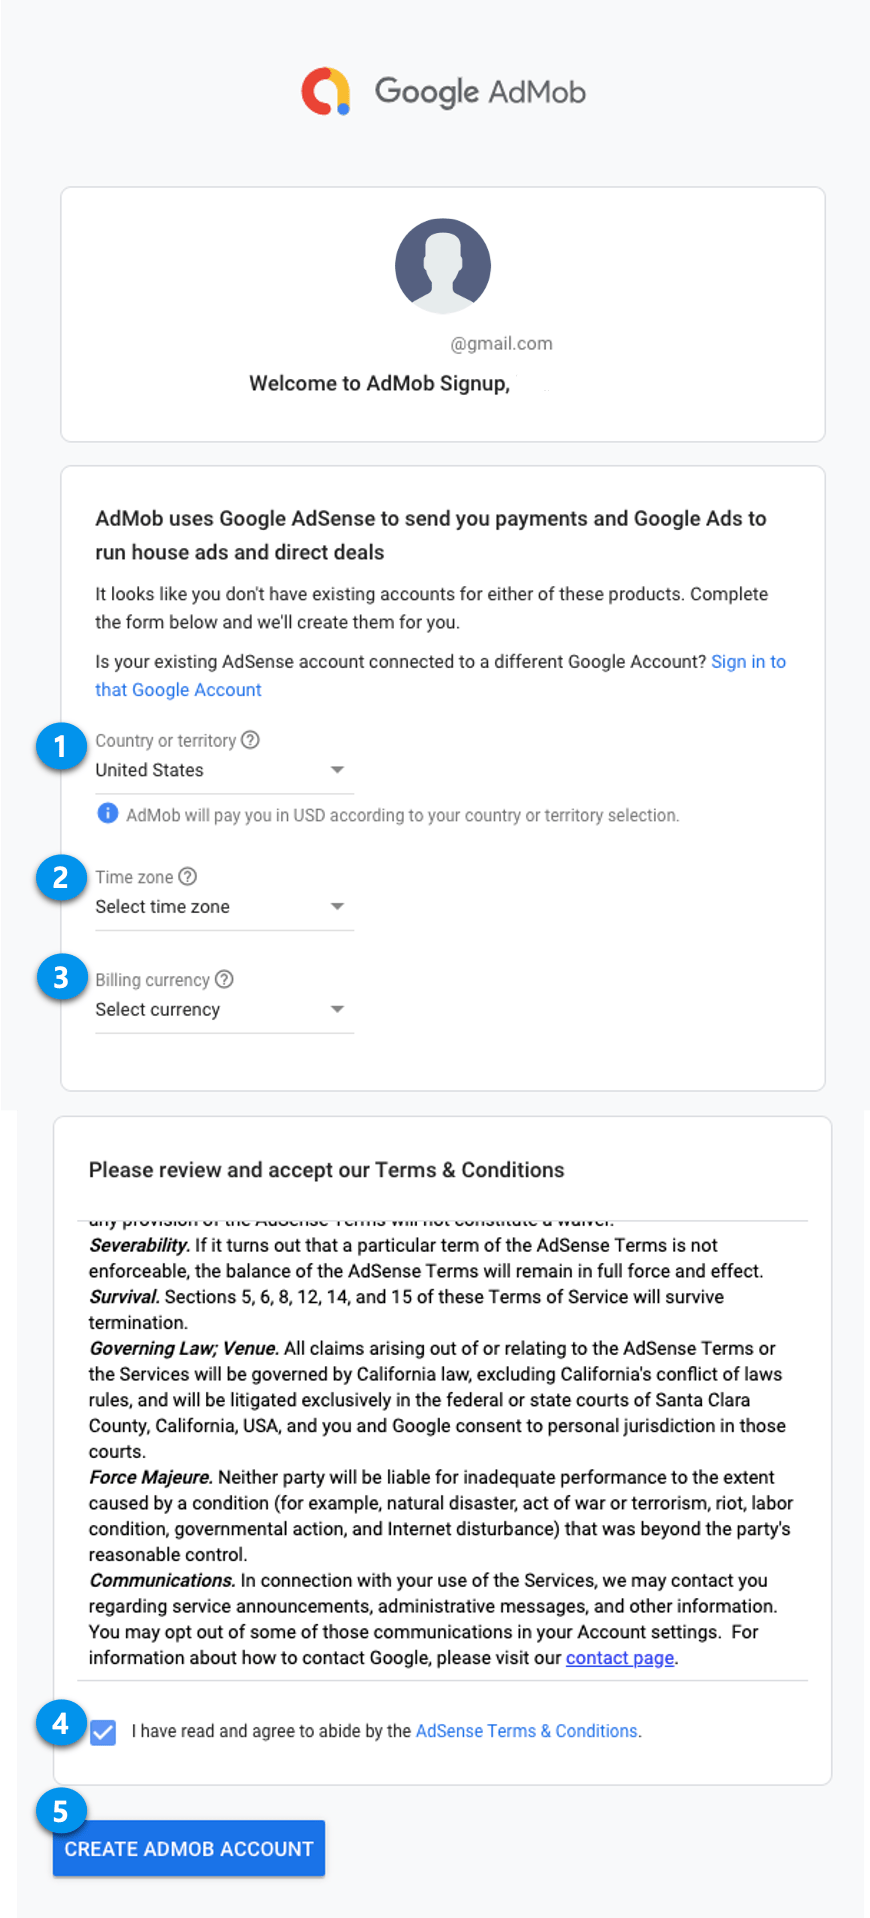
1\) Select Country: Select Korea (Please select your country)
2\) Select Time Zone: Select Seoul Time (Please select your preferred time zone)
3\) Payment Currency: Korean Won (You can also select another currency for other countries.)
4\) Check your agreement to terms and conditions.
5\) Please select the \[Create ADMOB account] button.
4\. After entering basic information, check the items and select the \[Continue Using ADMOB] button.
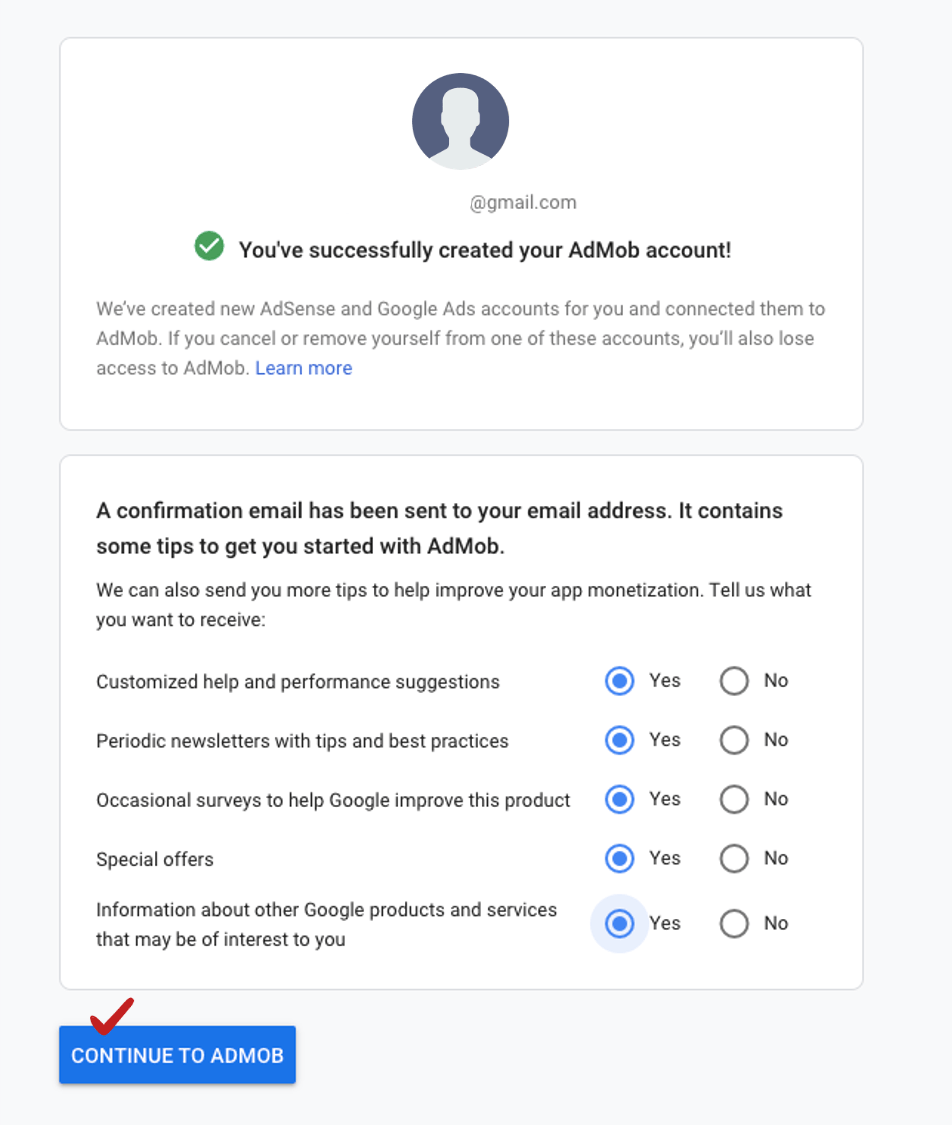
\
\&#xNAN;**※ Almost all of the information (policy, method of use, google AdMob related information) will be sent to the user’s email when using AdMob.**\
**Therefore, all of the above items should be checked in “Yes”.**\
If you check ‘No’, you will not receive the relevant information, so please receive it by email and refer to the operation of AdMob.
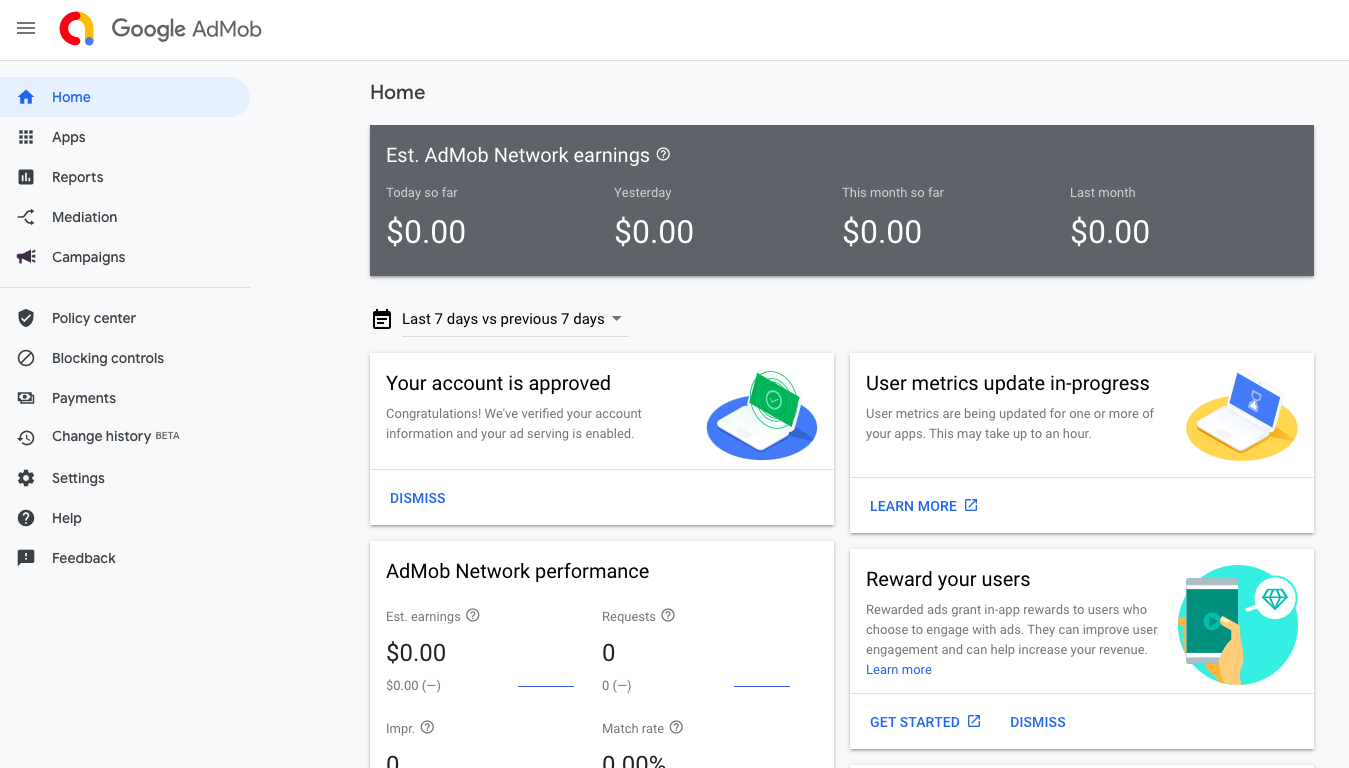
### **STEP.2 Subscription completed. Get started with AdMob**
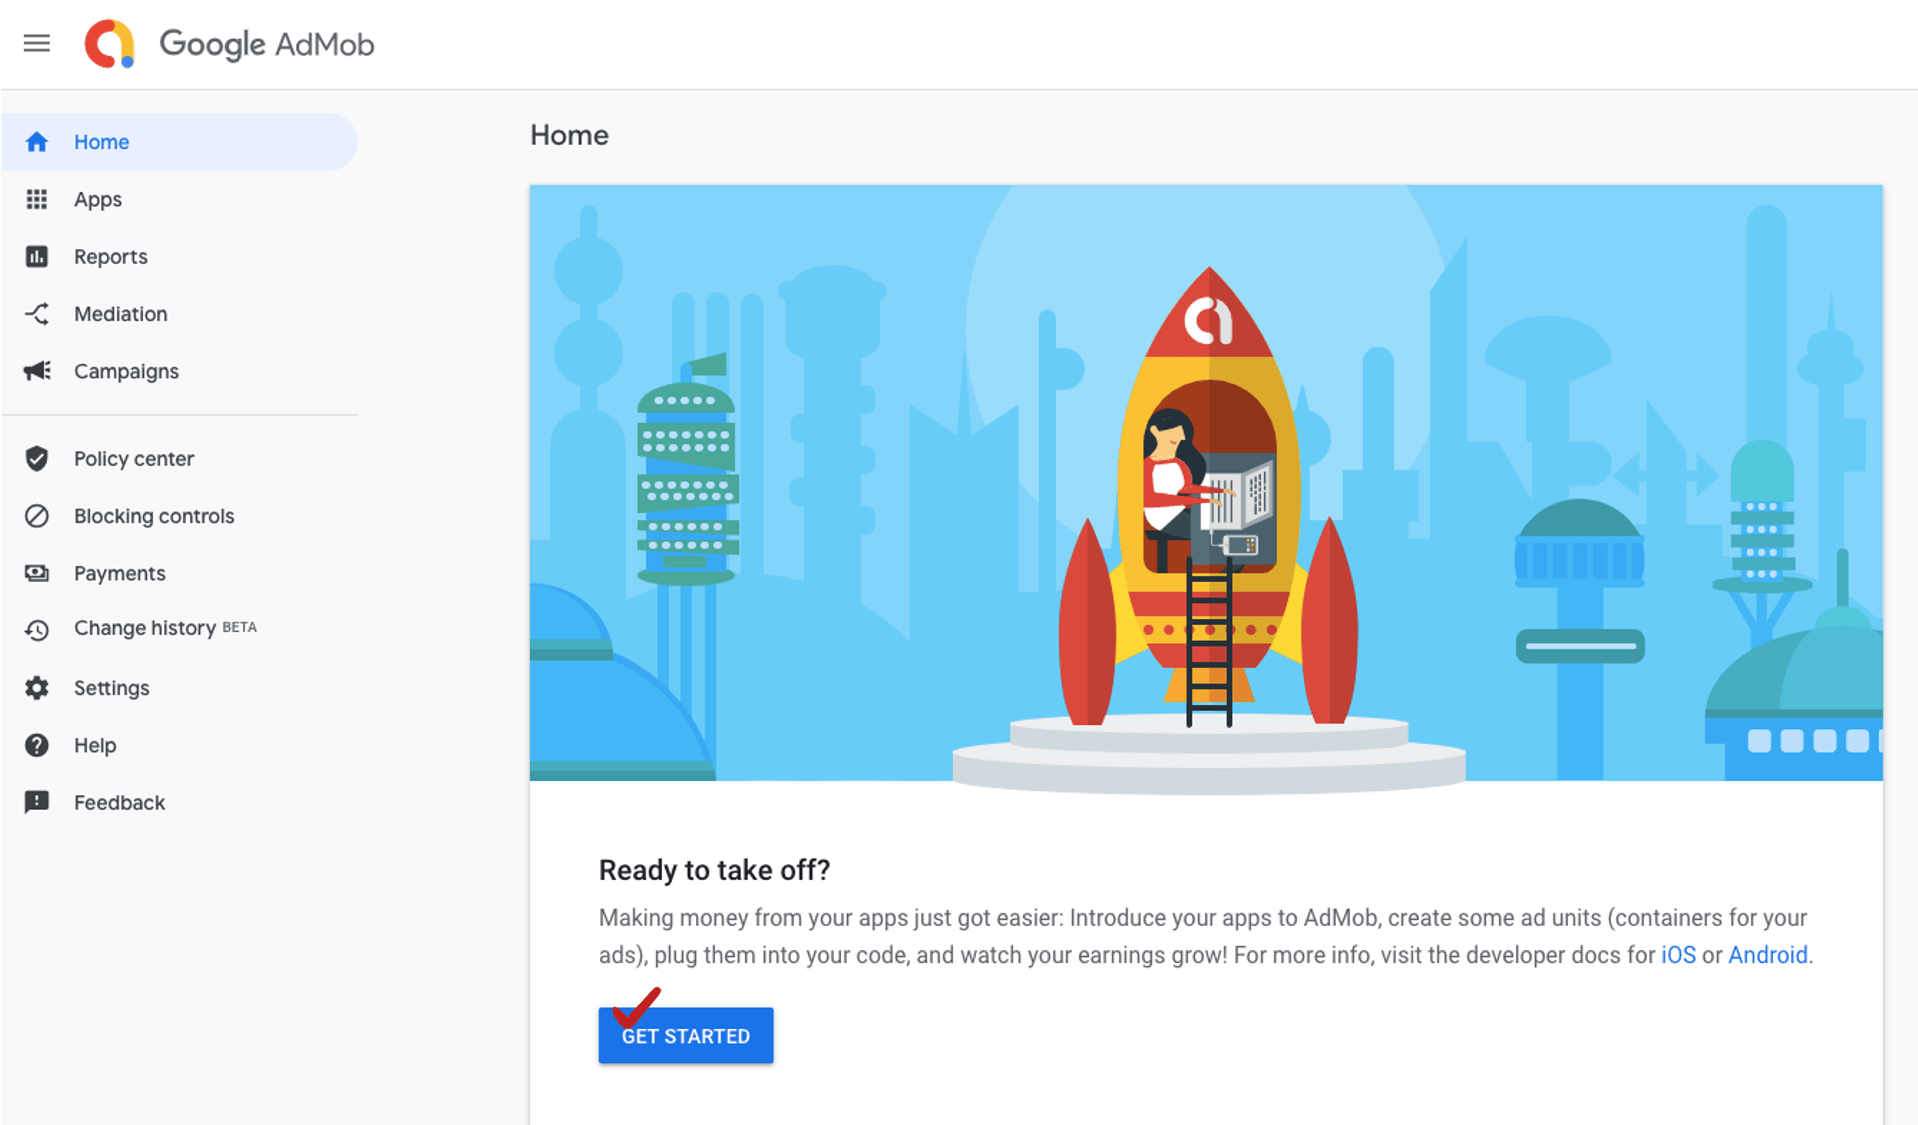
**Admob subscription is complete. Signing up is very simple, right?**\
It’s not particularly difficult. You only need to proceed like the above instructions.\
This will bring up the AdMob management page as shown in the image above.\
Let’s create an ad unit ID in the app by selecting the \[Start] button on the page.\\
### **STEP.3 Set up a new app**
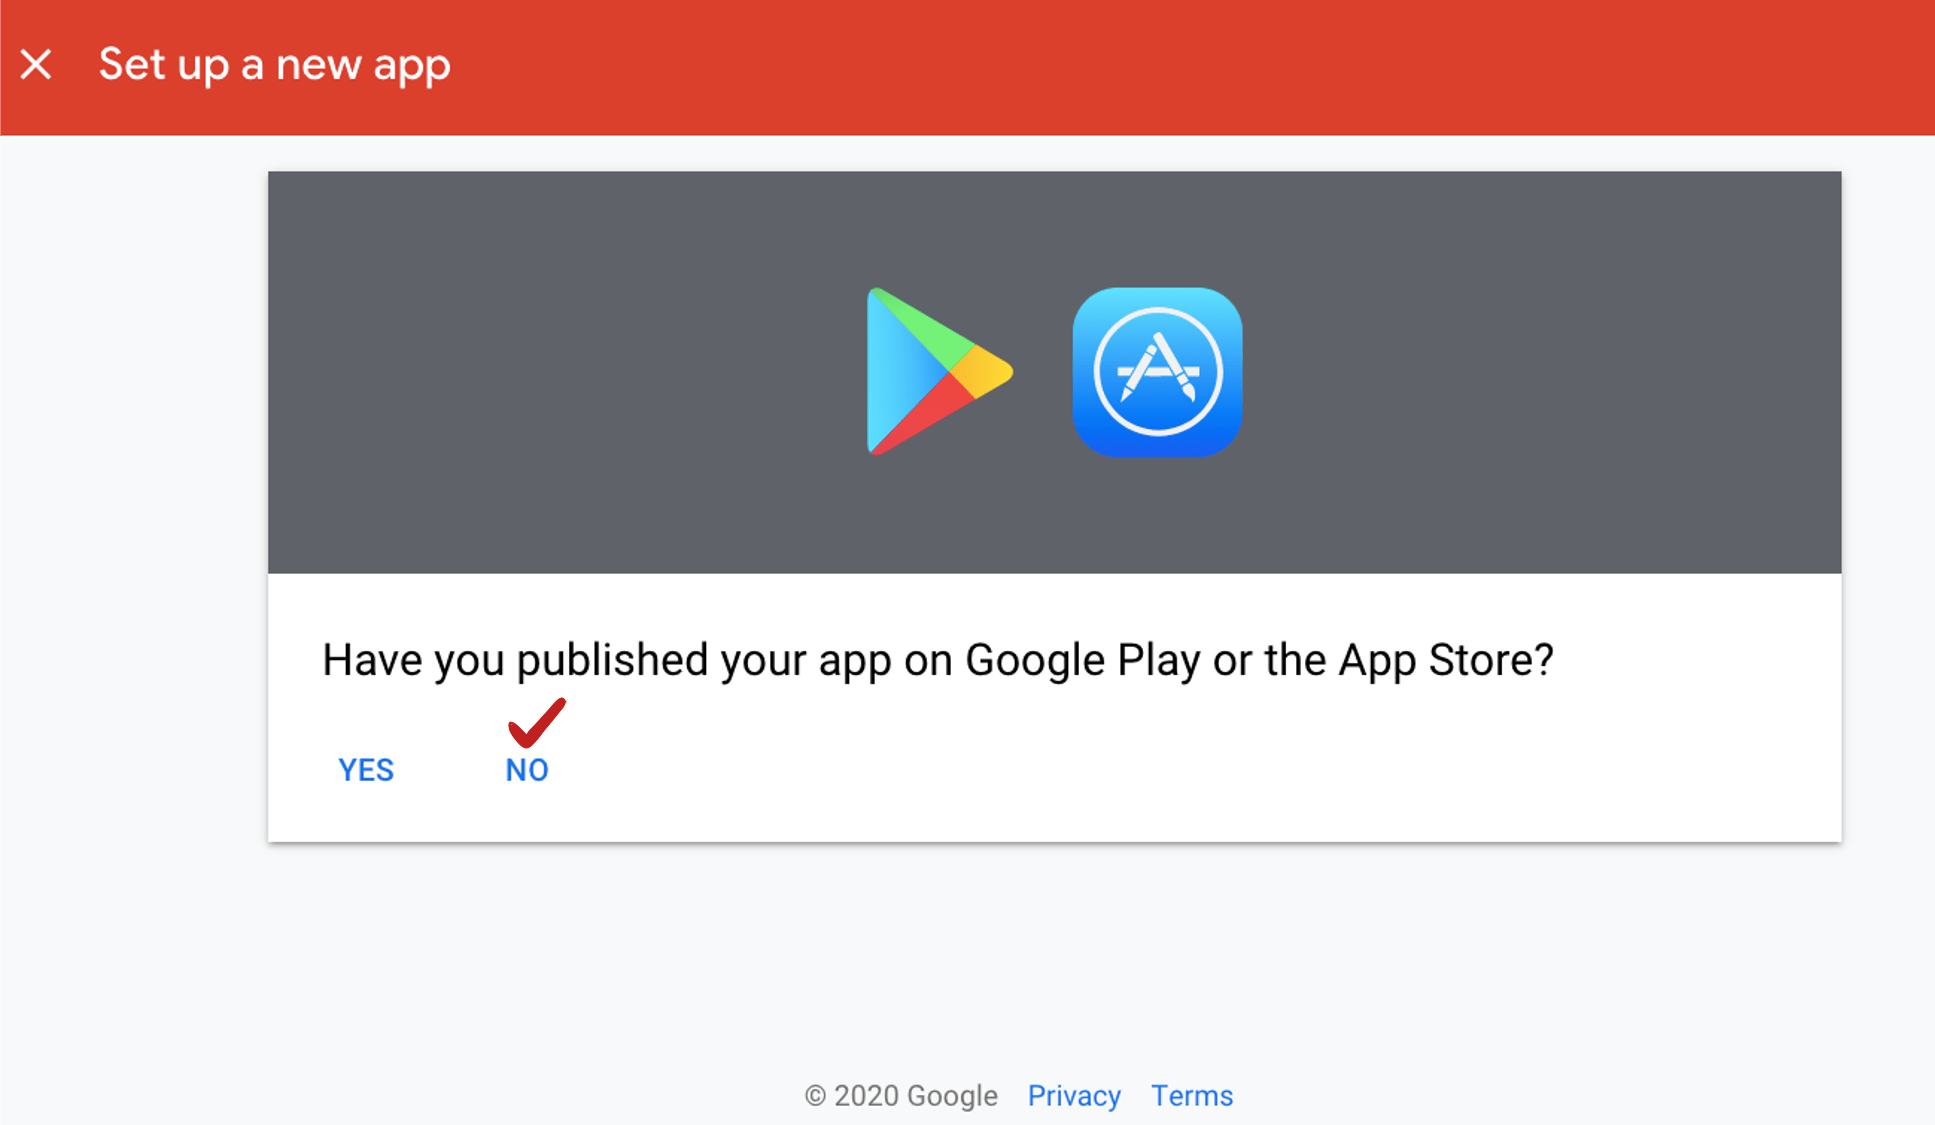
Press the Start button and you’ll see a new app settings page.
At this point, **you will be asked if you have published (launched) the app to the Google Play Store and App Store.**
–**If you are a user here, and if your app is released to the store! Check “Yes”**
**-If you just created it and haven’t released it yet, please check “No”.**\
\\
As explained above, we will show you how to create an ad unit by checking ‘No’.\
If your app hasn’t been released to the Store yet, please select ‘No’.
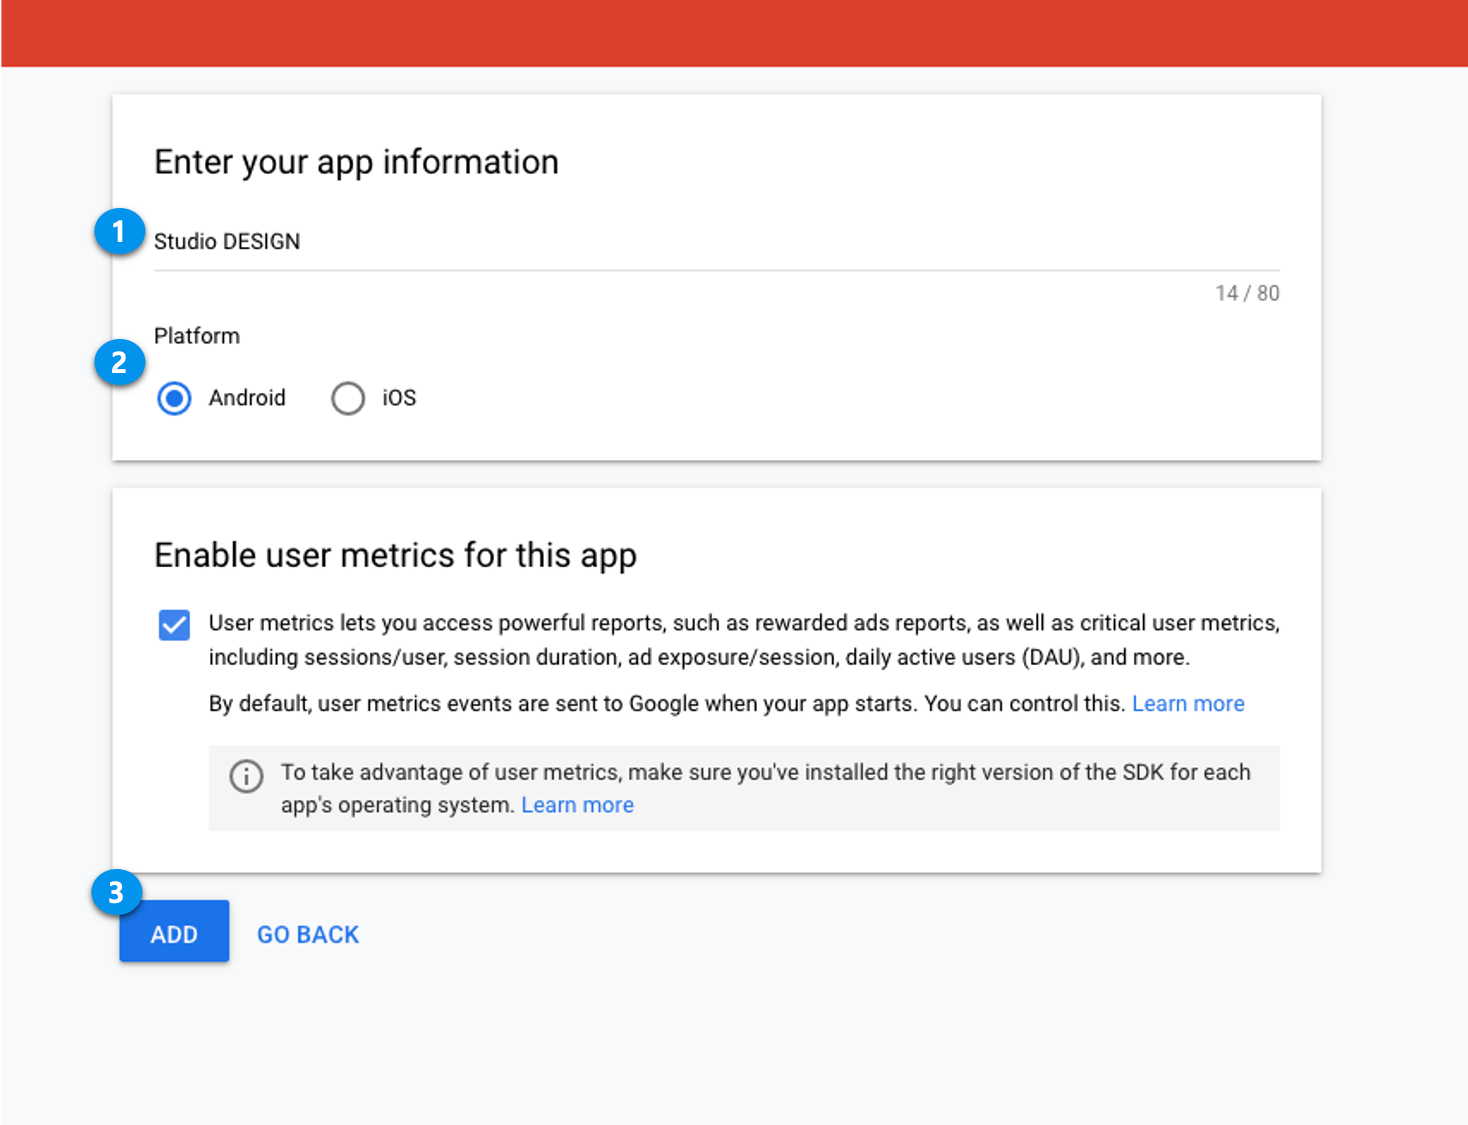
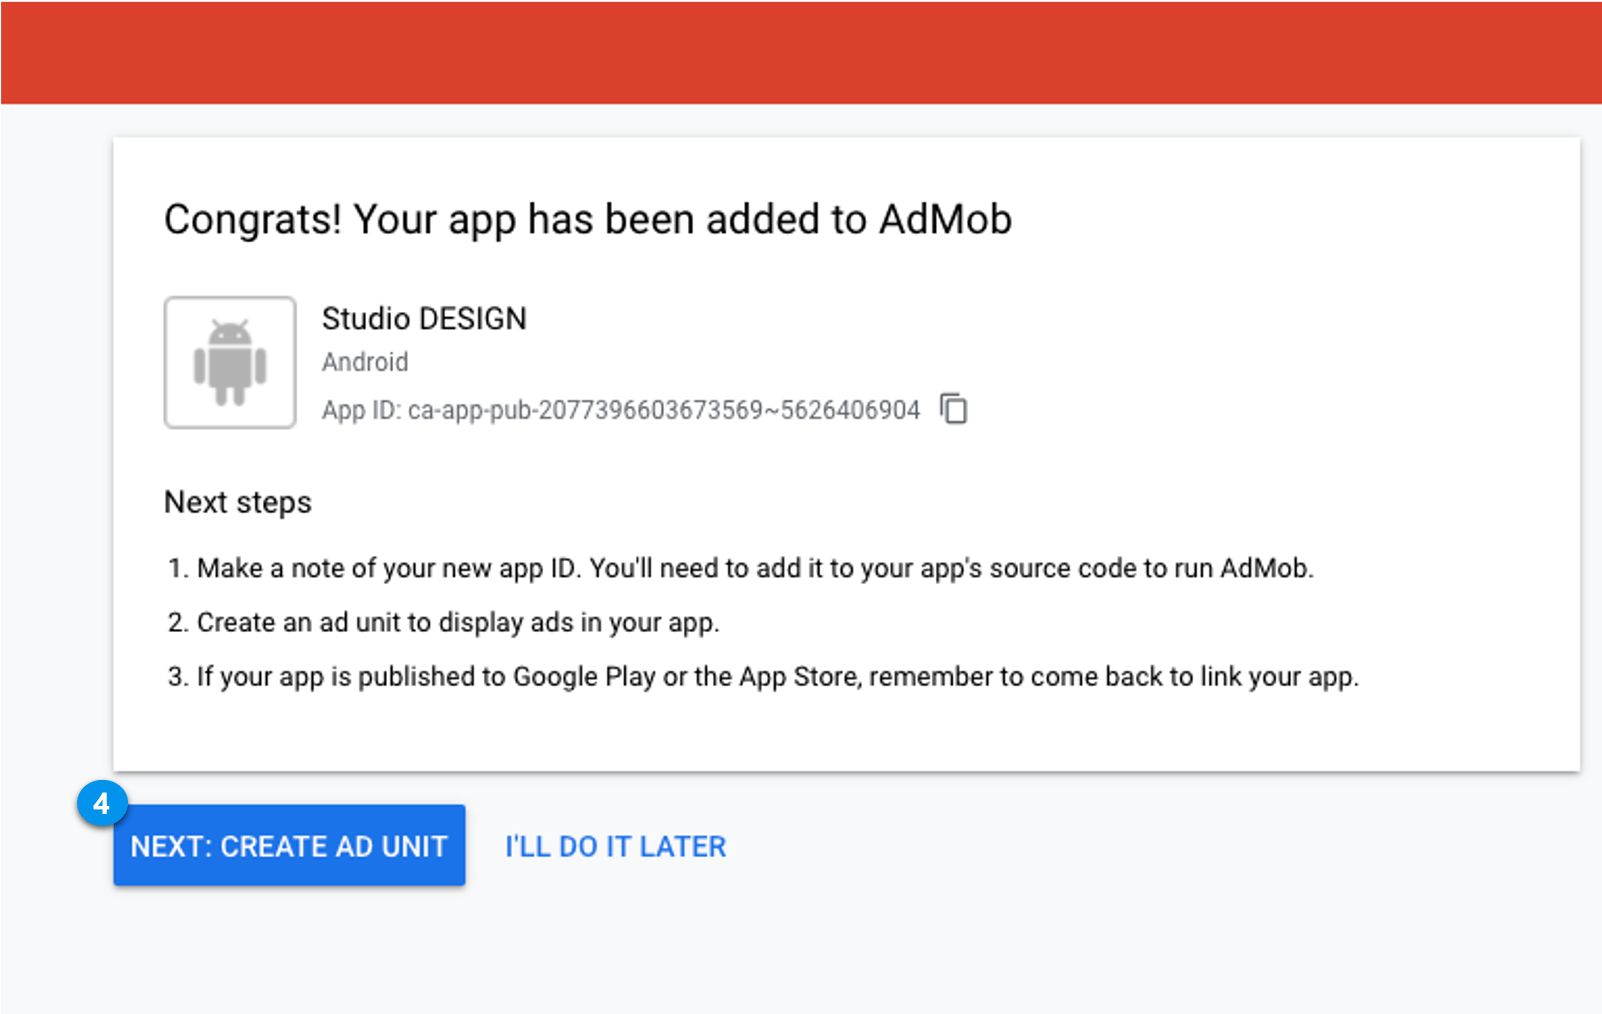
1\)Enter the name of the app: the name of the app you created, and the name you’re releasing in the Store.
2\)Please choose the platform: Android and iPhone can be applied to both, so if you want to release together, please make your order.
3\)Select the \[Add] button.
4\)Select the \[Next step: Create an ad unit] button.
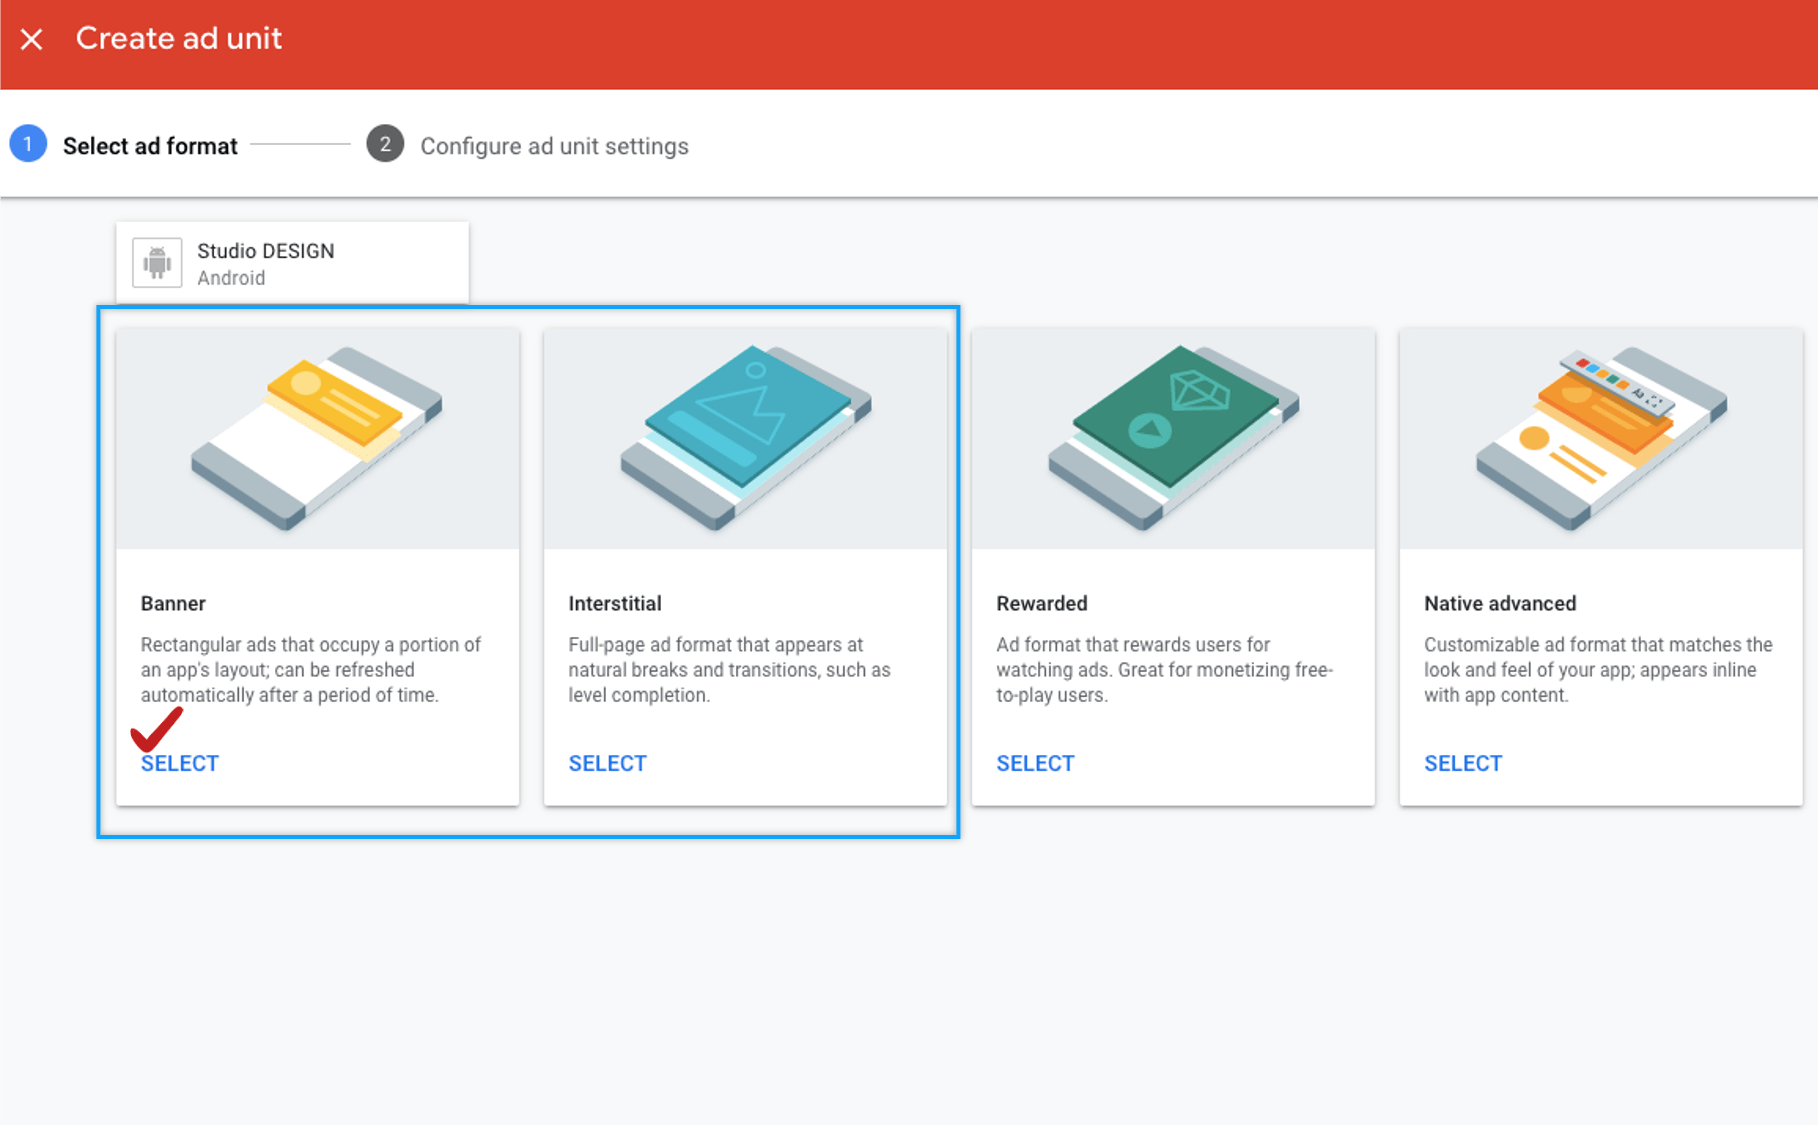
**Ad mob can have 2 kinds of the banner and front side**.
Therefore, you can create an ad unit for both **banner and front**.
If you select the Create Ad Unit button, the unit ID is created.
There’s nothing difficult to do.
Select the banner and the front side in order.
First, let’s choose a banner and make it.
**1) Select your banner ad**
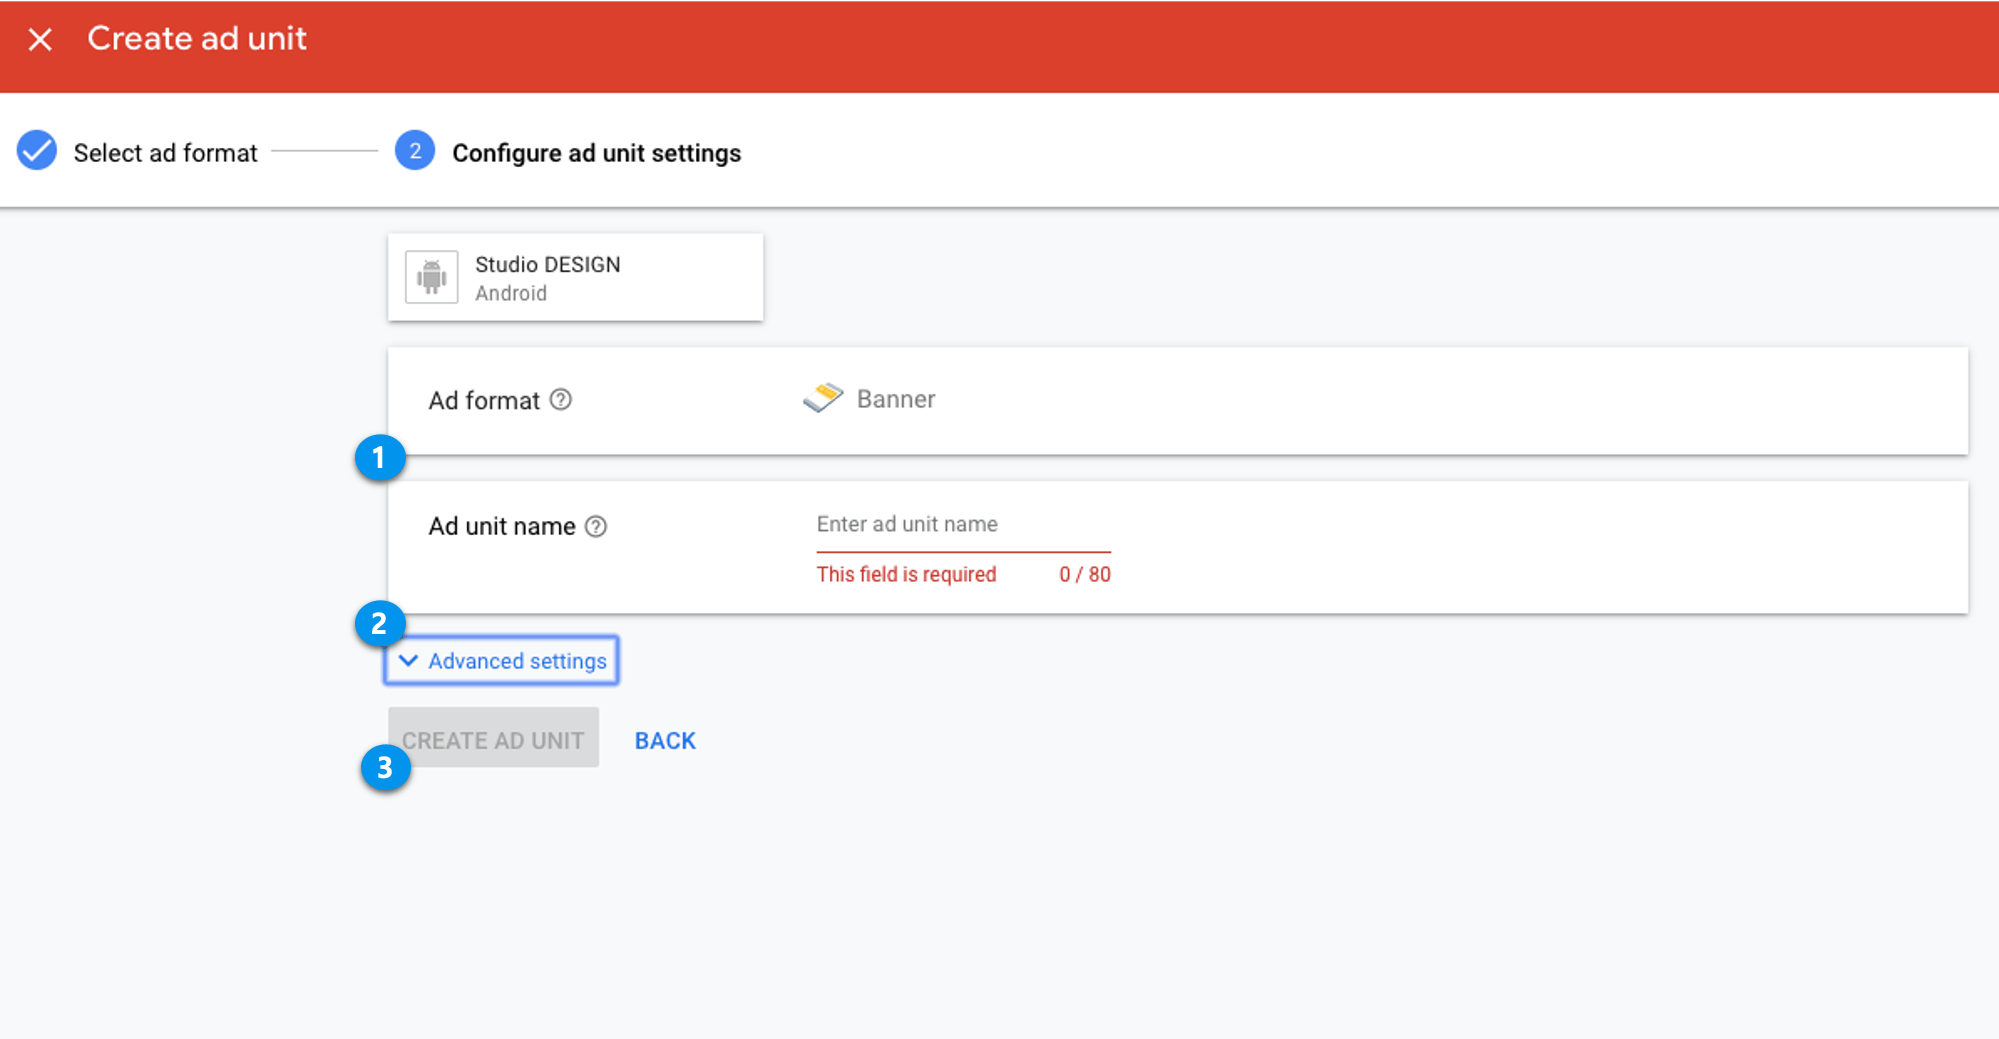
**2) Enter the ad unit name: It’s only for you to check, so you can easily enter it.**
**3) Select the Create Ad Unit button.**
This allows you to create your ad units by selecting the same banner and front ad.
From this point, proceed as described above.
### **STEP.4 Check your ad units**
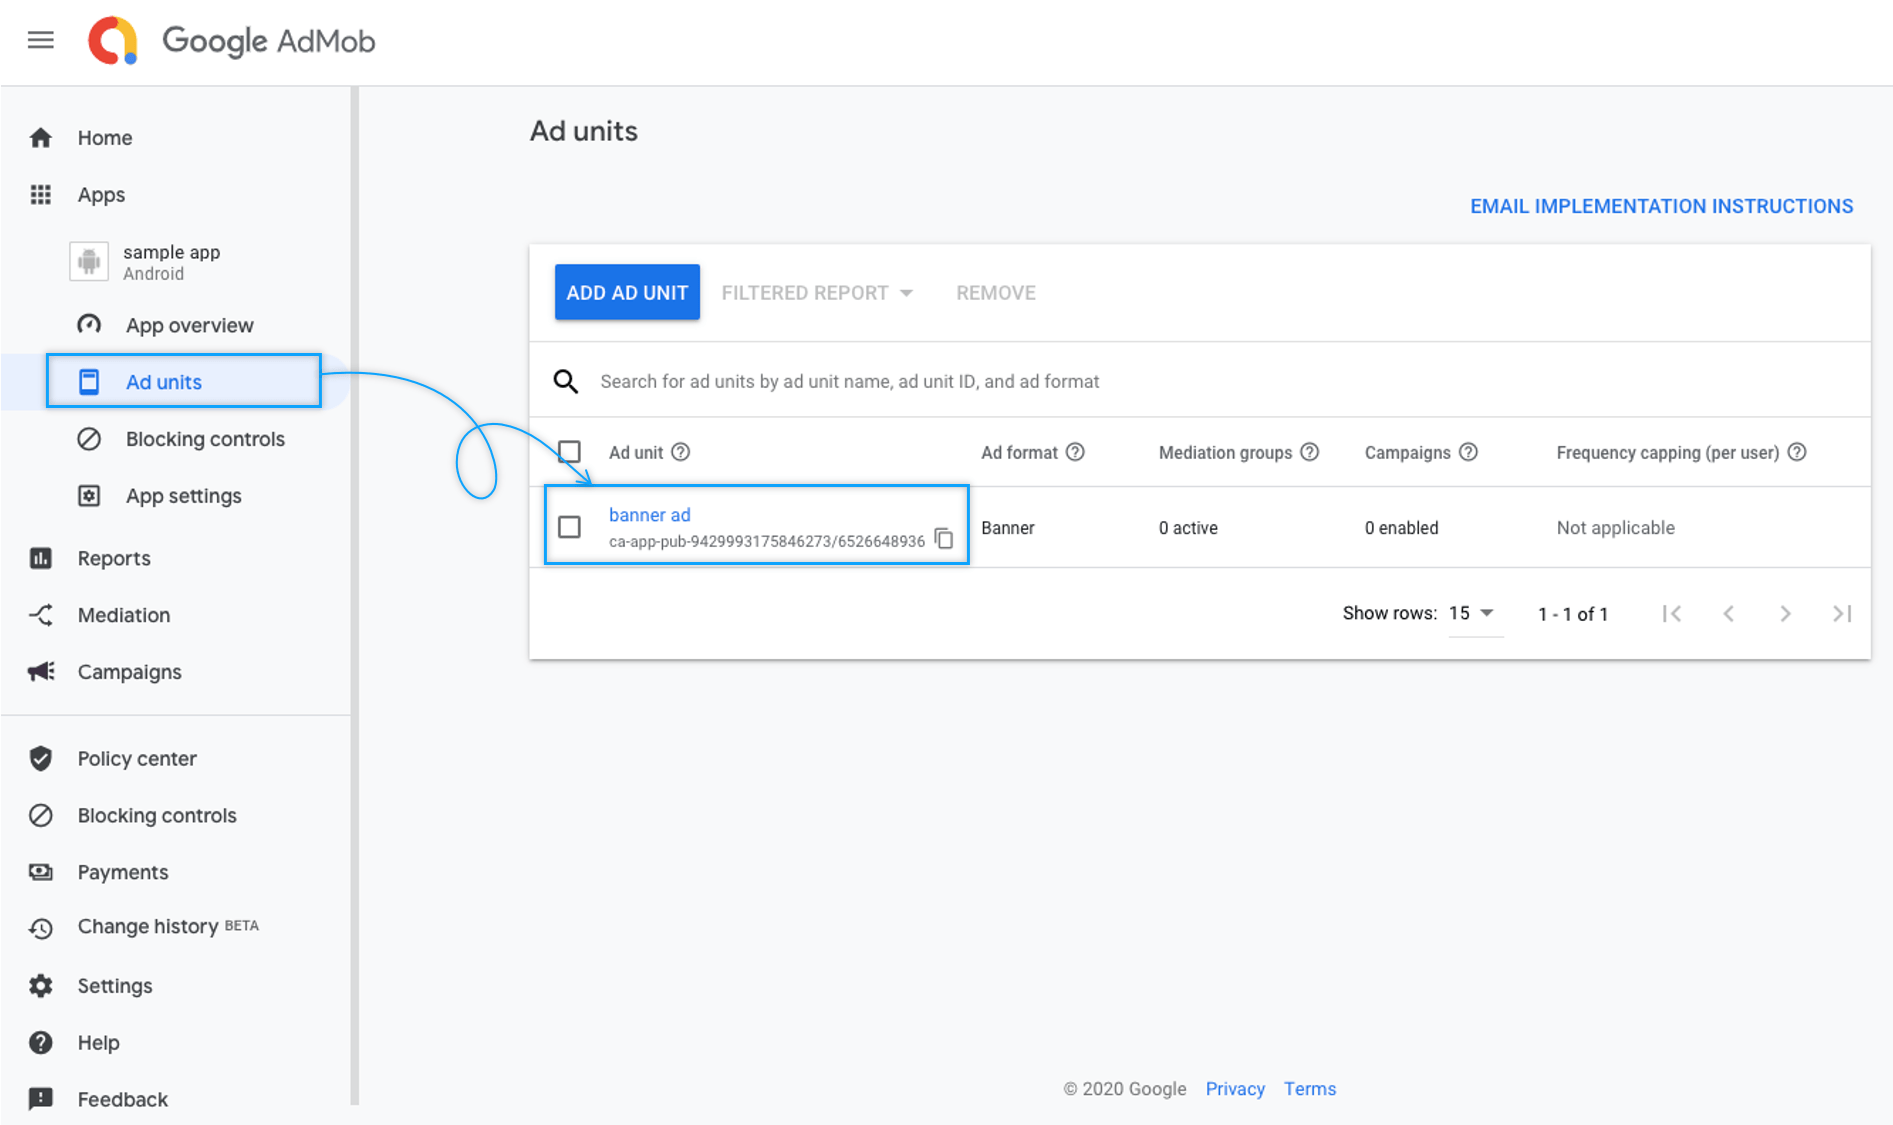
Once you’ve created your ad unit ID, you can check it on the admin page.
You can select the ad unit ID you created by selecting \[Ad unit] from the left menu of the AdMob management page. \\
**Copy app ID**
**If you have created an ID, please check and copy the App ID – Android App ID, iOS App ID**
**▶ Where can I check the Android App ID and iOS App ID?**
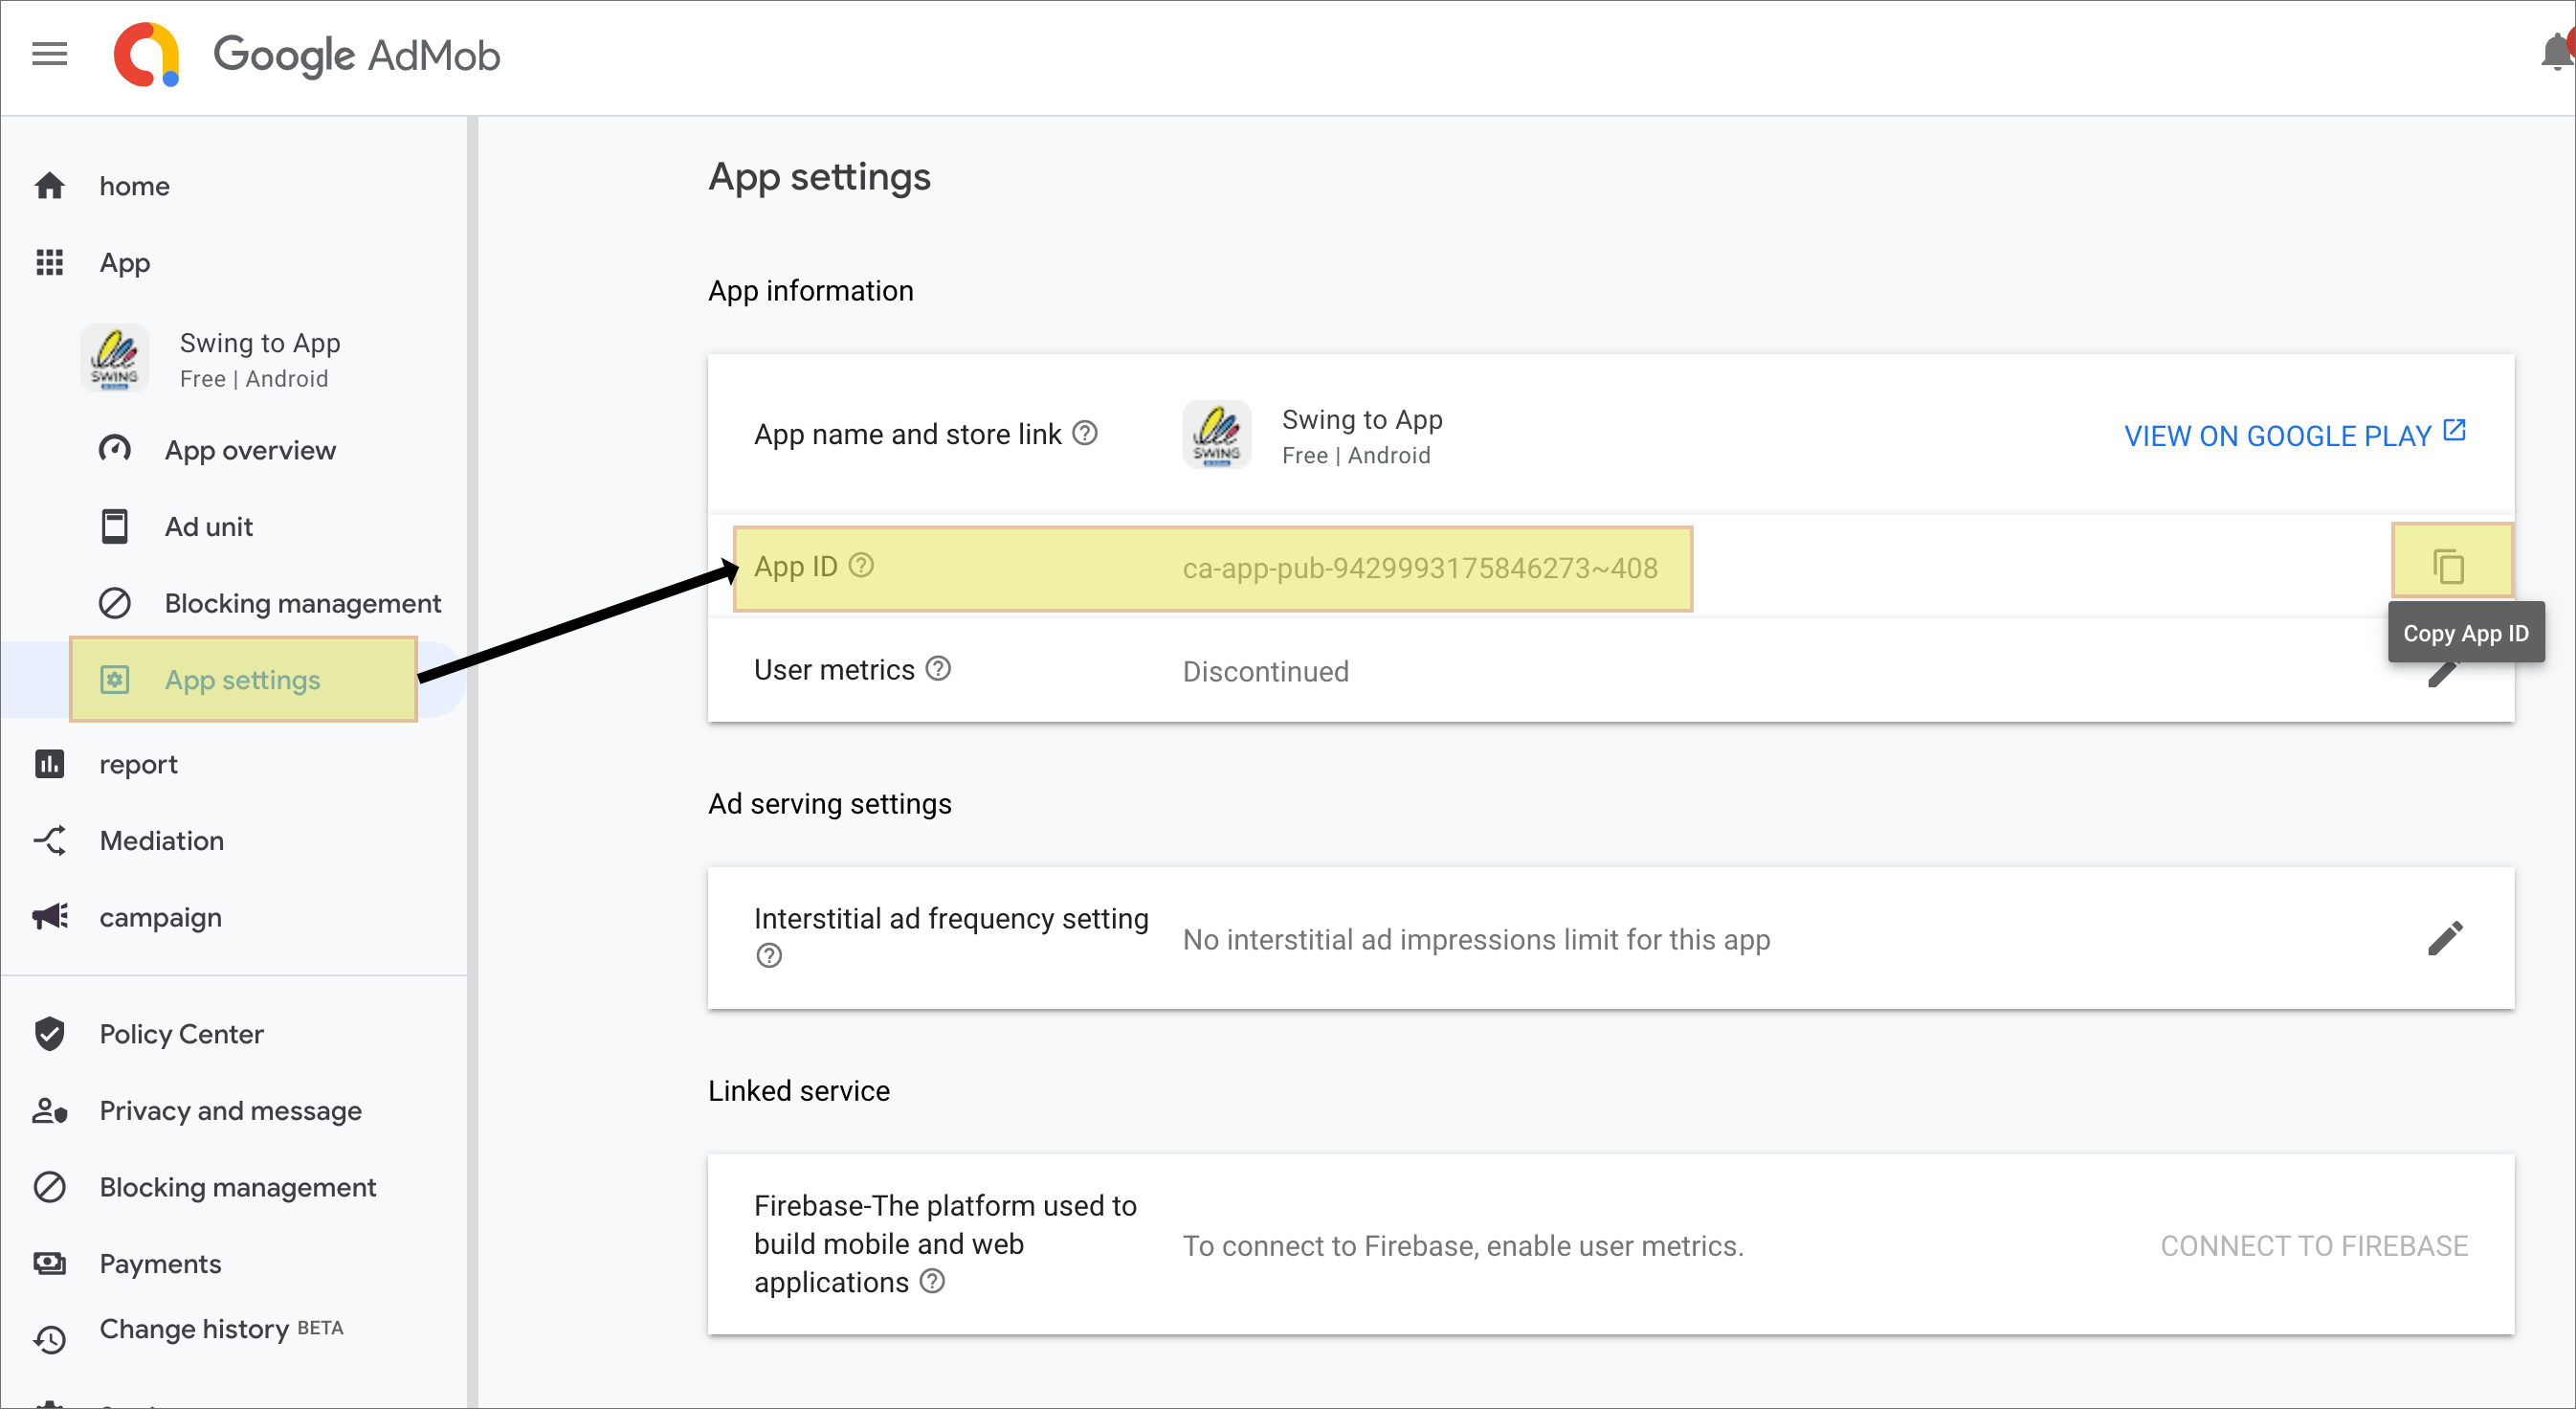
**Select the app you added from the dashboard → Select the category on the left → View the app ID by selecting the App Settings tab.**
If you press the copy button next to the ID, you can copy the ID. Please paste the ID when you leave an ad-mob request.
Android and iPhone app IDs will be created, so please check each app ID and paste the ID on the ad mob plug-in setup screen.\
\
\ **You can check the ad-mob plug-in setting advertisement setting in detail if you look at the post below.**
**☞** [**Go to see how to set ad-mob plug-in ads**](/store/admob/admob-plugin-apply.md)
### **STEP.5 Operation of AdMob’s**
If you created an ad Unit ID after signing up for AdMob, we will tell you what to do next.
Please check as it is important!
If you apply AdMob ads, you can check the operating status of payment information and other information through the AdMob management page in the future.
You can manage it on this page.

**01. Enter payment information**
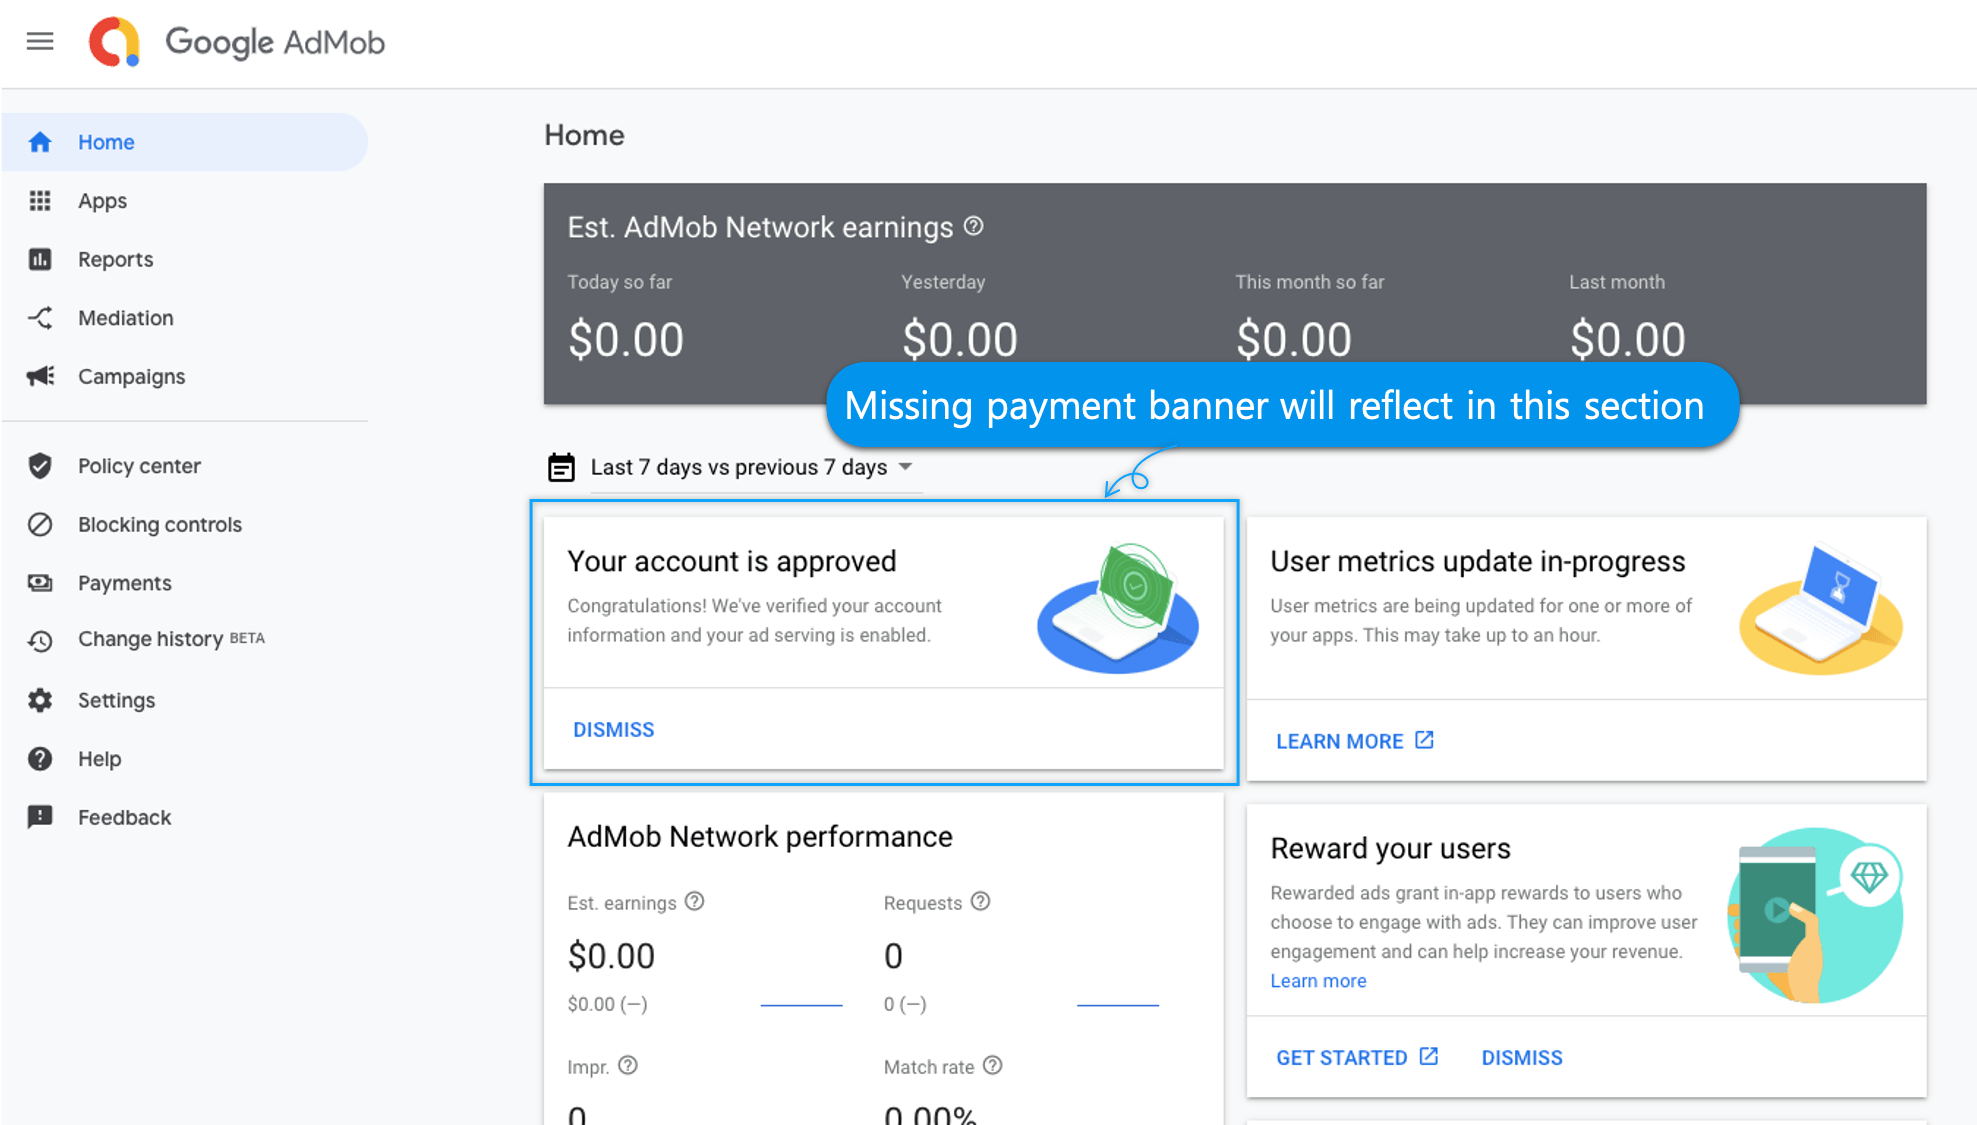
If you look at the main dashboard, can you see the missing payment information?
**There is a message stating that your payment information is missing. \*If your payment information is missing, please add it as your ad won’t show.**
Please enter the **\[Add payment information]** menu.


Once you’ve completed your payment profile entry, go back to the main dashboard, and you’ll see that your status has changed to **\[Account Approved]**.
Your account information has been verified, so your ads can run.
\*Admob can enter the method of receiving payment when the standard revenue provided by Admob is not entered when entering the account information.
As a result, you won’t enter the account, bank, etc., on which you want to receive revenue.

**02. Block management – app ad management**
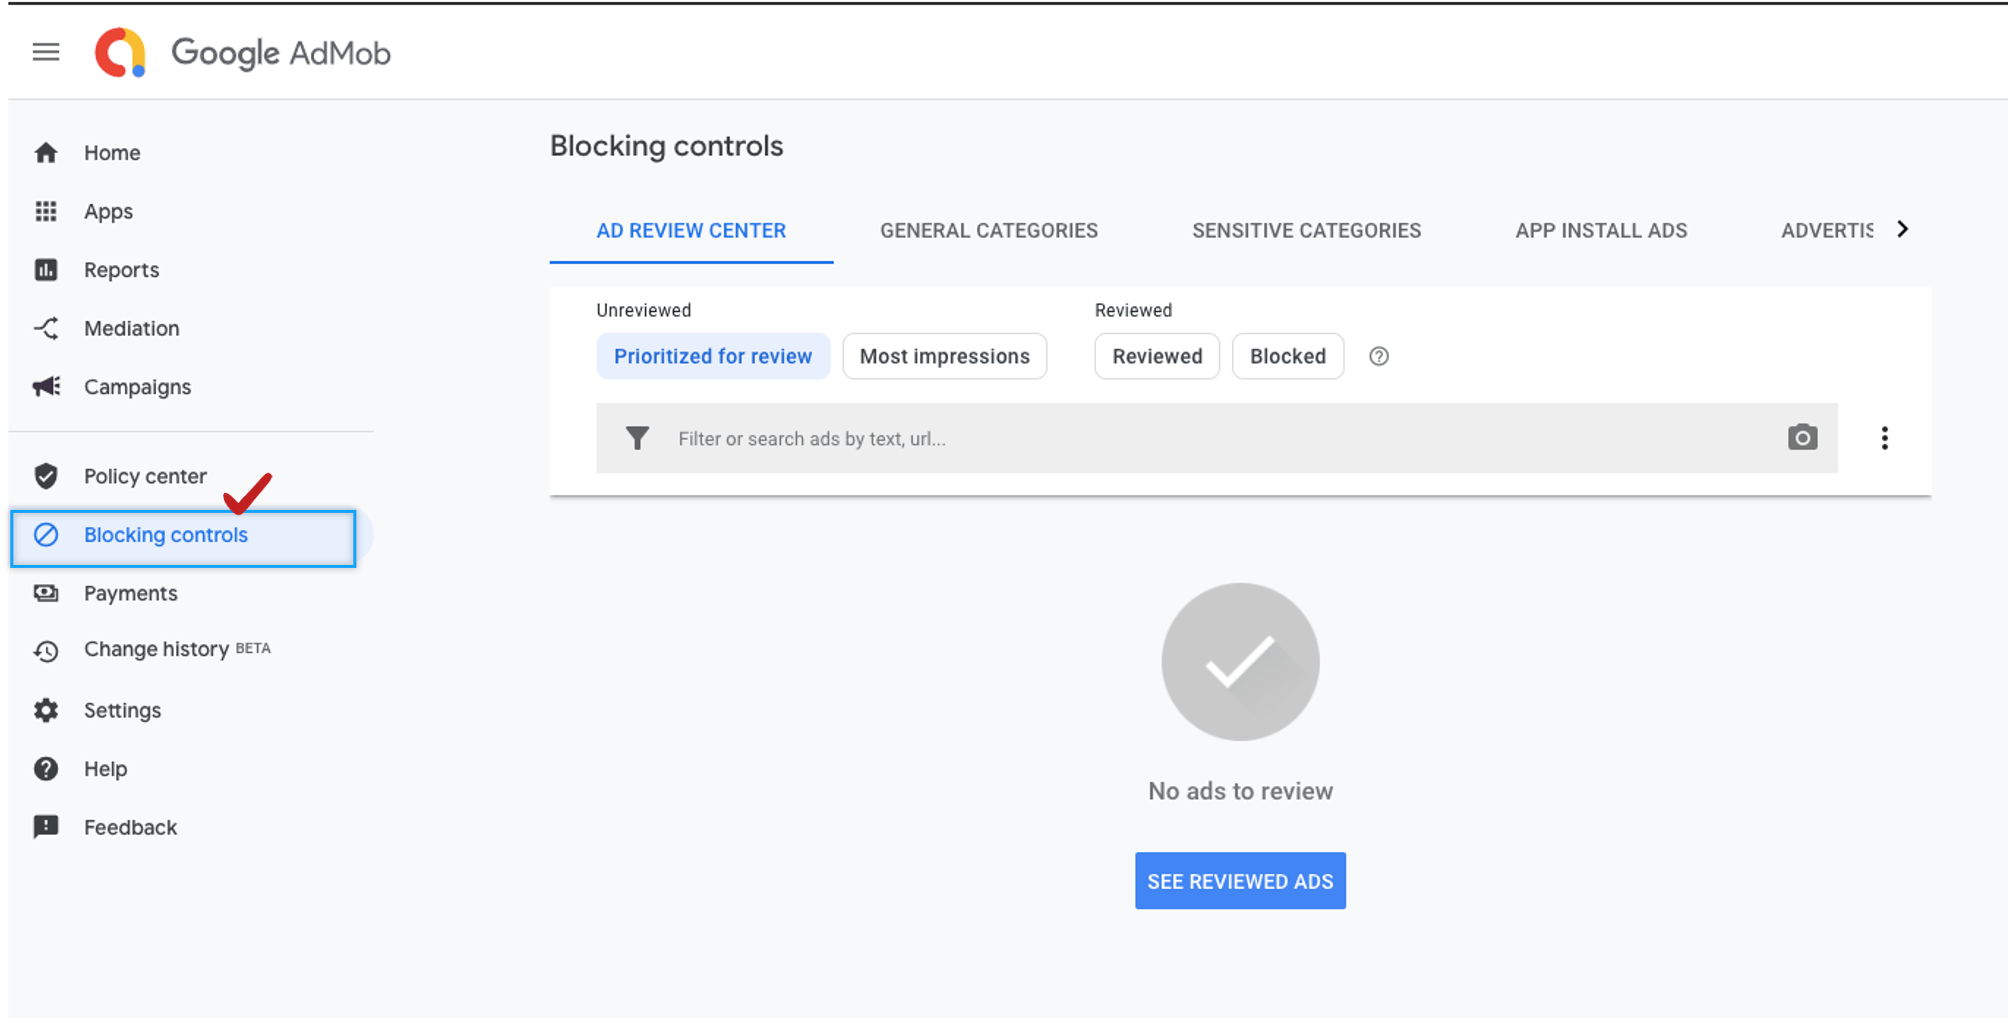
Once you’ve entered your payment information, make sure there are no un-reviewed ads in Block Management so that your ads can be published.
From the left menu, go to the \[Manage Block] menu.
**1) Un-reviewed ads**
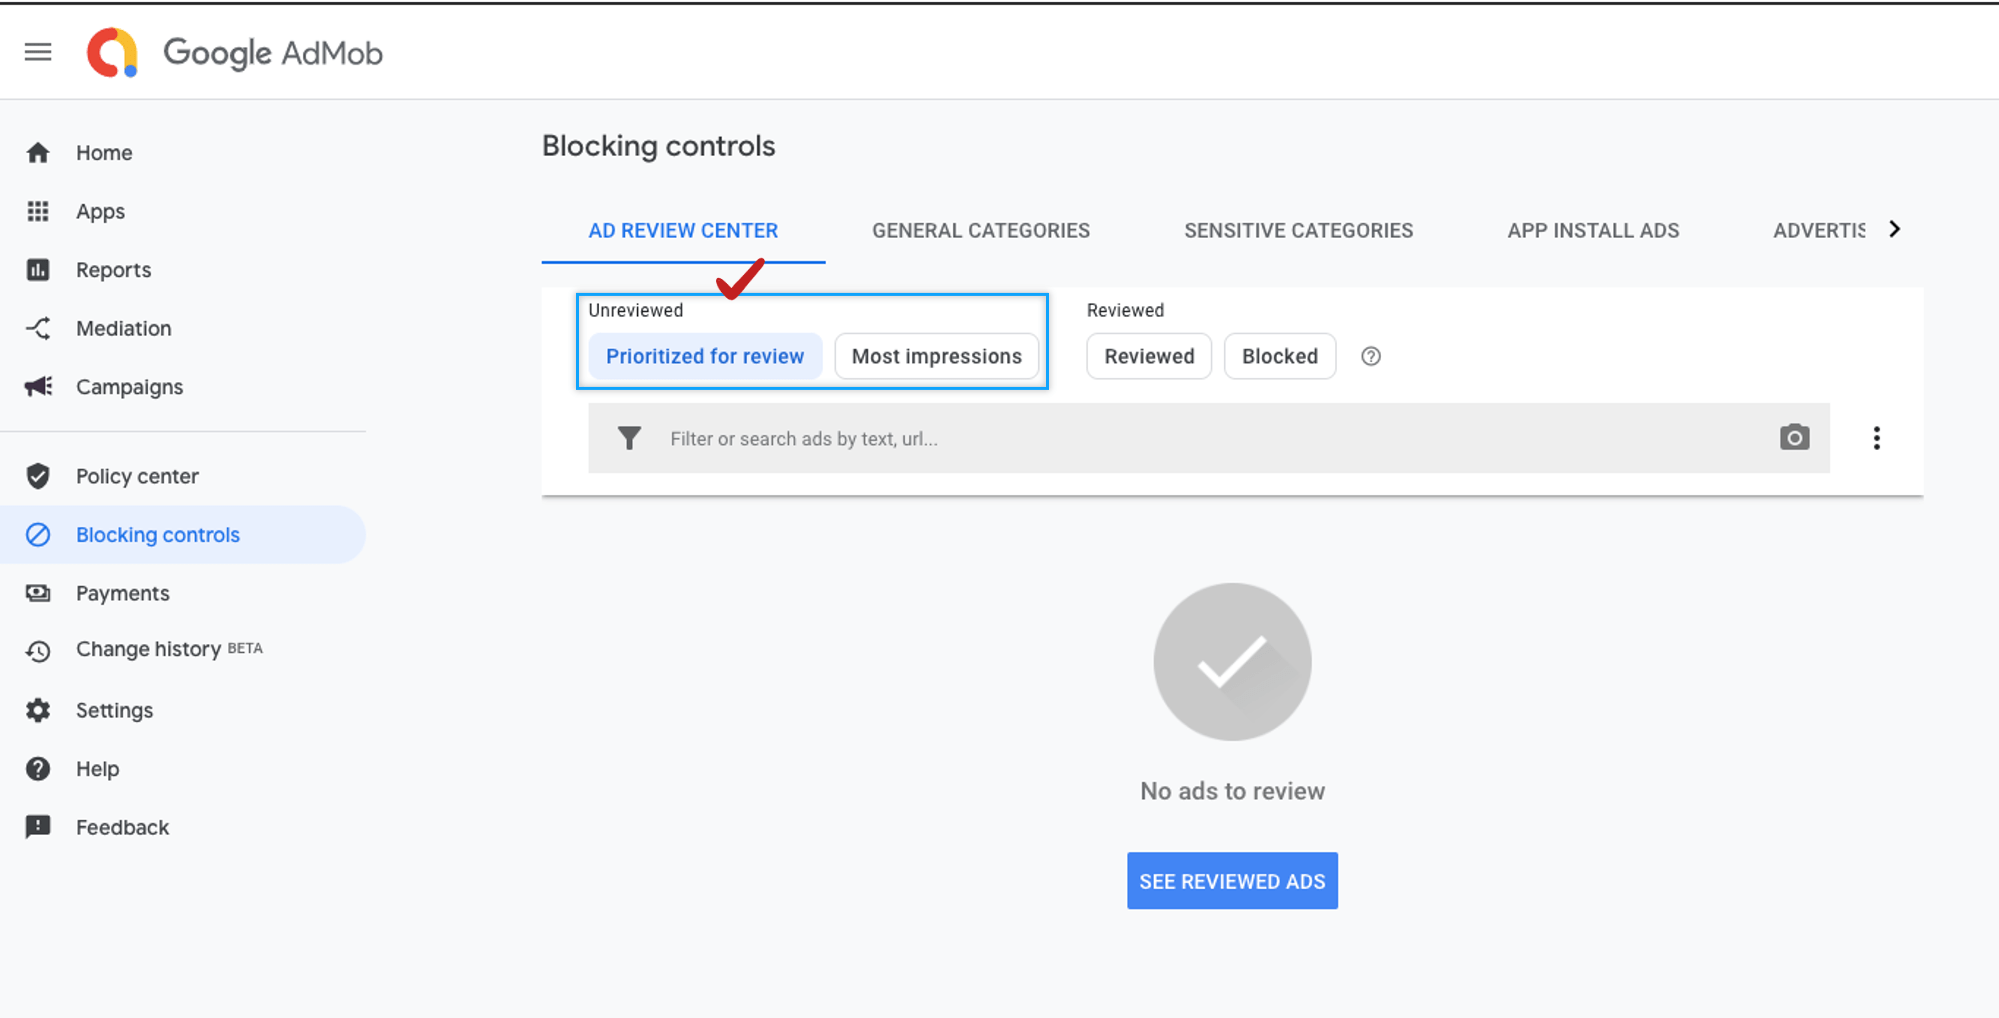
**(1) Select Ad Review Center**
**(2) If you select \[Un-reviewed Ads], you’ll see ads that haven’t been reviewed yet, as in the image above. If ads appear on the screen**
**(3) You’ll need to select the \[Mark All Review] button to change the status to ‘Reviewed’.**

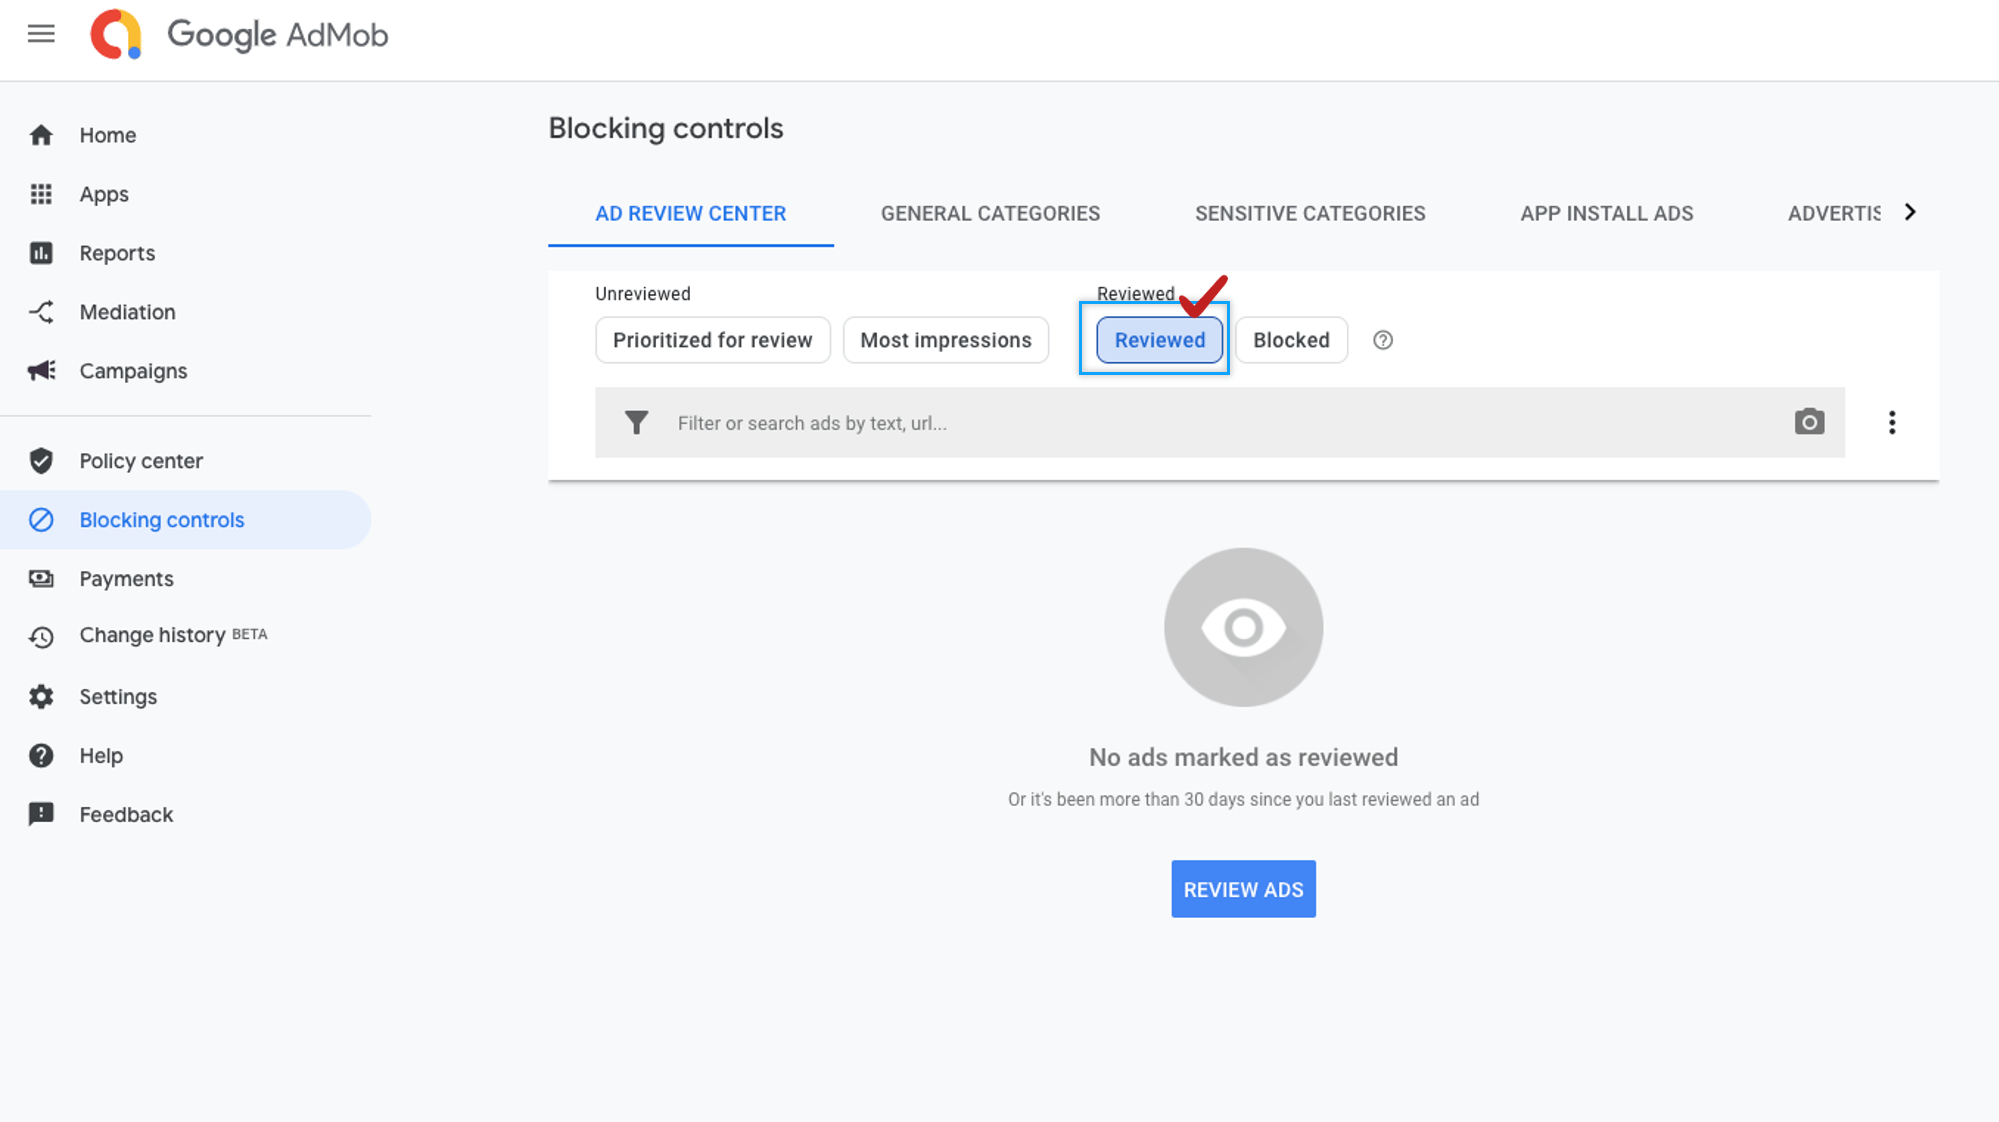
By selecting the \[Reviewed Ads] menu, you’ll see that previously un-reviewed ads are “reviewed.
\*\*If there are ads that have not been reviewed, AdMob ads will not be posted to the app.
Therefore, you should tap the un-reviewed ad menu to check that there are no un-reviewed ads.
**2) Blocked ads**

Even if you don’t have un-reviewed ads in the first place, if you have blocked ads, they won’t be published.
So, select the \[Blocked] menu to see if any of the ads that have been applied to your app are blocked.
If no ads are blocked, they will appear like the image above, but if there are ads that are blocked, they will appear together on the screen.
You should check it out and review it before removing the blocked ads.

**03. Add another app ad unit ID**
If you need to add another app to create an ad ID during operation, check out the methods below!
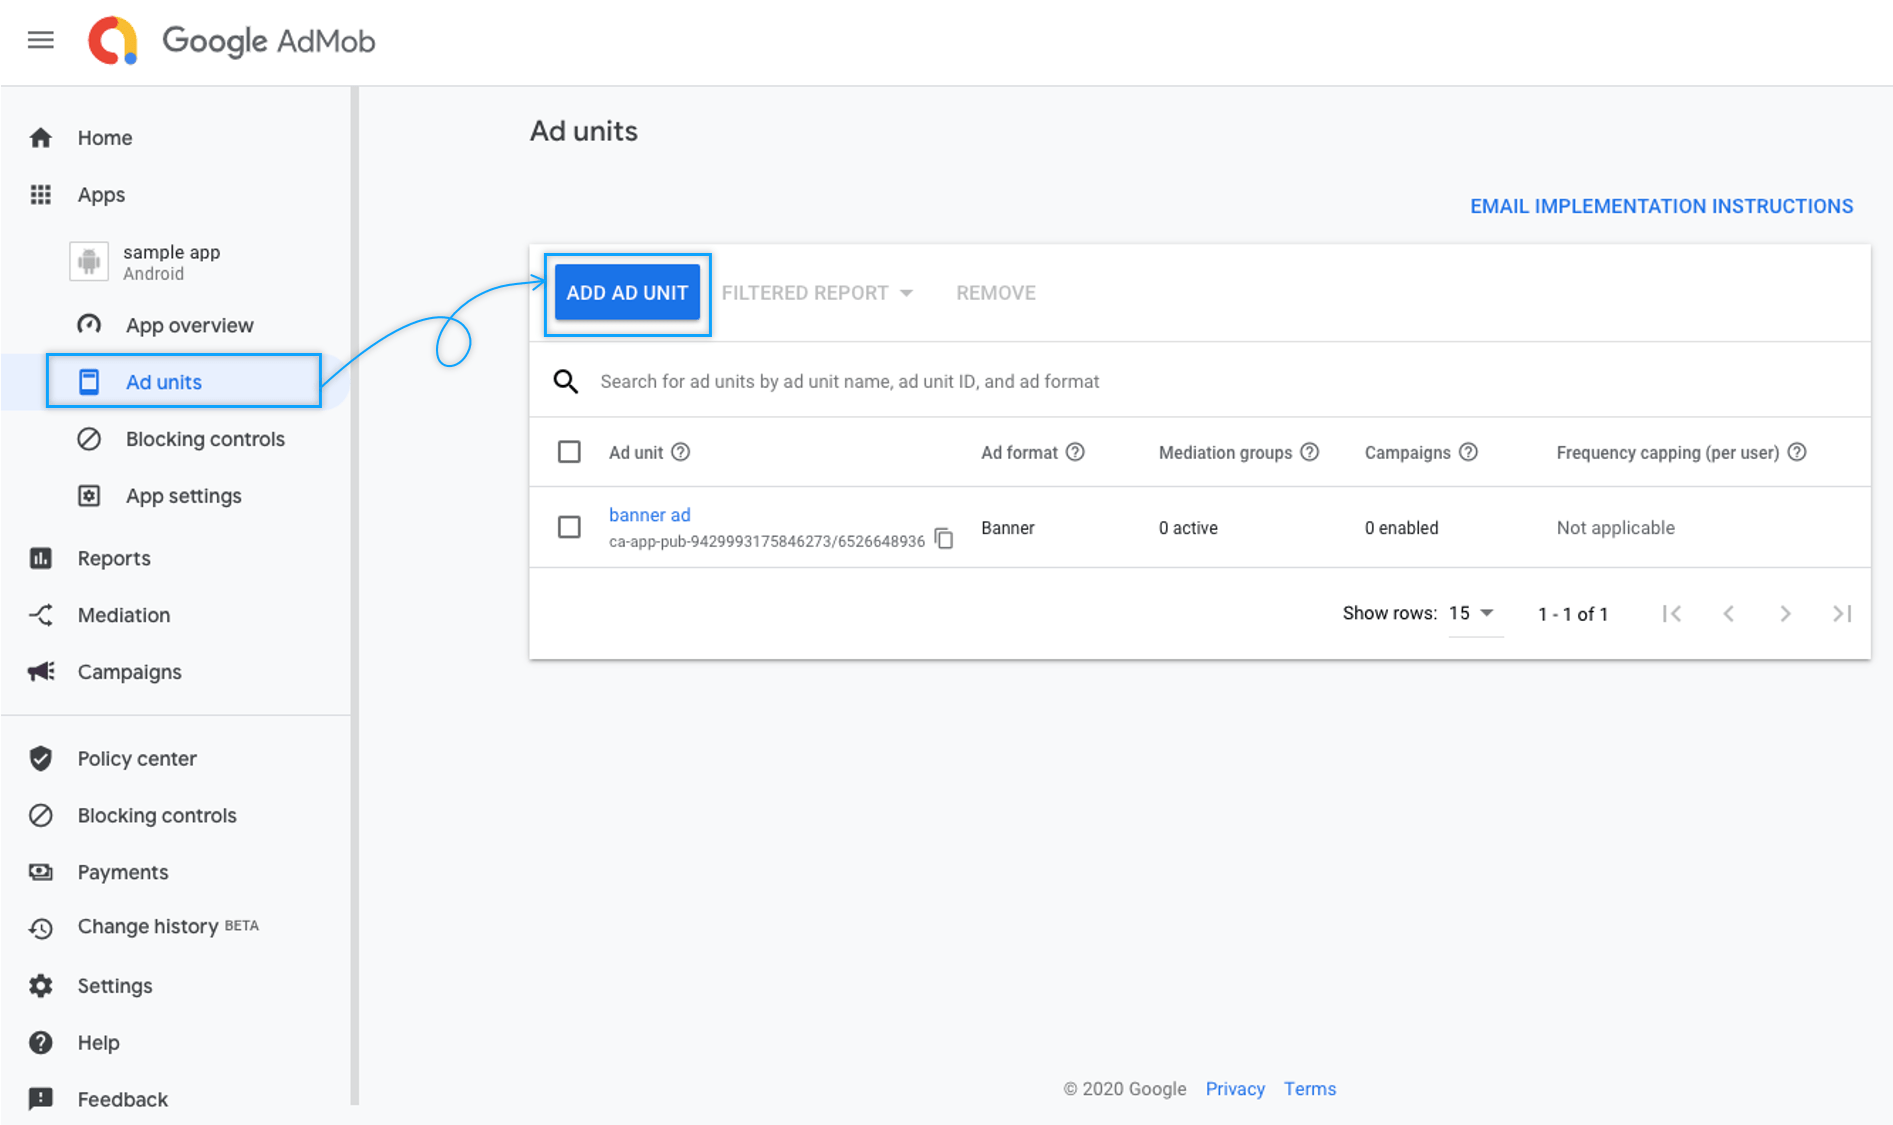
**+ If you select \[App] in the left menu, you can check other apps. You can add and run another app.**
**+ And if you need to create more ad units in the app, you can add another ad ID by pressing the \[Add ad unit] button.**\
\ **AdMob ads are only set up in the swing2app app, so you’ll need to take care of both management and operations.**
**Please be sure to read and operate AdMob notices and policies.**
**\*Especially if you keep clicking on the advertising banner on your phone, Google may suspect that it is suspicious and may drop your ad.**
Please do not continue to select ads even for testing.
Therefore, please check the email as these contents will be sent to the AdMob subscribed to the AdMob e-mail, AdMob policy, etc.