> For the complete documentation index, see [llms.txt](https://documentation.swing2app.com/llms.txt). Markdown versions of documentation pages are available by appending `.md` to page URLs; this page is available as [Markdown](https://documentation.swing2app.com/manual/appmanage/board/file.md).
# Bulletin Board – How to Attach Files
**\*\*Notes on file attachment\*\***
File attachment is only available on the Swing2App web dashboard-post management.
The file attachment function is not available in the app, so if you need to register a file, please use it on the web.
When registering a post in the app – Only content (text) and images can be registered.
There must be a bulletin board before registering a file, right?
If you haven’t created a bulletin board yet, please create a bulletin board first!
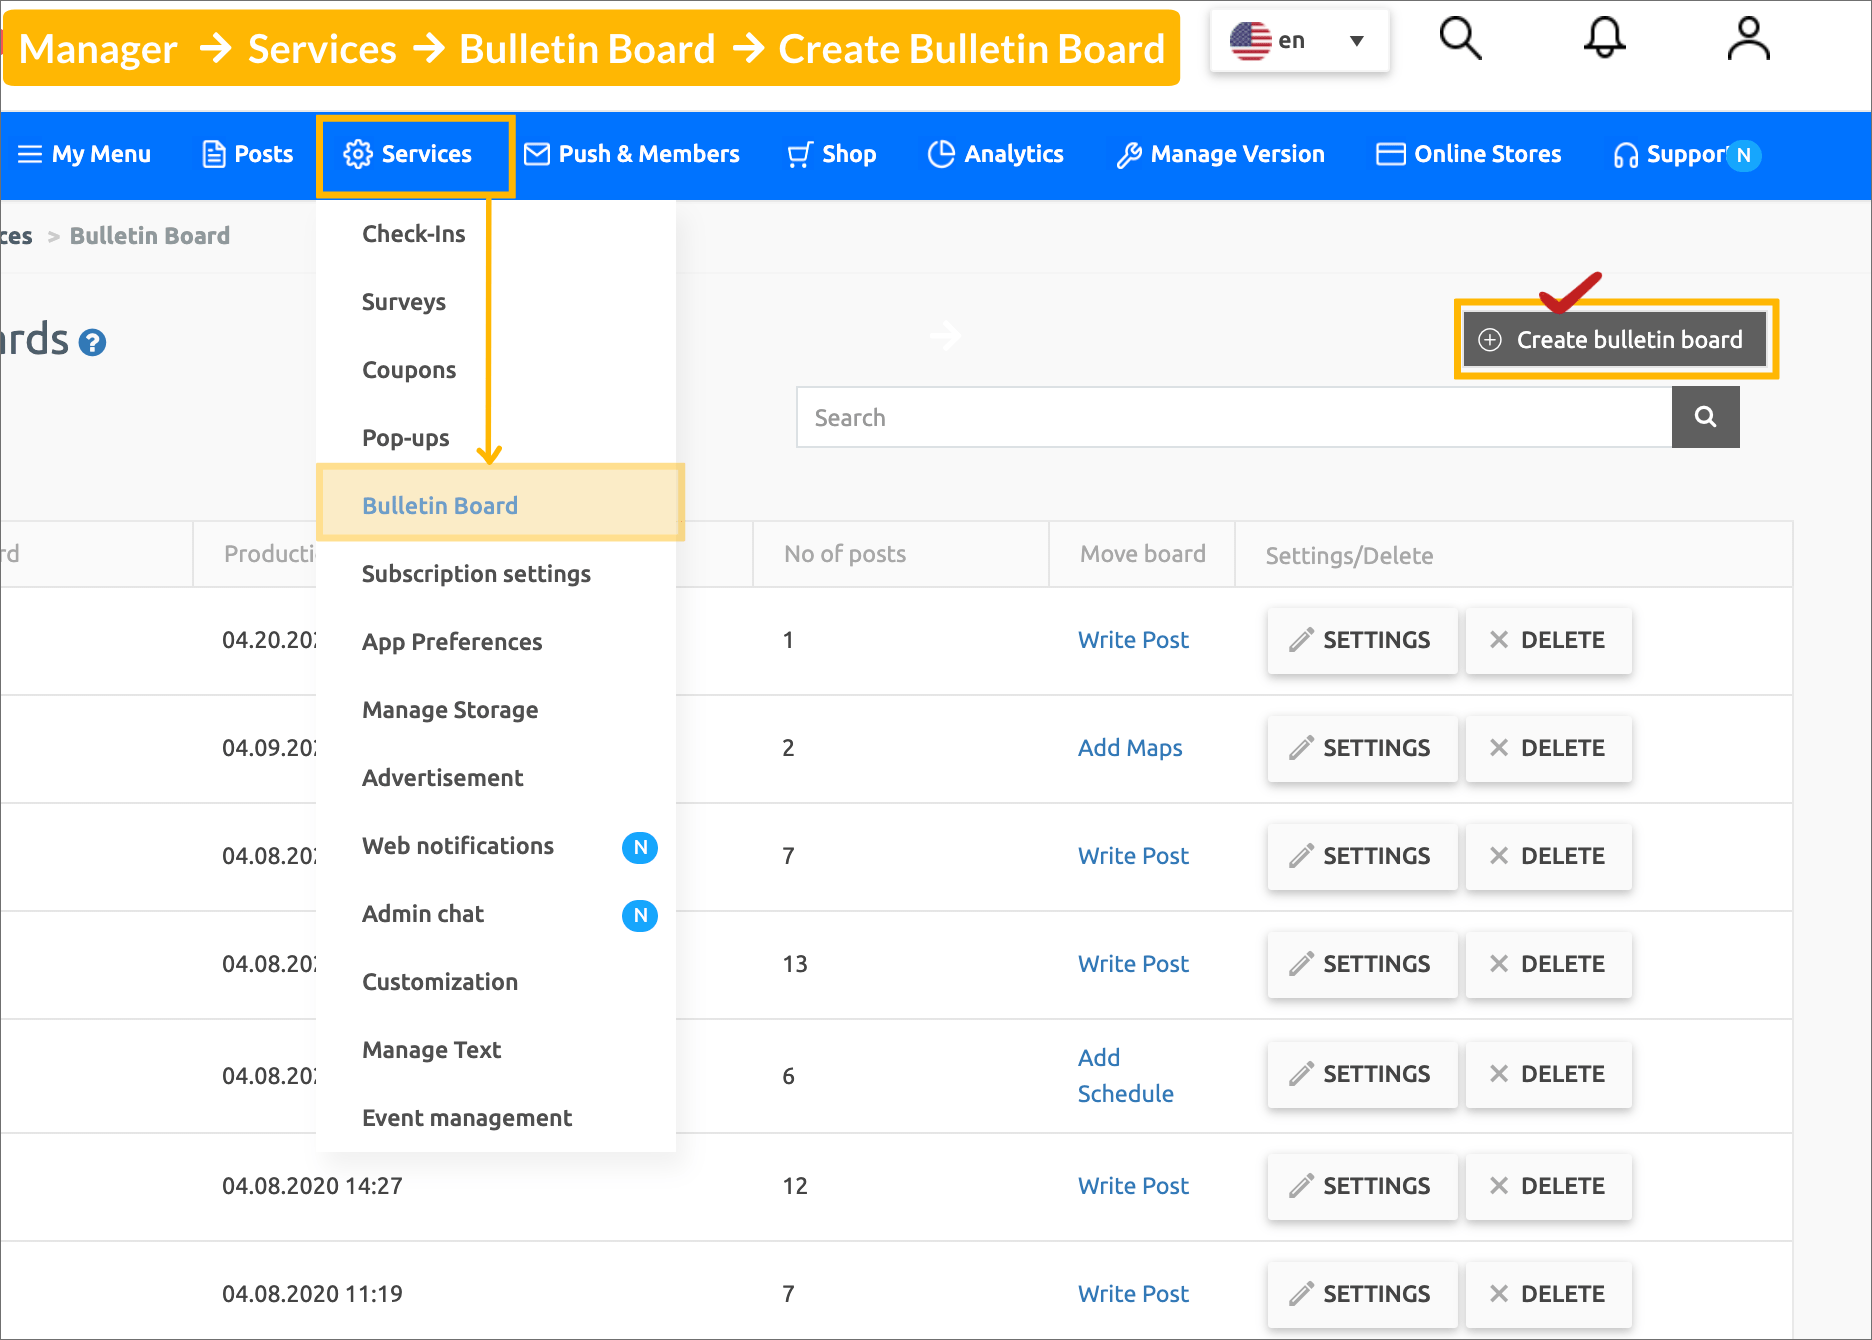
[Manager → Services → Bulletin Board](https://www.swing2app.com/auth/login?\&redirectUrl=%2Fview%2Fboard_edit) →\[Create Bulletin] button to create a bulletin board.
Please refer to the manual below for detailed manual for creating a bulletin board.
[https://support.swing2app.com/documentation/appmanage/board/boardeditor/](https://documentation.swing2app.com/manual/appmanage/board/pages/nayUWwqwZPEBgp1Gbpnd#1.-create-bulletin-board)
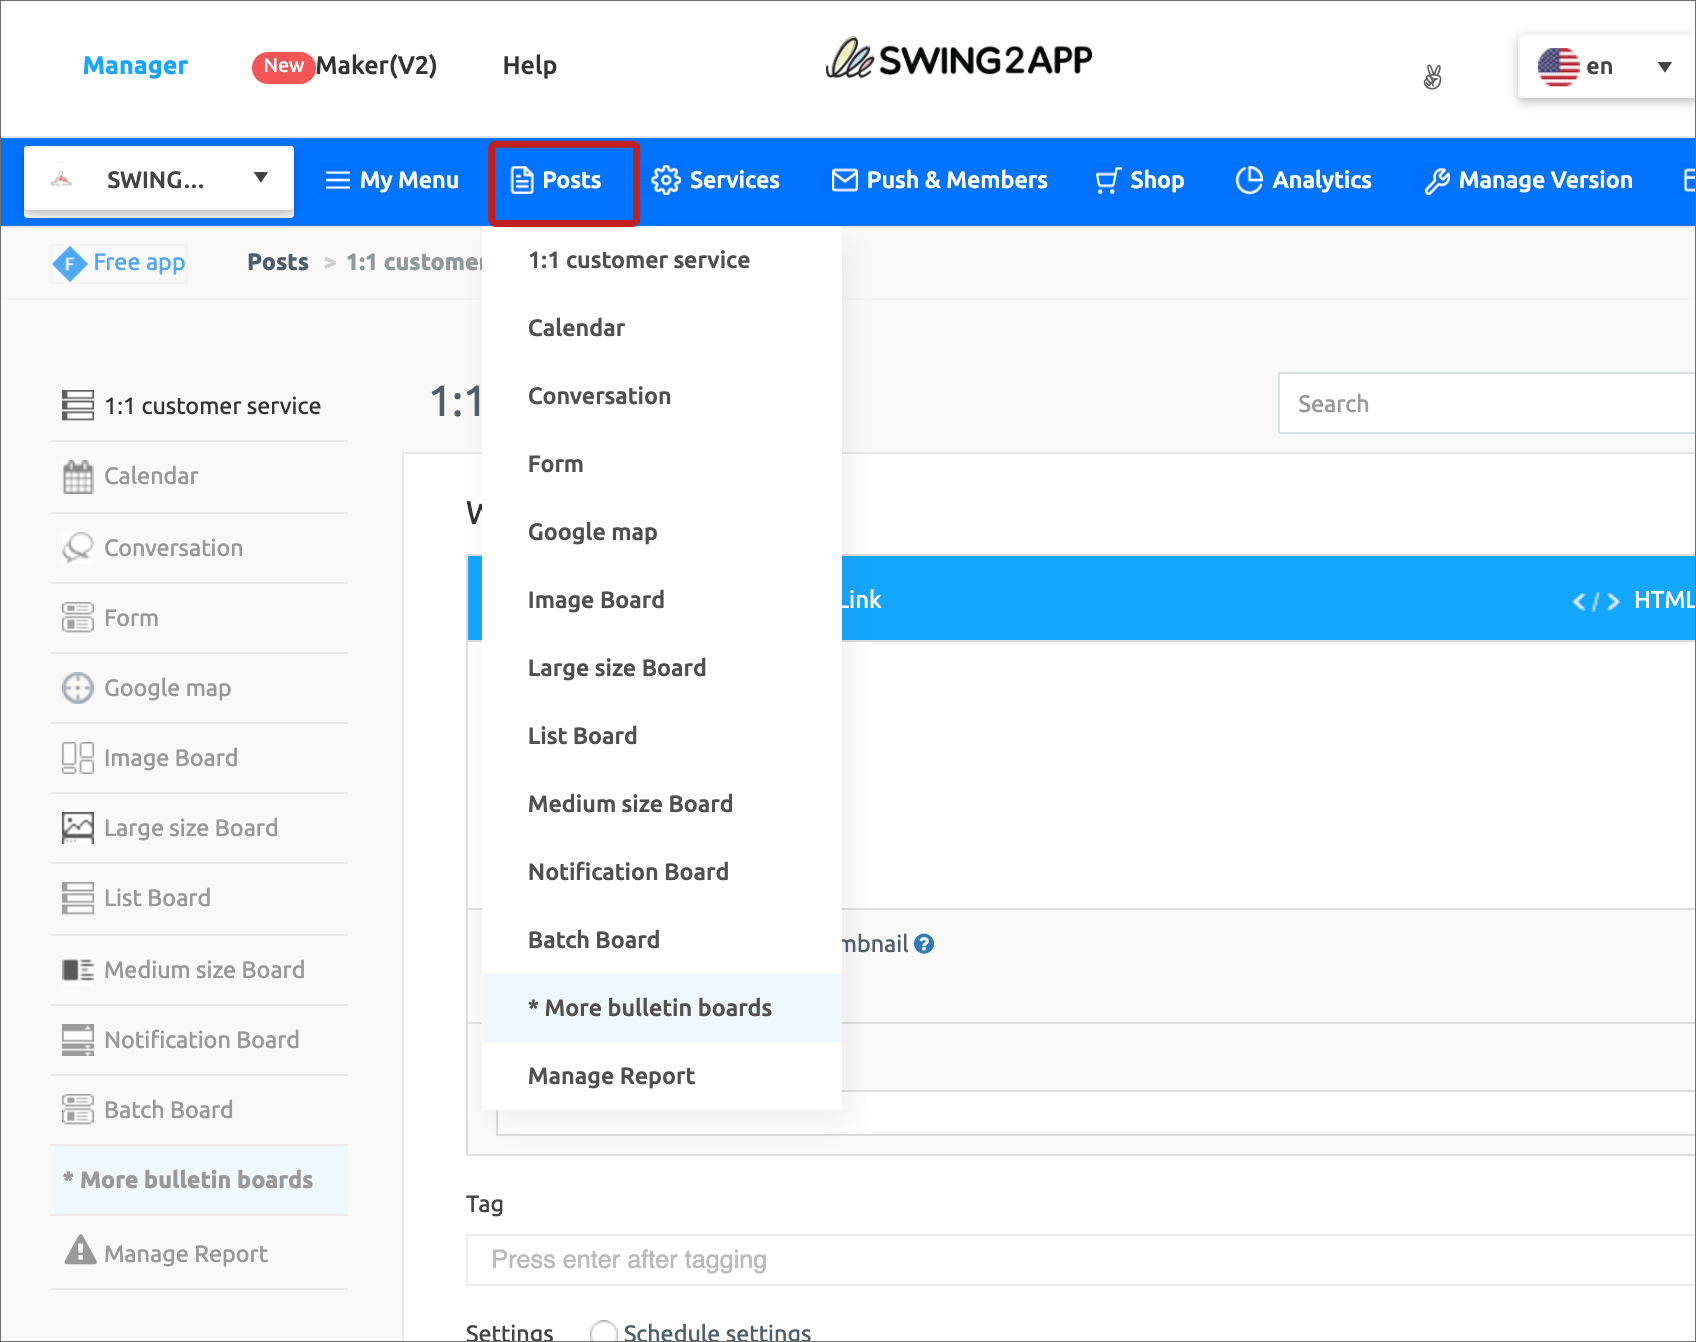
When you have completed the bulletin board in Services, go to Posts and select the bulletin board to register the file to that bulletin board.
**File attachment can be used in two ways.**
### **STEP.1 Board function – Using file attachment**
The first way to attach a file is to use \[Attach File] among the functions provided on the bulletin board!
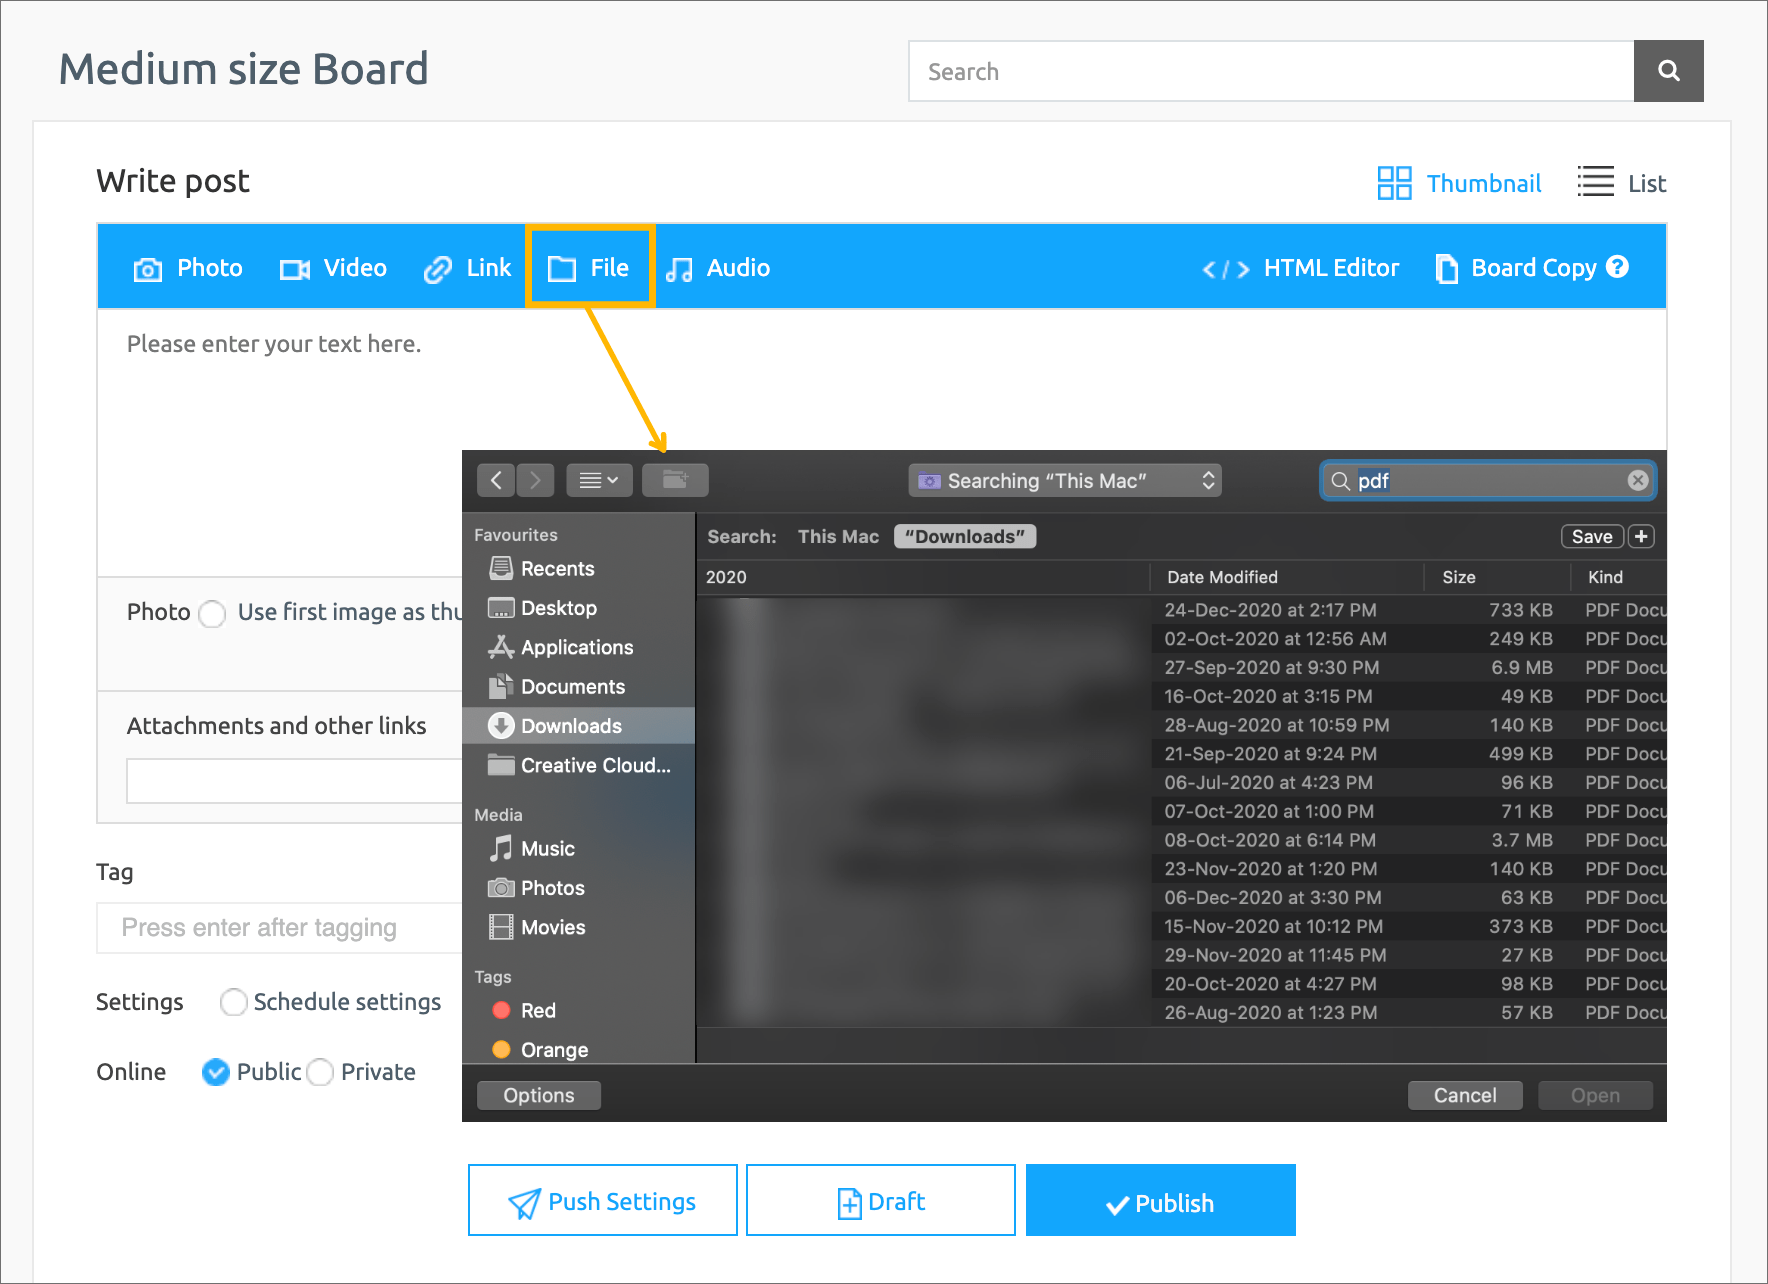
There is a **\[File]** button in the blue line at the top of the post creation page.
Click the button to load and register files saved in My Computer.
\*Caution\*
When registering a file, the capacity cannot exceed 5MB. Please pay attention to the capacity and register!
Files can be uploaded without a limit on the number of files provided they do not exceed the size.
> “I don’t see the file button in the blue area!” Those who do this are because the file attachment is not checked in the bulletin board function.
>
> Please check the method below and correct it.
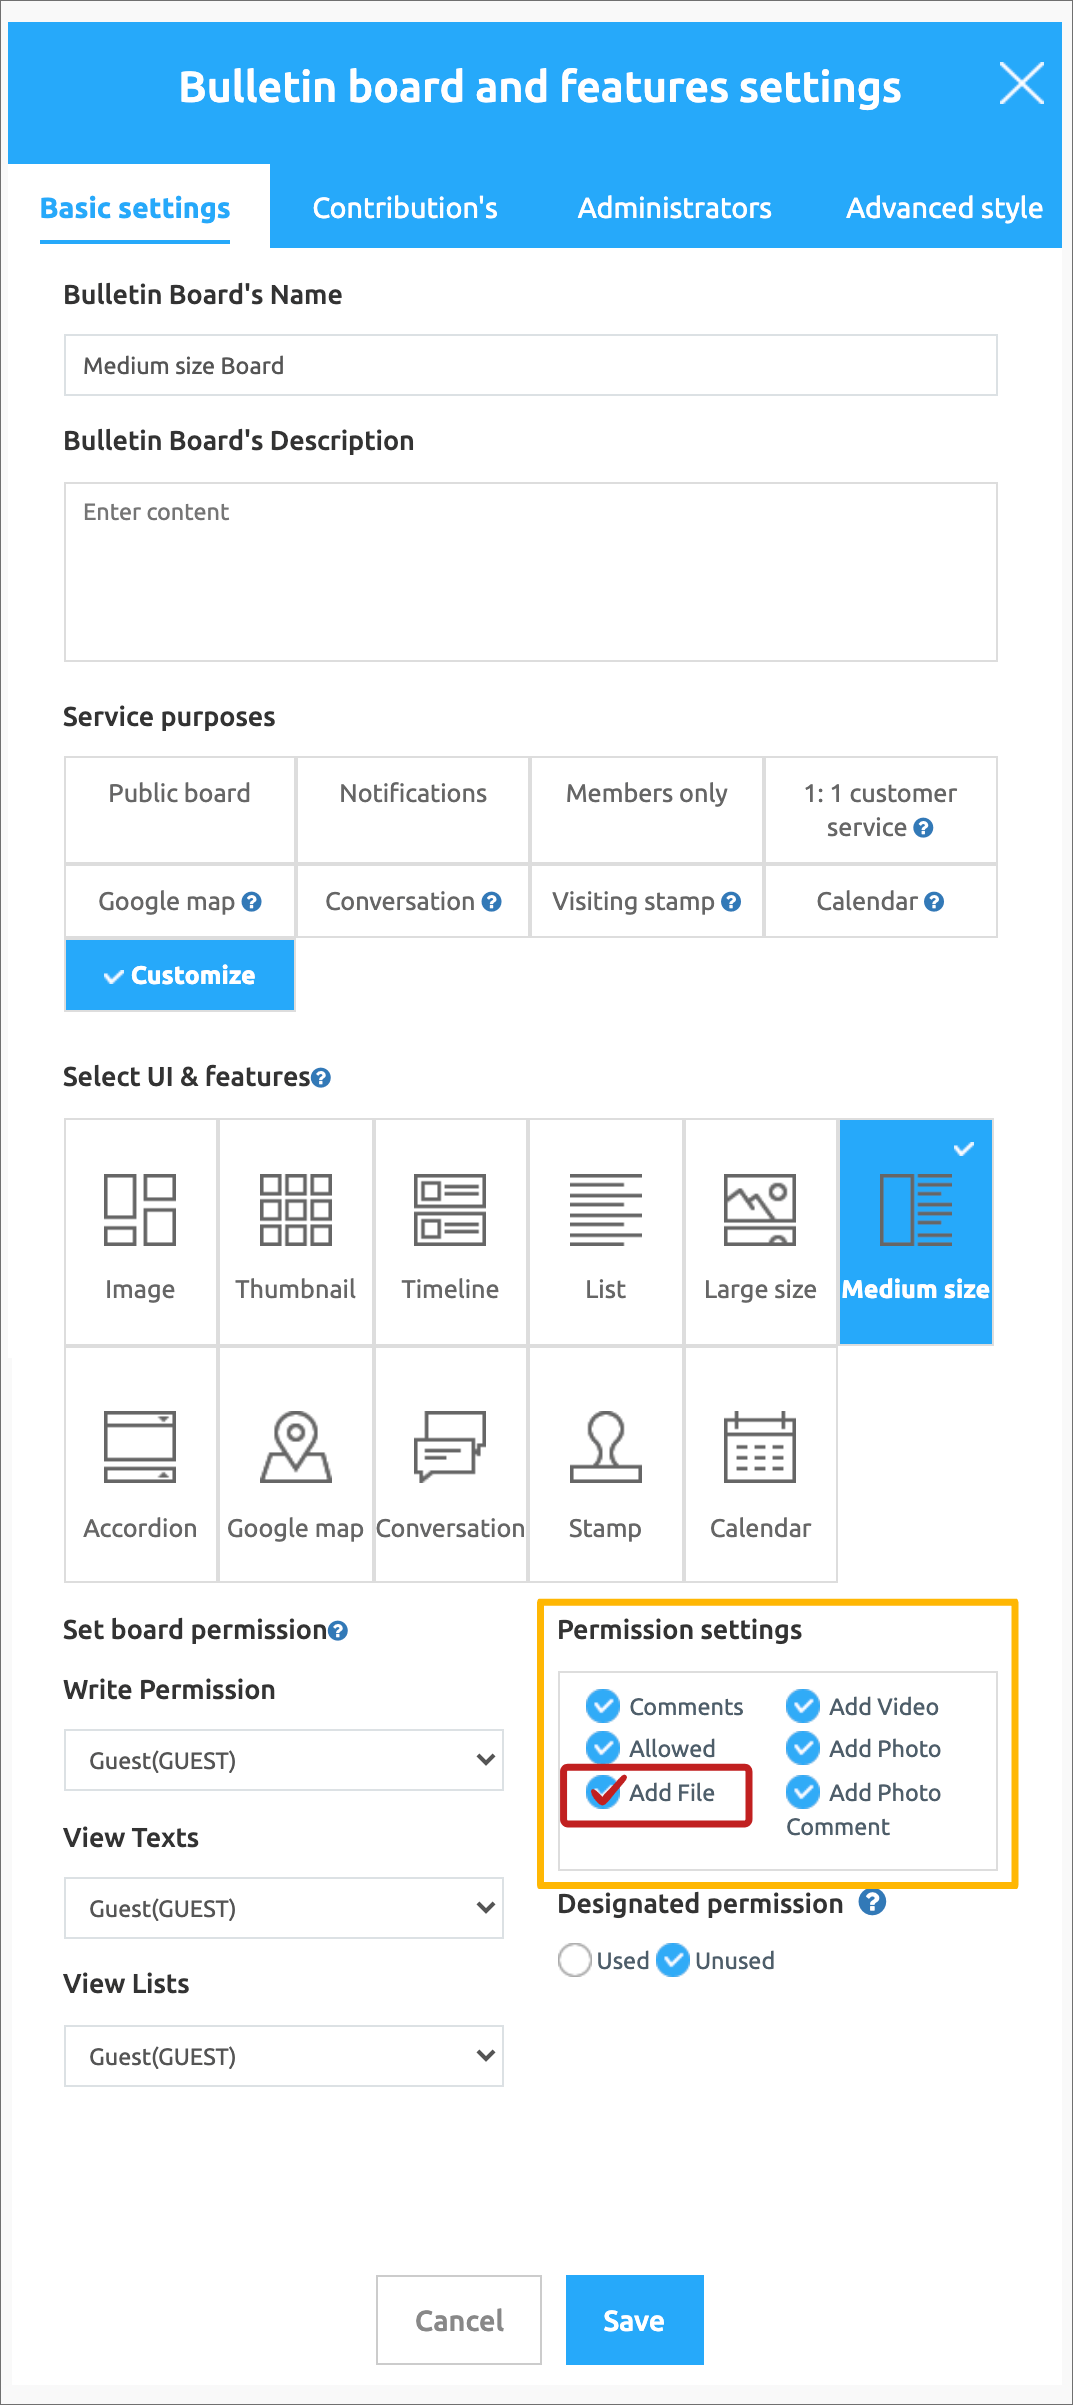
Select the \[Settings] button for the bulletin board created in the bulletin board management.
The bulletin board and function setting window appear.
If you scroll down, you can see the allowable range setting.
Check \[Attach File] and click the Save button.

**1. File attachment bulletin board app execution screen**


**2. Bulletin board function File attachment feature \_ Located at the bottom of the text body**

Files registered by this method are registered in the form of attachments, so the file is placed at the bottom of the body.
Since the file location cannot be modified, it is suitable for writing only for short writing or downloading files to users.
### **STEP.2 Bulletin Board Editor-Select File Upload Button**
**The second way to attach a file is to use the \[Upload File] button in the HTML editor’s writing bar.**
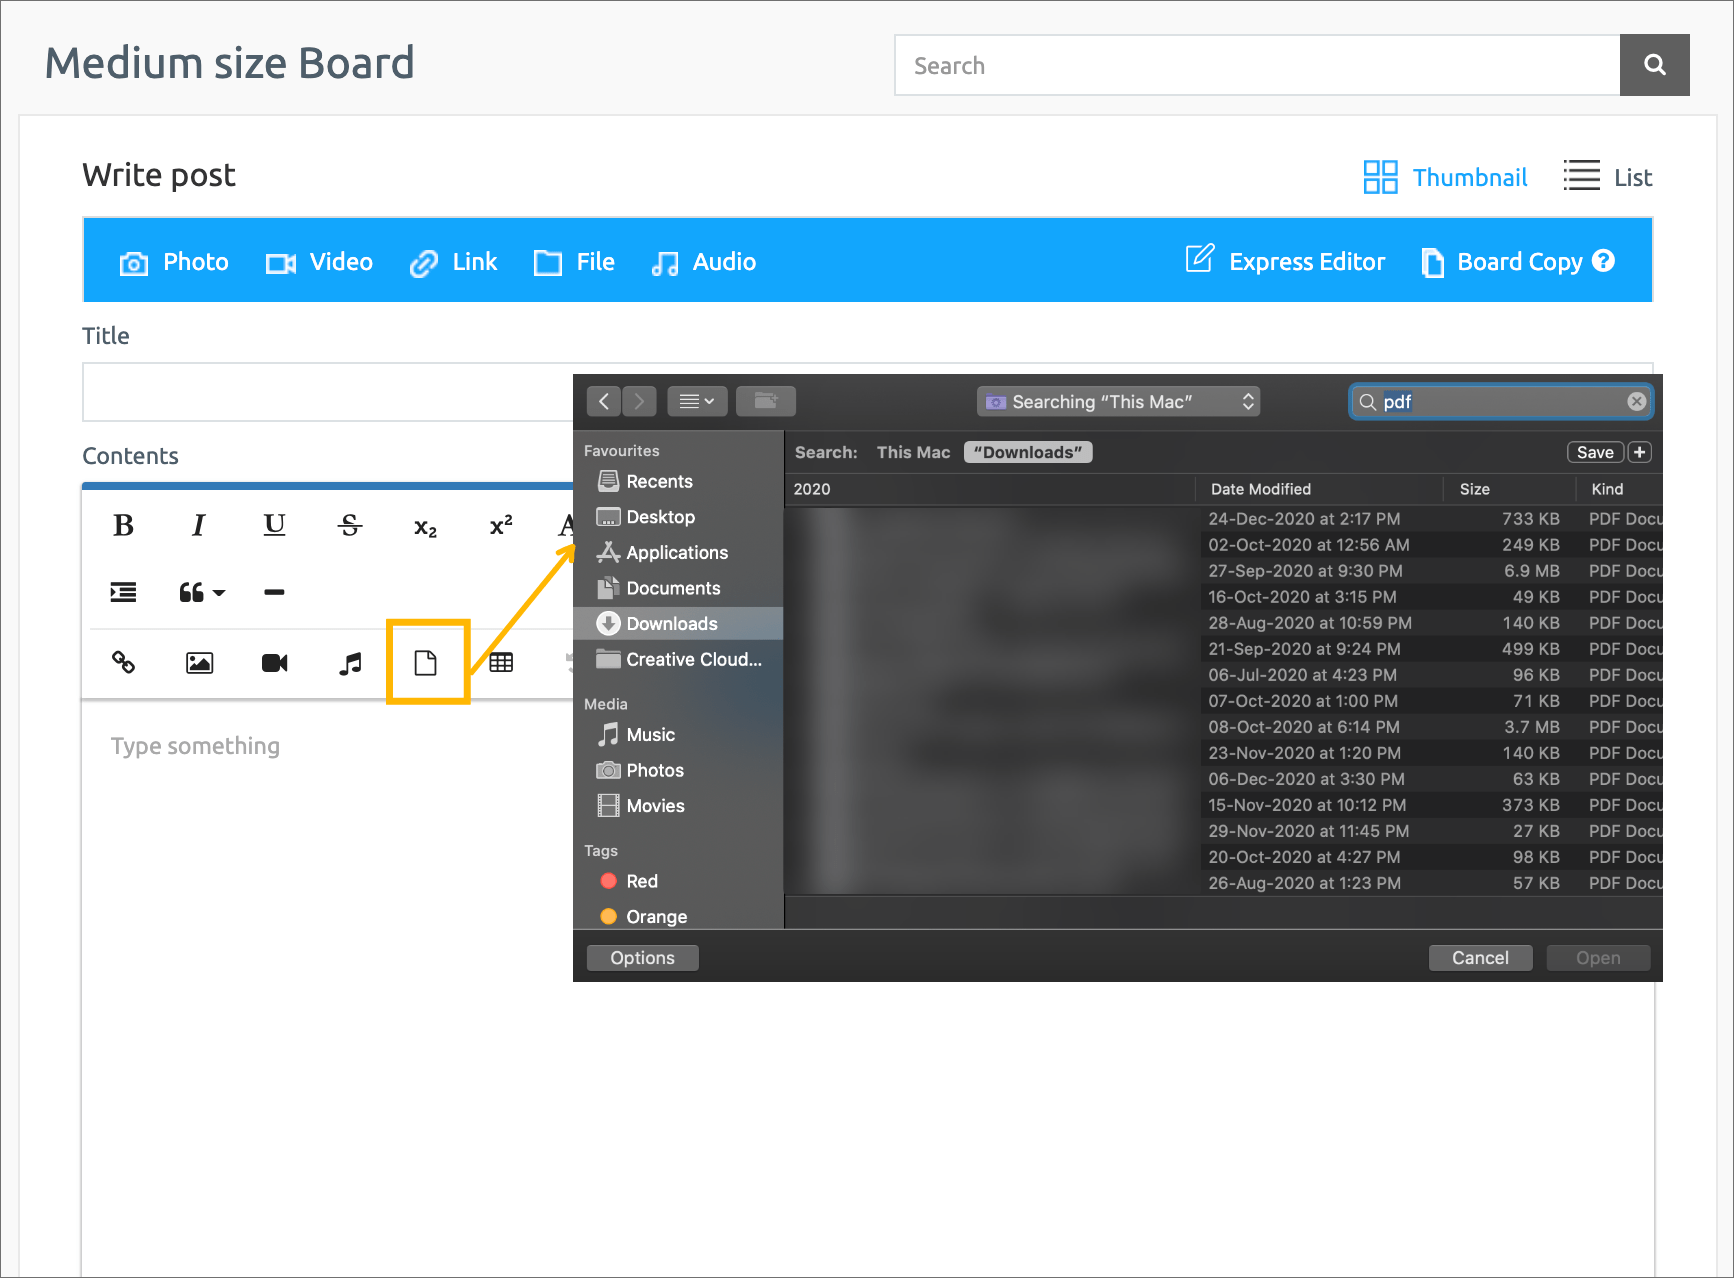
Writing – If you select HTML Editor, an option bar is created in the text..
(HTML editor is a bulletin board writing tool with various styles and writing designs added from the existing bulletin board writing method.)
If you look here, there is a**\[File Upload]** button.
If you press the file upload button, you can load the same file and register it in the post!
**\*Caution\***
When registering a file, the capacity cannot exceed 5MB. Please pay attention to the capacity and register!
Files can be uploaded without a limit on the number of files provided they do not exceed the size.

**1. File attachment bulletin board app execution screen**


**2. Bulletin Board Editor File Attachment Features \_ Freely arrange the text body**

**When attaching a file in this way, you can freely write a post because the file is attached to the body of the post.**
As you can see in the attached image, you can freely place file attachments under the text or under the image.
Therefore, it is suitable for writing a long article like a blog and providing files in it.