> For the complete documentation index, see [llms.txt](https://documentation.swing2app.com/llms.txt). Markdown versions of documentation pages are available by appending `.md` to page URLs; this page is available as [Markdown](https://documentation.swing2app.com/manual/swingshop/basicinformation-settings.md).
# Store Management - Basic Information Settings
**\[Swing Store] Store Management – Basic Information**
**Swing Store – Shop Management will tell you how to enter the basic information of the mall.**
**Swing Store provides a “Store/shop main page and Store/shop information” page to help you create a shopping mall apps.**
This page shows the basic information of the shopping mall.
You can enter the basic information in the Store Management – Basic Settings menu.
**Store management – In the manual, we’ll show you how to enter the basic information and how it looks like in the app.**
### **STEP.1 Swing Store – Store Management – Basic Information Setting Page**
Go to **Manager** Page
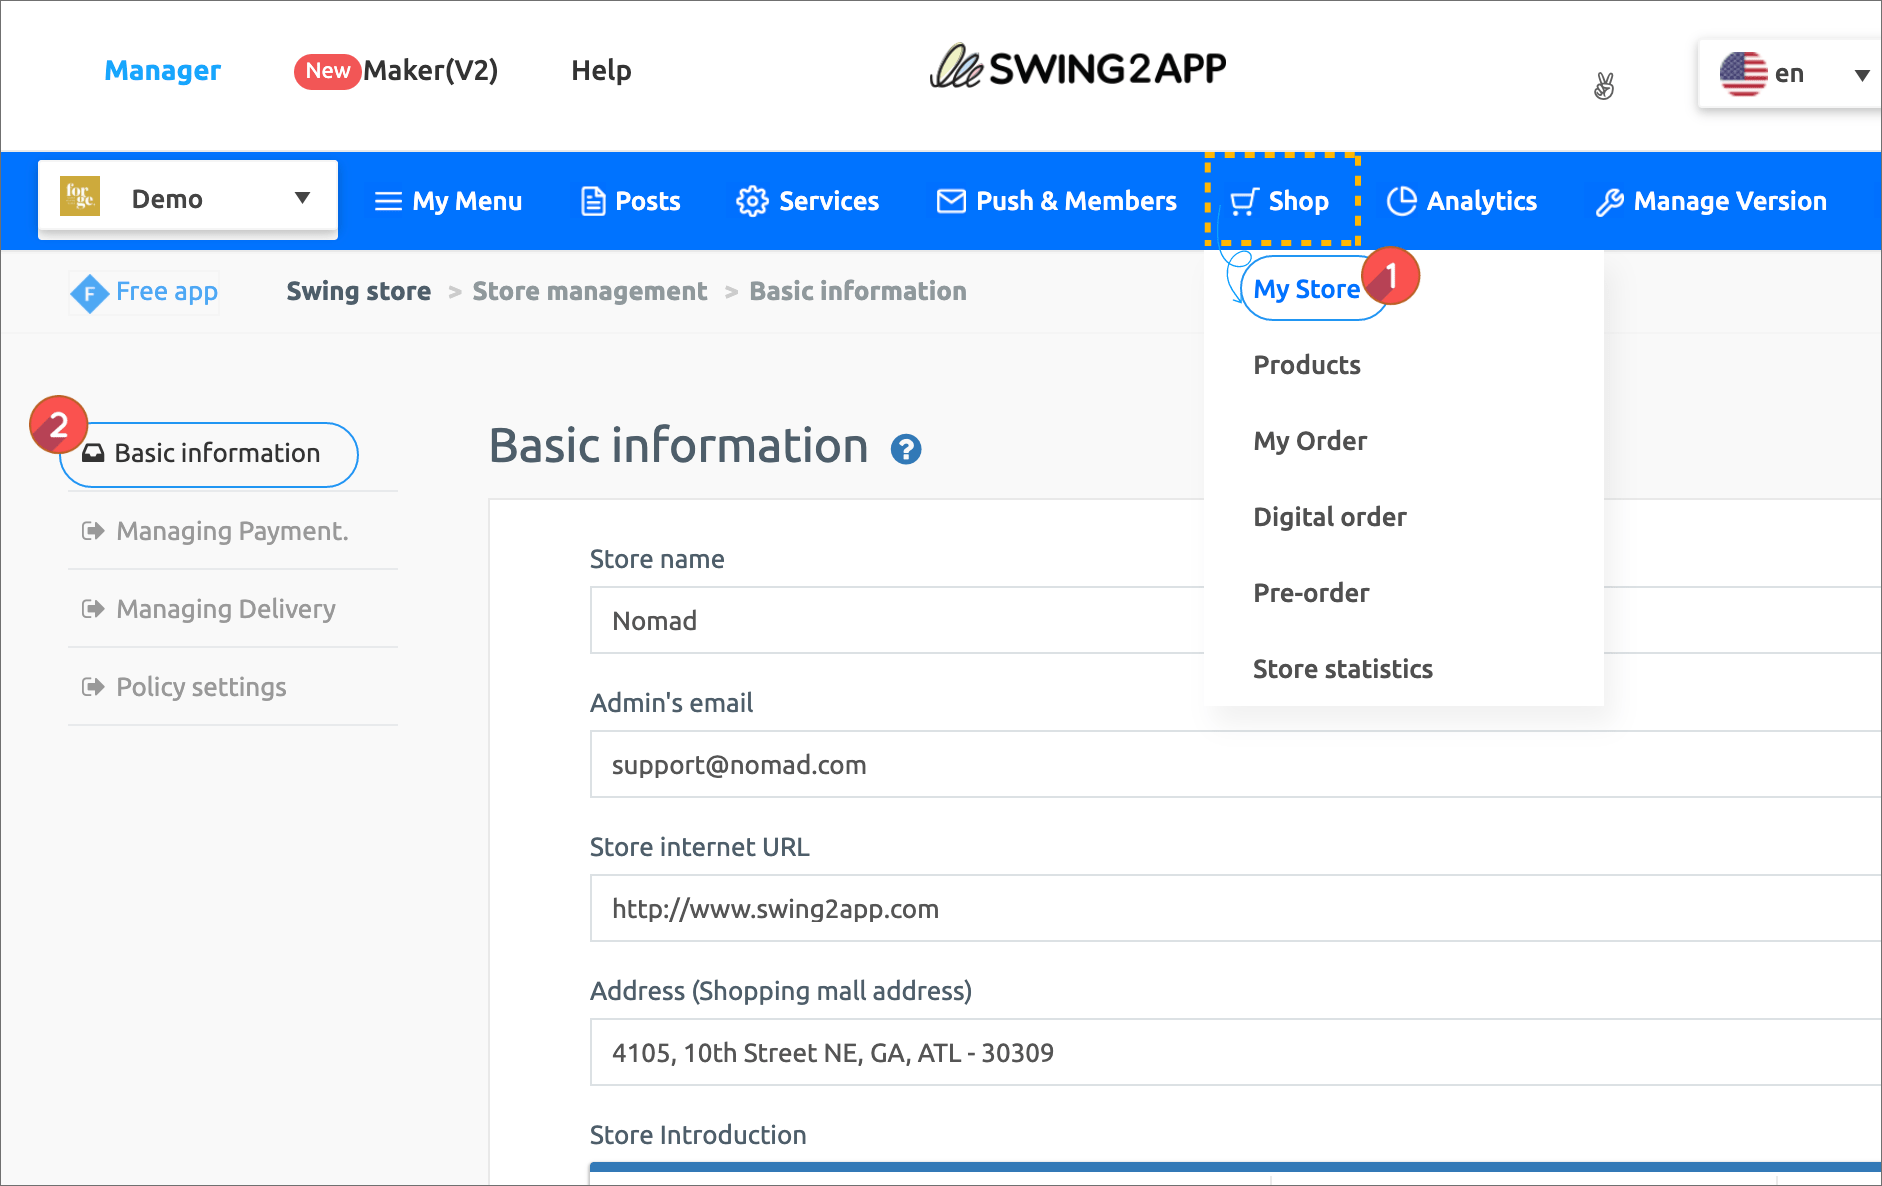
1. Click **Shop** option and select **My Store** from the drop down list.
2. Click **Basic Information.**
Basic information setting page can be seen in the main page of the shopping mall provided by the swing store.
The items entered in the basic information will be displayed on the App – Store main screen.\\
### **STEP.2 Enter basic information**
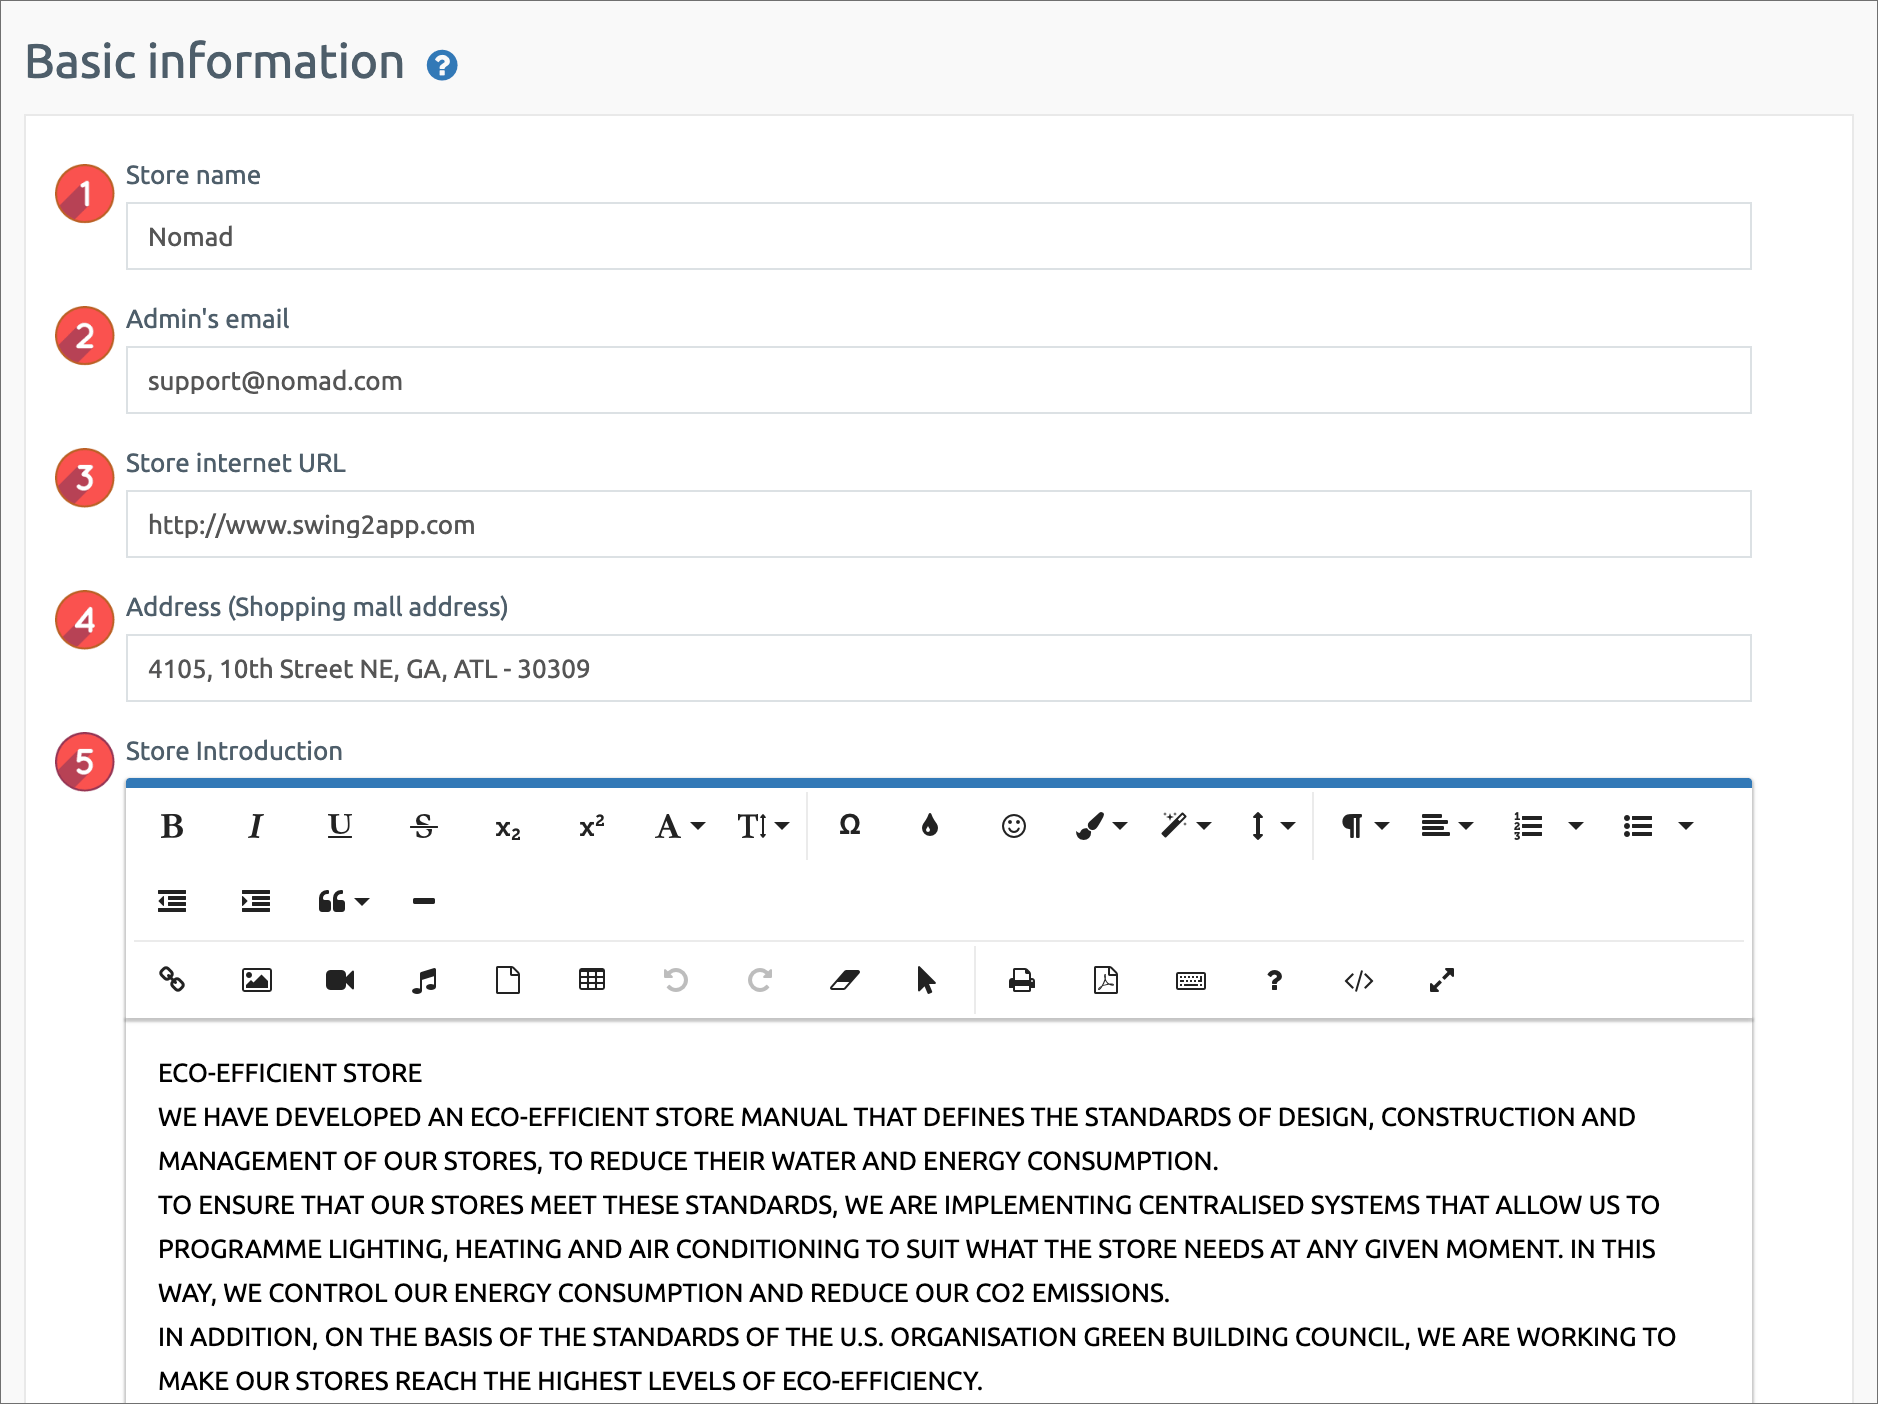
1\. Store name: Enter the store name.\
2\. Admin Email: Enter the administrator email.\
3\. Store Internet URL (Shopping Mall Address): If you have a site, please enter it.\
4\. Address (shopping mall address): Please enter the location (address) of the shopping mall.\
5\. Store introduction: Simply enter the mall introduction.
**\[App launch screen]**
**\*Let’s check how the contents entered in items 1 – 5 are displayed in the app.**
\* Store name, email, address, store introduction can be found on the shopping mall information page. \\
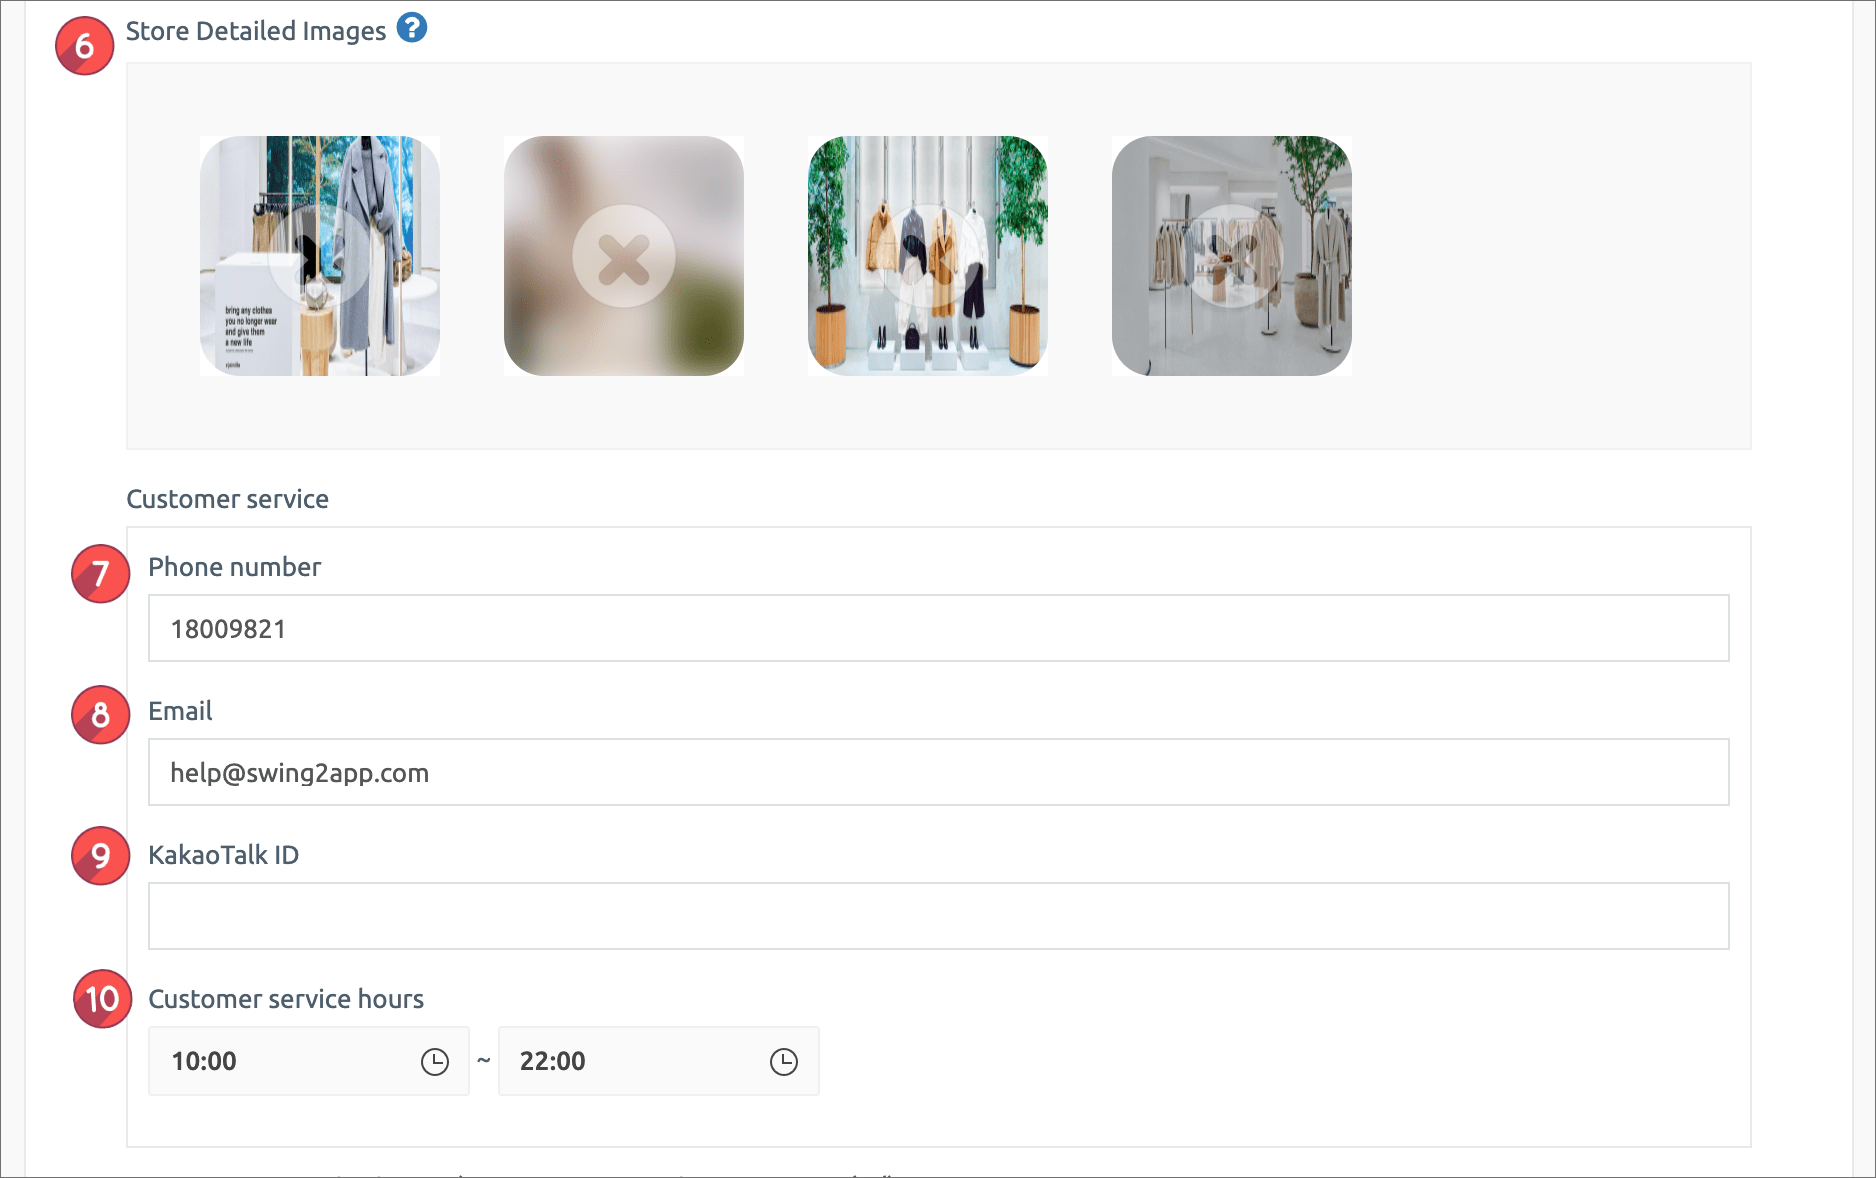
6\. Store detailed image: Please register the image to enter on the main page of the shopping mall. You can usually just put one representative image.\
\&#xNAN;**\*If you put multiple images, the main image will be displayed as the representative.**\
**Shopping Mall Information Page – If you select the image icon, you can check the entire registered image.**\
\&#xNAN;**\[Customer Center Information 7-10]**\
7\. Phone number: Please enter the shopping mall customer center phone number.\
8\. Email: Please enter the administrator’s email address\
9\. KakaoTalk ID: KakaoTalk ID is currently not working. Please wait a little bit longer and we will add it.\
10\. Customer Service Hours: Set the customer care center hours with the time buttons.
**\[App launch screen]**
**Let’s check how the details of the 6 stores, 7 – 10 customer information entered in the app will be displayed.**
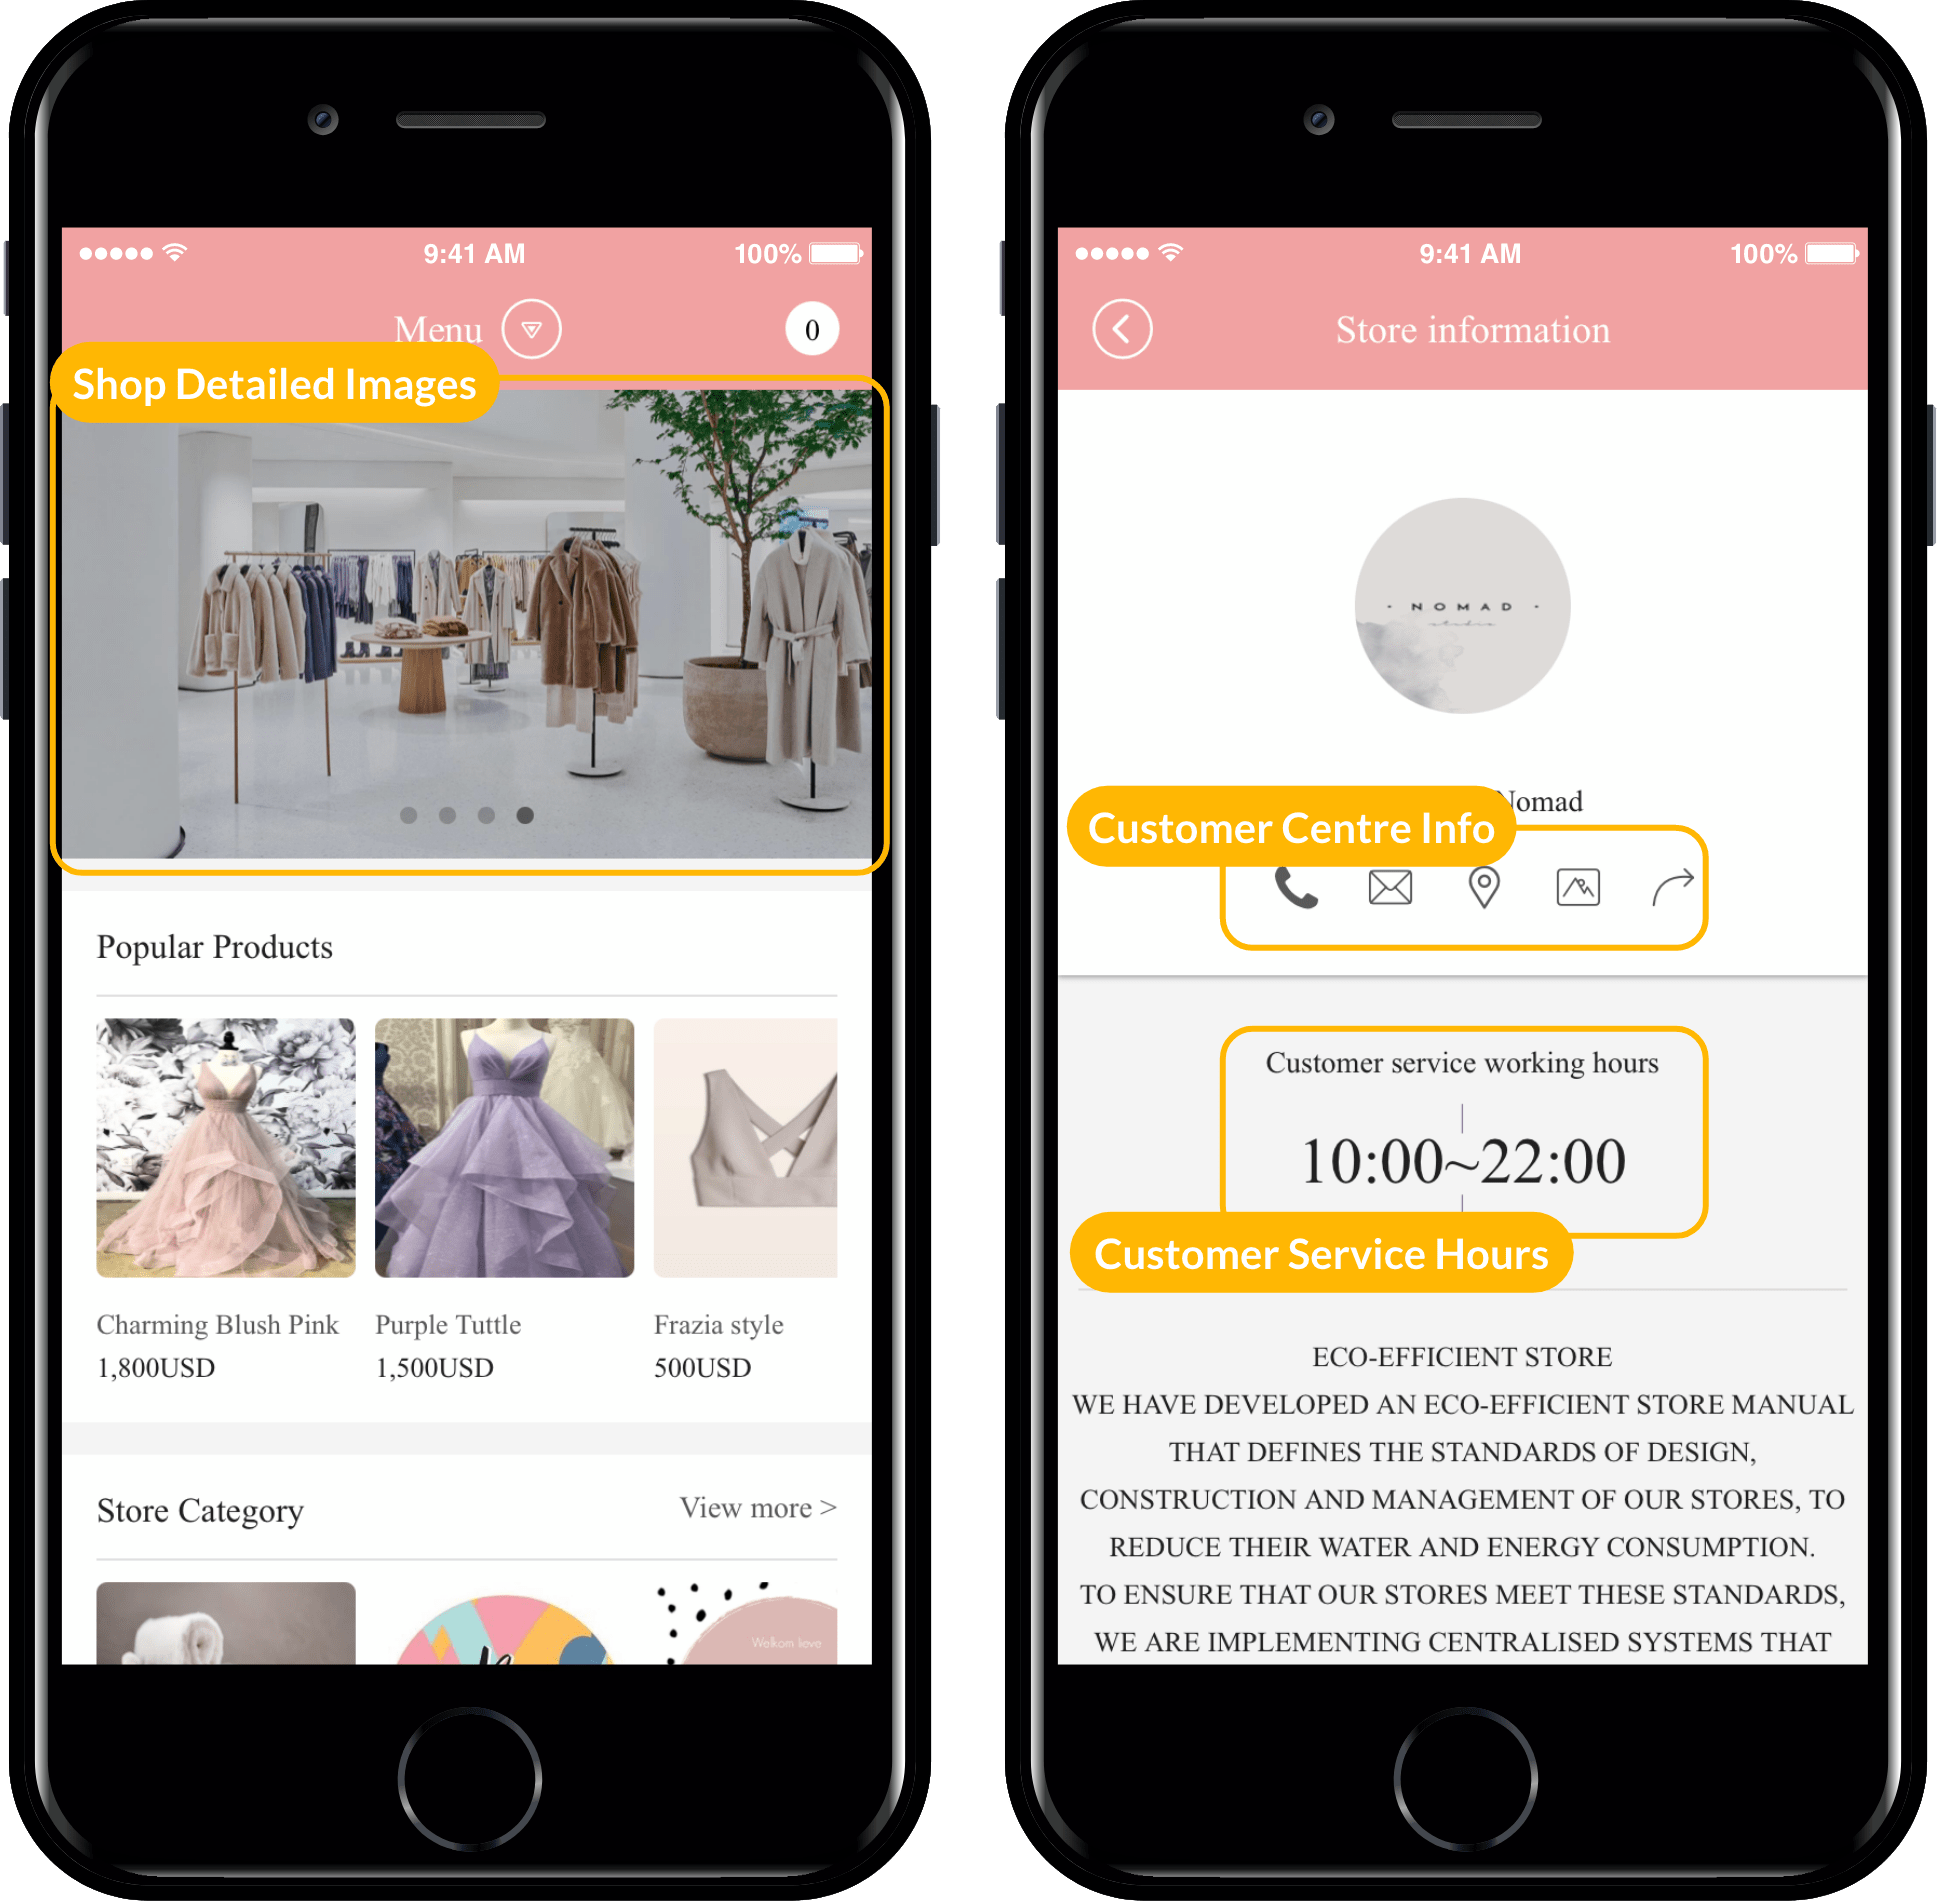
Store detailed image: You can check the registered image at the top of the shopping mall main page.
\*Customer Center Information: If you look at the shopping mall information page, you will see phone and email icons. When you select the icon, it will be linked to the input.
You can also check the opening hours of the customer center below.
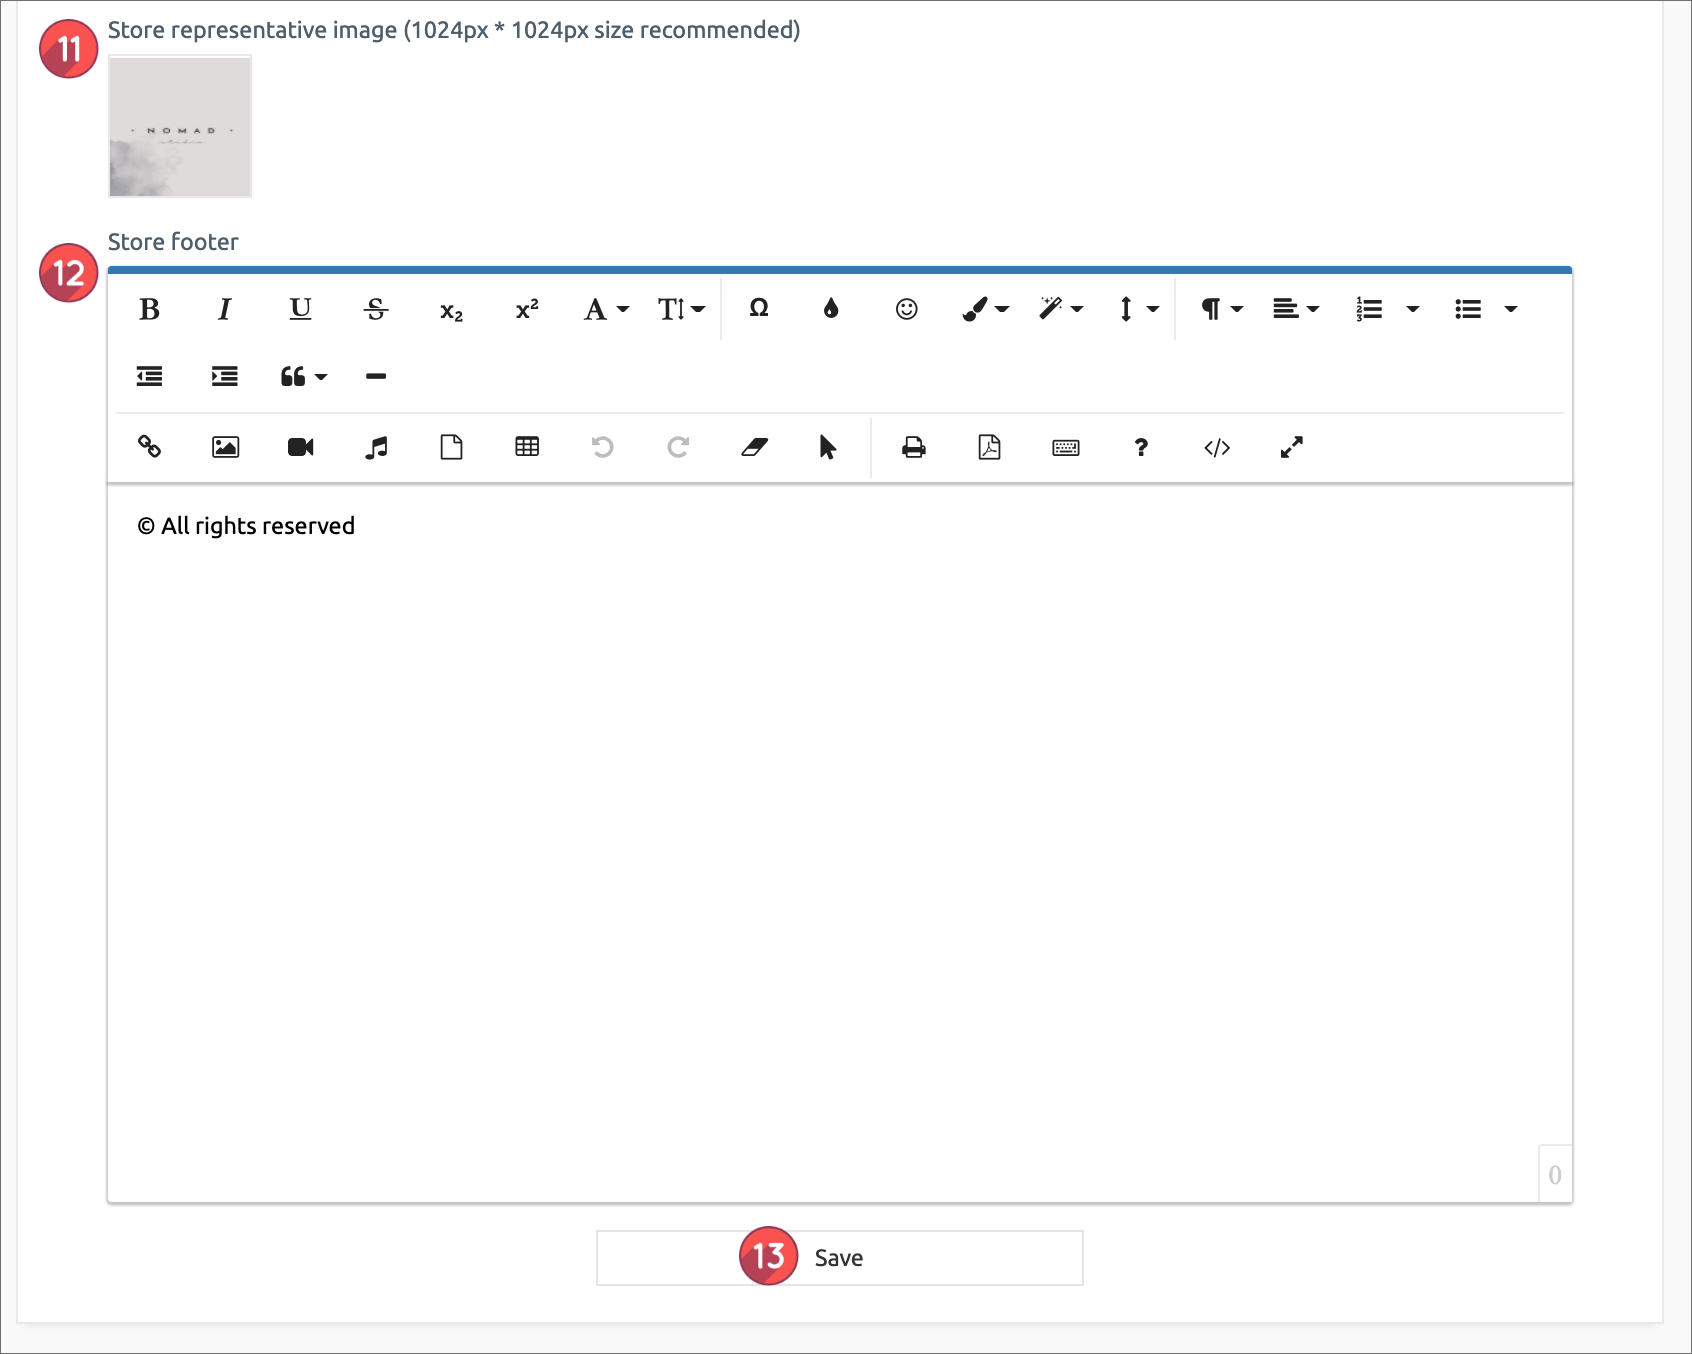
11\. Store representative image: The representative image is shown as the main icon image of the shopping mall information page.\
It’s the same size as the app icon. You can also include an app icon image. (You can edit the image later)\
12\. Store footer: Please enter the phrase at the bottom of the mall.\
13\. After completing all contents input, press \[Save] button to complete basic information setup.
**\[App launch screen]**
**Let’s check how the image of the 11th store image and the 12th store footer is applied in the app.**
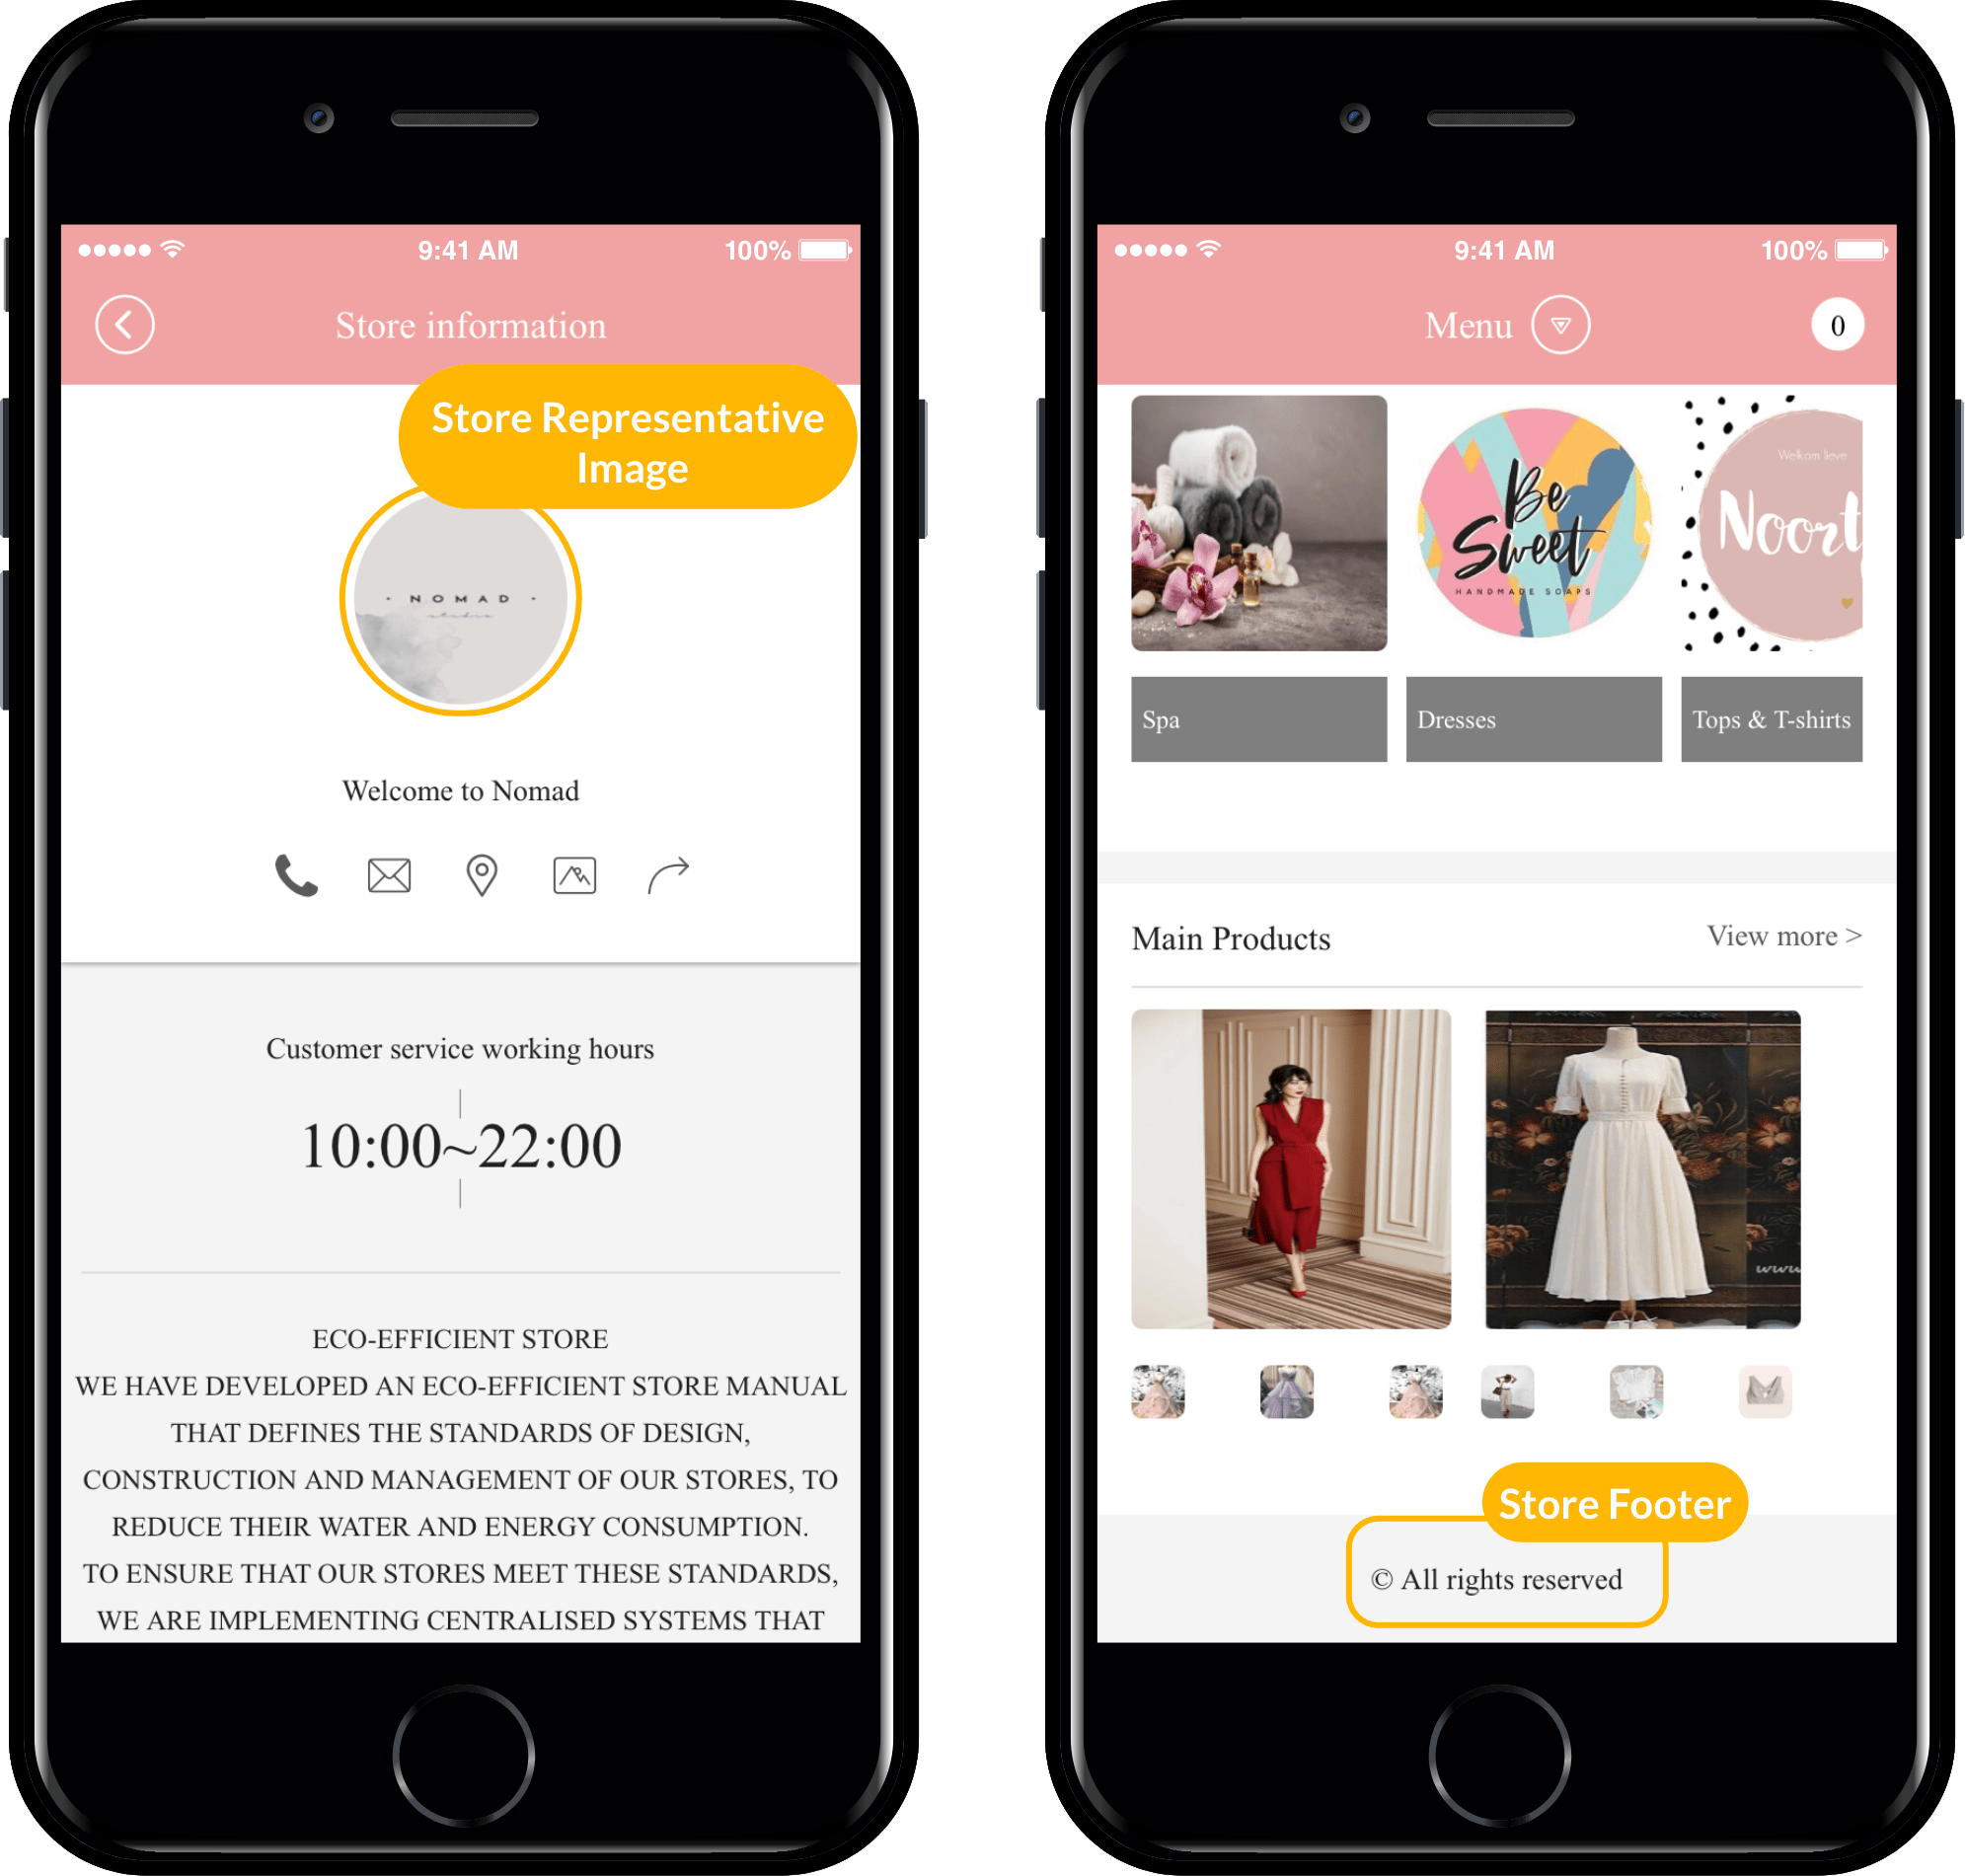
\* Store representative image: You can check the representative image at the top of the shopping mall information page.
\* Store footer: You can check at the bottom of the shopping mall main page.
### **STEP.3 Apply to apps – Shopping Mall Information, Mall Main page**
**+Where can I apply the mall information, shopping mall main page?**
The main page of the shopping mall shown in the app and the shopping mall information page will tell you where you can apply.
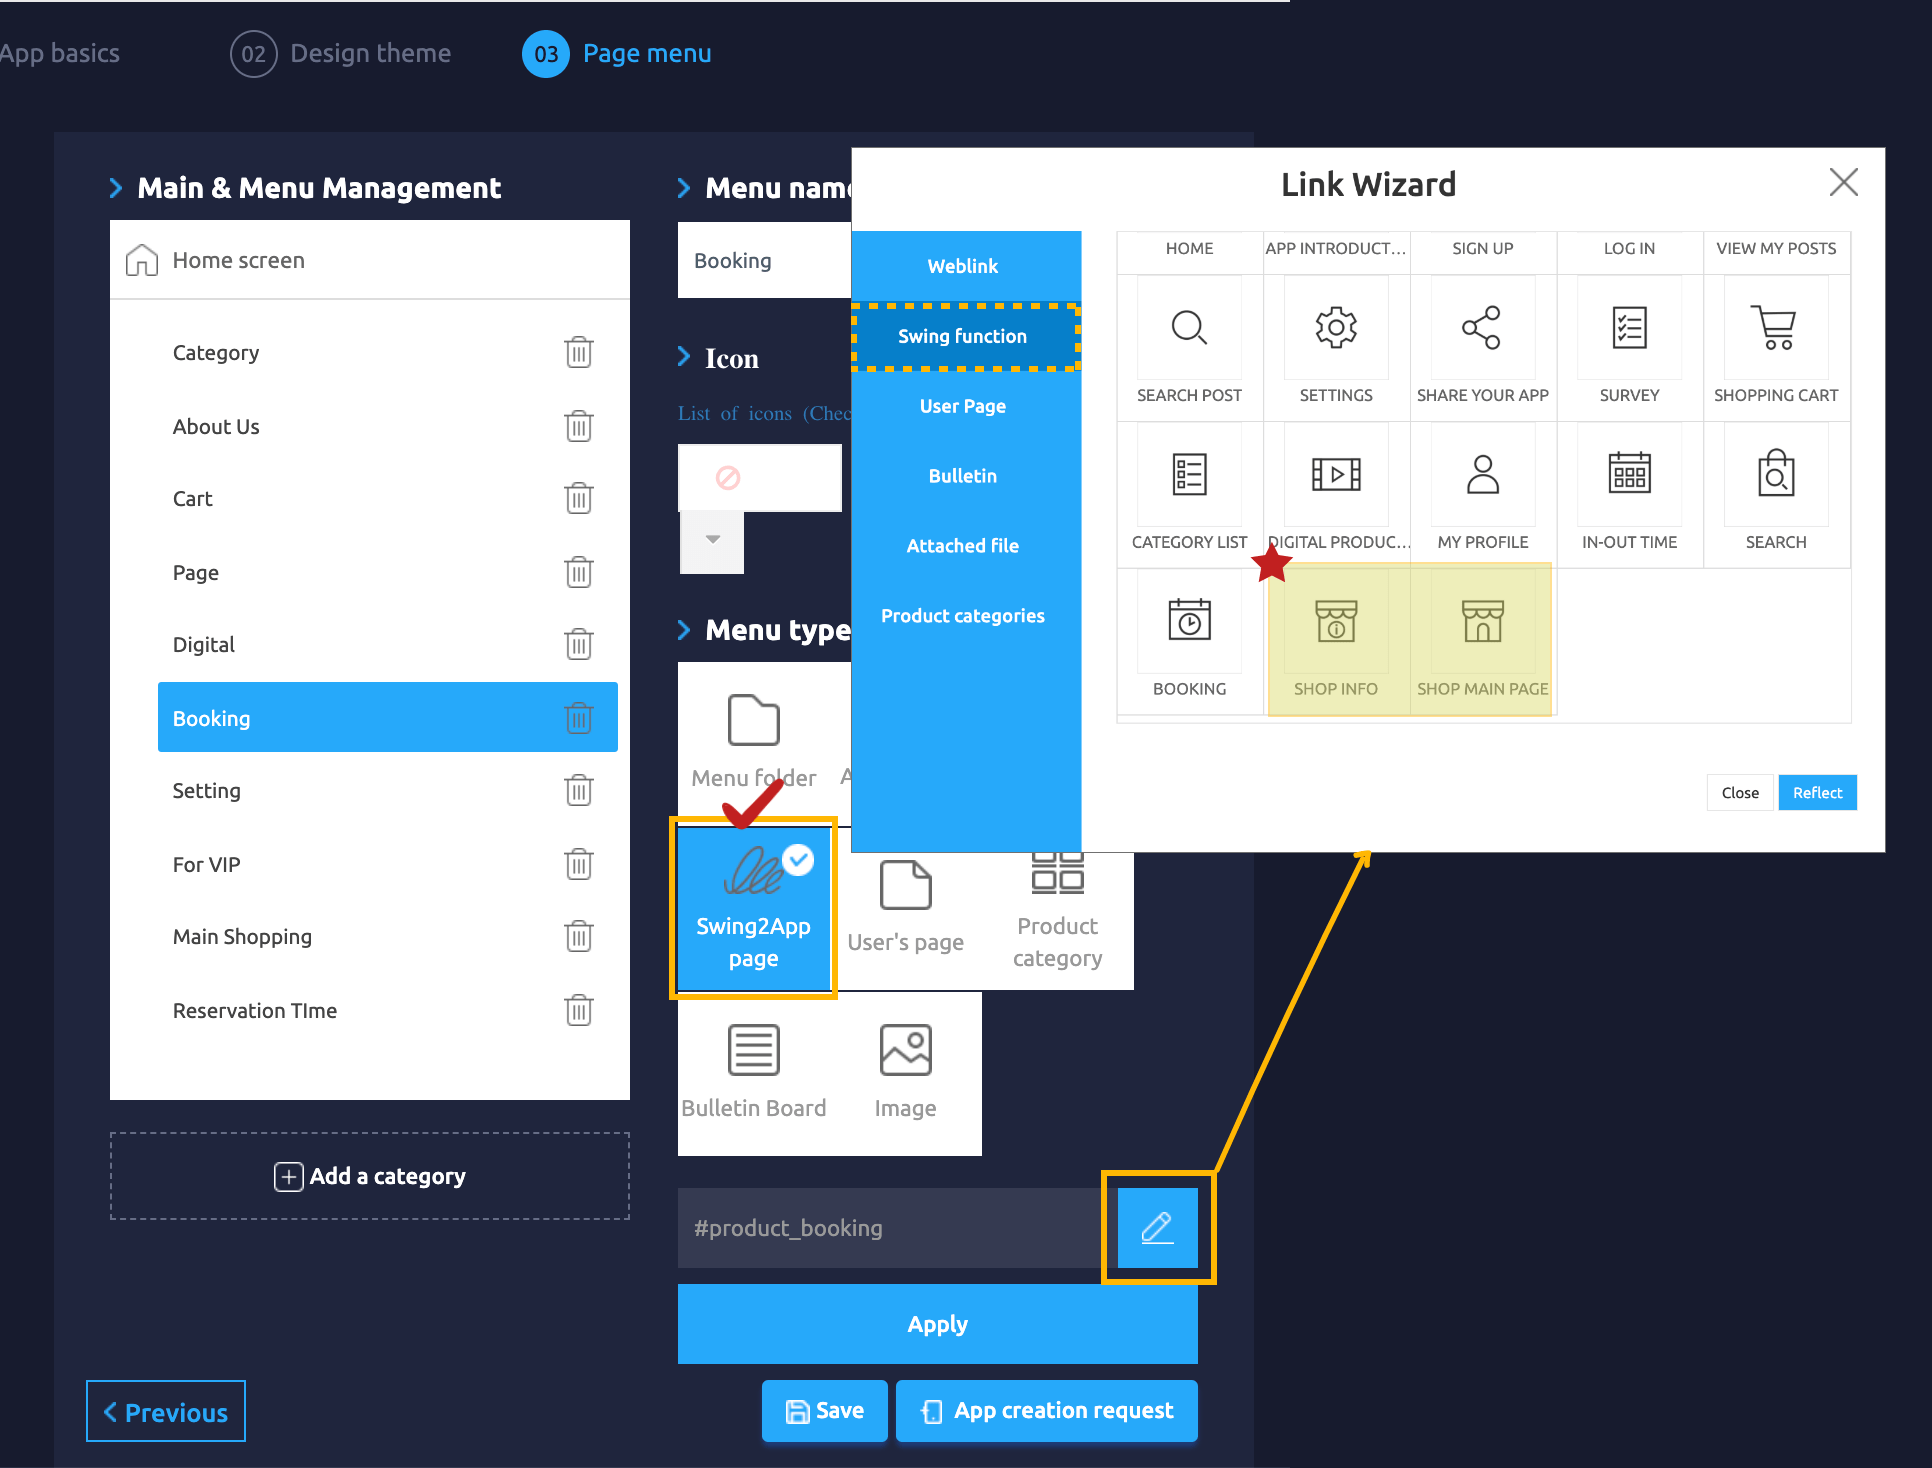
1\. Maker(V2) page – Go to the Step 3 Page menu.
2\. Select \[Swing2App Page] from the menu type on the right and press the Link Wizard button below.
3\. The page list provided by the swing2app page appears as an image.
4\. Here you can check the Shop Info, Shop Main Page.
5\. Select the page and press \[Apply]-\[Save] button to apply it to the app.\\
**\[Instructions]**
Swing Store Management – The information entered in the Basic Information menu is divided into two Swing2App pages \[Shop Info, Shop Main Page].
In other words, the **information entered in the basic information is shown in two pages on the ‘shop main page’ and ‘shop info’ page, so the basic information is displayed only when the page is exposed in the app.**
However, this page is also a basic option provided by Swing2App, so users can make their own shopping mall main page and information page.