> For the complete documentation index, see [llms.txt](https://documentation.swing2app.com/llms.txt). Markdown versions of documentation pages are available by appending `.md` to page URLs; this page is available as [Markdown](https://documentation.swing2app.com/store/admob/admob-plugin-check.md).
# AdMob Plug-in check
If you have completed the AdMob ad setting and the ad does not appear in the app, please check it!
If you have completed the AdMob ad setting and the ad does not appear in the app, please check it!
Even though you have completed the settings in the AdMob plugin, some people may have a hard time not seeing ads in the app right away.
Please check once more the contents announced in Swing2App.
The order in which the manual guides you is not relevant. Please check all the contents.
### **1. Check whether the ad ID and app ID are correctly entered in the AdMob plugin.**
The simplest and most important!
On the Swing2App AdMob plugin setting screen, enter the ad unit ID and app ID you created.
In some cases, the front and banner ad unit IDs are changed and entered, and the ad unit ID is incorrectly entered in the place where the app ID is placed.
Therefore, please check once more that the ad unit ID and app ID are correctly entered!
Since you need to create separate ad unit IDs for Android and iPhone, make sure that the two are not mixed.
And if you have completed setting up the AdMob plugin for the first time, be sure to click the \[Request for app creation] button to update the app to the new version! You have to do it.
Please refer to the manual below for how to use Swing2App AdMob plugin settings!
**☞**[**Go to see how to use AdMob plugin settings**](/store/admob/admob-plugin-apply.md)

### **2. It may take up to a week or more to send advertisements.**
**\*This is the most representative case in which the advertisement is not displayed immediately. (General case)**
Advertising transmission refers to distributing advertisements by checking the user’s AdMob account and connected apps in Google.
It is not judged, but because it is a fixed stage, it takes a normal time for advertisements to be distributed in the app due to such transmission.
However, there are variations because there are cases in which the transmission is completed immediately and advertisements are shown in the app.
If you create a new Google AdMob account or create a new App ID, it may take longer than usual.
**Ads are sent out normally and may take an average of over a week, so please be patient.**

### **3. Have you finished entering’Payment Profile’ in the AdMob dashboard?**
This is for those who are new to AdMob, that is, those who have signed up for AdMob for the first time.
After creating an account in AdMob, you need to complete the payment profile to receive the advertising revenue.
If the payment profile is not entered, it will not be reflected even if you create an advertisement ID and set it in the app.
Therefore, those who signed up for the first time must be **\*Please make sure you have entered your payment profile in the AdMob dashboard.**
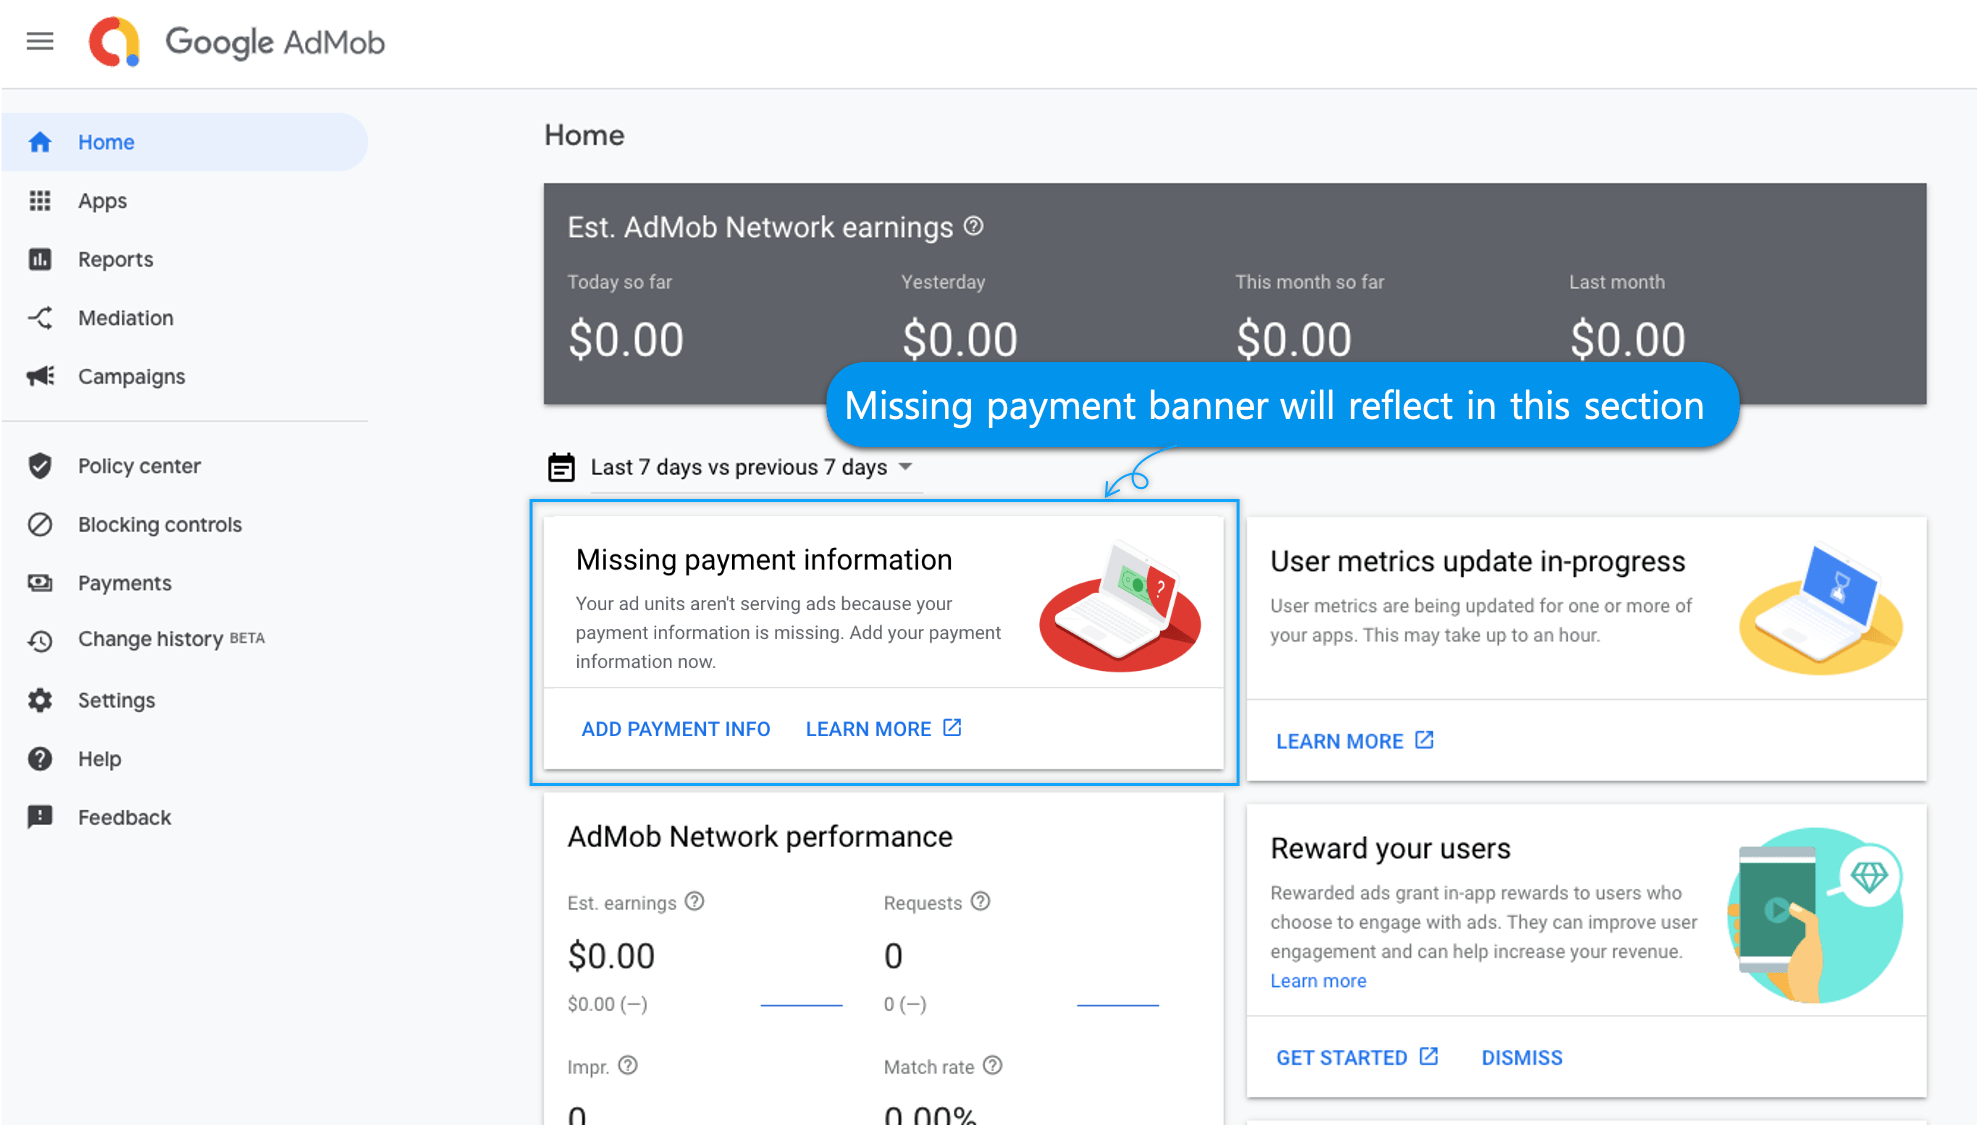

-Account approval has been completed and ad serving has been enabled-to be completed!
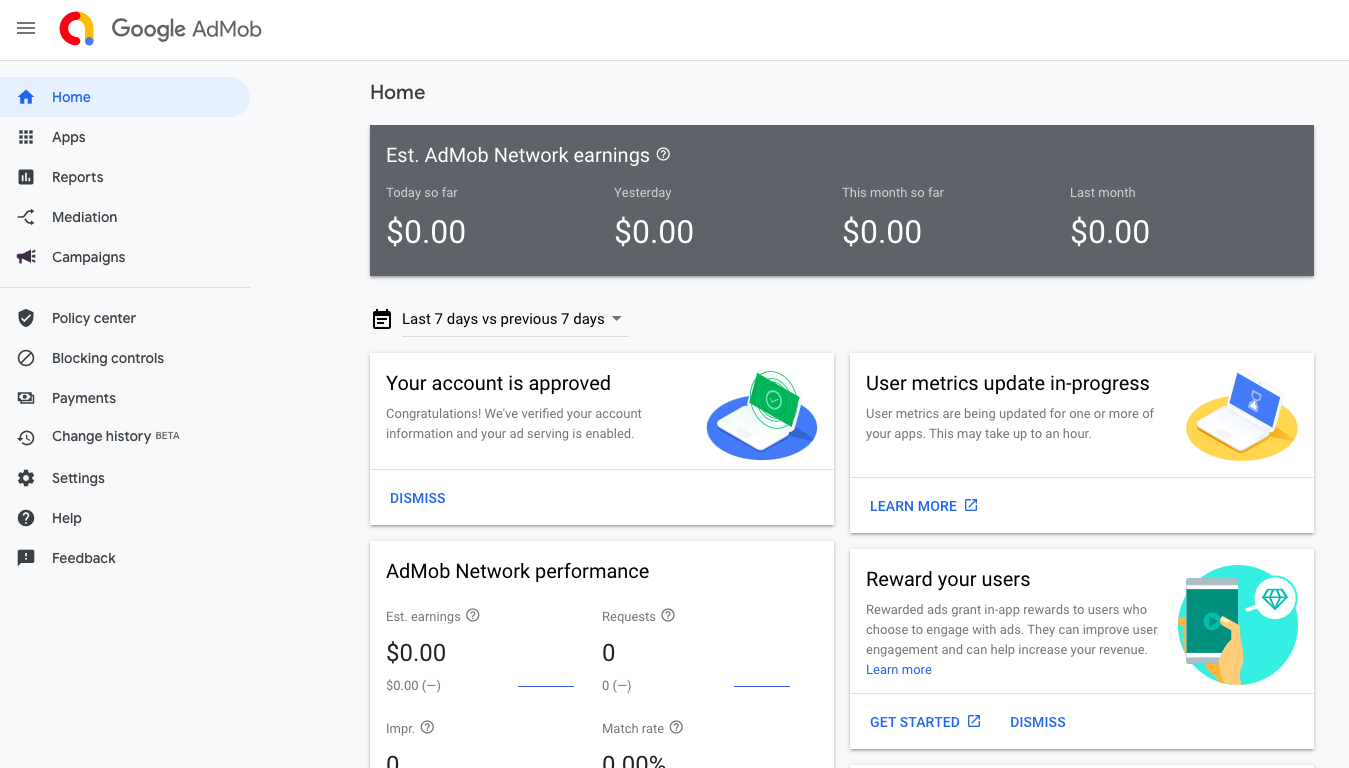

### **4. Ad Review – Have you checked all unreviewed, blocked ads?**
You need to make sure there are no unreviewed ads in the block management in your AdMob dashboard.
From the category on the left side of the AdMob dashboard, select Block Management → \[Go to Ad Review Center].
**1) Priority reviewed ads**

(1)If you select \[Priority reviewed ads], you will see ads that have not yet been reviewed, as in the image above.
(2)You should change the status to ‘Reviewed’ by selecting the \[Mark all as reviewed] button.
**2) Blocked Ads**
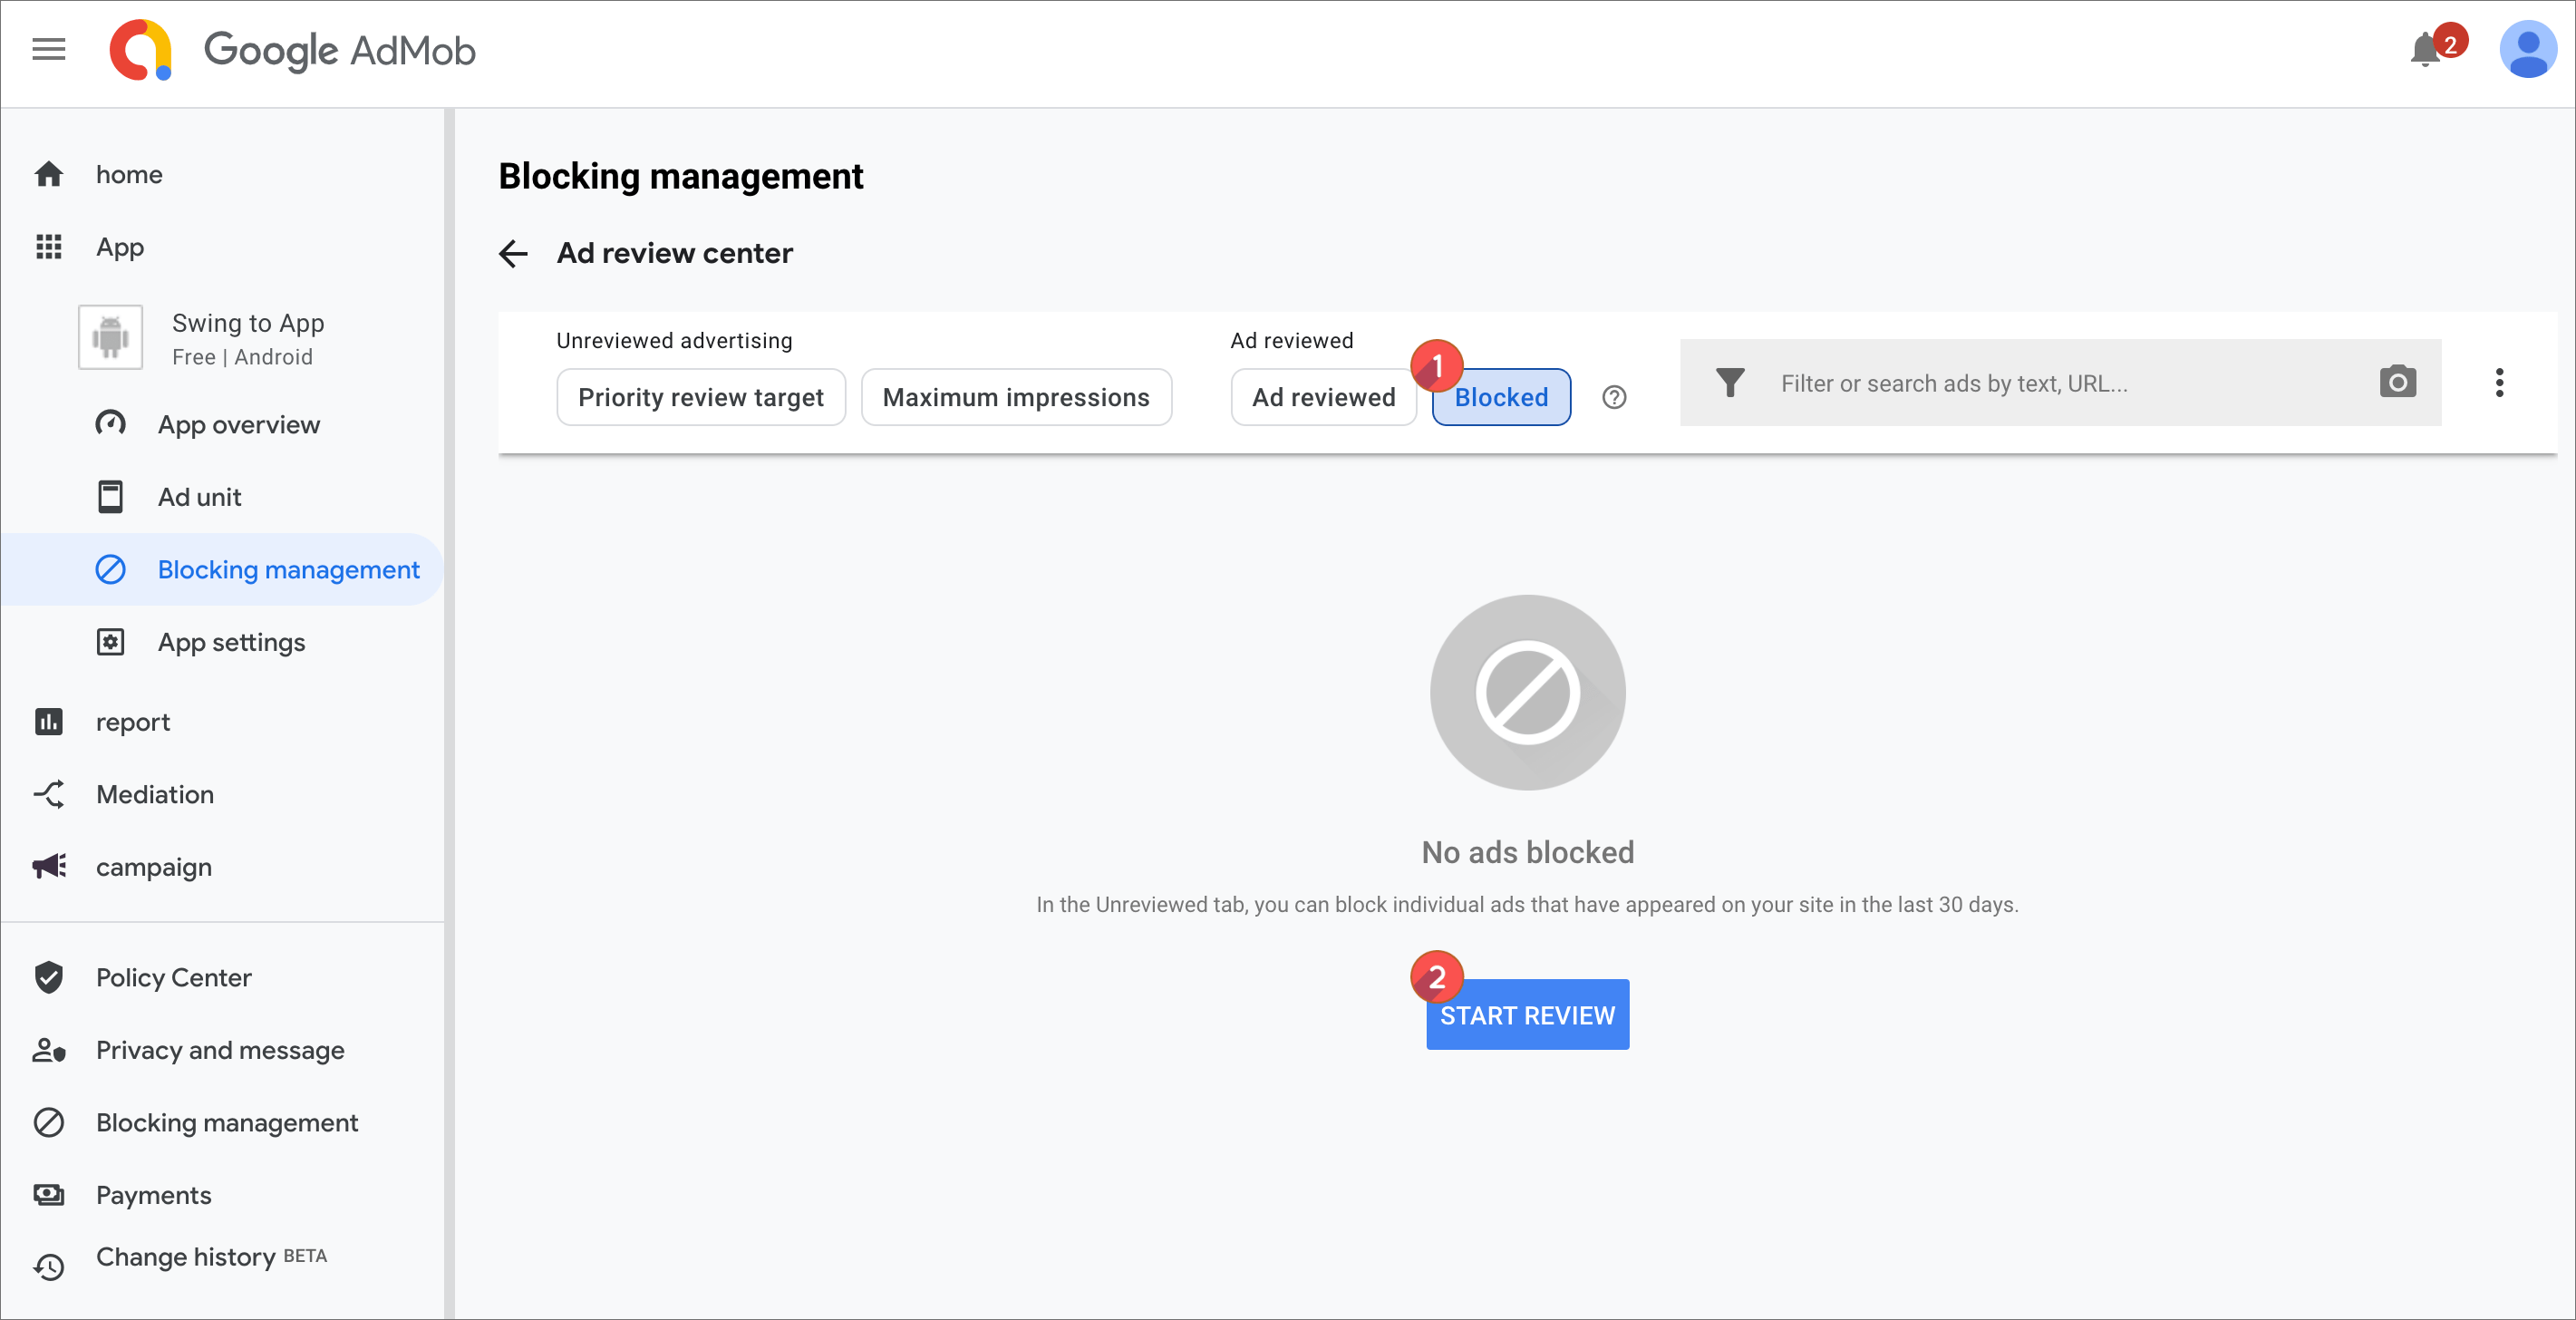
Even if you don’t have any un-reviewed ads in the first place, if you have blocked ads, they won’t be published.
So, select the \[Blocked] menu to see if any of the ads that have been applied to your app are blocked.
Please check that there are no unreviewed ads and blocked ads in blocking management so that ads can be posted.
Ad review should continue to be managed by the user.
Instead of reviewing the advertisement for the first time, you should check if there are any advertisements that have been accessed from time to time and have been unreviewed or blocked.
\*If there are many unreviewed advertisements, there are no advertisements distributed to the app, so you cannot see the advertisements in the app.
In case of unreviewed processing, it may take more than a week to reflect the app.
You can check the details of how to add AdMob payment information and review unreviewed advertisements by viewing the manual below!
☞ [**\[Go to the Swing2App AdMob Operation Notes\]**](https://support.swing2app.com/knowledgebase/admob-operation/)

### **5. Please check if there is any violation of the fraudulent click or invalid traffic policy.**
Please check if there is any violation of the fraudulent click or invalid traffic policy.
All illegal fraudulent click traffic is a violation of policy due to artificially clicking a lot of AdMob ads.
Of course, those who create and use AdMob advertisements for the first time do not have such violations because the advertisement itself has not been created yet.
If the ad ID applied to another app within the AdMob account is suspended due to policy violation, the account may also be suspended.
Not only the ad unit ID is suspended, but in some cases even the AdMob account is suspended.
Therefore, please check whether there is any policy violation.
Usually, in case of a violation of this policy, no other action can be taken, the only way to do this is to wait for Google to approve it again.
It may take some time as it may take an average of 1 to 2 weeks or more.
In addition, please check your email and AdMob dashboard for any other violations of AdMob policies.
\*In case of suspension due to policy violation, you must wait until the suspension is resolved.

### **6. Check AdMob test ads**
**\*This method is for users to check whether there is a problem with the app created by Swing2App or with the AdMob server provided by Swing2App.**
By applying the test ID in the AdMob plugin, you can check if the AdMob ad for test appears in the app.
**\[How to set up AdMob advertisement for testing]**

On the AdMob plugin setting screen, delete all IDs in the ID field, leave blank and save.
If you leave it blank, the red message below will show “Your test ID is in use”.
The test advertisement setting is completed only when the message is displayed.
Save it and run the app again. **(Please close the app completely and relaunch it)**
**Mobile phone app execution) AdMob ad screen for testing**
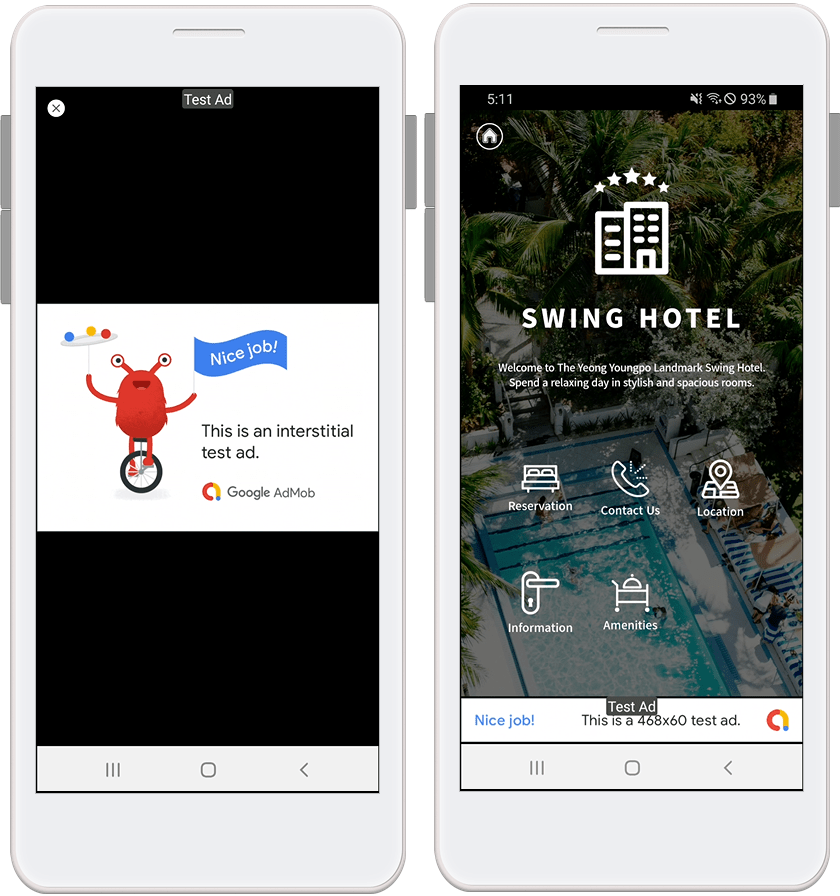
You can see the front and banner ads for testing in the app.
If the ad for AdMob test ads appear well in the app, there is no problem with the app created by Swing2App or the Swing2App server itself.
In general, it may take the usual time for the ad to be distributed to the app due to the ad sending time.
The AdMob plugin settings provided by Swing2App are available only by purchasing the ‘AdMob Application Plugin ($220)’ product of Swing2App.
For how to set up AdMob advertisements, please refer to ☞[See How to use AdMob plugin settings.](/store/admob/admob-plugin-apply.md)
If the test ID is applied, the AdMob test ad does not appear in the app or
If you have checked all of the above methods, and the ad does not appear in the app after a long time has passed, please contact the Swing2App customer center.
We’ll check and guide you!