> For the complete documentation index, see [llms.txt](https://documentation.swing2app.com/llms.txt). Markdown versions of documentation pages are available by appending `.md` to page URLs; this page is available as [Markdown](https://documentation.swing2app.com/manual/maual/appbasic/editor.md).
# Image Editing Tool

▶ **What is an Image Editing Tool?**
**Image Editing Tool is an easy way to edit the image size when creating an app provided by Swing2App.**
If an image size you want to upload when creating an app is different from the recommended size mentioned in the production method, you can easily change the size.
The image editing tool provided by Swing2App allows you to easily edit and upload images to your desired size.
This manual will tell you how to use the image editing tools that can be used to attach app icon images.
**▶ Where to use Image Editing Tools?**
When creating an app, it can be used from the menu that requires image upload.
**\*Image Editing Applicable Menu: App Basic Info) App icon, idle screen image/web template page image attachment/market upload image attachment.**
When uploading an image that does not fit the specified size, the image editing tool window appears.
Just resize and upload it on the image editing tools page.
> **When creating an image, the app icon image and the app idle screen image are placed in the app basic information item.**
>
> **At this time, the image size should be inserted according to the standard size provided by Swing2App to upload.**
### **1. Select an app icon**
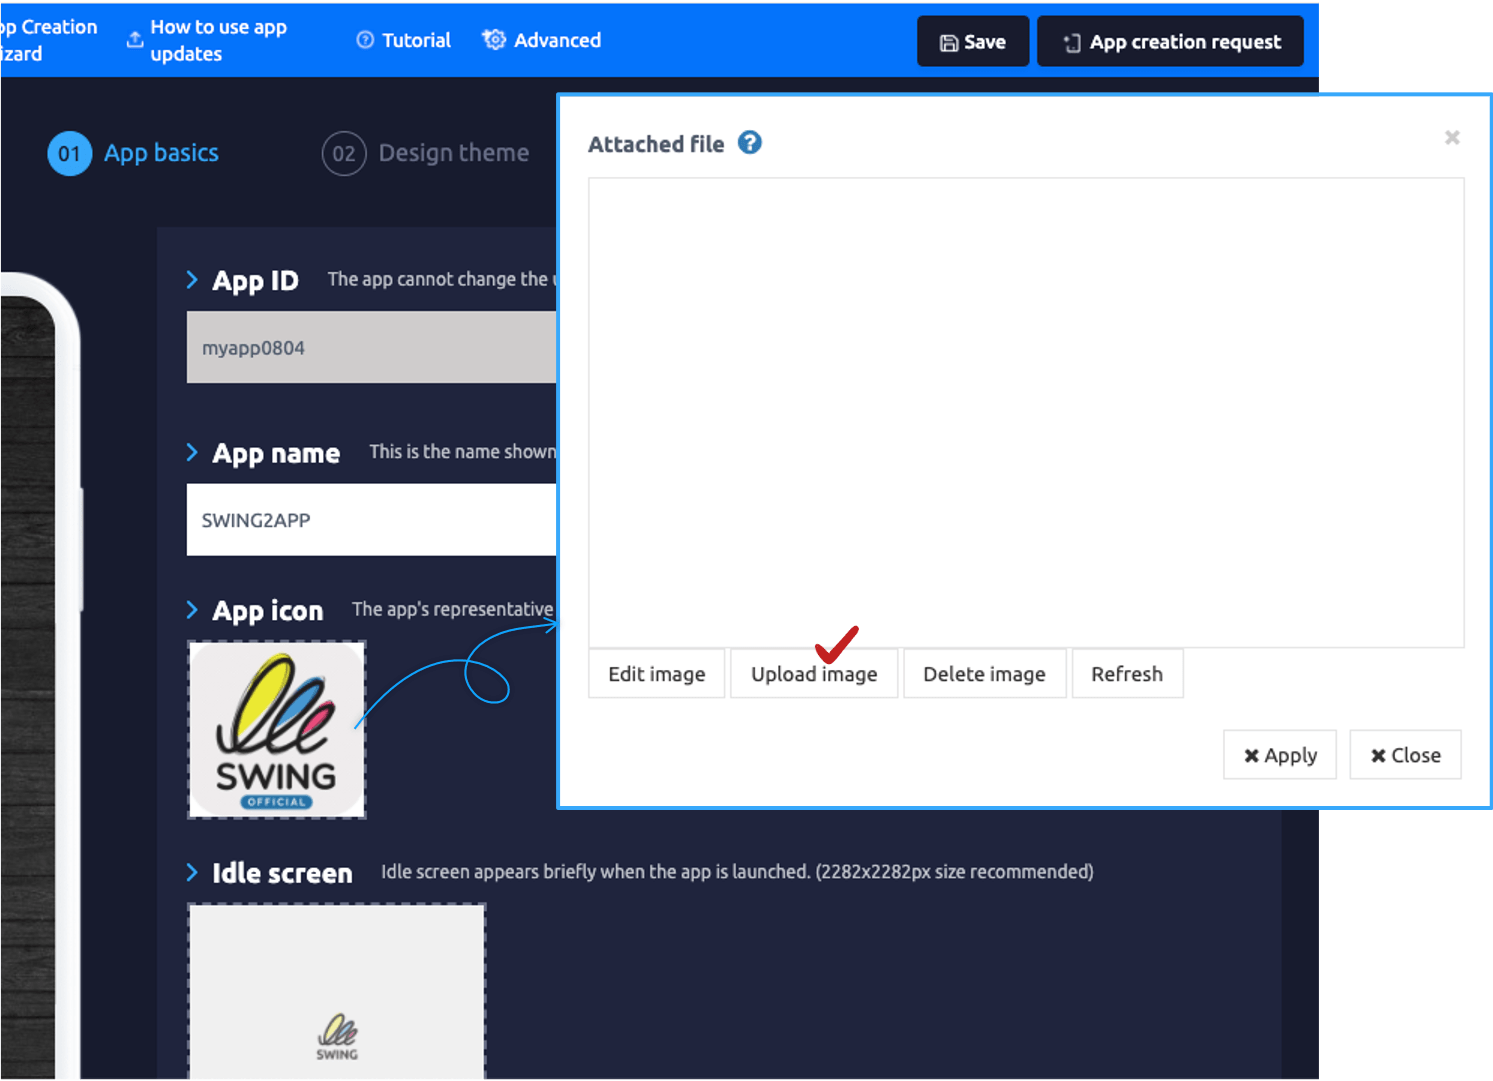
When you select an app icon image, a file attachment window appears where you can upload an image.
Click the \[Upload Image] button here to attach an image from the file.
### **2. The Image Size does not match**
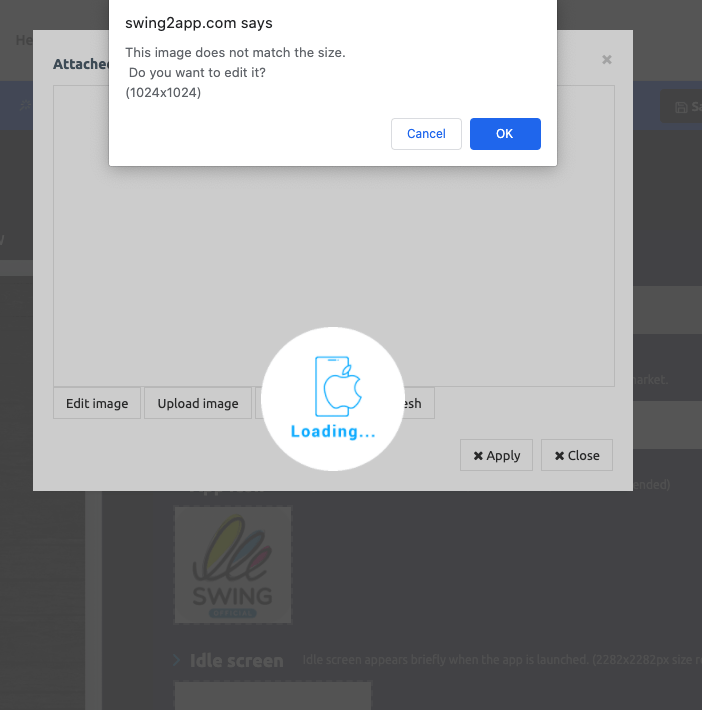
The required App icon image size is 1024 X 1024 px.
If the attached image does not match the size, a pop-up window appears to remind about the required size as shown in the above image. If you select ‘OK’, you will be directed to the image editing tool window.
### **3. Image Editing Tool**

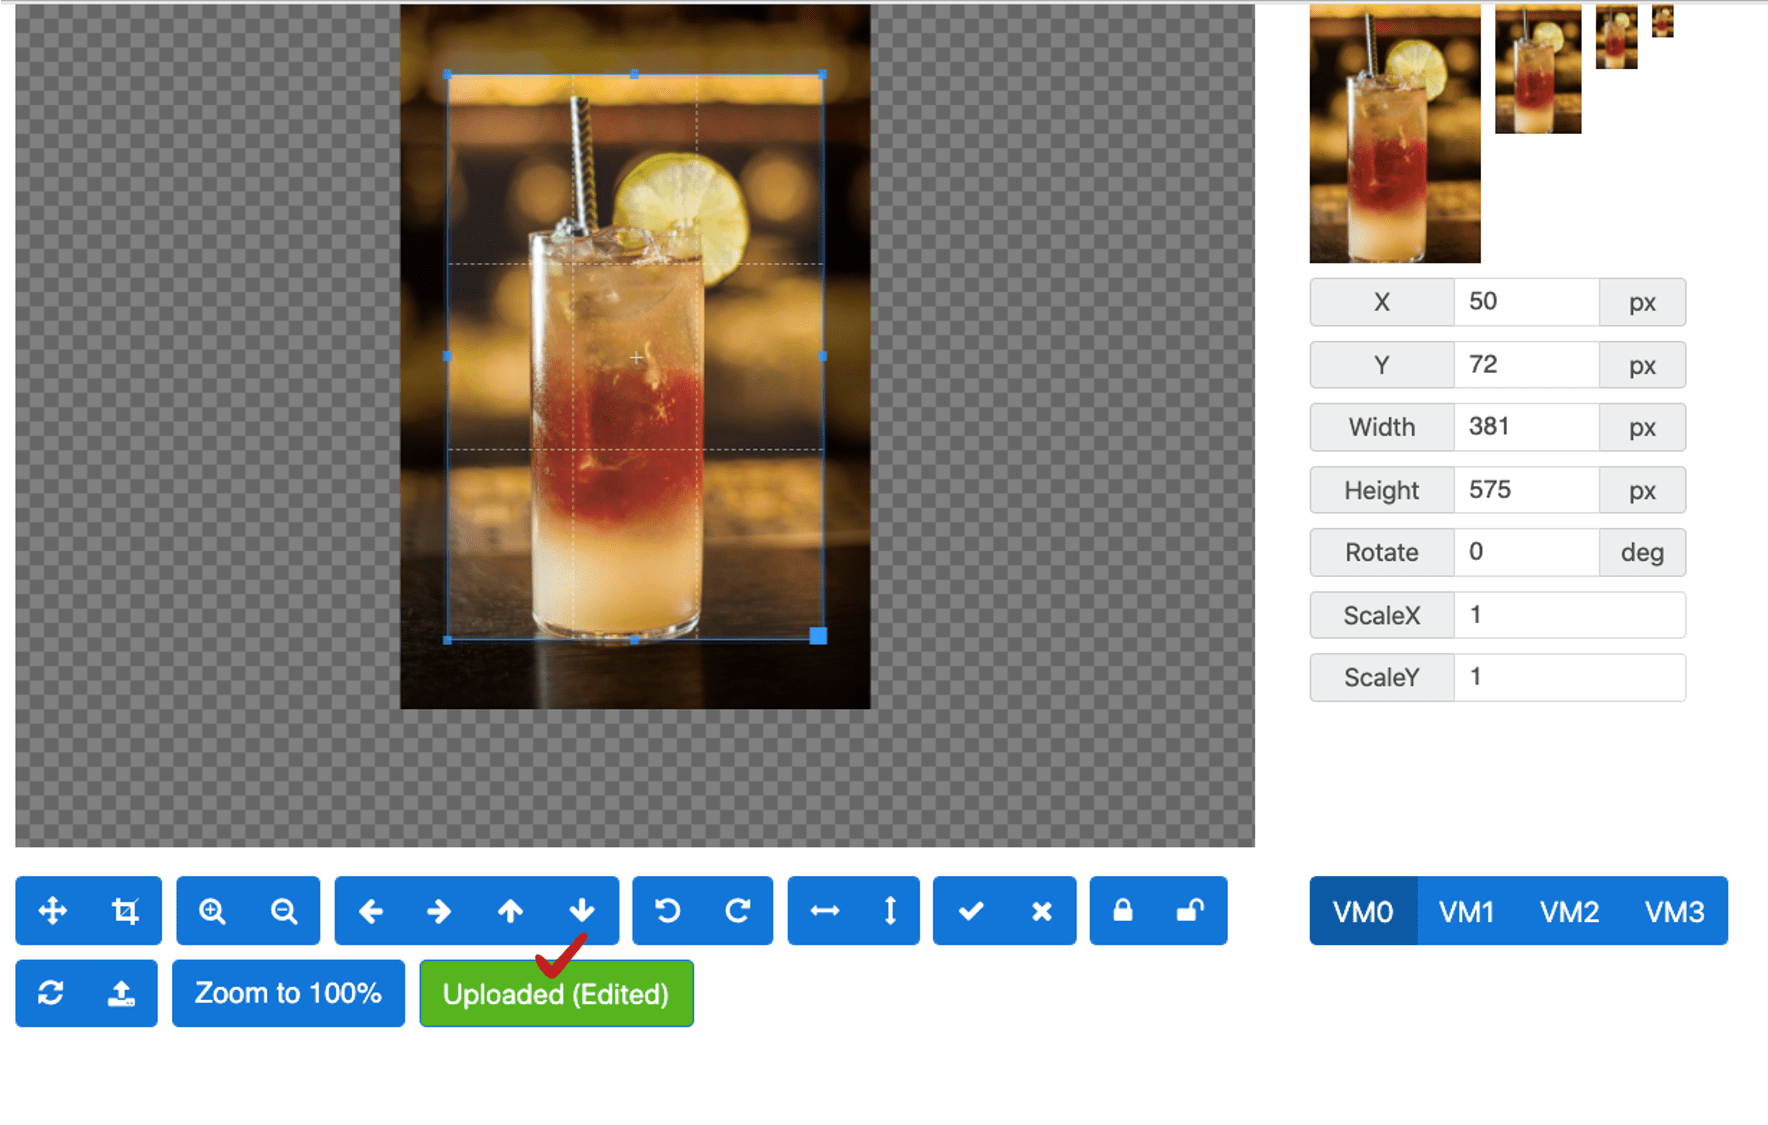
As you can see in the image, the (blue line) area is designated as the image size to be uploaded in the image editing tool window.
You can select the blue line with your mouse to pull or reduce it. You can edit the image to fit the area.
If the image is large, simply drag the area with the mouse to apply the desired image.
**\* If you upload an image smaller than the size you need to upload, you may need to increase the size of the original image, which may result in poor image resolution.**
(This happens when the uploaded image size is smaller than the image size above 1024×1024).
Therefore, **we recommend that you use an image that is larger than the specified size!!**
When you finished editing the image, select the \[Upload (Finish)] button.
### **4. Correct Image Size**
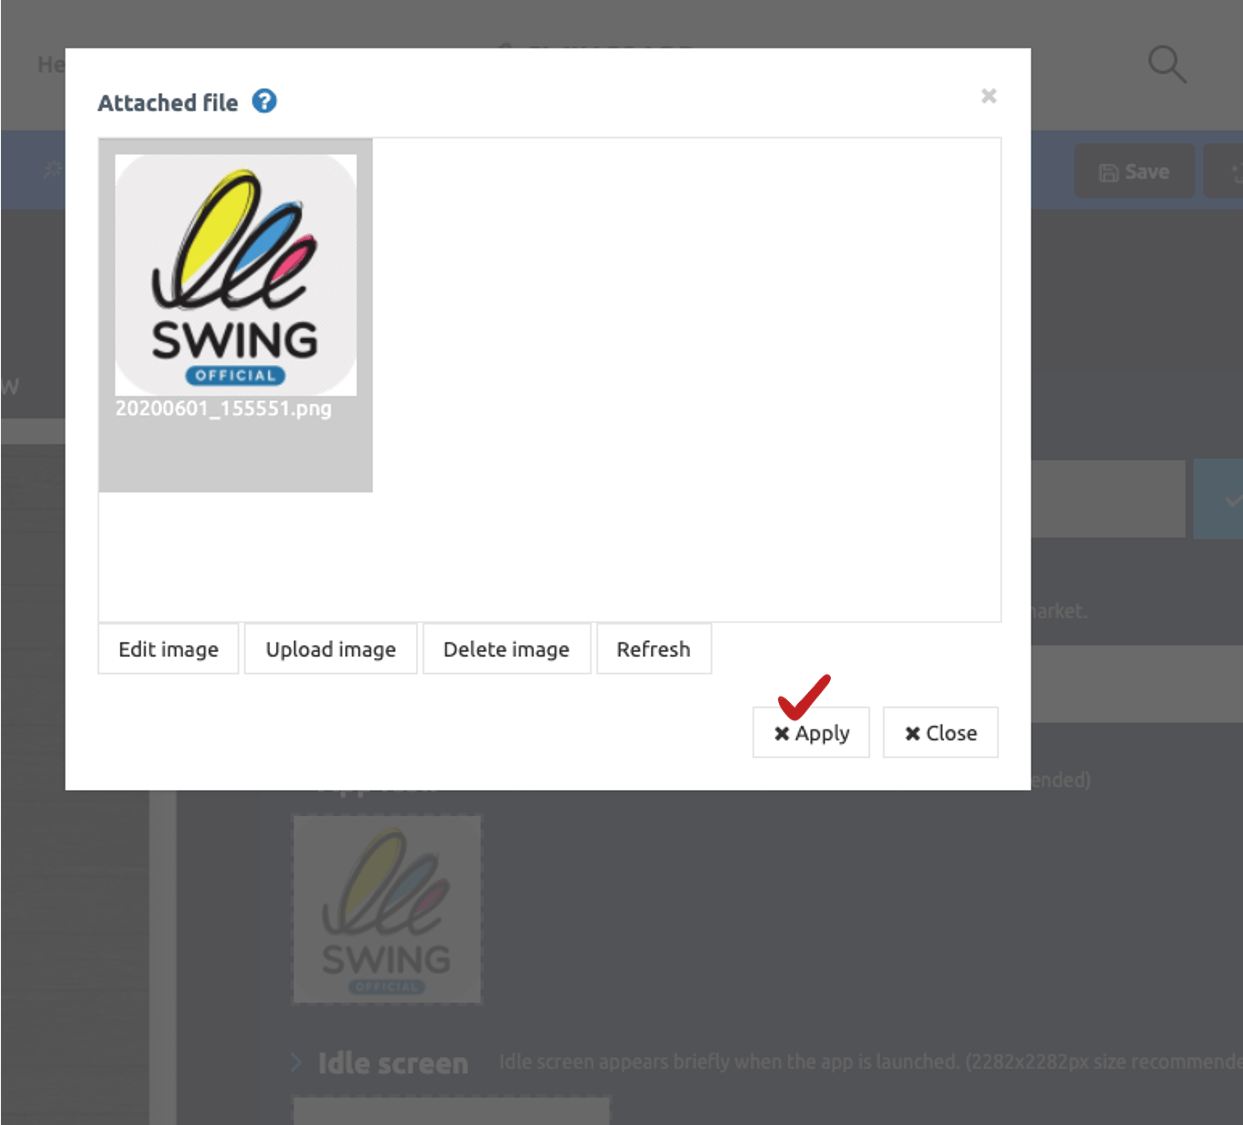
The image size has been edited.
Check the uploaded image in the file attachment window and select the \[Apply] button.
**▶ View how to use the Image Editing tools**

**5. Register the App Icon Image**
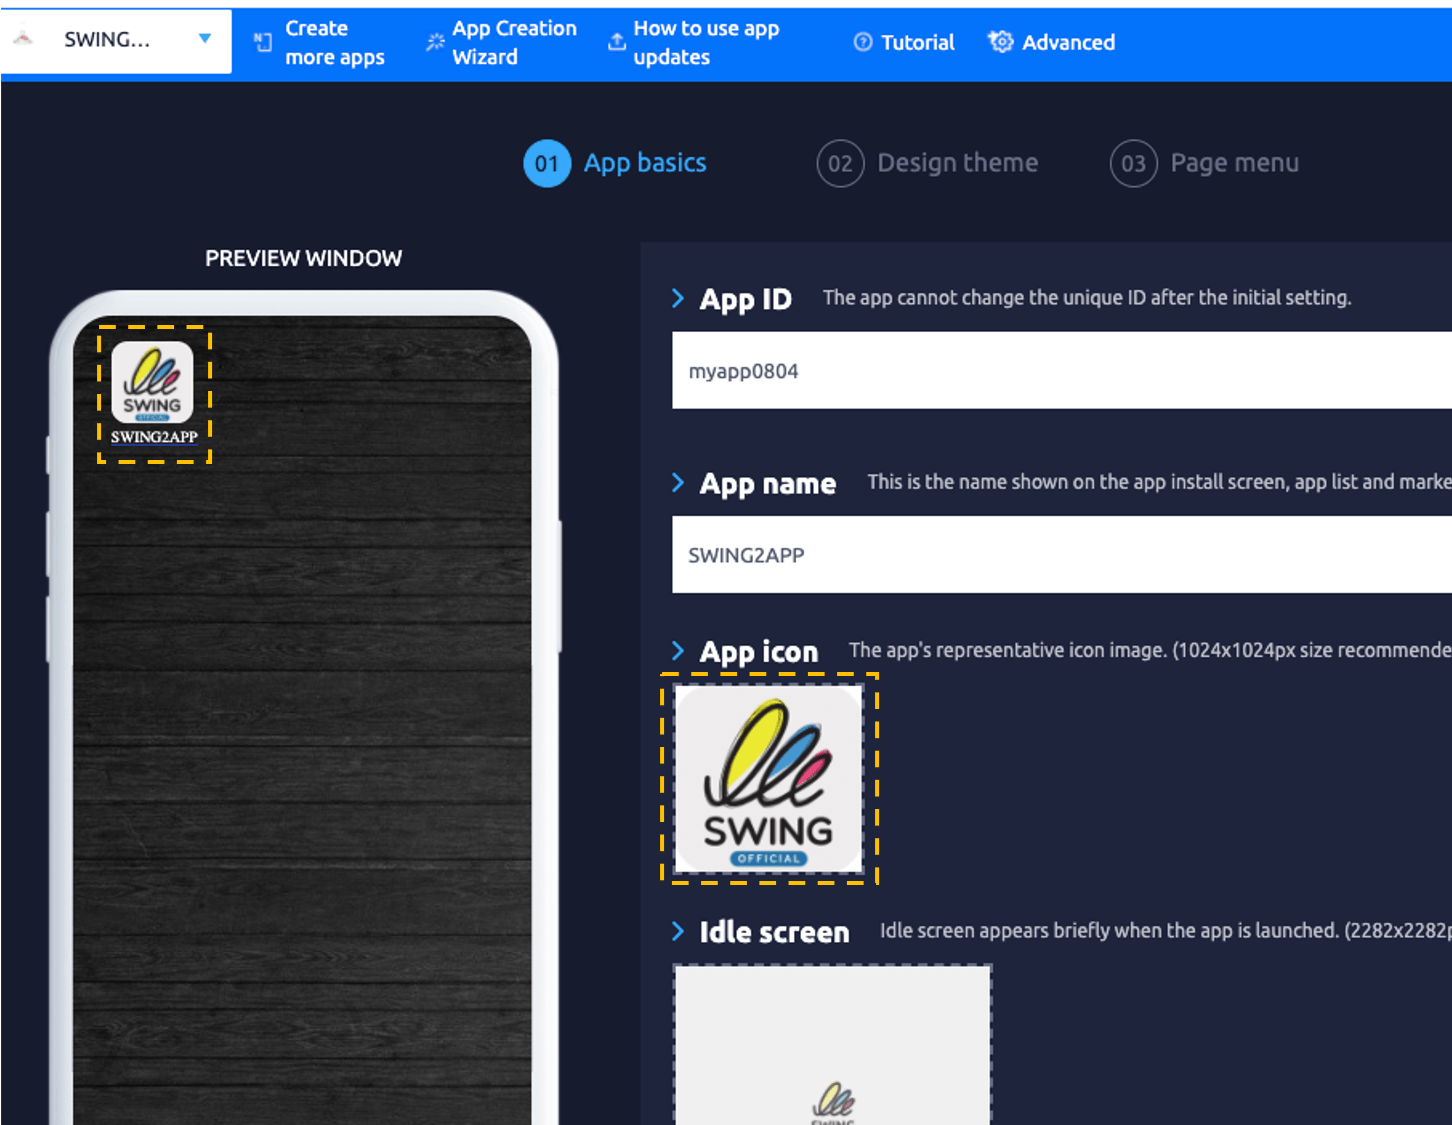
If the image is edited with the size editing tool, the icon image is registered normally.
**–The method of editing the app icon image and the idle screen image is the same.**
**–If the size does not match, please register the idle screen by adjusting the size through the image editing tool.**
**Please refer to the post for the app icon creation guide.**\
\&#xNAN;**☞** [**\[Go to the app icon creation guide\]**](/manual/maual/appbasic/appicon.md)
**App Basics – App icon, in addition to the idle image.**
**\*You can also use the image editing tool to register images on the web template page or register graphic images in the market upload application!**
**Edit Web Template Image Size**
**How to use the Template Page**\
\&#xNAN;**\[Maker(V2) – Page menu – Import user page – Move template page creator – Select template]**\
\
Select the template page and select a button to attach an image.\
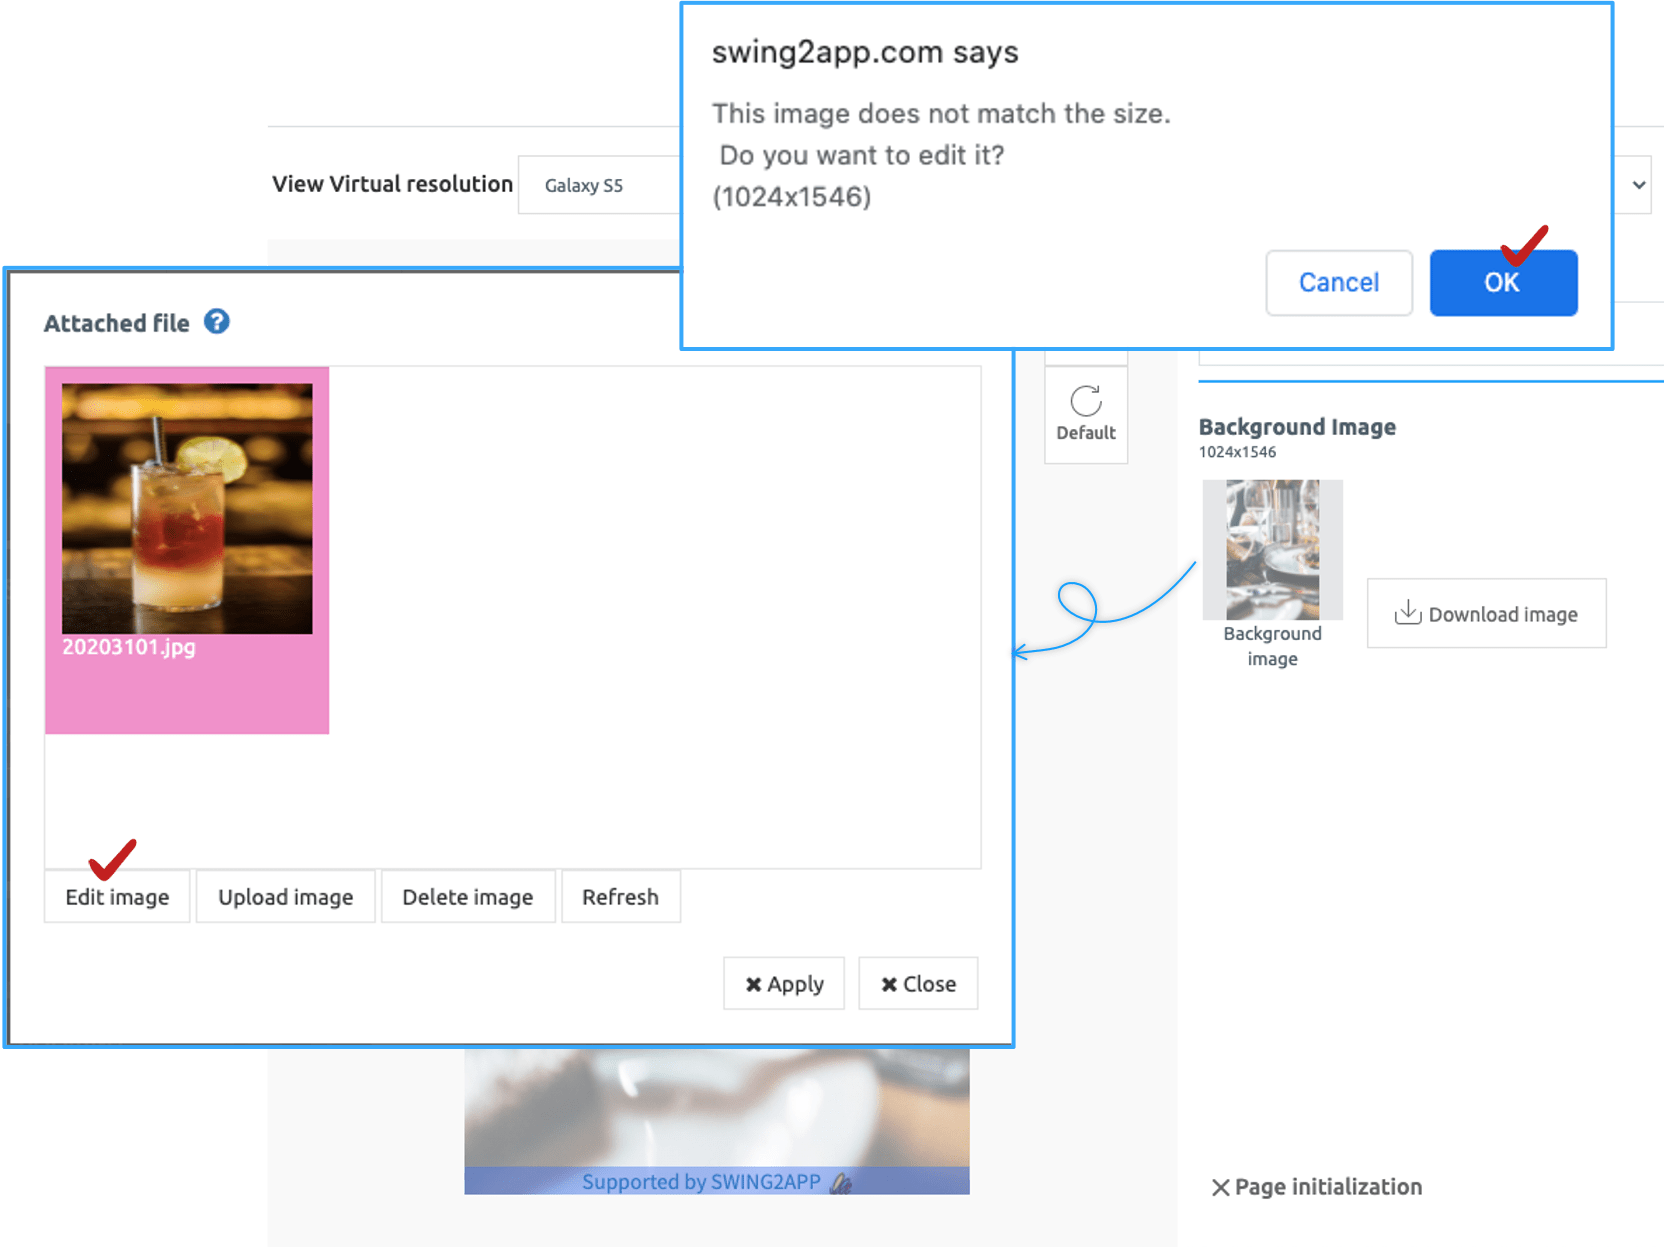
(The above image is a background image of a restaurant template.)\
The template’s background image size is 1024 × 1546.\
When you upload an image that doesn’t fit, a pop-up window with the message, “The image doesn’t match the size. Do you want to fix it?” appears.\
Selecting ‘OK’ will take you directly to the image editing tool.
As you can see from the image, the (blue line) area is designated as the image size to be uploaded in the image editing tool window.\
You can adjust your uploaded image to fit the area.\
When you finished editing the image, select the **\[Upload]** button and the image registration is completed!
**Market Upload Request – Edit Graphic Image Size**

**Market Upload is available when you apply for a Play Store or App Store upload on Swing2App.**\
\[Manage Version – Production history – Upload request] button is available.
When uploading to the market such as the Play Store and App Store, you need to include screenshots, graphic images, etc.\
Play Store screenshot images do not exceed minimum and maximum length,\
but graphic images must be sized exactly as shown above.\
**Graphic image (1024×500), if you can adjust the image size, you can change the size immediately by using the image editing tool.**
When you select the graphic image button, you’ll see an image upload window.\
Select the image you want to upload, and if it doesn’t fit, go to the image editor page.

As you can see in the image, the **(blue line) area** is designated as the image size to be uploaded in the image editing tool window.\
You can adjust your uploaded image to fit the area.\
When you finished editing the image, select the **\[Upload]** button and the image registration is completed.
**When uploading an image while creating an app, you can use the image editing tool to register and adjust the image size easily according to the standard size.**