> For the complete documentation index, see [llms.txt](https://documentation.swing2app.com/llms.txt). Markdown versions of documentation pages are available by appending `.md` to page URLs; this page is available as [Markdown](https://documentation.swing2app.com/manual/appmanage/board/stamp.md).
# How to create and register a stamp
**▶ What is the stamp function provided by Swing2App?**
In Swing2App, you can stamp with a mobile coupon built into the app, not a paper coupon.
The administrator can add a stamp with the membership number issued by the app, or you can add it by taking a QR code.
If you run the app provided by the company without the hassle of carrying a coupon, you can immediately get a stamp!
**Since it is a function provided as a bulletin board, you can select the stamp UI in the bulletin board management and reflect it in the app.**
***
### **STEP.1 Create a stamp**
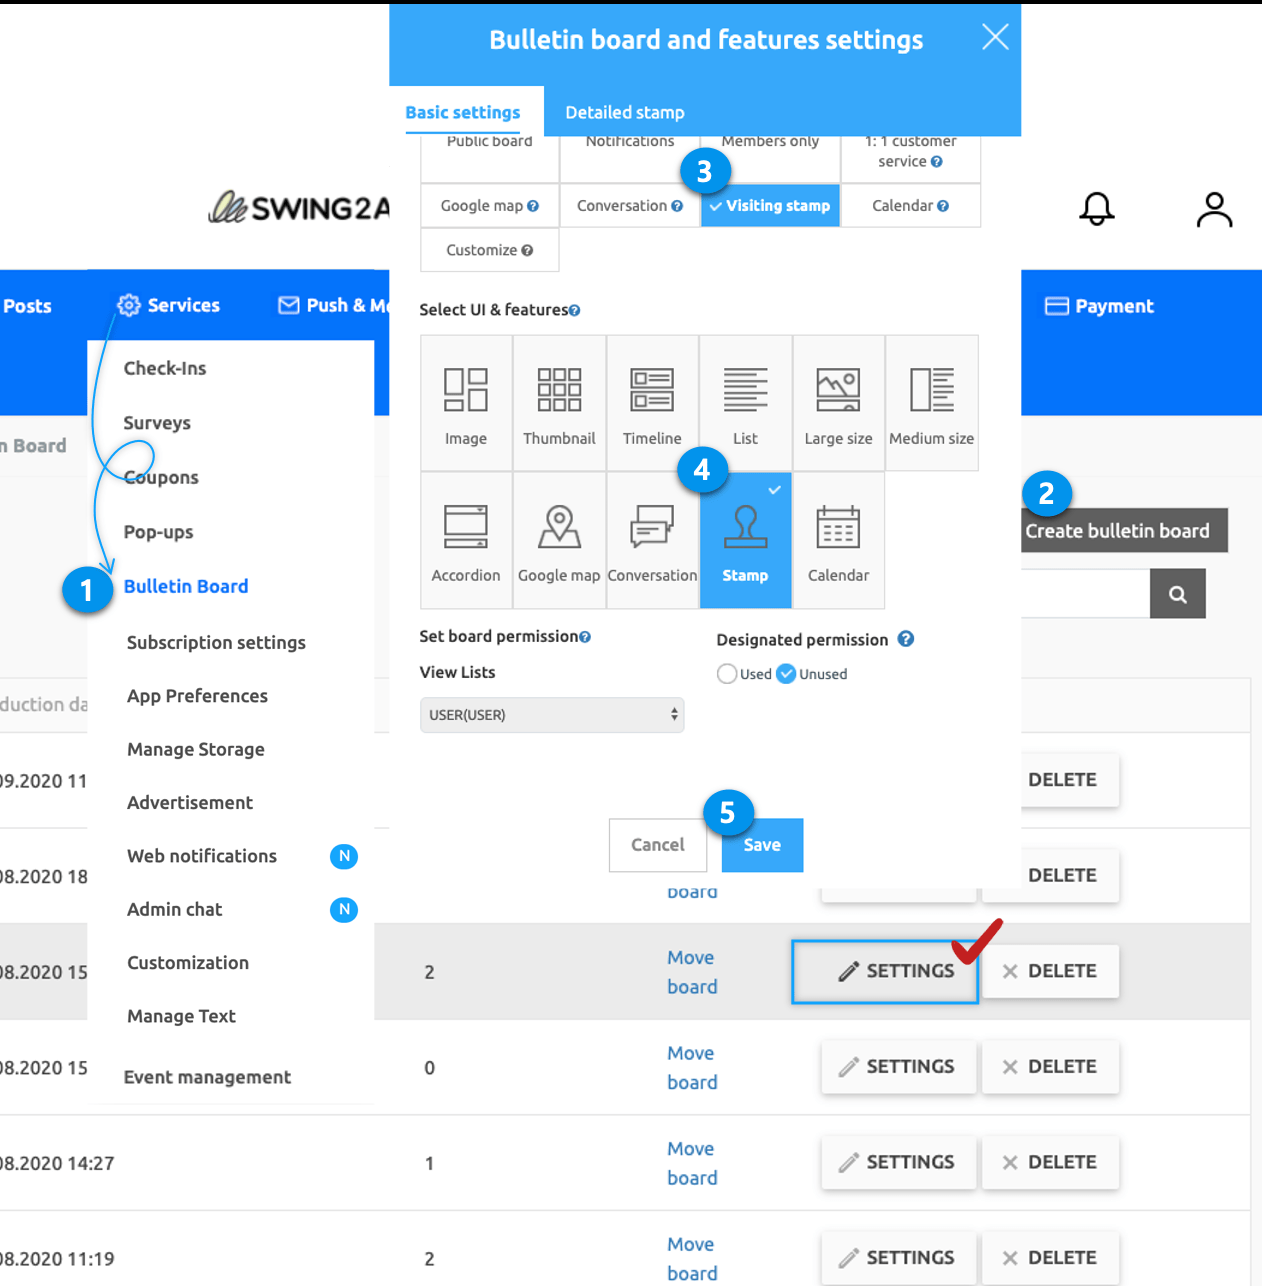
1. Go to **Manager.** Select **Services** and click on **Bulletin Board** from the list.
2. Either click on **Create Bulletin Board** to create a new board or click on **Settings** to edit the existing board.
3. Select **Visiting Stamp.**
4. The **Stamp** will be automatically selected due to the Visiting stamp.
5. Click on **Save.**
***
**Select the \[Create Bulletin] button to open the \[Bulletin Board and Features Setting] window.**
Select the stamp in the window and save it.
There are 2 ways to set up a stamp.
**1. How to set the default stamp board 1**
1. Go to **Manager.** Select **Services** and click on **Bulletin Board** from the list.
2. Either click on **Create Bulletin Board** to create a new board or click on **Settings** to edit the existing board.
3. Select **Visiting Stamp.**
4. The **Stamp** will be automatically selected due to the **Visiting stamp.**
5. Click on **Save.**
This method does not edit other detailed settings menus and uses the UI as it is. (It’s fixed to a grey area)
If you want to change the permissions in the detailed setup, please follow the instructions below.

***
**2. Stamp bulletin board setting method 2**
1. Go to **Manager.** Select **Services** and click on **Bulletin Board** from the list.
2. Either click on **Create Bulletin Board** to create a new board or click on **Settings** to edit the existing board.
3. Select **Customize.**
4. Select **Stamp.**
5. Set the Board Permission.
6. Click on **Save.**

**\*If you want to use the bulletin board only for specific members, check \[Allow user to use designated authority] and select the member group to specify.**
The second way is to use the various options provided by the bulletin board.\
If you want to use the default setting without using the option, you can apply it first.
**3. Stamp bulletin board setting**
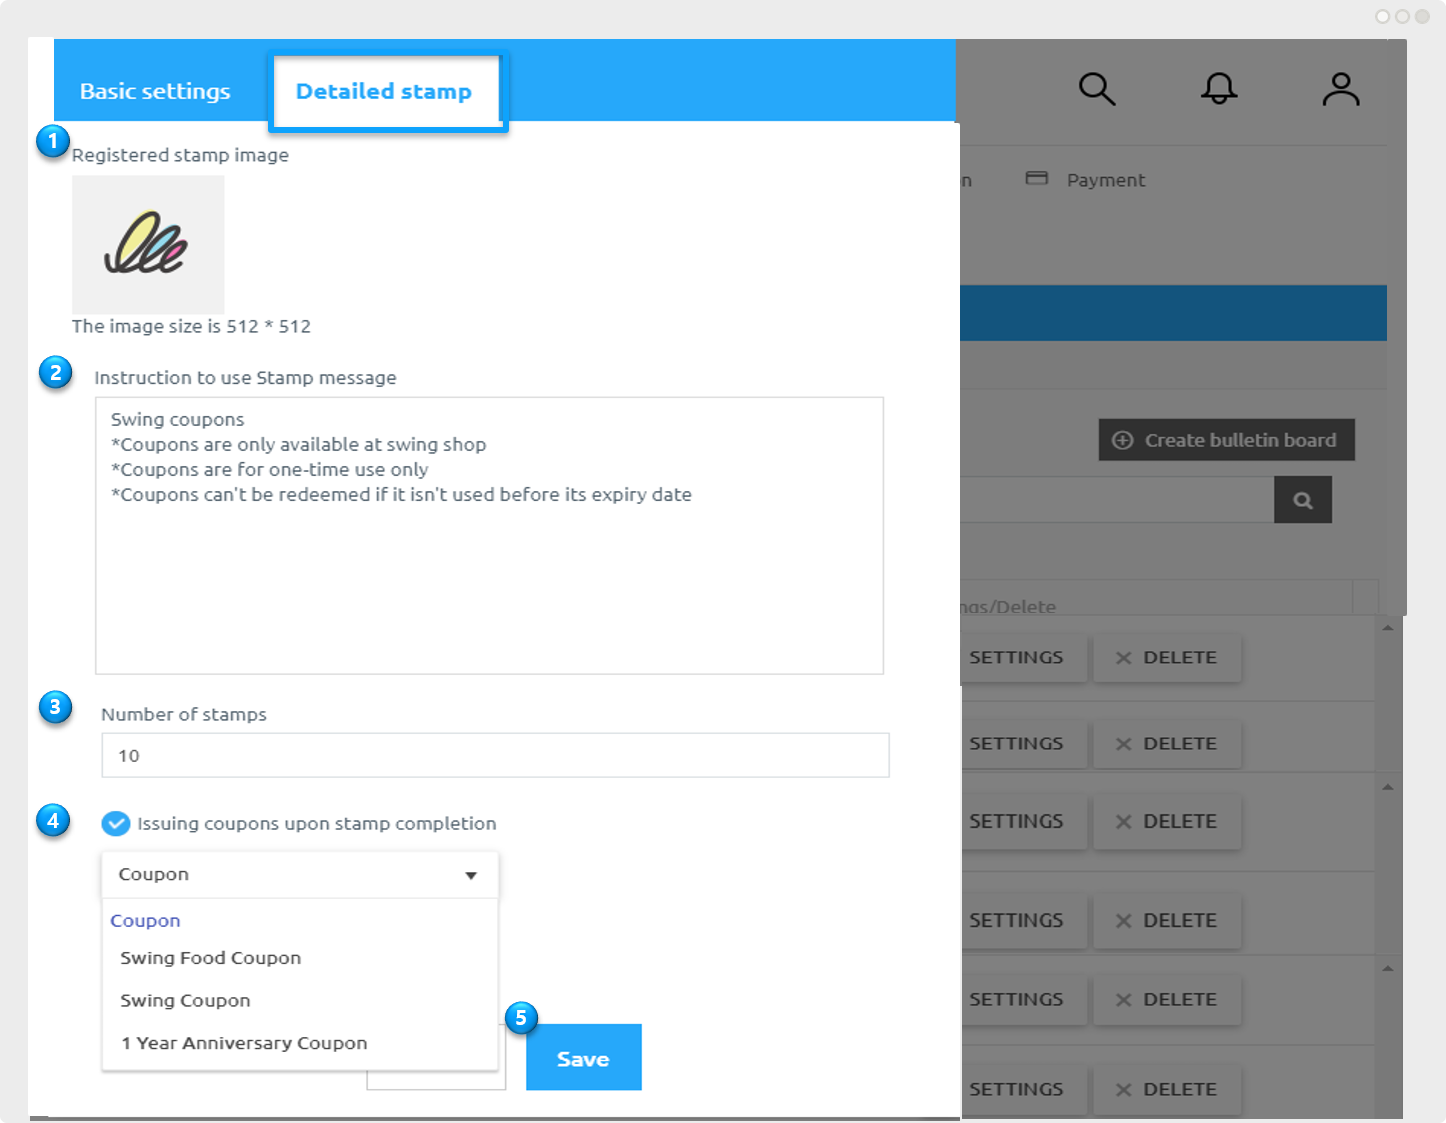
Enter stamp settings in **Basic settings.** Click on the **Detailed Stamp** tab to fill details for the stamp.
1. Enter image in Registered stamp image(image size 512px \* 512px)
2. Enter details of the stamp in Instructions to use Stamp.
3. Fill the number of stamps.
4. Select coupons in Issuing coupons upon stamp collection.\
(Please make coupon in Managers→Services→Coupons)
5. Click on **Save.**
\*Please uncheck if you are not using a coupon.
\*If you check the coupon issuance, you need to make a coupon first.
If you don’t have any coupons, there will be no coupons to choose from.
\*When the stamp is completed, the coupon issuance function is available with the new feature, which requires an app update.
\
\&#xNAN;**↓ Stamp setting completed**
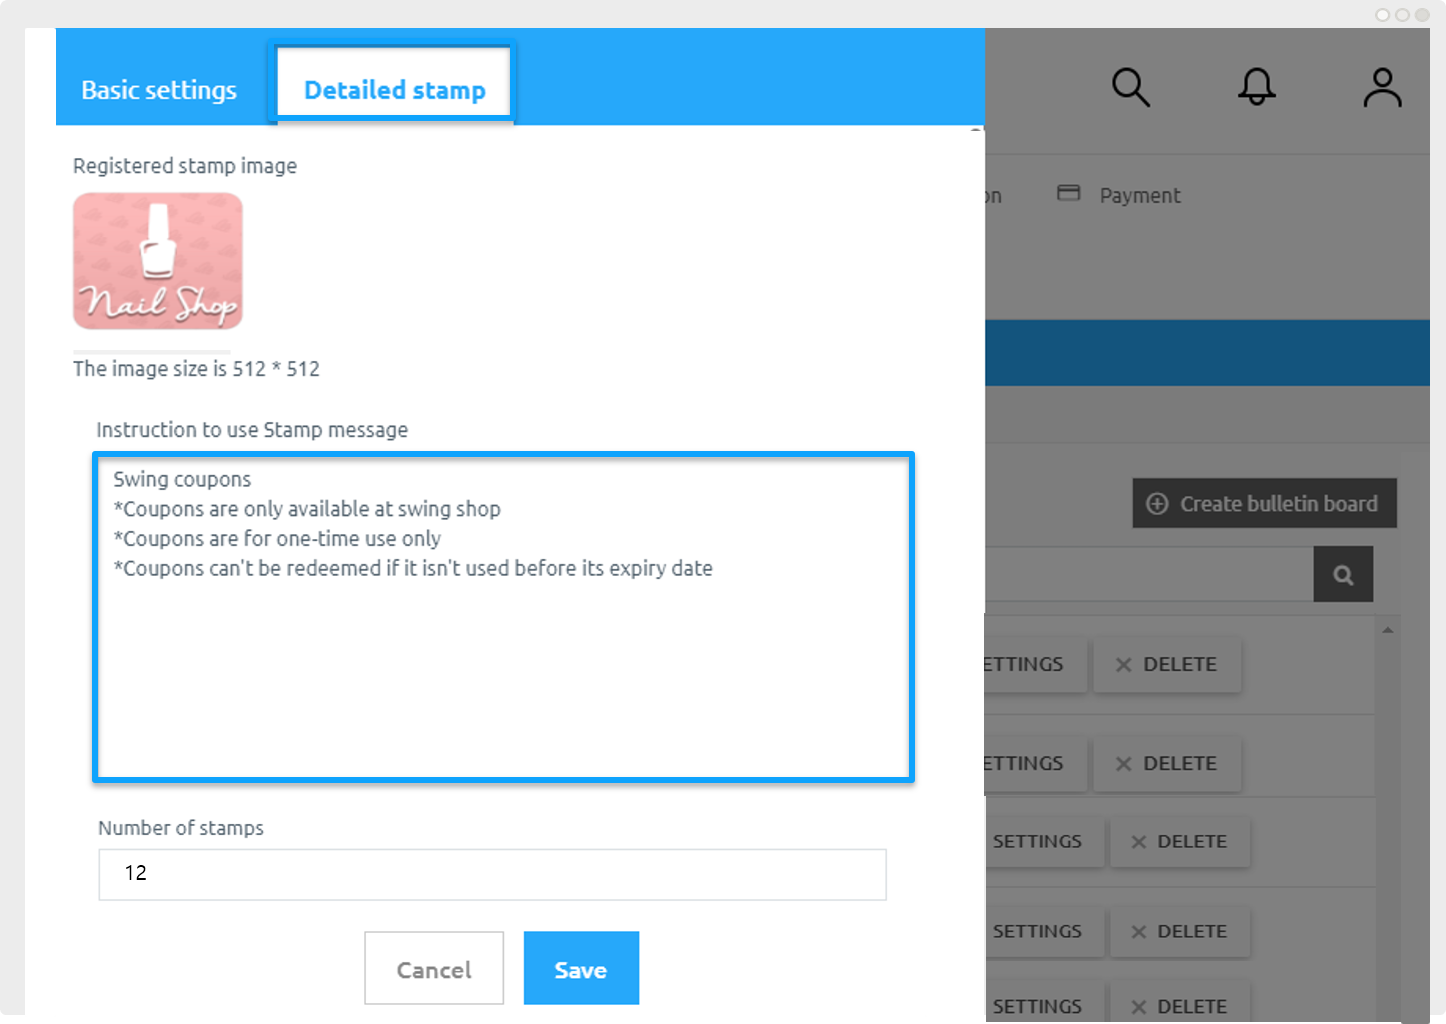
**★ Please check how to make a stamp board with animated images**
### **STEP.2 Apply Stamp Board to App**
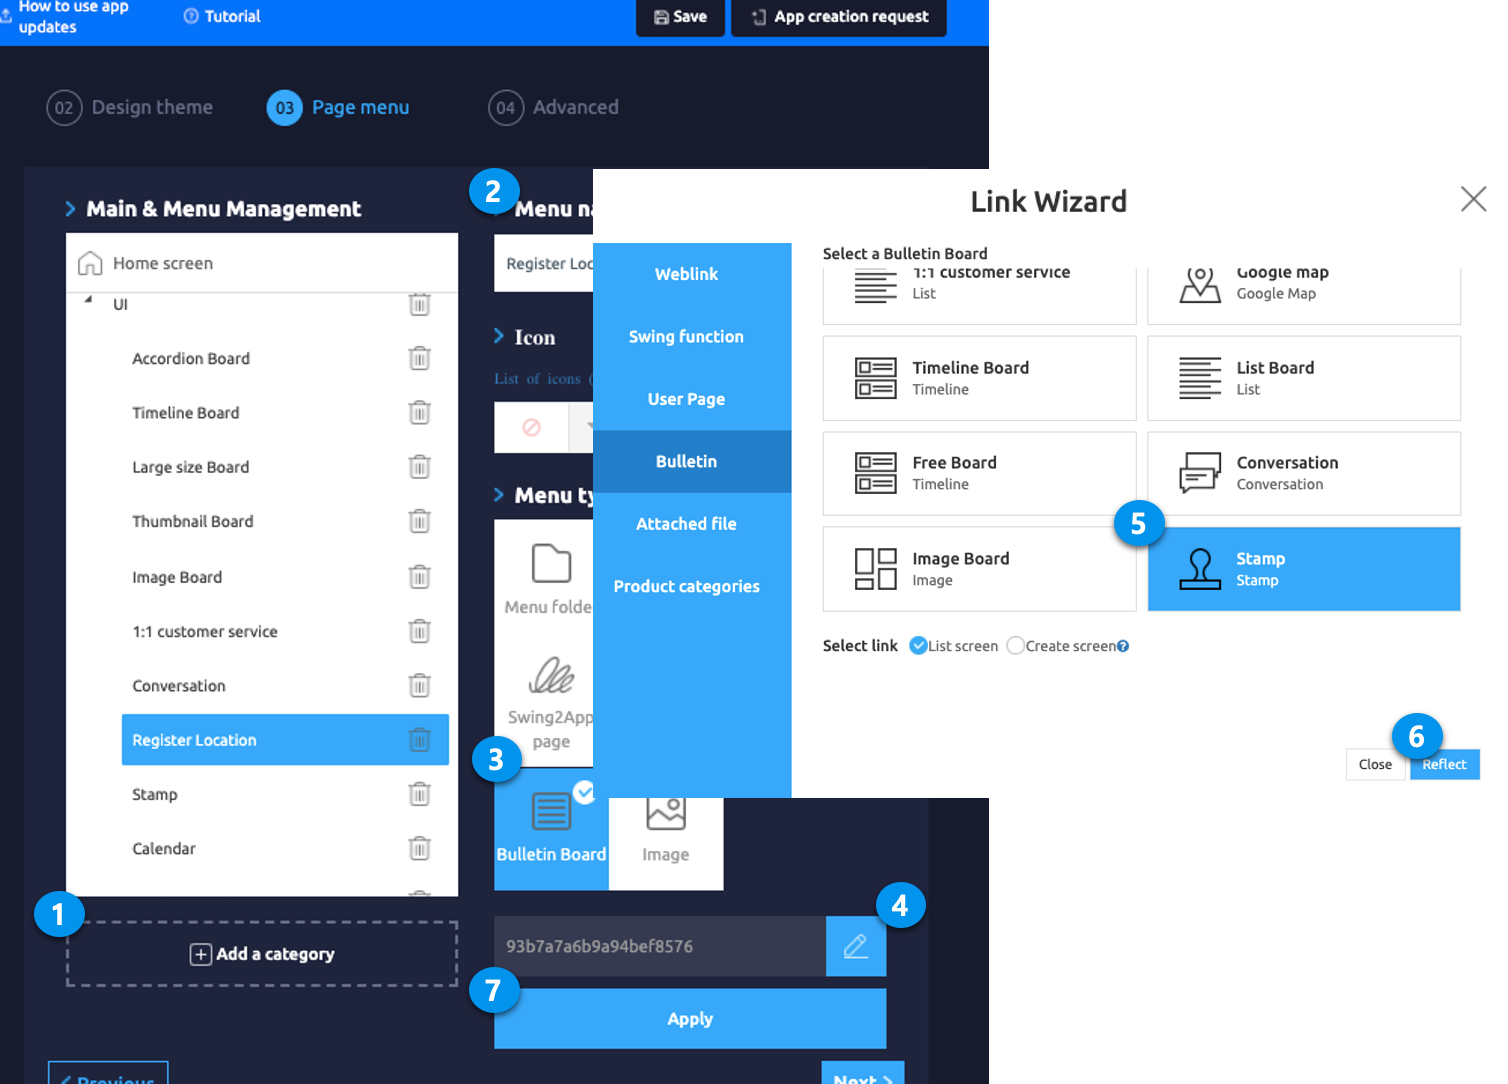
If you made a stamp on the bulletin board, it should be applied to the app. Go to **Maker(V2)** and click on **Page Menu.**
1\. From the menu set by default, click the **Add a category** to add a new menu.\
2\. Edit the name of the added item in **Menu Name.**\
3\. Select **Bulletin Board** in the **Menu Type.**\
4\. Click on **Link Wizard**(pencil icon).\
5\. Select the board from the list of Bulletin Boards in the Link Wizard window.\
6\. Click on **Reflect.**\
7\. Click on **Apply** and then **Save.**
### **STEP.3 Stamp Cycle**
We will show you how to put stamps on the app members.
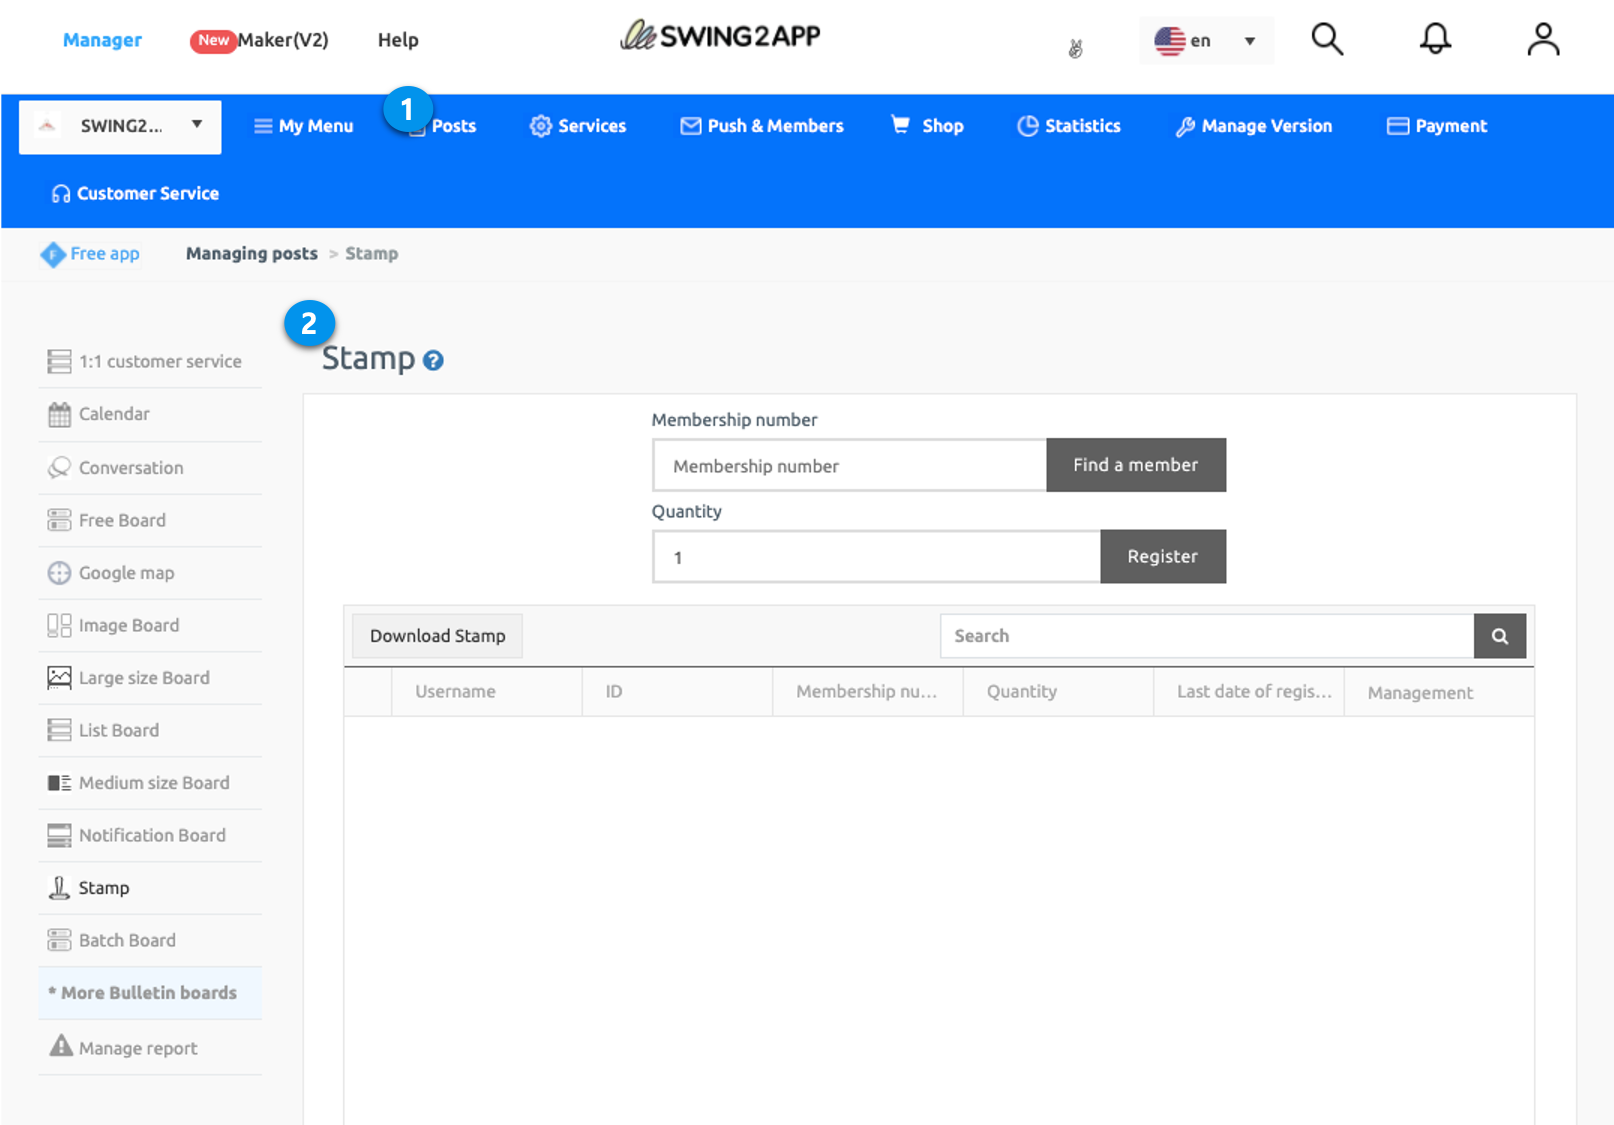
1. Go to **Manager** and select **Posts.**
2. Click on the Stamp bulletin board.
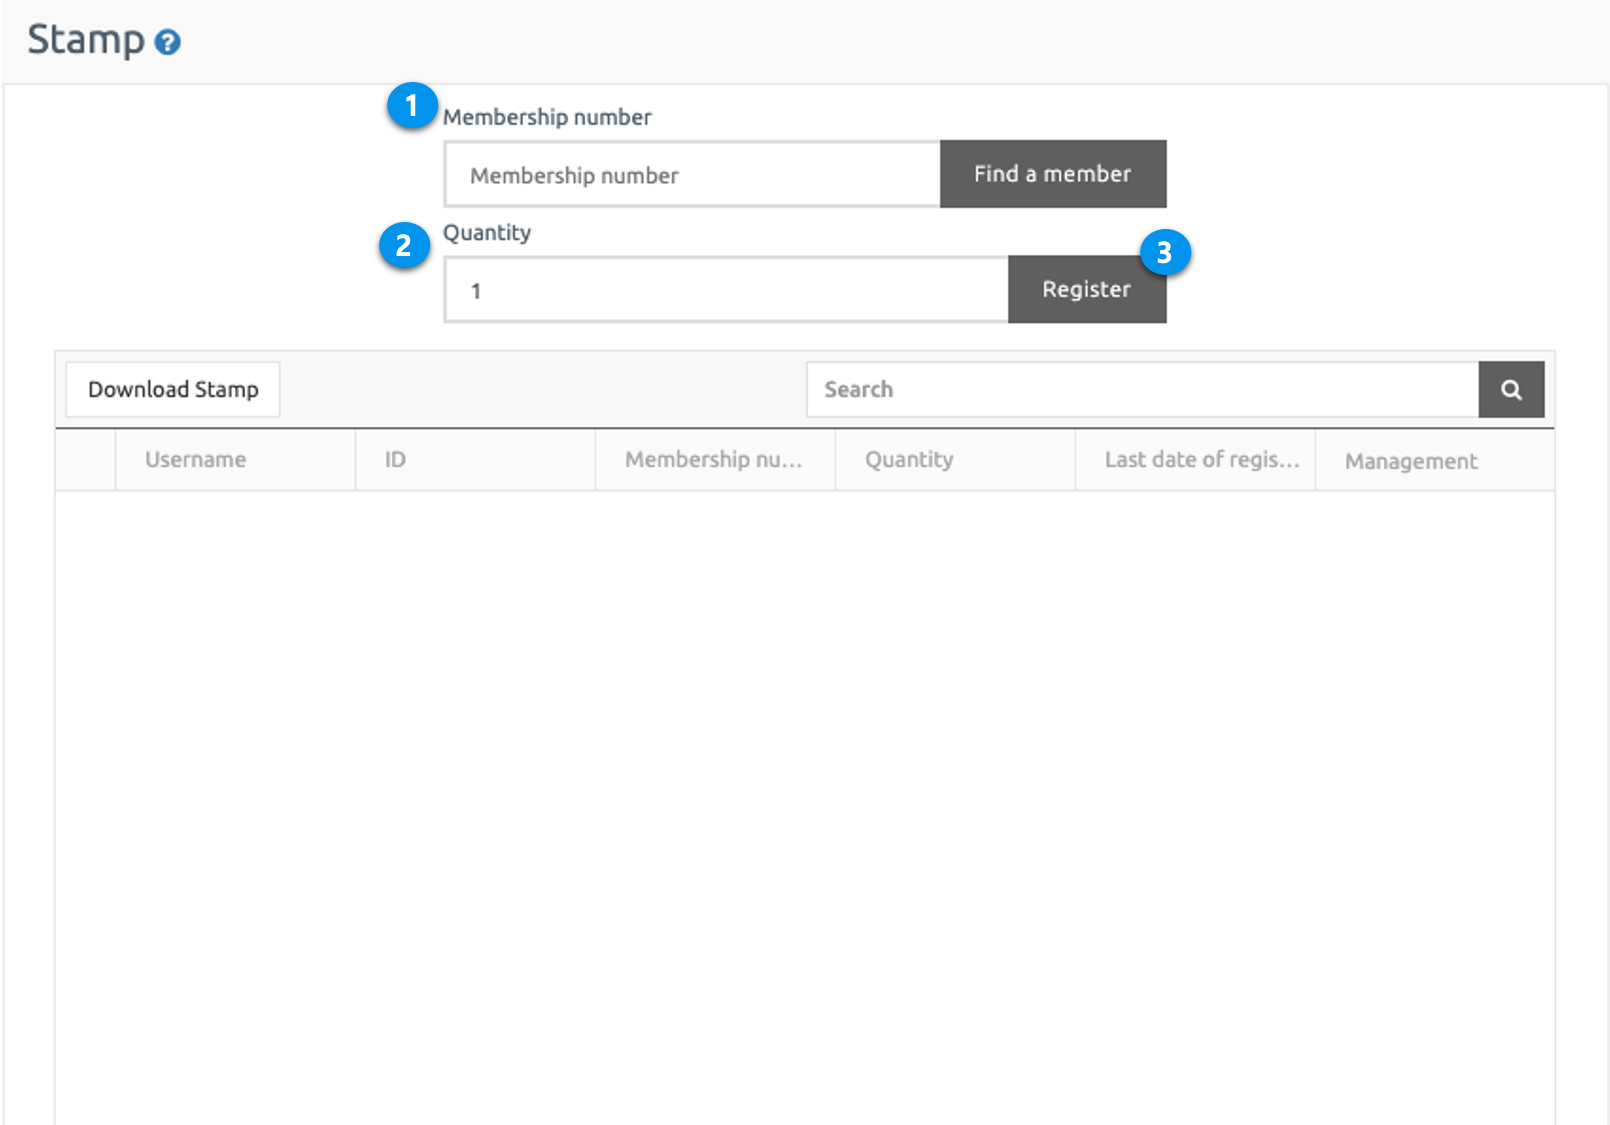
**1. How to add a stamp 1 – Add by membership number**
1. Enter the **Membership number**
2. Check the quantity to register the stamp
3. Click Register.
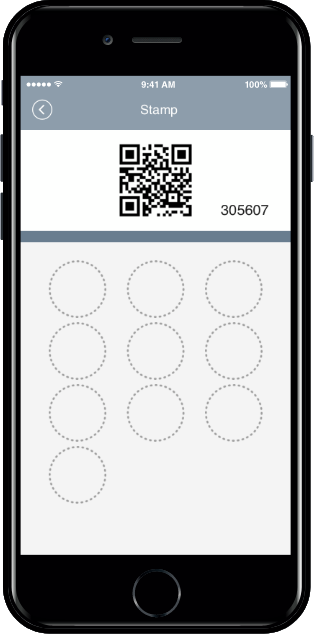
**↓↓ You can check the membership number for each user by looking at the app launch screen below.**
***
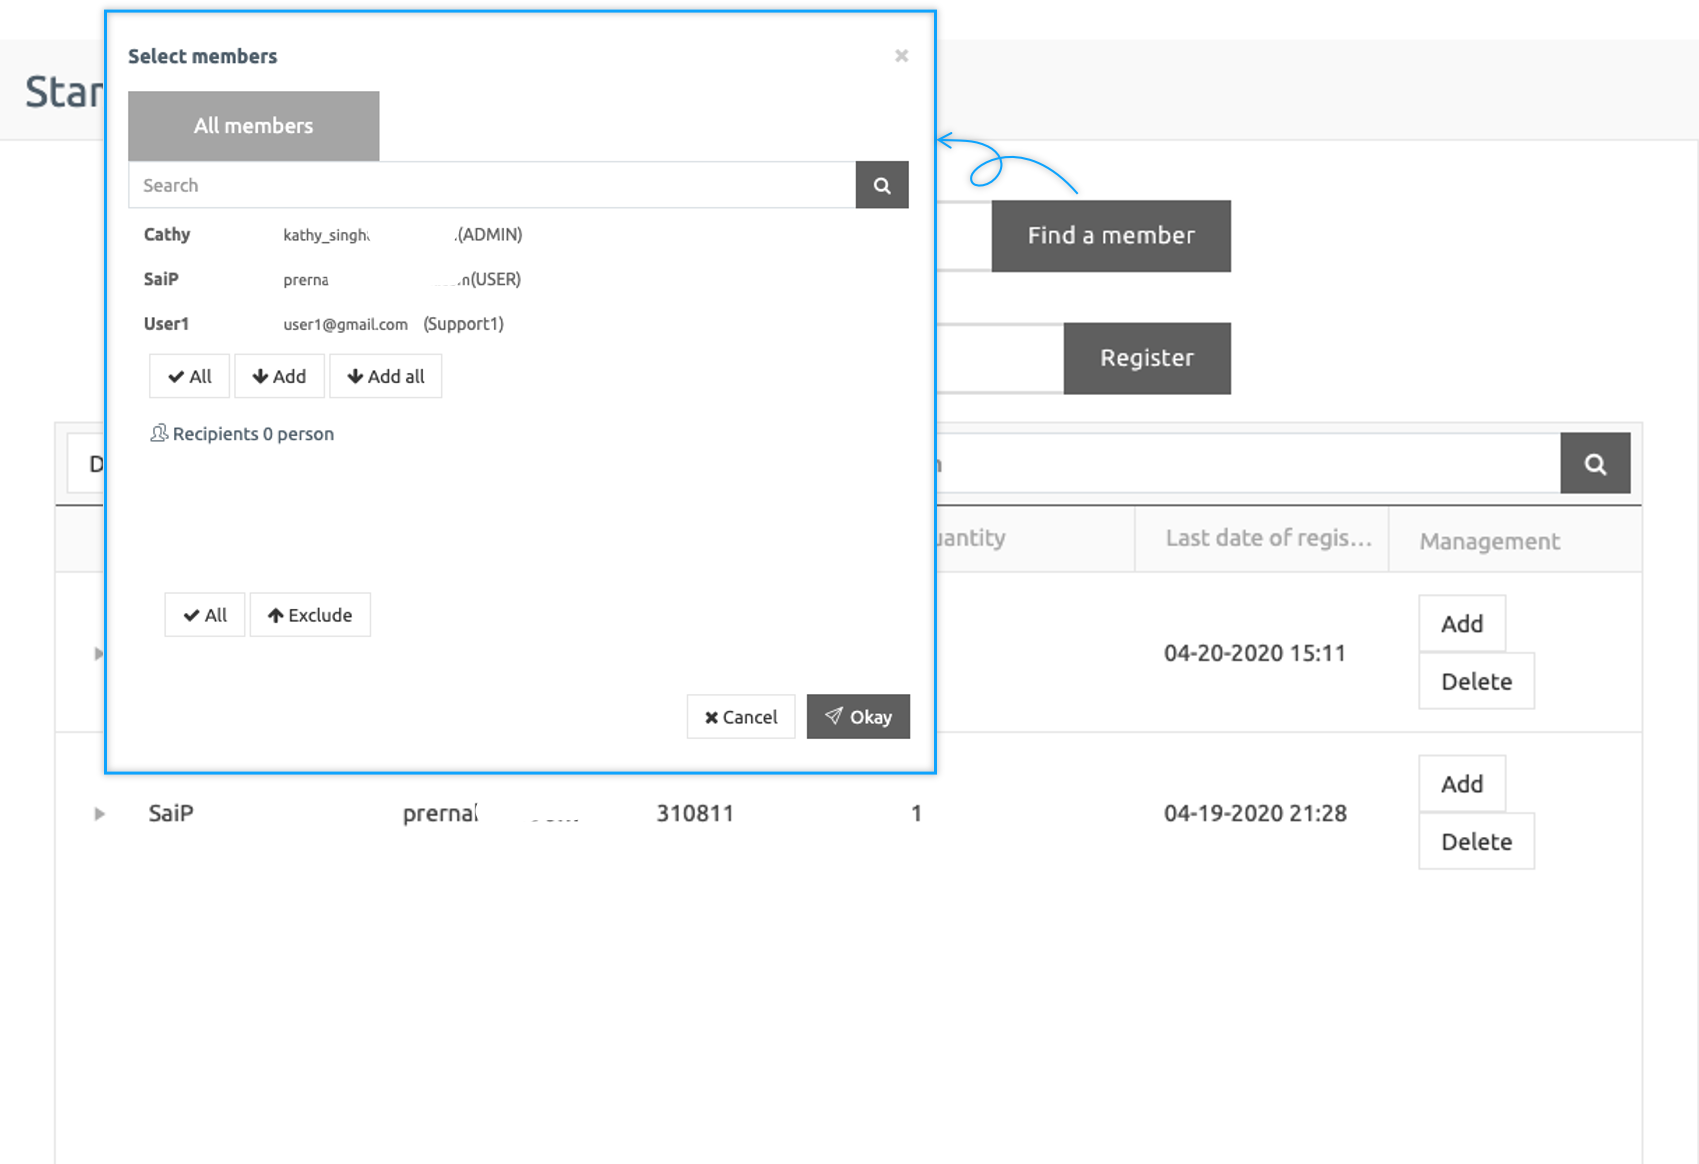
**2. How to add a stamp 2 – Add a stamp to the member finder**
If you are unable to verify your membership number right away, you can register using the second method-**Find Member.**\
If you click on the **Find Member** button, a list of members registered for the app will open.\
Search for a username, select the member, and register a stamp.
**3. How to add a stamp 3 – Adding a member stamp in the app administrator login**
**The third way to add stamps is for administrators to register stamps with QR code in the app.**
1. After running the app, go to Settings
2. Click on Administrator Login.
3. In Admin Log-in, go to Admin Menu.
4. Click on Add Stamp.

Reading with QR code allows you to scan your QR code image with the QR code reader embedded in Apps.
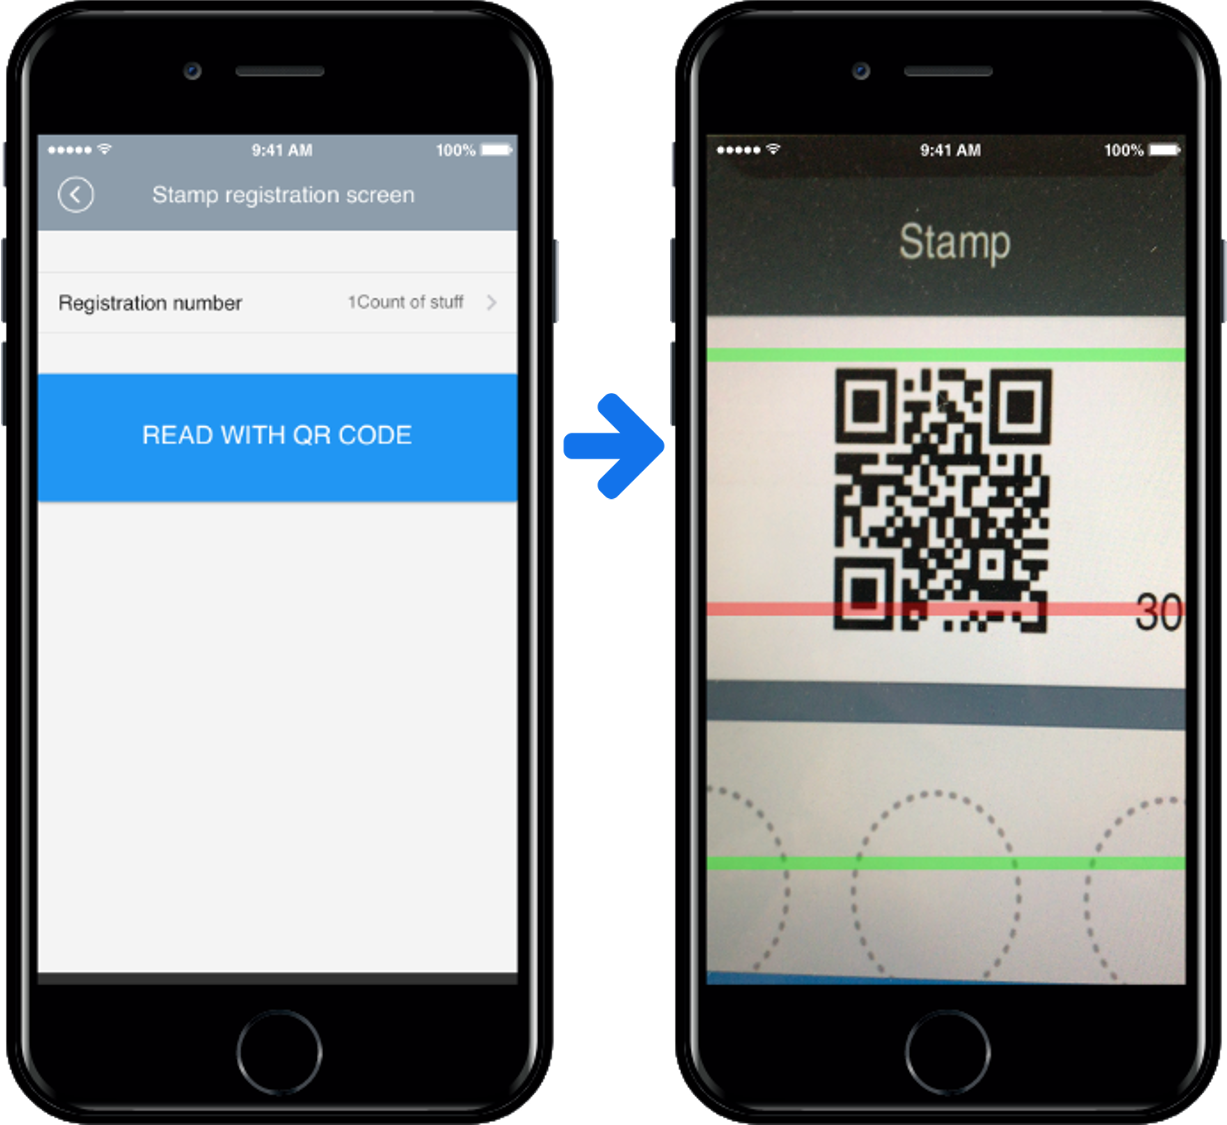
\*At this time, you have to open the stamp in your app to see the QR code image.
The user’s stamp is registered by executing QR code on the app manager menu – Stamp registration screen.
App Manager Menu – Stamp registration method can be found in the details below.
[**\[App Manager Menu: Go to Stamp Registration Manual\]**](/appguide/appoperation/appadministrator-stamp.md)
### **STEP.4 How to delete a stamp**
If you entered the wrong stamp quantity or reset the registered stamp,
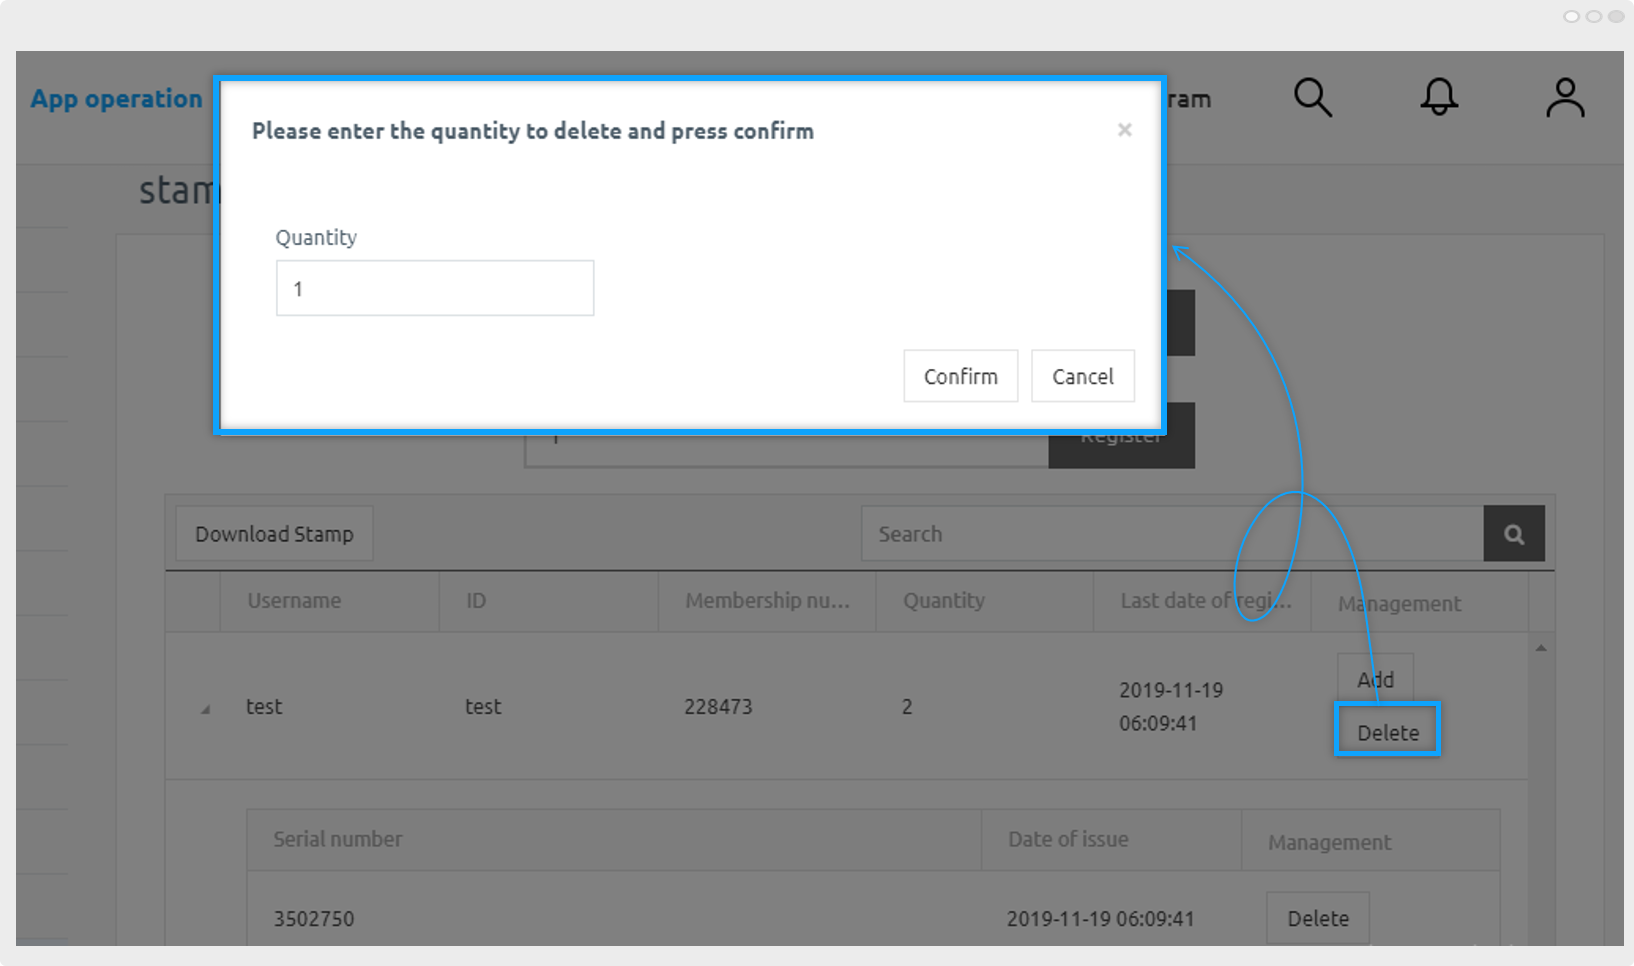
You can press the **Delete** button to delete as many quantities as you like, or you can delete all stamps.
-If you press the **Delete** button next to the member list of the stamp board, the quantity input window to be deleted appears.
-Enter the quantity to delete and press **OK.** The stamp will be deleted by that number.
-If you want to initialize the stamp, you can enter the total stamp and delete it.
***
**STEP.5 App Launch Screen**
On the bulletin board, QR codes and membership numbers will be issued randomly for each user.\
App administrators can add stamps to users with QR codes.\
You can add a stamp by registering your membership number on the web administrator page. How to use message input in bulletin board function – the detailed setting is placed at the bottom of the stamp screen.
When you add a stamp, the stamp is added as a quantity, just as the stamp in the coupon.\
The stamp image is also displayed as the image registered in the bulletin board function – detail setting.

**★Please check the image added to the stamp.**
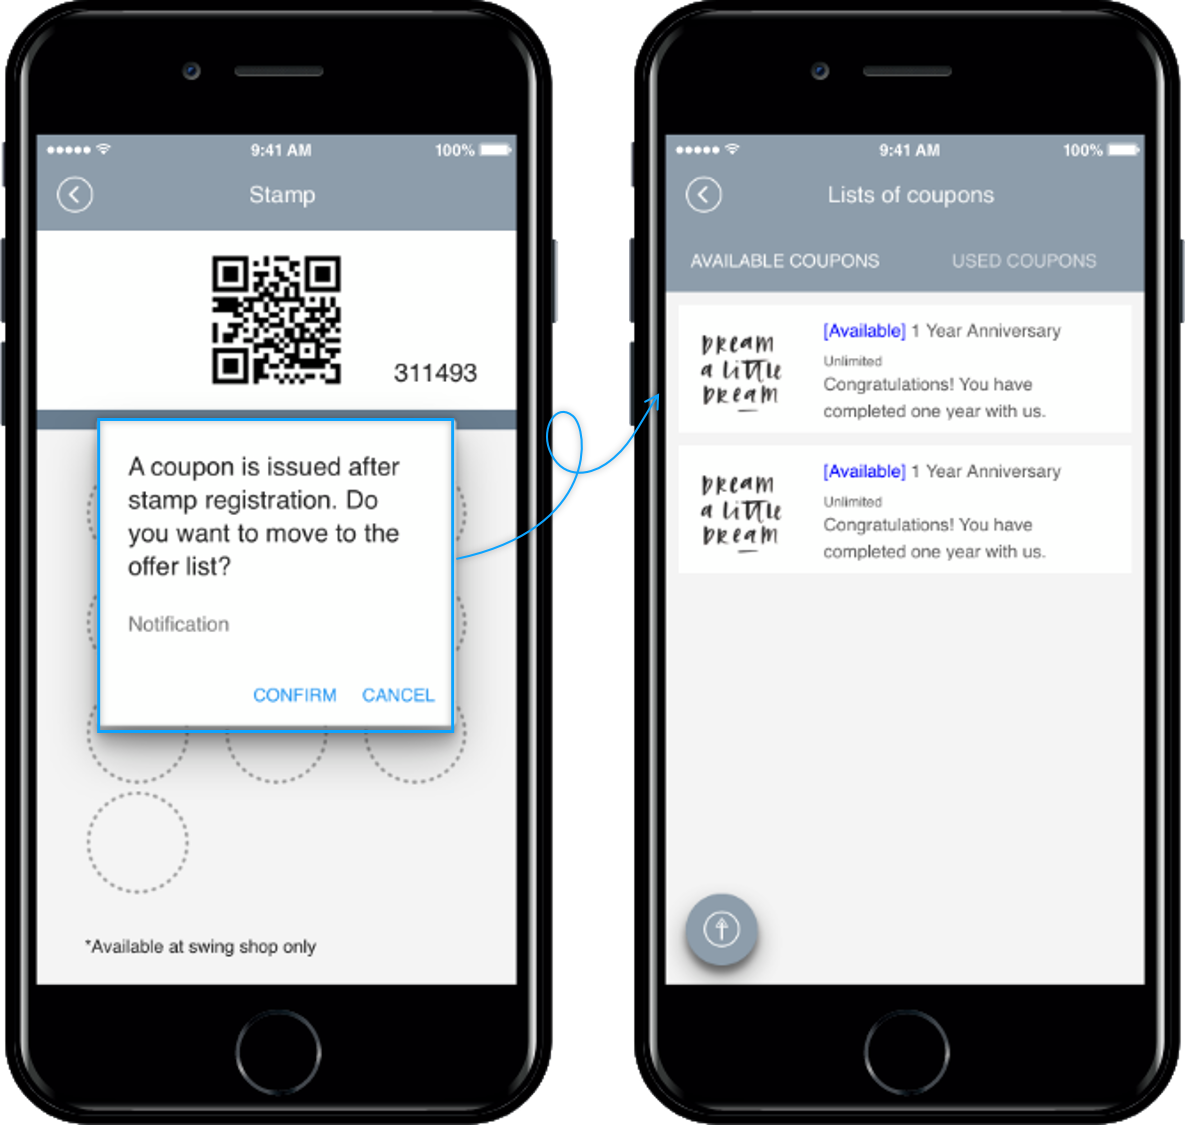
**▶ A coupon was issued when the stamp was completed**
Once the stamp registration is completed by the number set by the administrator, all stamps are reset (disappeared) and a pop-up window will appear stating that the coupon has been issued.
Select Confirm to see a list of coupons issued by your users.
**\*Instructions**
1. The number of the stamp is set to 10.\
You can edit the number of stamps in \[Stamp Details].
2. **If you check \[Issued coupon upon completion of stamp]**\
When the number is filled up by the specified stamp, the screen is automatically reset,\
The coupon set by the administrator is automatically issued to the user.
3. **If you do not check \[Issued coupon upon completion of stamp]**
If you take all the stamps provided by the app, your stamp is not automatically reset.
It must be initialized manually by the administrator to set again.
You can delete the number of registered stamps by pressing the \[Delete] button on the web admin page as described above.