> For the complete documentation index, see [llms.txt](https://documentation.swing2app.com/llms.txt). Markdown versions of documentation pages are available by appending `.md` to page URLs; this page is available as [Markdown](https://documentation.swing2app.com/manual/maual/pagemenu/editor-page.md).
# How to create HTML editor page
**What is the HTML Editor page?**
One of the functions provided by the user page of the swing2app operation page is a menu that allows users to create their own web pages.
You can freely place your posts and images as if you were typing them into a blog or café.
You can apply web links, videos, text effects, and more.
The biggest feature is that you can freely create the style you want.

 **HTML Editor page Apply Step**
### **STEP.1 How to create HTML editor page**
**1. Select Add/Manage HTML Editor Page**
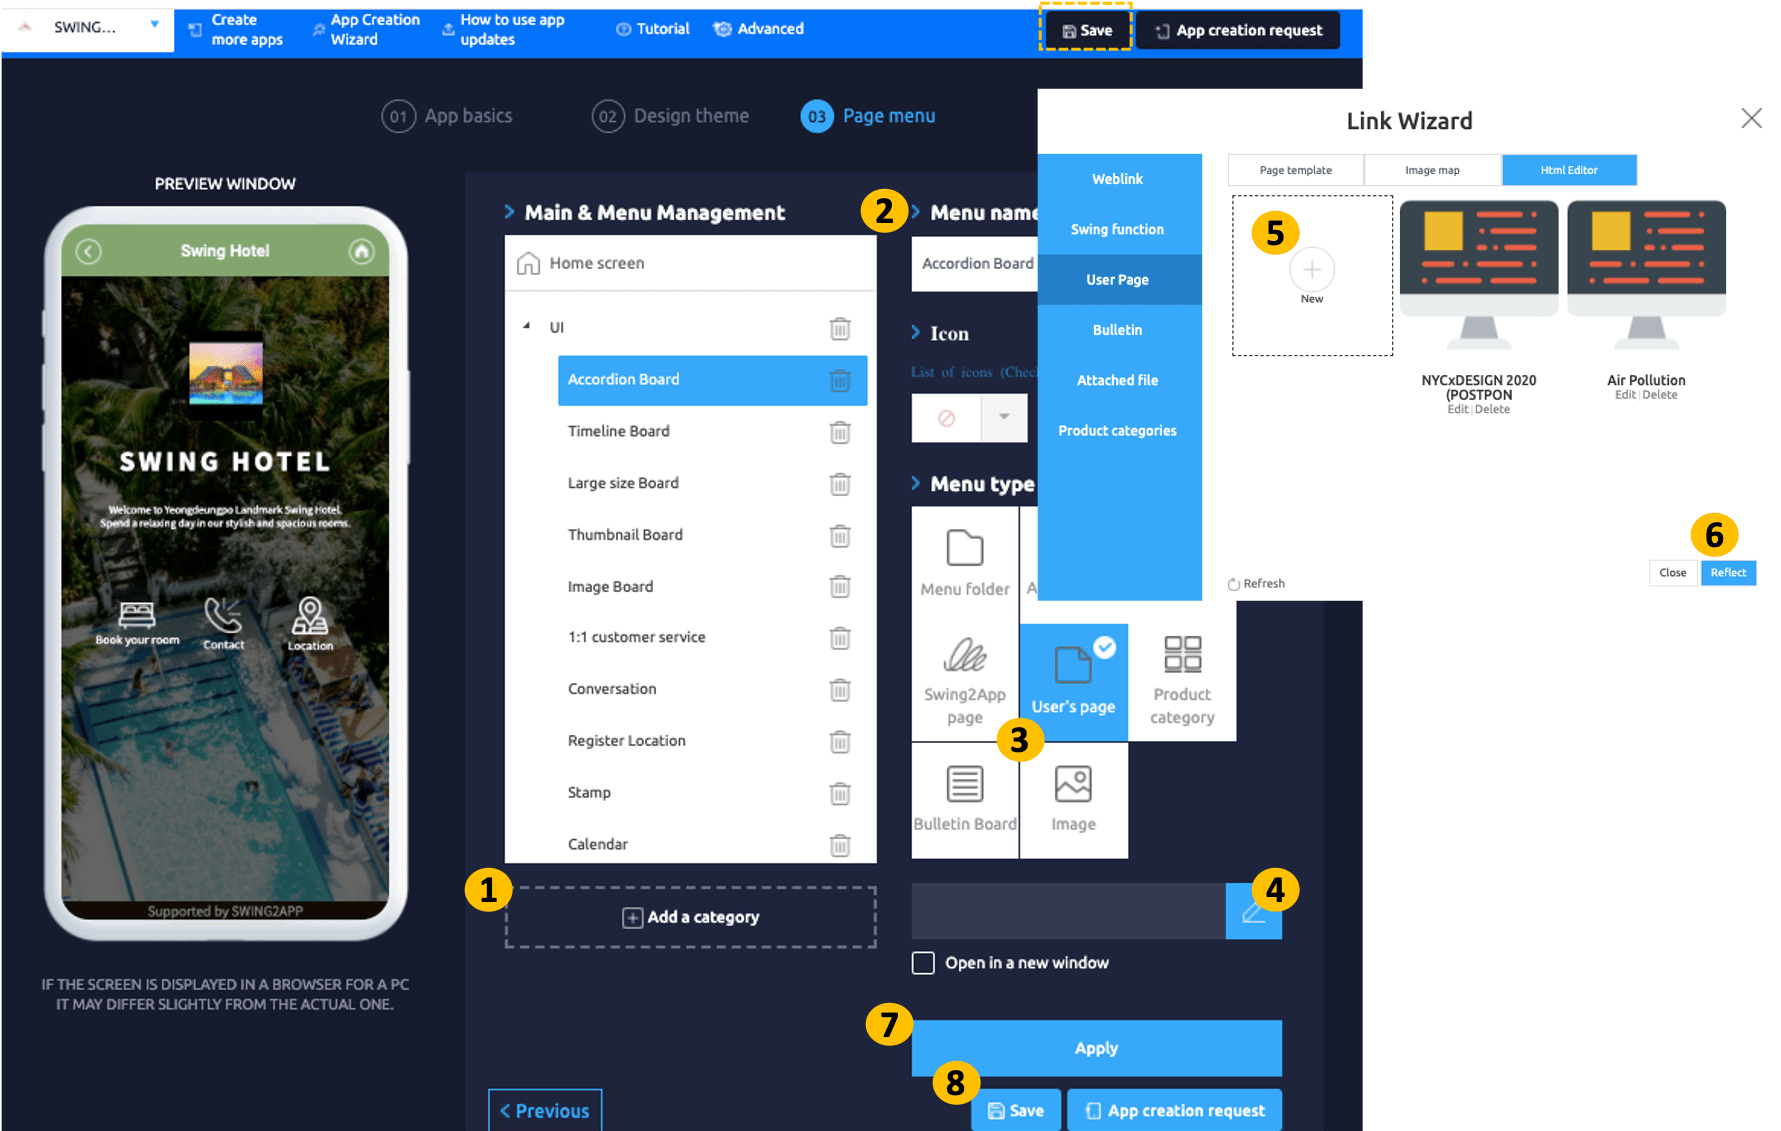
On the **Maker(V2)** page – go to the **Page menu** level.
1. Click **Add a category**.
2. You can change the menu name at the top of the home screen (unless you change the name, it will be displayed as the app name.)
3. Select the **User’s Page** menu in the **menu type.**
4. Click the **Link Wizard.**
5. When the Link wizard window appears, select the **HTML Editor** and click **New.**
6. Click on **Reflect.**
7. Press the **Apply** button.
8. Click on **Save.**
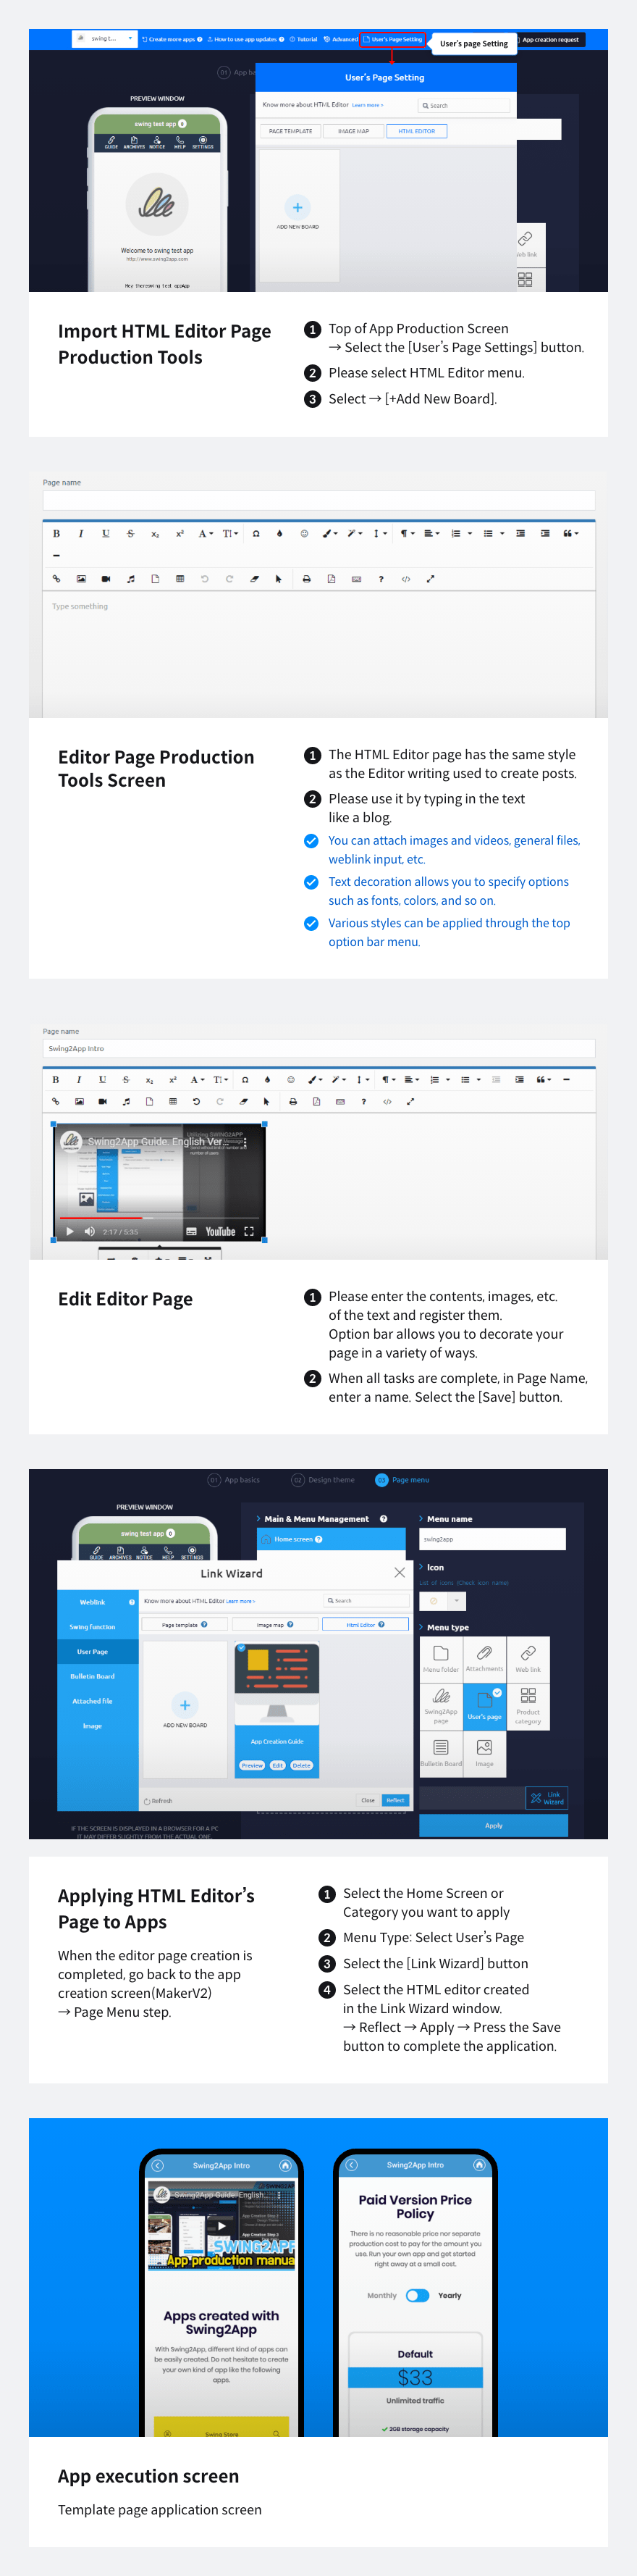
**2. Editor page creation screen**
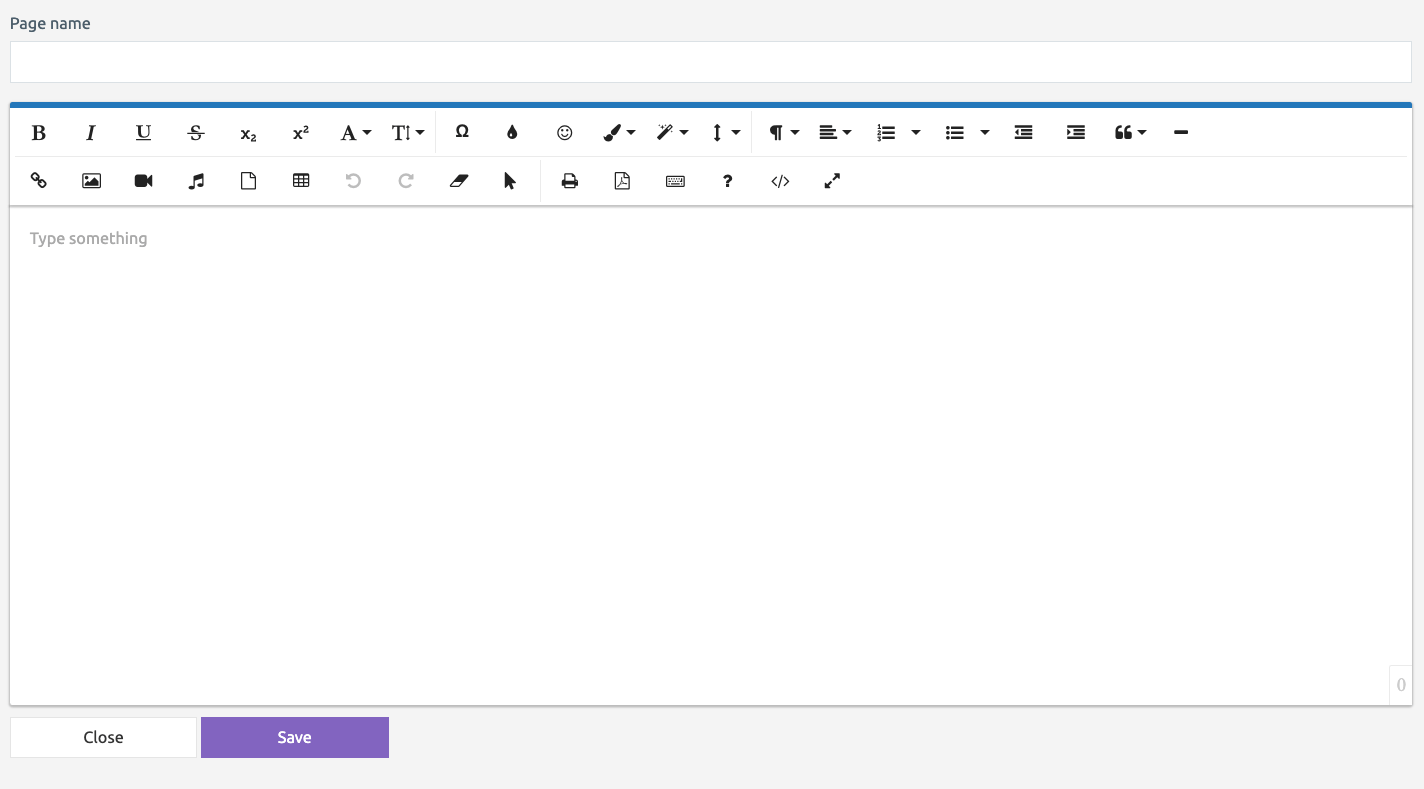
Select Add/Manage HTML Editor Page to open the Creator Site as shown in the image above.
HTML editor pages are the same style as writing posts provided by swing2app.
It’s the same as how to write a post, so it’s not hard to use.
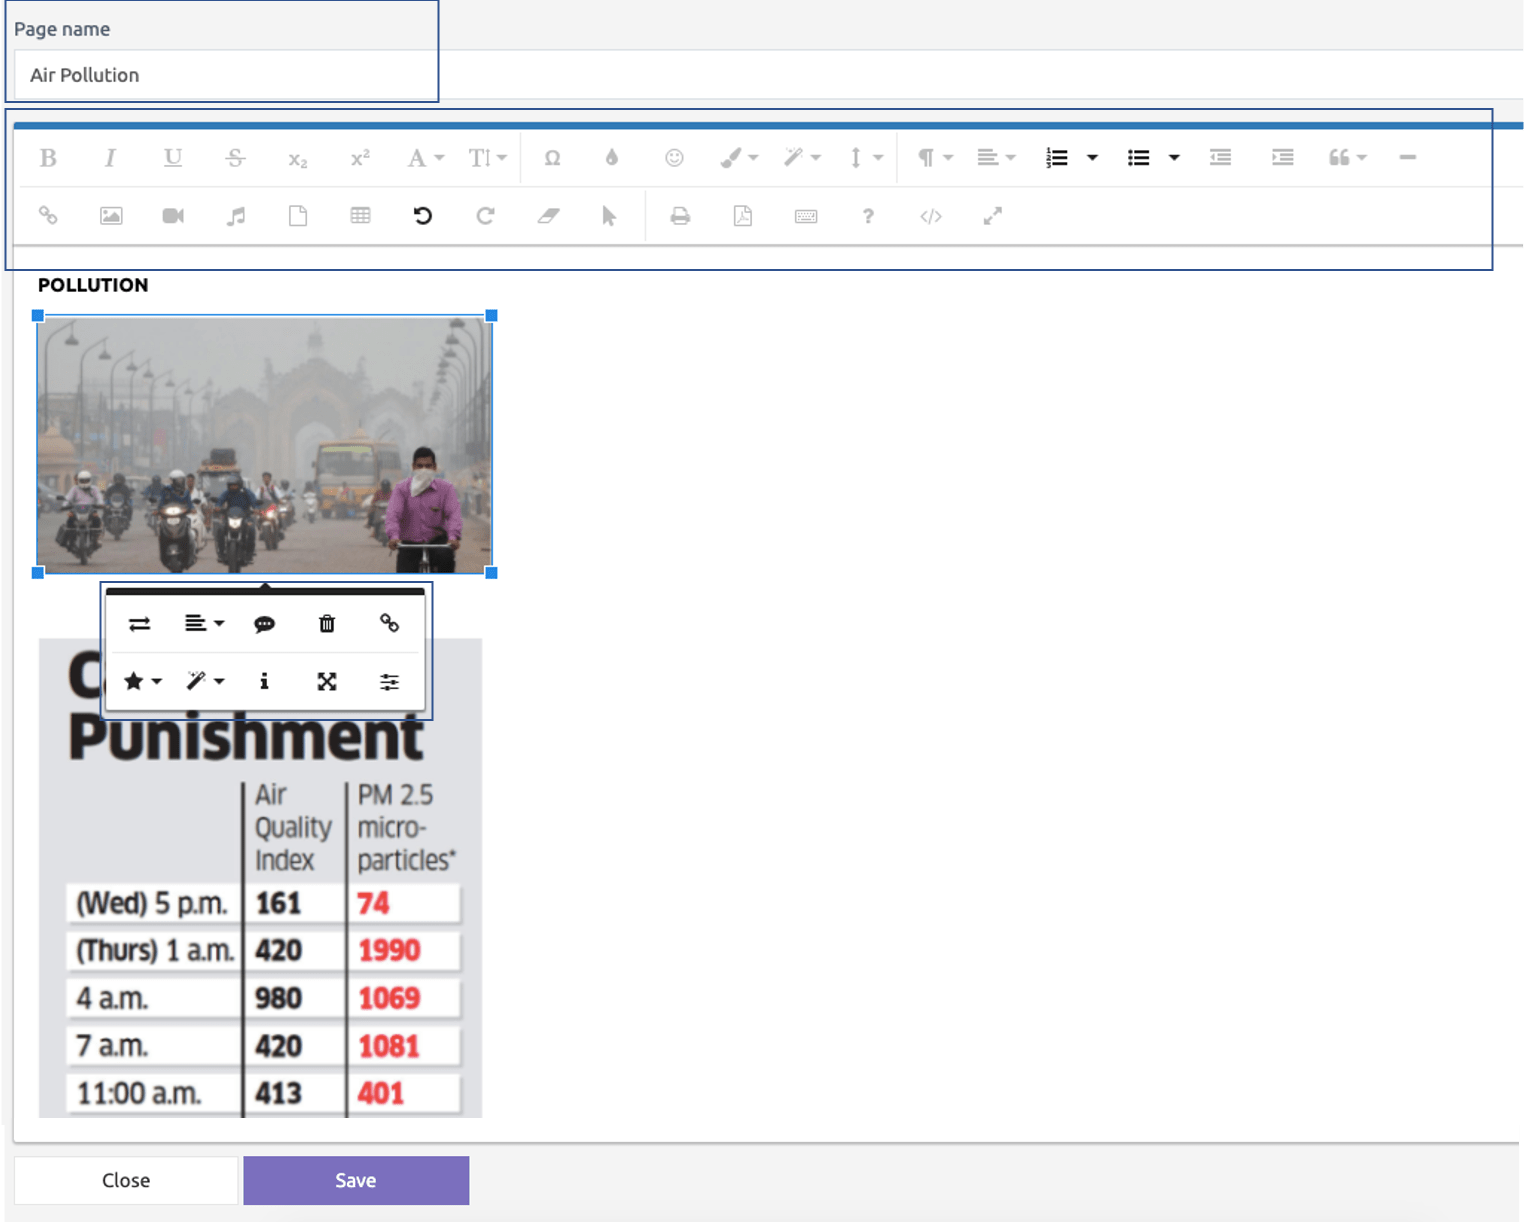
You can work in the style you want on the Editor Page Creator site.
> **You can attach images, videos, and animated images.**
>
> **And because you can decorate text, you can specify options such as font and color.**
>
> **You can apply various styles through the tool bar menu at the top.**
**When the editor page is completed, press the save button.**
\*The page name is displayed as the screen title on the app launch screen.
### **STEP.2 Apply to Editor Page App**
1. Select the menu item for which you want to apply HTML page.
2. You can change the menu name at the top of the home screen.
3. Select the **User’s Page** menu in the **menu type.**
4. Click the **Link Wizard.**
5. Select the newly added editor page in the User page window and select the ‘Apply’ button.\
(If you do not see the added editor page, refresh it.)
6. Click on **Reflect.**
7. Press the **Apply** button.
8. Click on **Save.**

When the editor page production is completed, please come back to the app production page – page menu.
\*If you place the editor page in the ‘home screen’, select ‘home screen’ in the main menu.
If you place a page in the menu, you can add a new menu by clicking the \[Add] button.
In this case, place the editor page on the home screen.
1. **Select Home screen**
2. **Select User Page**
3. **Click Link Wizard button**
4. **Select the newly added editor page in the User page window and select the ‘Apply’ button.**\
\&#xNAN;**(If you do not see the added editor page, refresh it.)**
5. **Select the Apply button at the bottom and press the Save.**
**You can check the editor page reflected through the app virtual machine.**
**Make sure your video plays well, and if you select a link to a web link, make sure you’re going to a linked web page.**
Below, we’ll show you some examples of how to apply the editor’s page, so please check.
### **STEP.3 Editor Page Application Screen**
**1. Web page style**
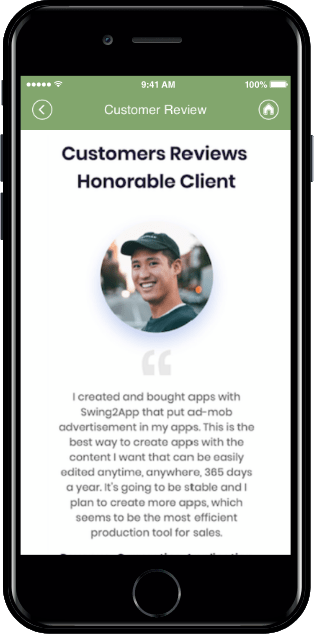
You can even create a web page style by placing one large image.
You can create a promotional image and register the image, and apply a web link (site URL) to set it to go to the linked site when you select the image.
**2. Blog Style**
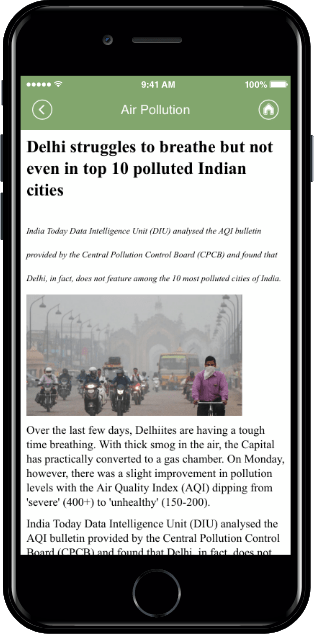
You can freely arrange text and images like a blog style.
You can enter text and register an image to create it.

You can also register your video.
\
\&#xNAN;**\[Editor page production]**
Editor pages can be customized to your style.
1. You can place an image and create it like an image page.
2. You can freely attach posts and images as if you were creating a blog post, and apply a video or web link. So, please plan on how to create it in advance and use the menu.