> For the complete documentation index, see [llms.txt](https://documentation.swing2app.com/llms.txt). Markdown versions of documentation pages are available by appending `.md` to page URLs; this page is available as [Markdown](https://documentation.swing2app.com/manual/appmanage/service/coupon.md).
# Coupon Management: Create and Issue Coupon
**Manage Coupon: How to create a coupon and issue it to a user**
The coupon is a menu where an administrator sends and manages coupons to the member using the app.
You can create your coupon, a to-do coupon, and product vouchers, etc. and you can share coupons by sending them to members.
We will provide detailed manuals on coupon management, including how to create coupons, how to issue coupons to users, app launch screens, and coupon processing.
### **STEP.1 Create Coupon**
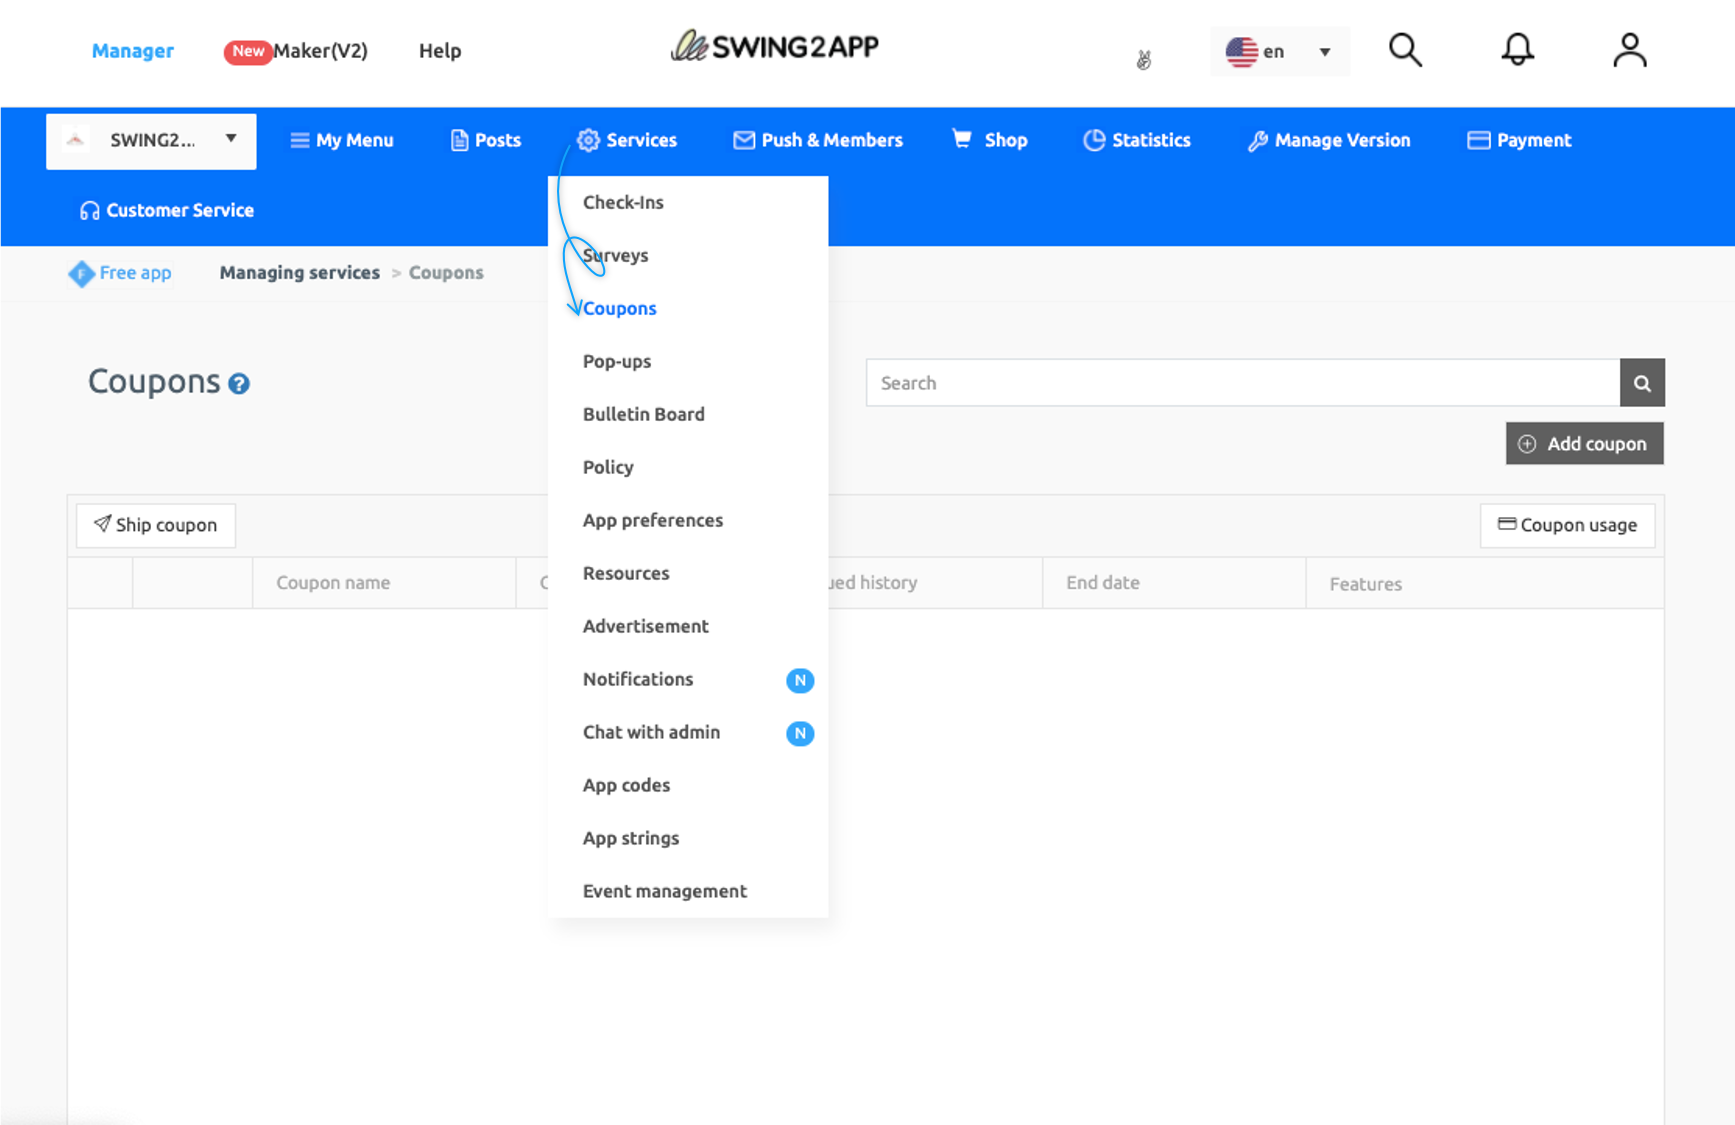
Please follow below instructions to go to Coupons:
1. Go to **Manager.**
2. Select **Services.** A drop-down list will open.
3. Click **Coupons.**
Please follow the below instructions to create Coupons:
On Coupons screen, click **Add Coupons.** A Coupon information window will open and enter the information.
1. Enter Coupon name.
2. Enter Coupon content.
3. Select the validity of the coupon either by selecting the date and time or checking Unlimited.
4. Upload image for the coupon.
5. Select **Save.**
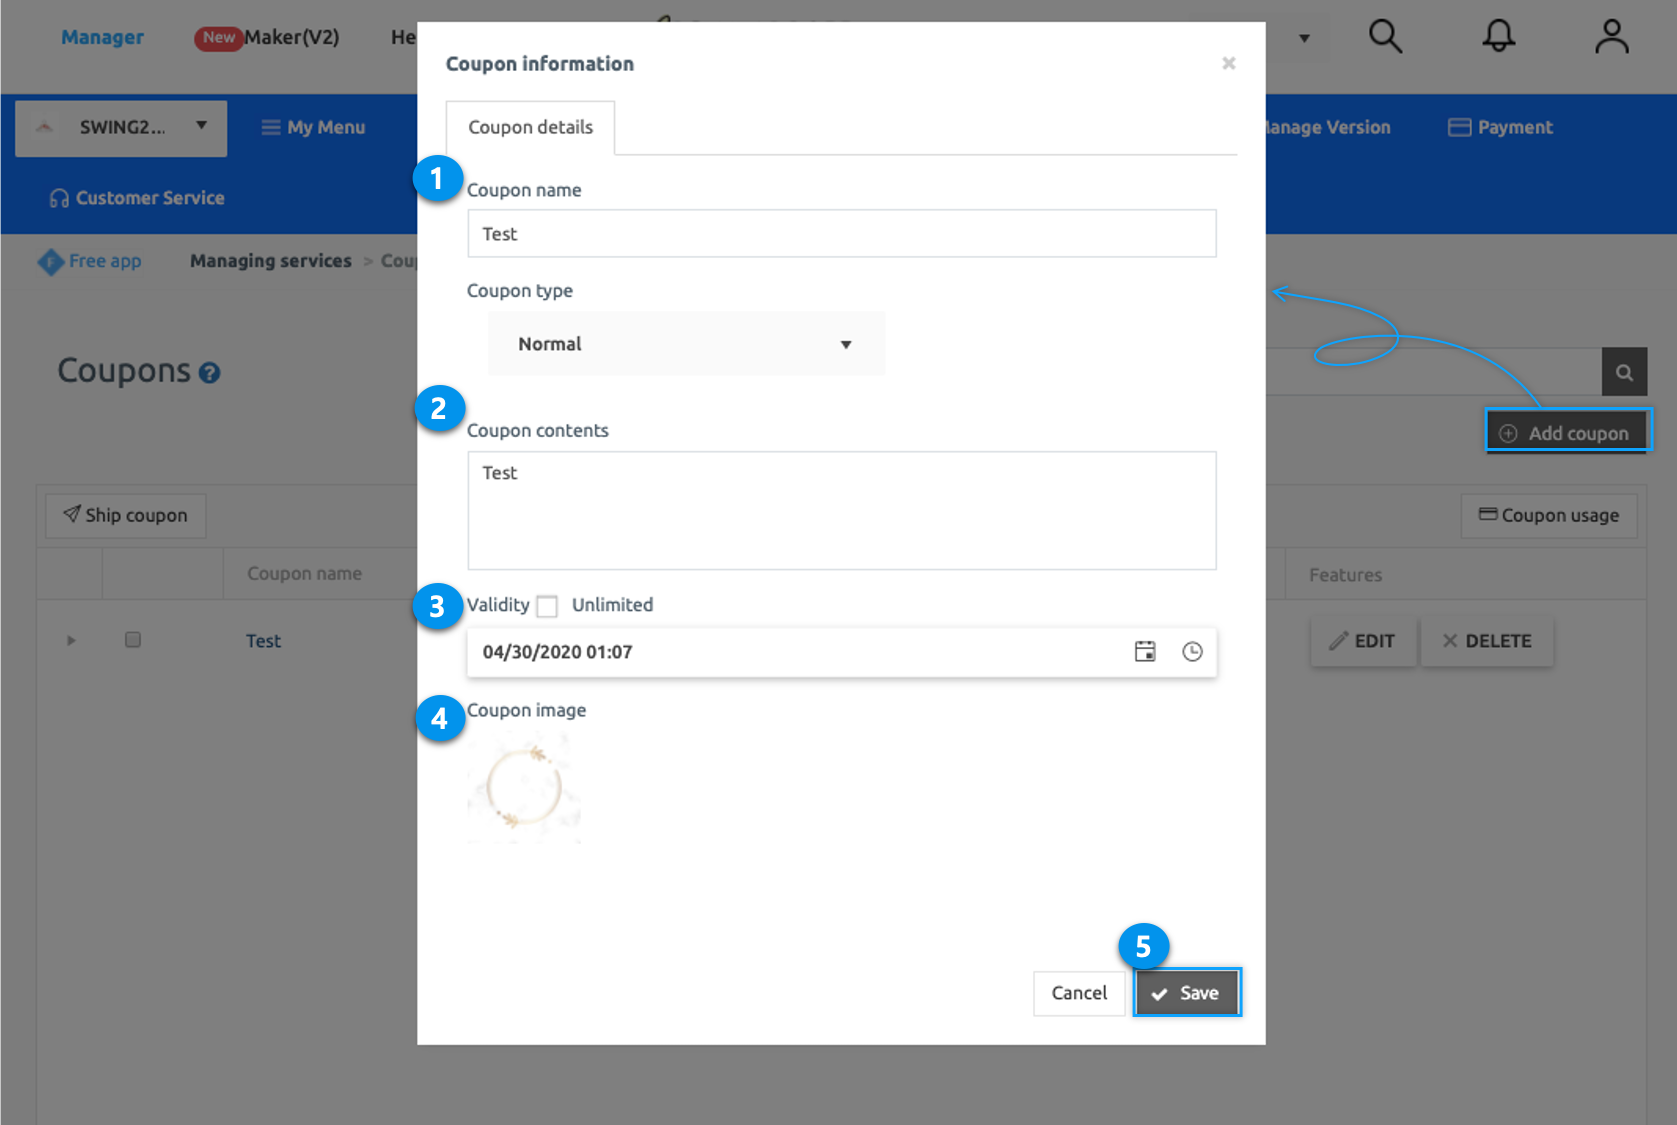
**\*You can also set unlimited coupon validity. You can set the effective date and time by selecting the calendar icon and the clock icon.**

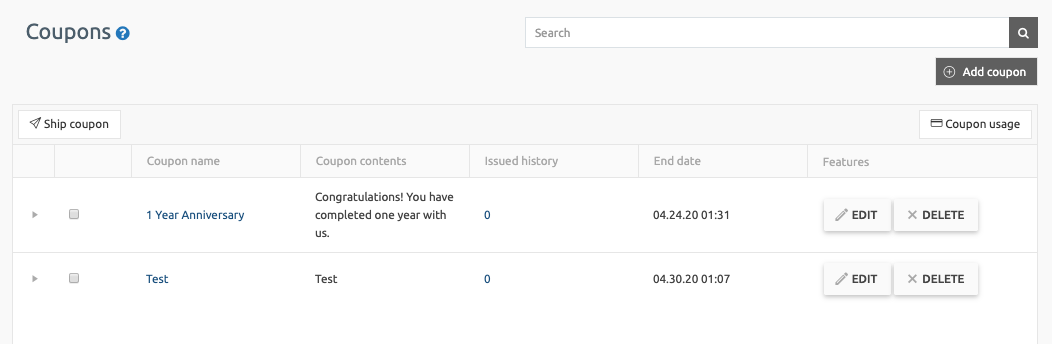
In the coupon table, the user can check the created coupon.
* Users can also edit or delete your coupon click **Edit** or **Delete.**
* Users can check the issued coupon history, so the user can manage all the coupons created.
### **STEP.2 Send Coupon**
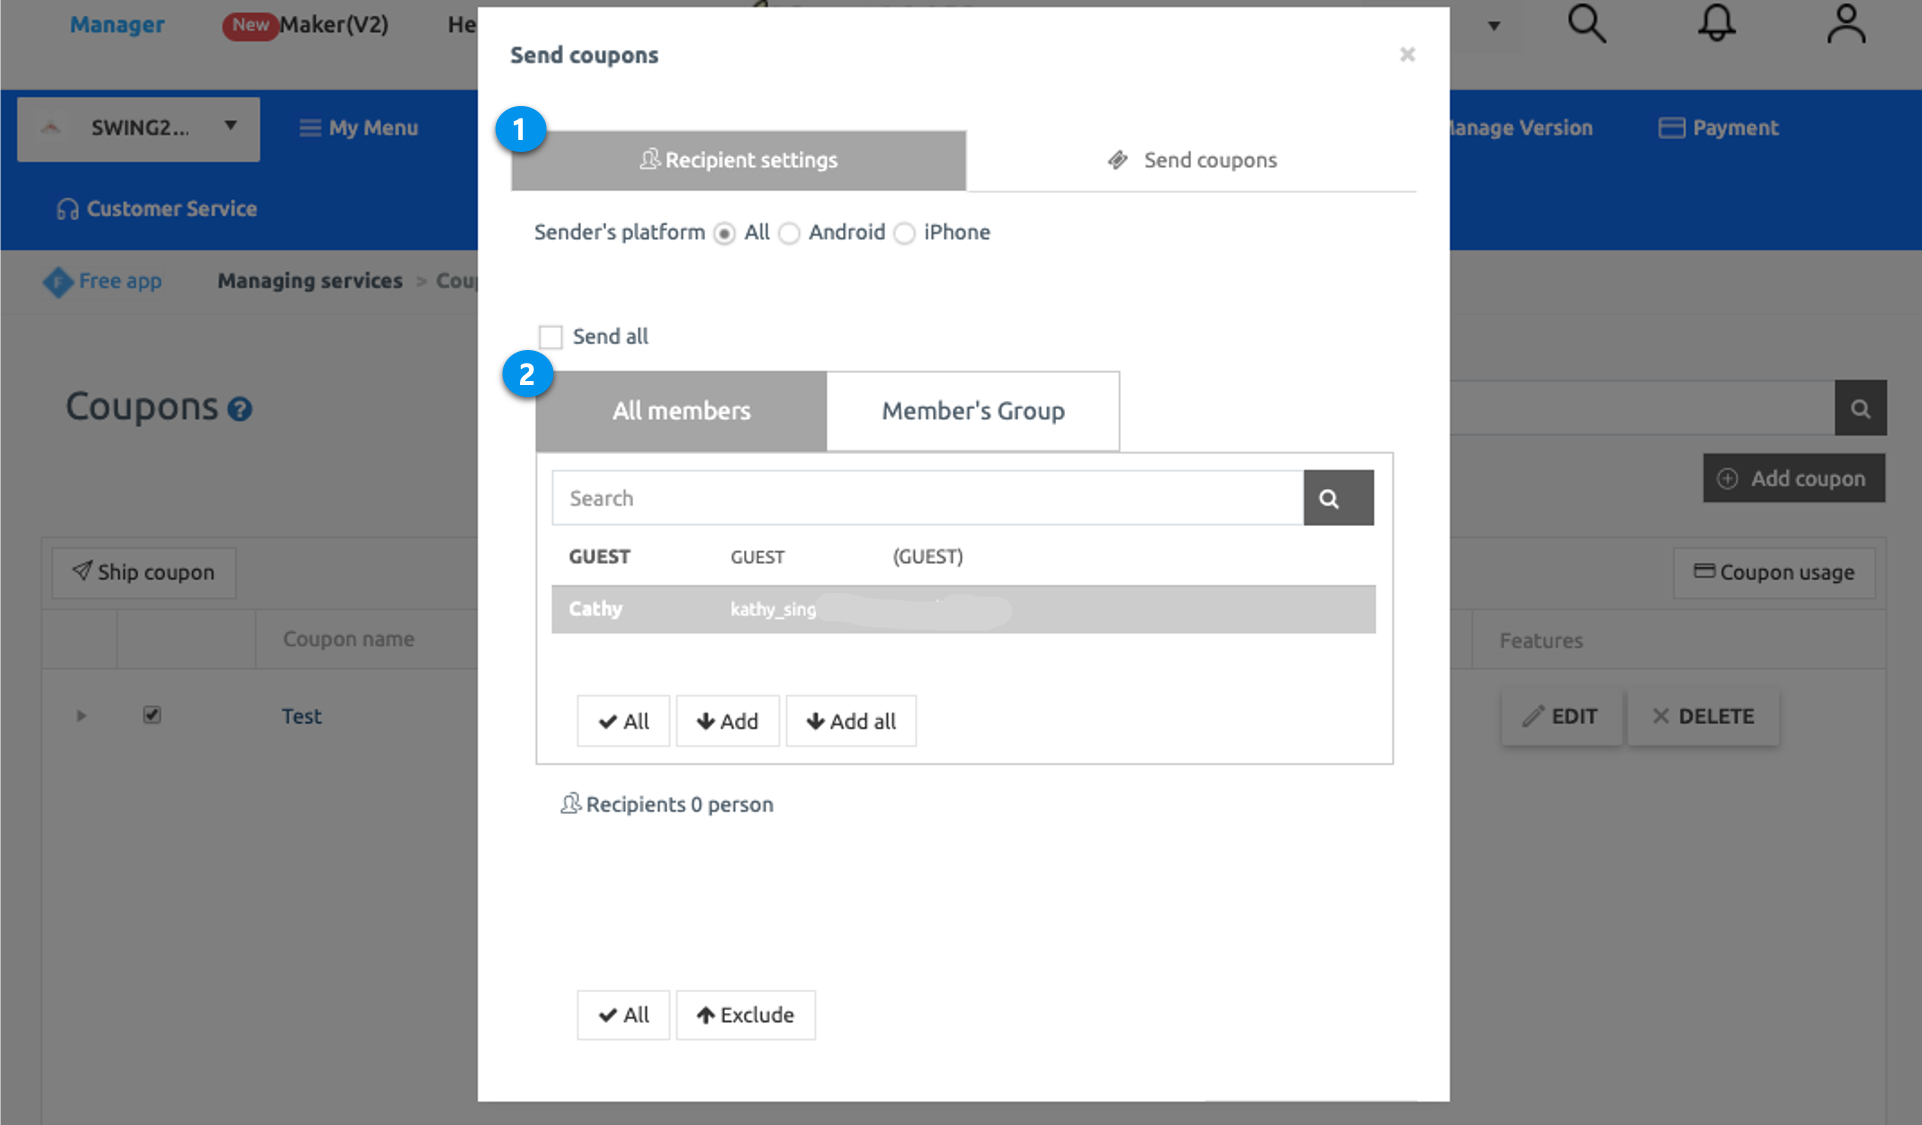
Select the coupon you wish to send. Then click **Ship Coupon** on the top left corner of the coupon table. Send Coupon window will open. Now please follow the below instructions to send coupons.
1. Select Recipient Settings
2. Select the member you want to send the coupon.
\*Member can send to all users. Users can select and send only to the users you want to.
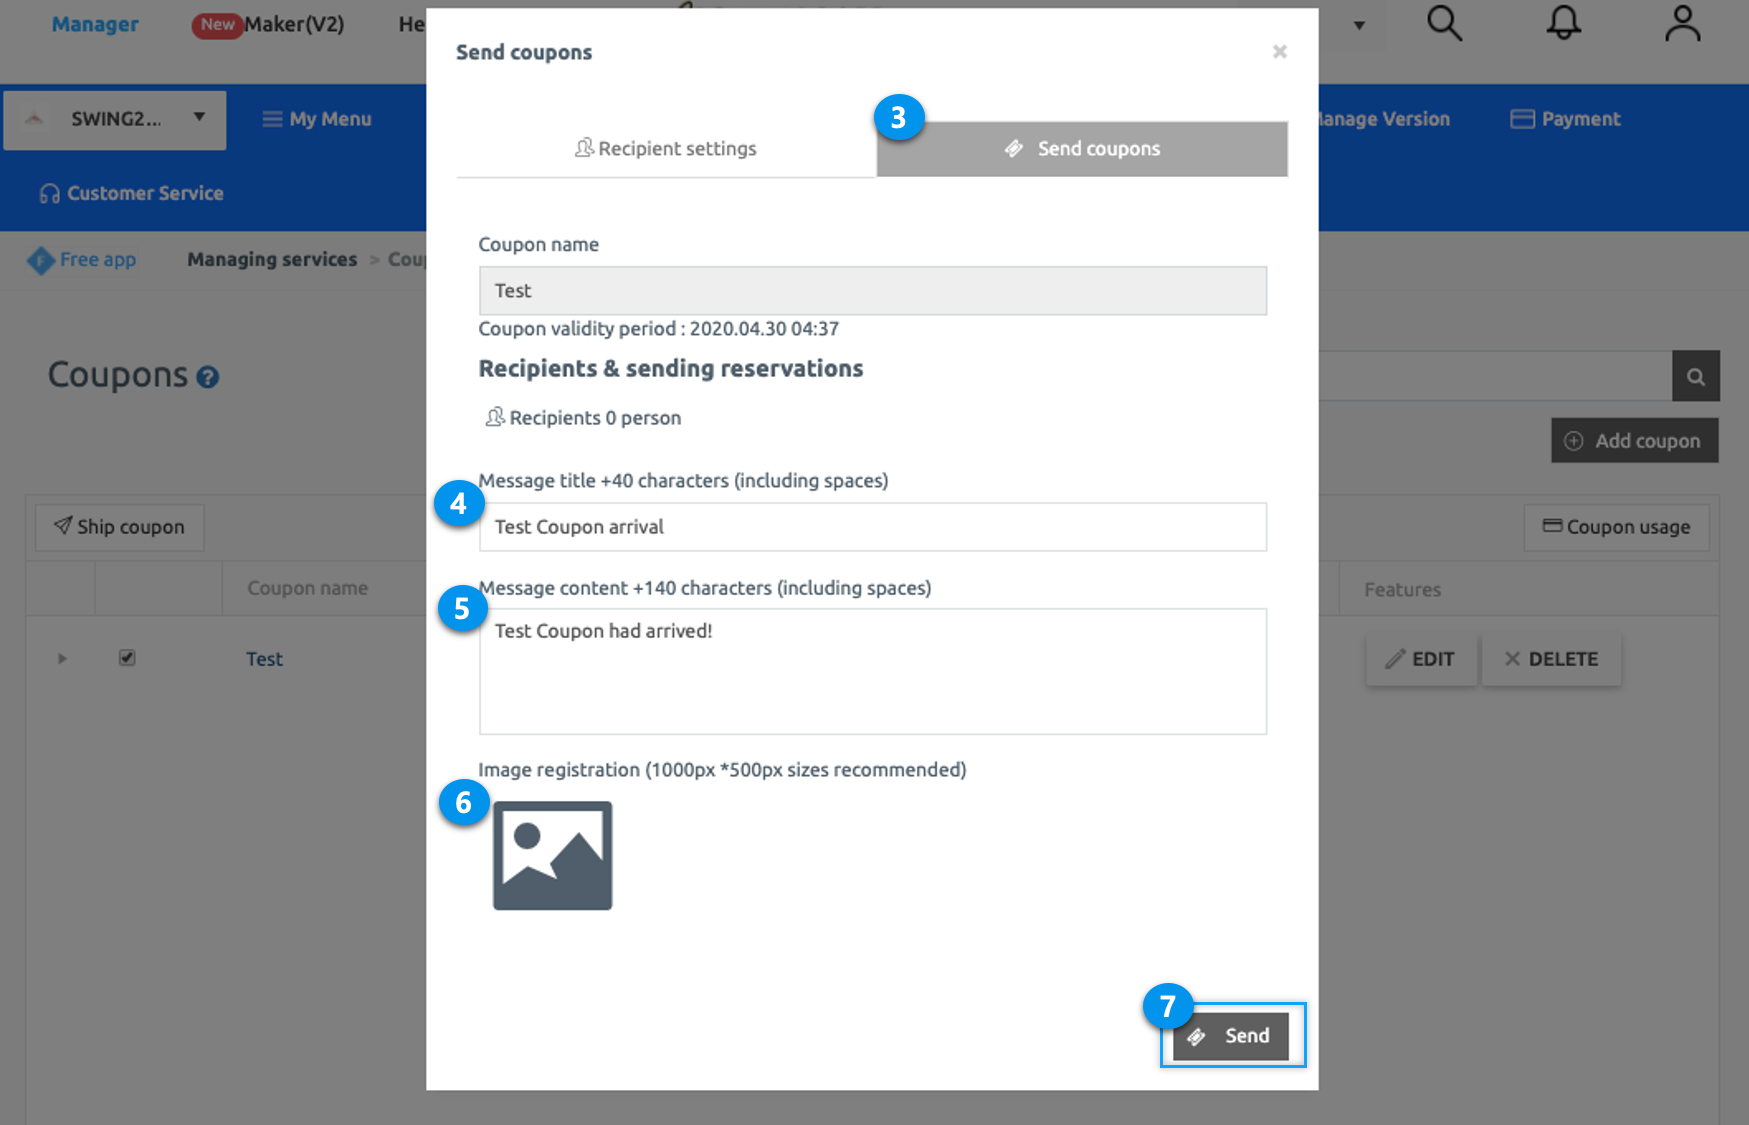
3\. Select Send Coupon.\
4\. Write Message Title.\
5\. Write a message to be sent in push message. (Push message title and content are fixedly provided. You can send it as it is, or you can edit and enter it.)\
6\. Upload image for the push message.(image size 1000px\*500px) (Image registration is not mandatory. Since the push image is not visible on the iPhone, iPhone users will not be able to see it even if you attached the image.)\
7\. Click **Send.**
### **STEP.3 Check User App**
▶**Push Notifications of issued coupons**
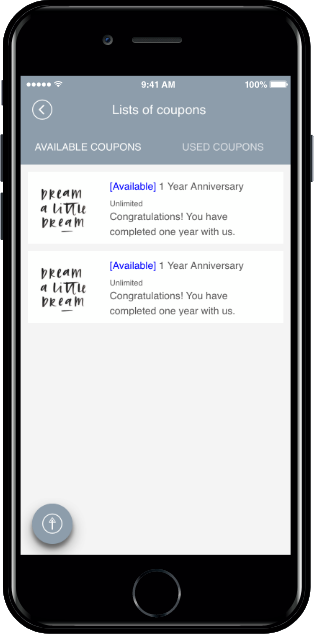
When the coupon is issued, the app push notification comes in, so the user can know that the coupon has been issued through the push notification.
Please select a push notification.
You can see the coupon issued by the administrator.
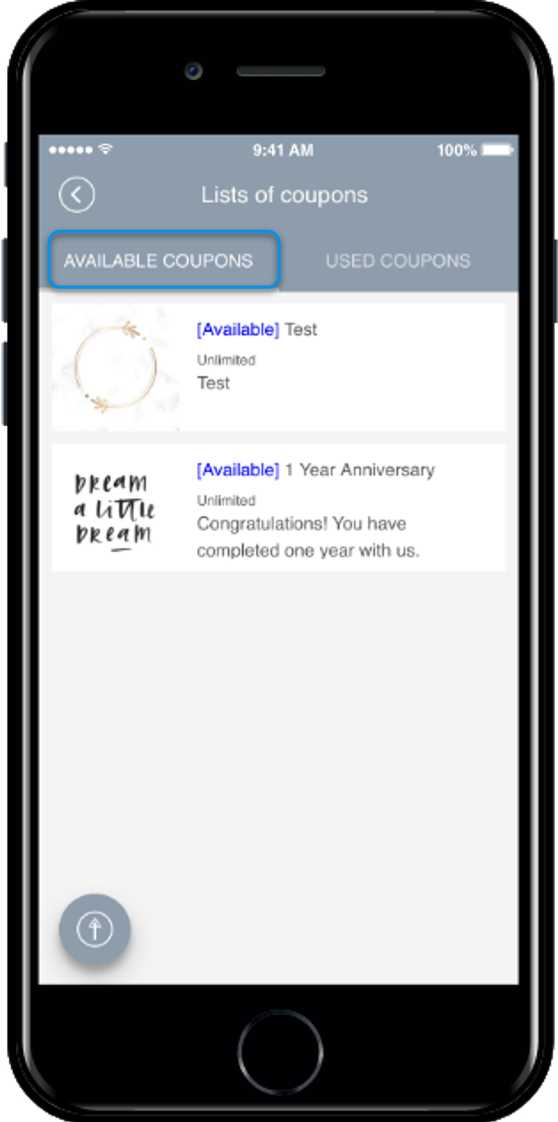
If you apply the coupon tracking menu in the app, users can check the coupons received on the coupon tracking page.
**★ Where can I create a coupon menu in the app?**
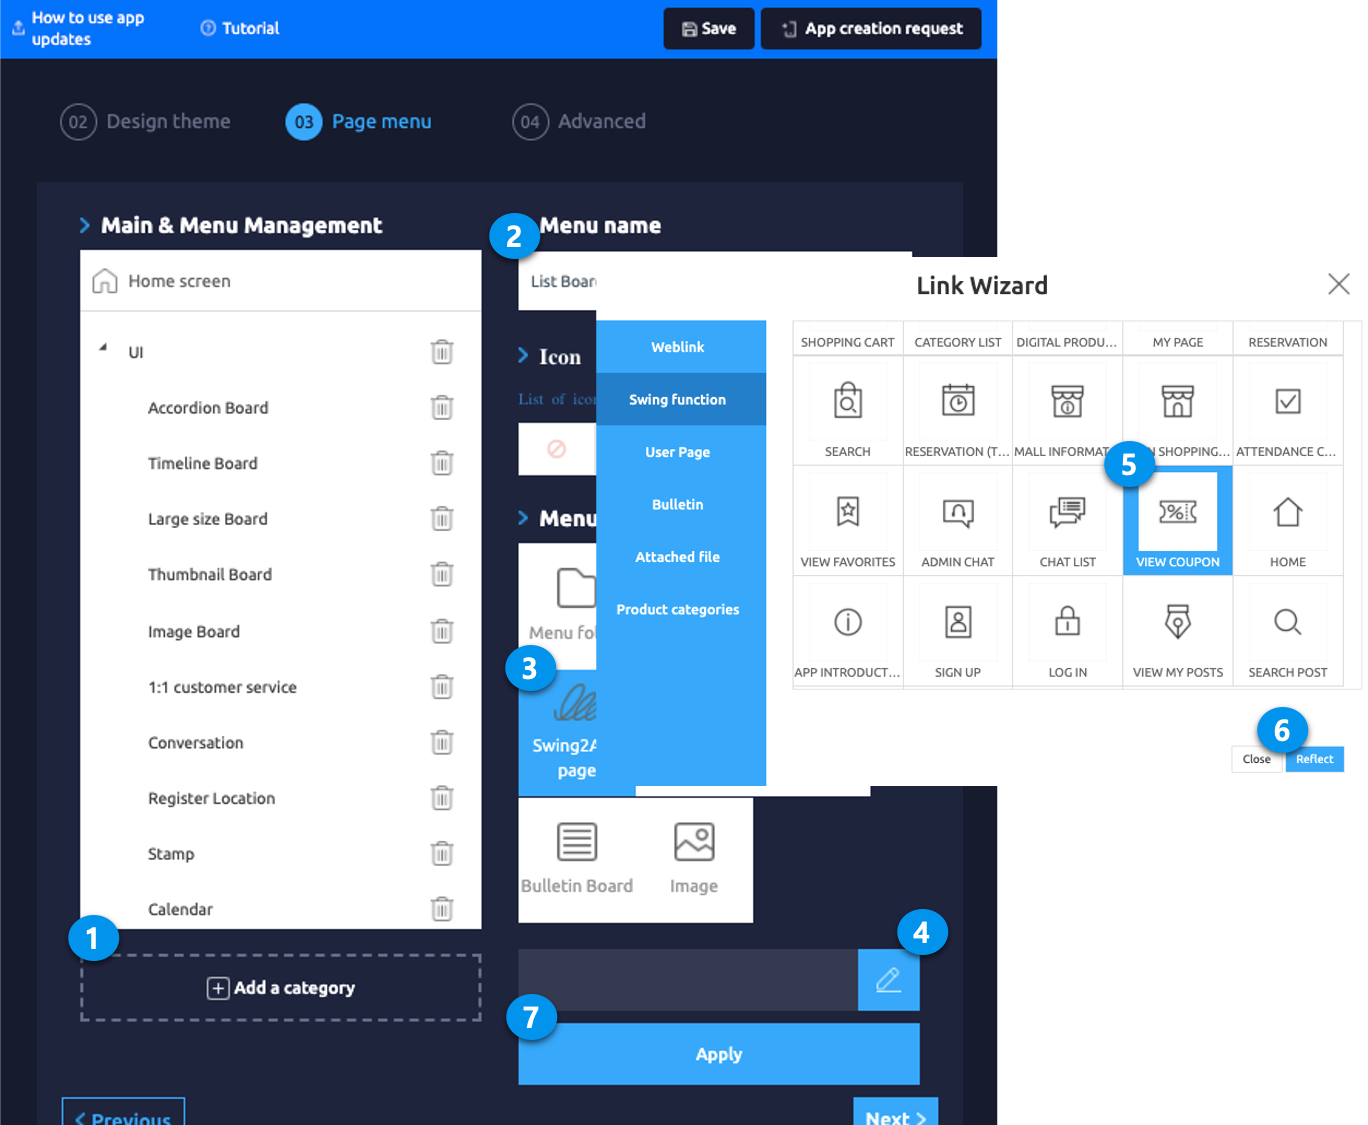
You can create coupon function in the **Maker(V2)** for the app. Go to **Maker(V2)** and click on **Page Menu.** To create the function, please follow the instructions below:
1. Click on **Add a Category.** A new item with be added to the menu items.
2. Change the name of the new item added from in **Menu Name** option.
3. Select **Swing2App** from **Menu Type.**
4. Click on the **Link Wizard icon**(pencil icon).
5. Select **View Coupon** from the list in the **Swing Function** tab.
6. Click **Reflect.**
7. Click **Apply** and click **Save** at the top of the page.
### **STEP.4** **How to use coupon**
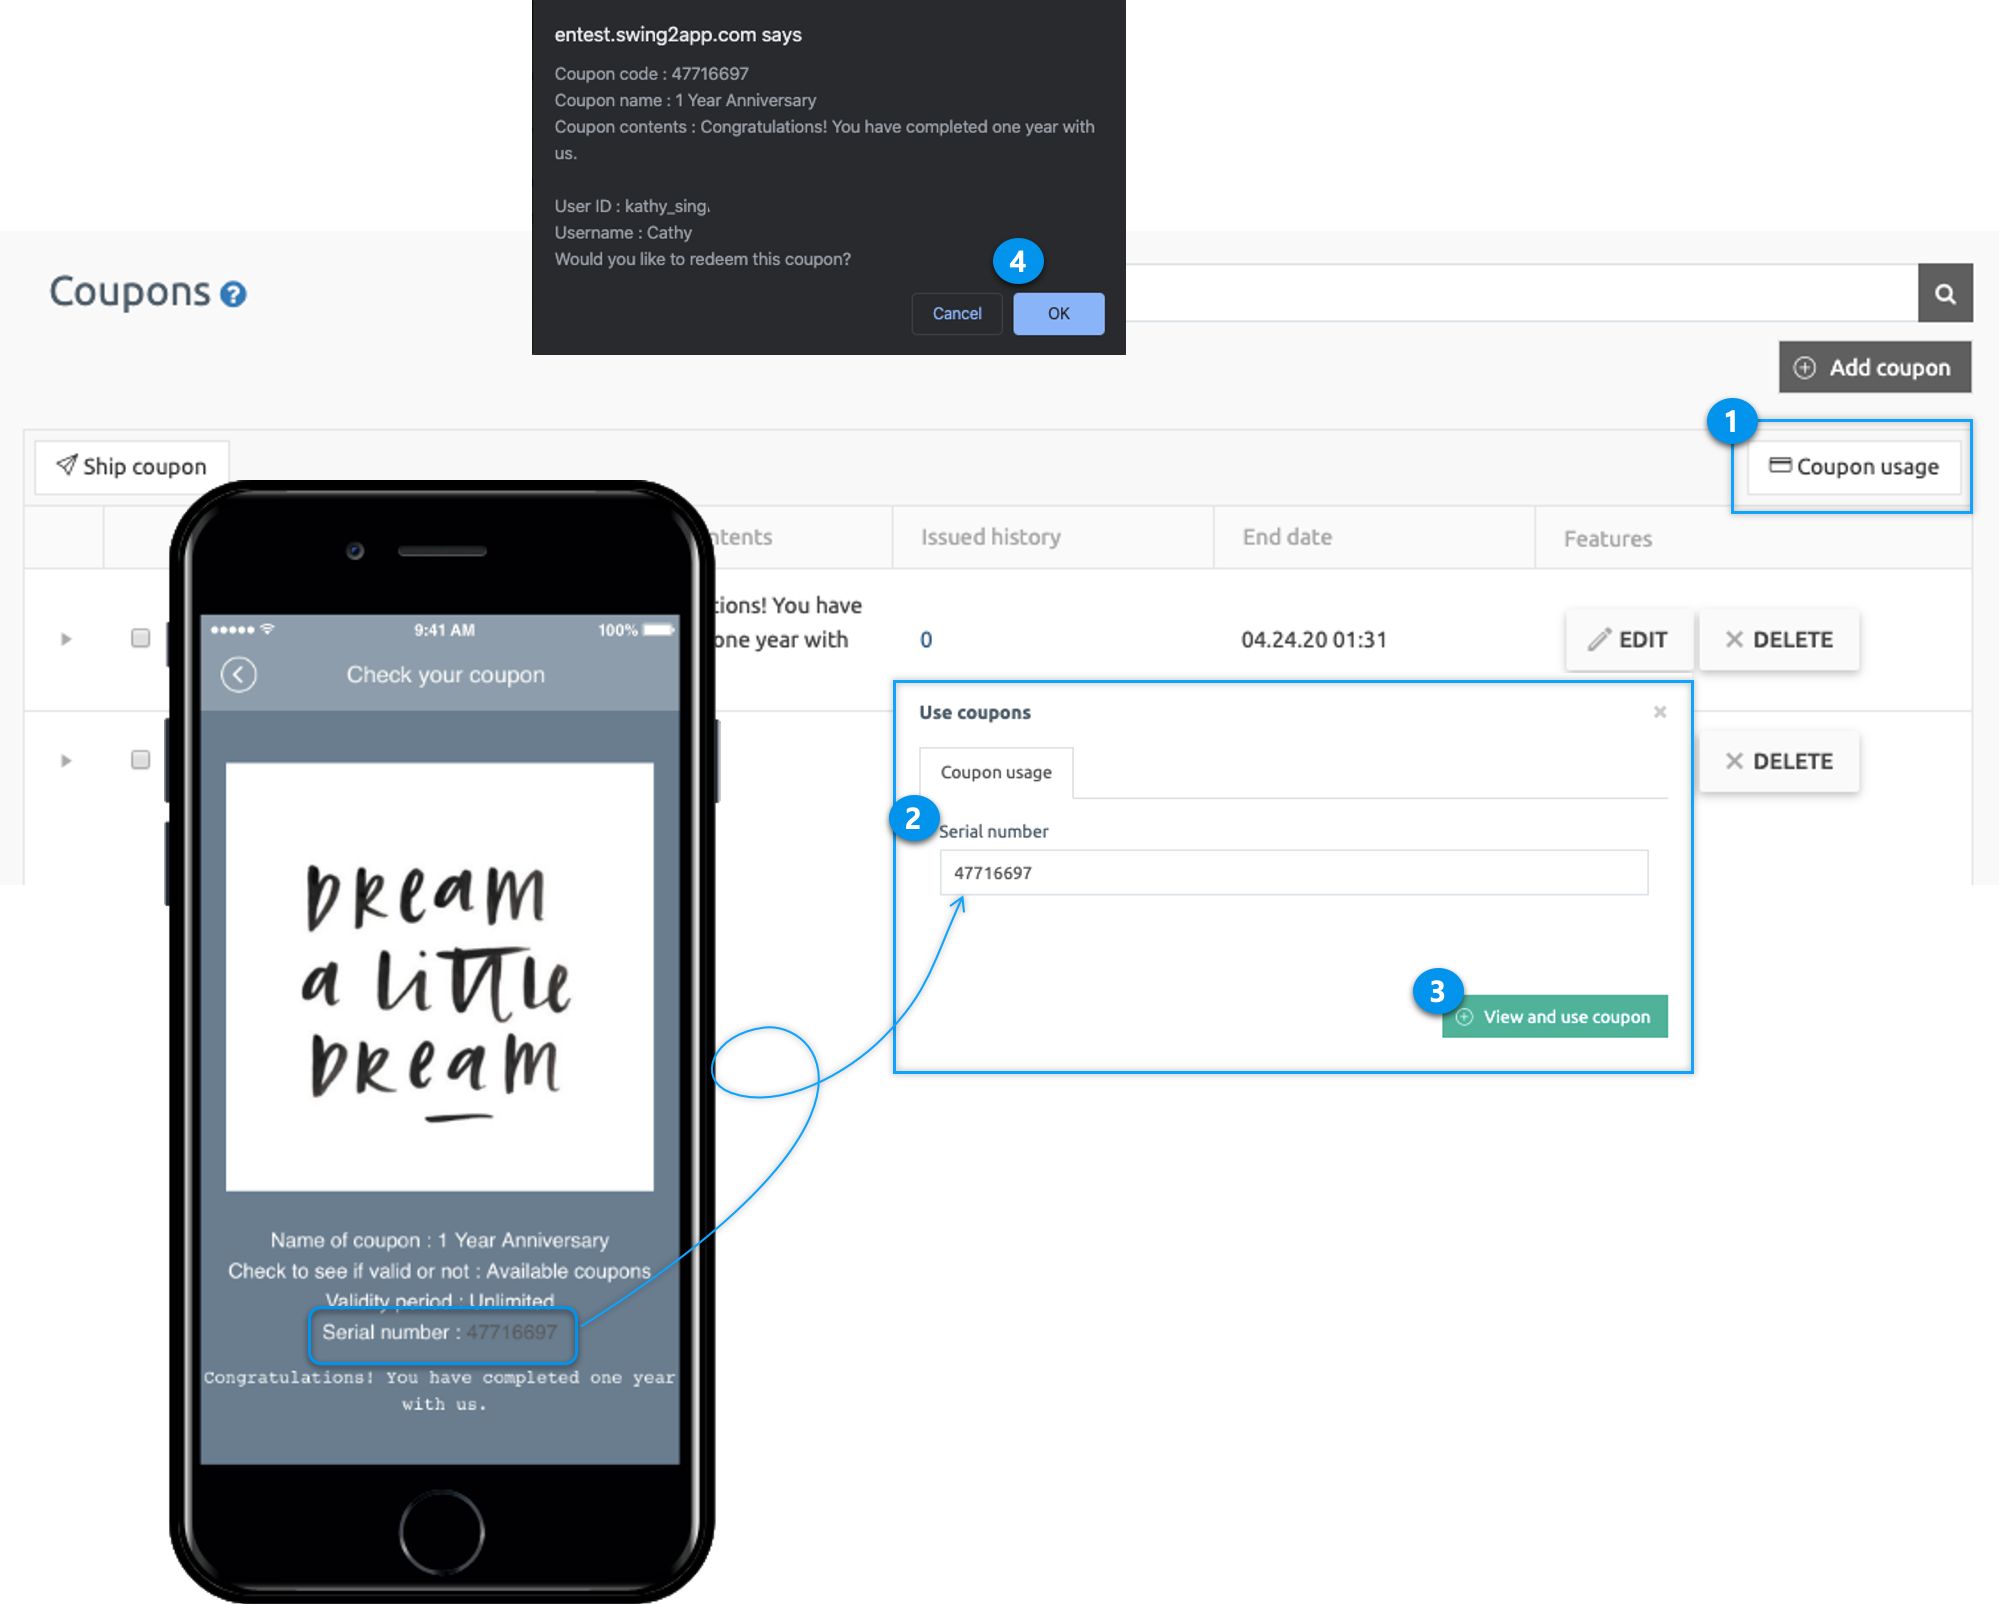
On the Coupon Management page
1. Click **Coupon Usage.**
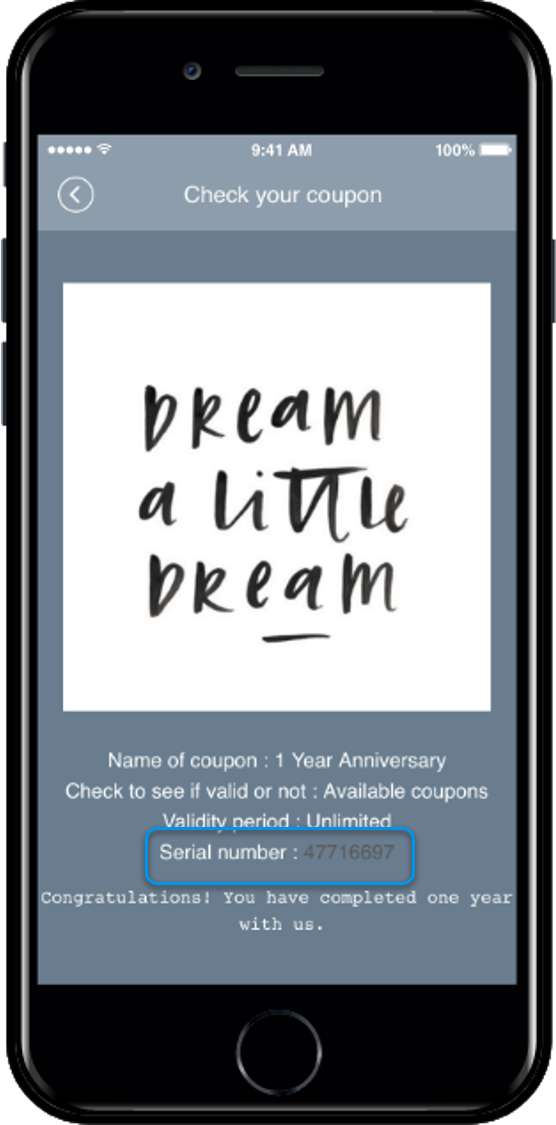
2. Please enter your coupon Serial Number in Use coupons window.
3. Click **View and use Coupons**, a pop-up will open. Click **OK** to complete. The coupon will be processed.
▶ **Launch user app after processing coupon**
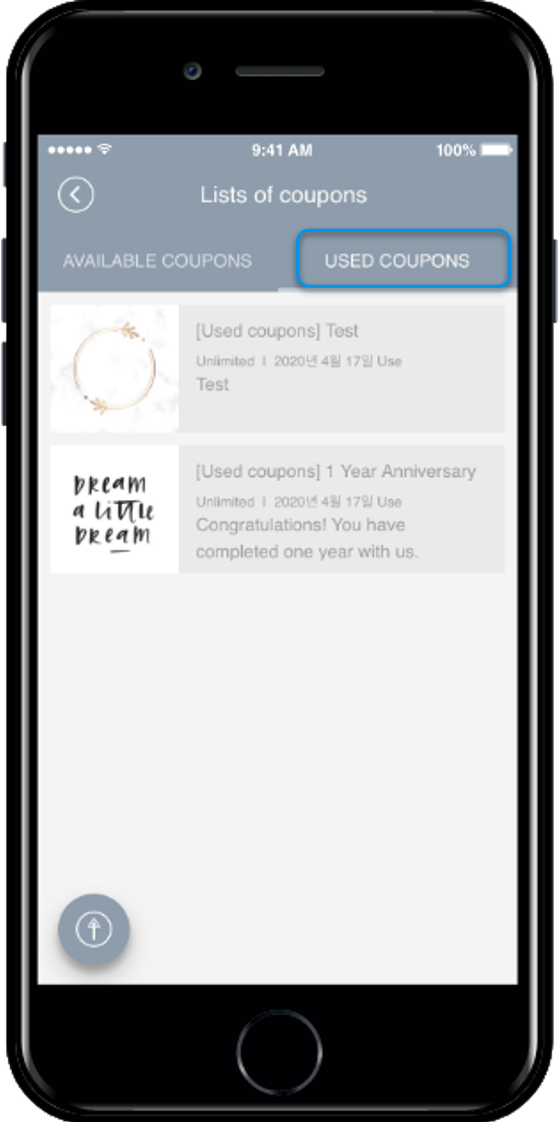
After launching the app again with a user account – You can see that the process has been used in the coupon tracking page \[used coupons] menu.
**★ App also allows administrators to process user coupons.**
**\[Access App Administrator Menu]**
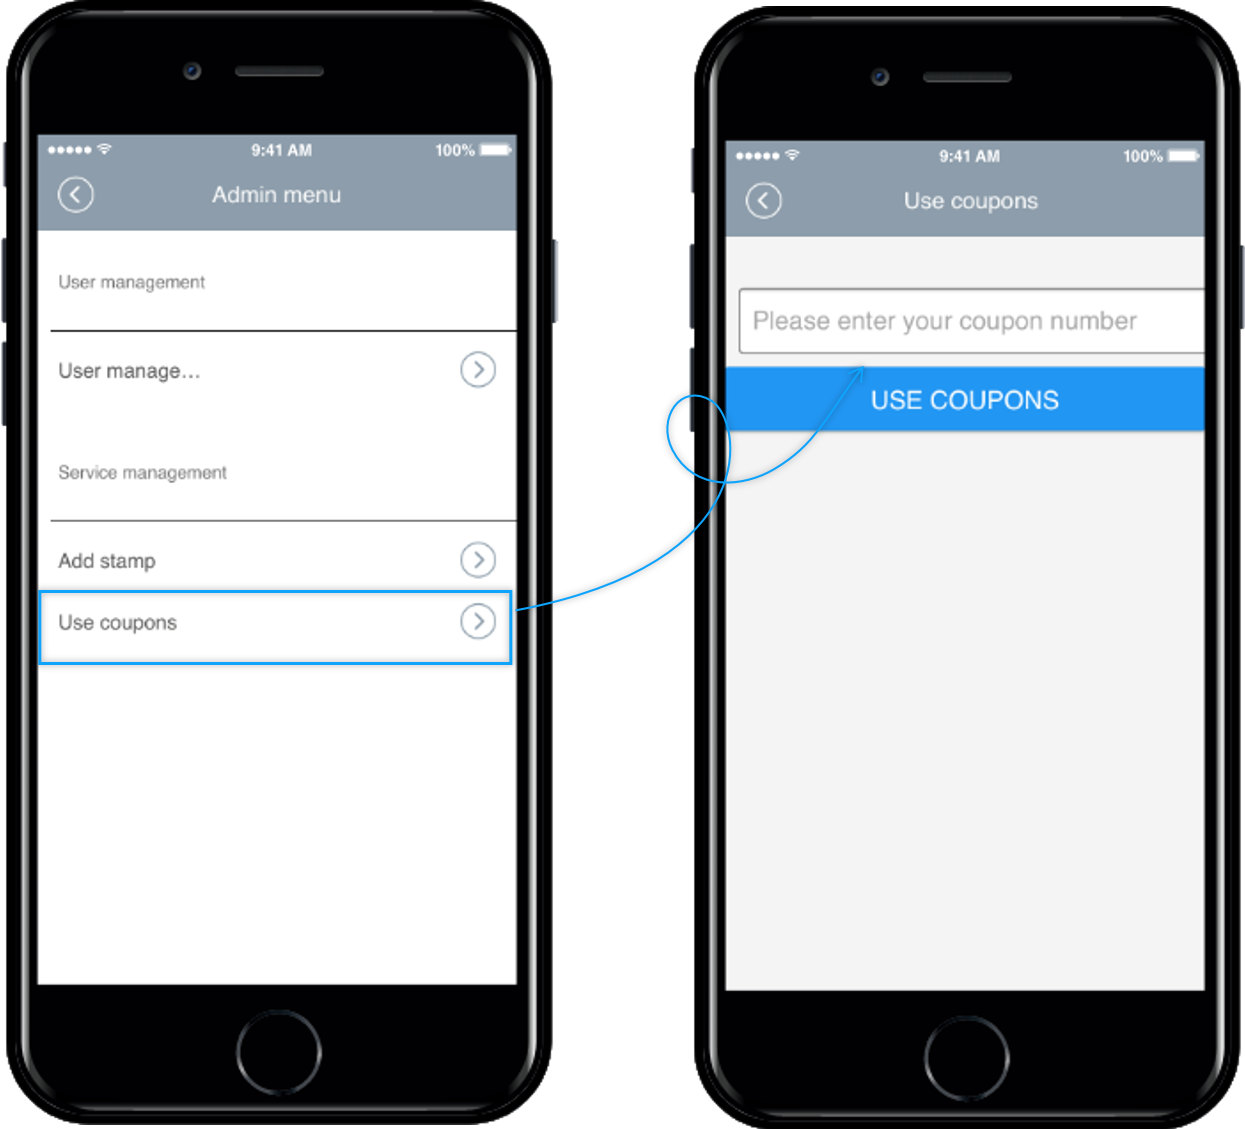
★ How to use
After launching the app, select the \[Setup] menu → \[Administrator Login] → log in to Swing2App account → \[Admin Menu] → select \[Use Coupon].
→ Check the coupon number and enter the coupon number.
**\* On how to process the usage of coupon in the App Administrator menu, please be sure to follow the manual below.**
**☞ \[ App Administrator Menu: View the coupon usage manual]**
**Summary:**
**STEP.1 Create Coupon**
**Manager** → **Services** → **Coupons** → Enter the coupon details to be issued by selecting the **Add Coupon.**
**STEP.2 Issue Coupon**
From the Coupon Management page → Click the **Ship Coupon** → First, select Recipient Settings → Second, select the member you want to send the push notification → Third, select Send Coupon → Fourth, fill in the details for push message → Fifth, click **Send**
**STEP.3 Use Coupon**
On the Coupon Management page, click **Coupon Usage** → Enter Coupon Serial Number → Click **View and Use Coupon**
Or you can use the app administrator menu in the app and you can use the coupon processing.