> For the complete documentation index, see [llms.txt](https://documentation.swing2app.com/llms.txt). Markdown versions of documentation pages are available by appending `.md` to page URLs; this page is available as [Markdown](https://documentation.swing2app.com/manual/appmanage/service/private-app.md).
# Create a Private App
Private apps come in two styles.
**1. Private: Available after the administrator approval**\
☞ A window appears that you need to sign up when you run the app, and app users can use the app after the administrator approves it even if they sign up.
**2. Private: Available when signing up**\
☞ The window says that you need to sign up when you run the app, and you can use the app immediately without admin approval.
Please check the manual to see how each private app setting is different.
**▶ Move app subscription policy**
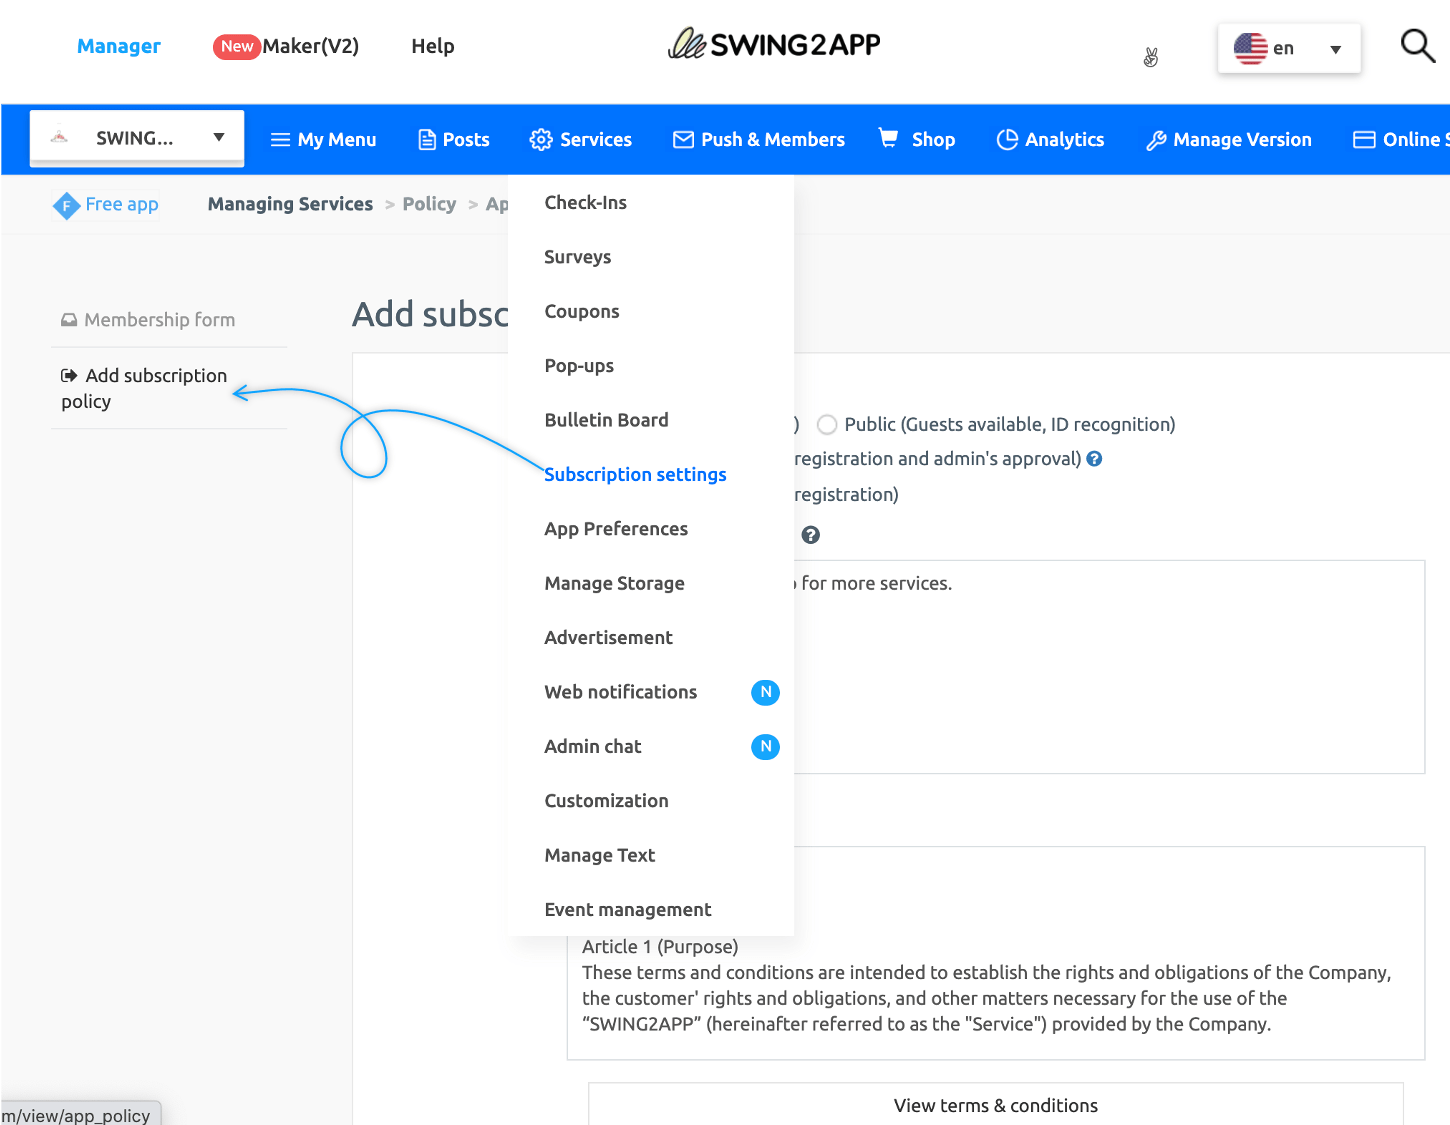
1. Go to **Manager.**
2. Select **Services.**
3. Click on **Subscription Settings.**
4. Click **Add Subscription Policy.**
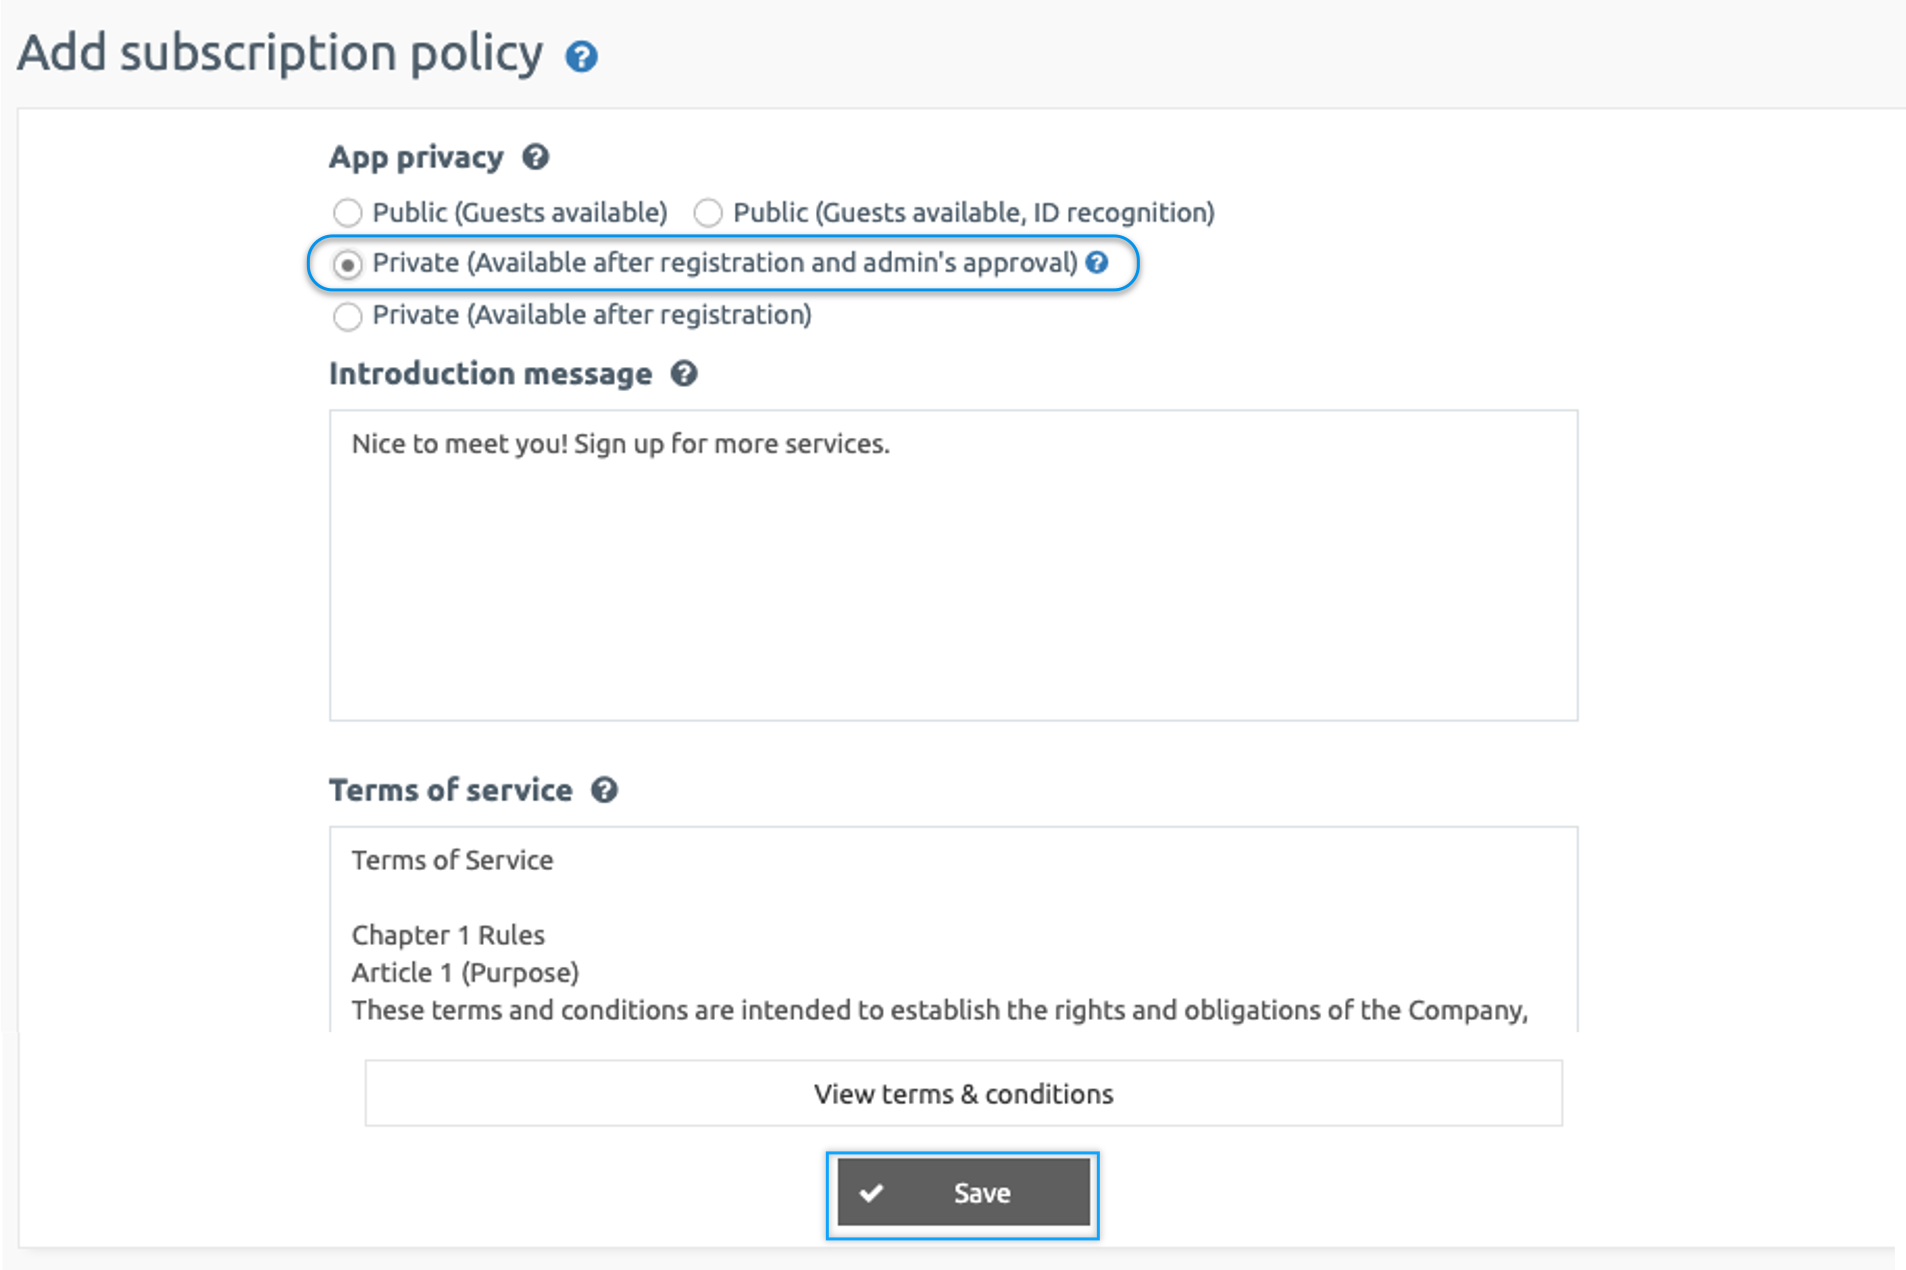
On the Subscription Policy page, you can choose whether your app will be public or private.
### **1. Private – Available after admin approval**
In the app sign-up policy, set the scope of the App Privacy to **Private(Available after registration and admin’s approval).** Then click the **Save** button at the bottom.
**▶App Launch Screen**
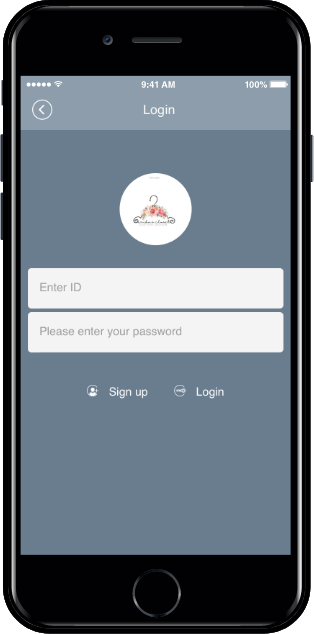
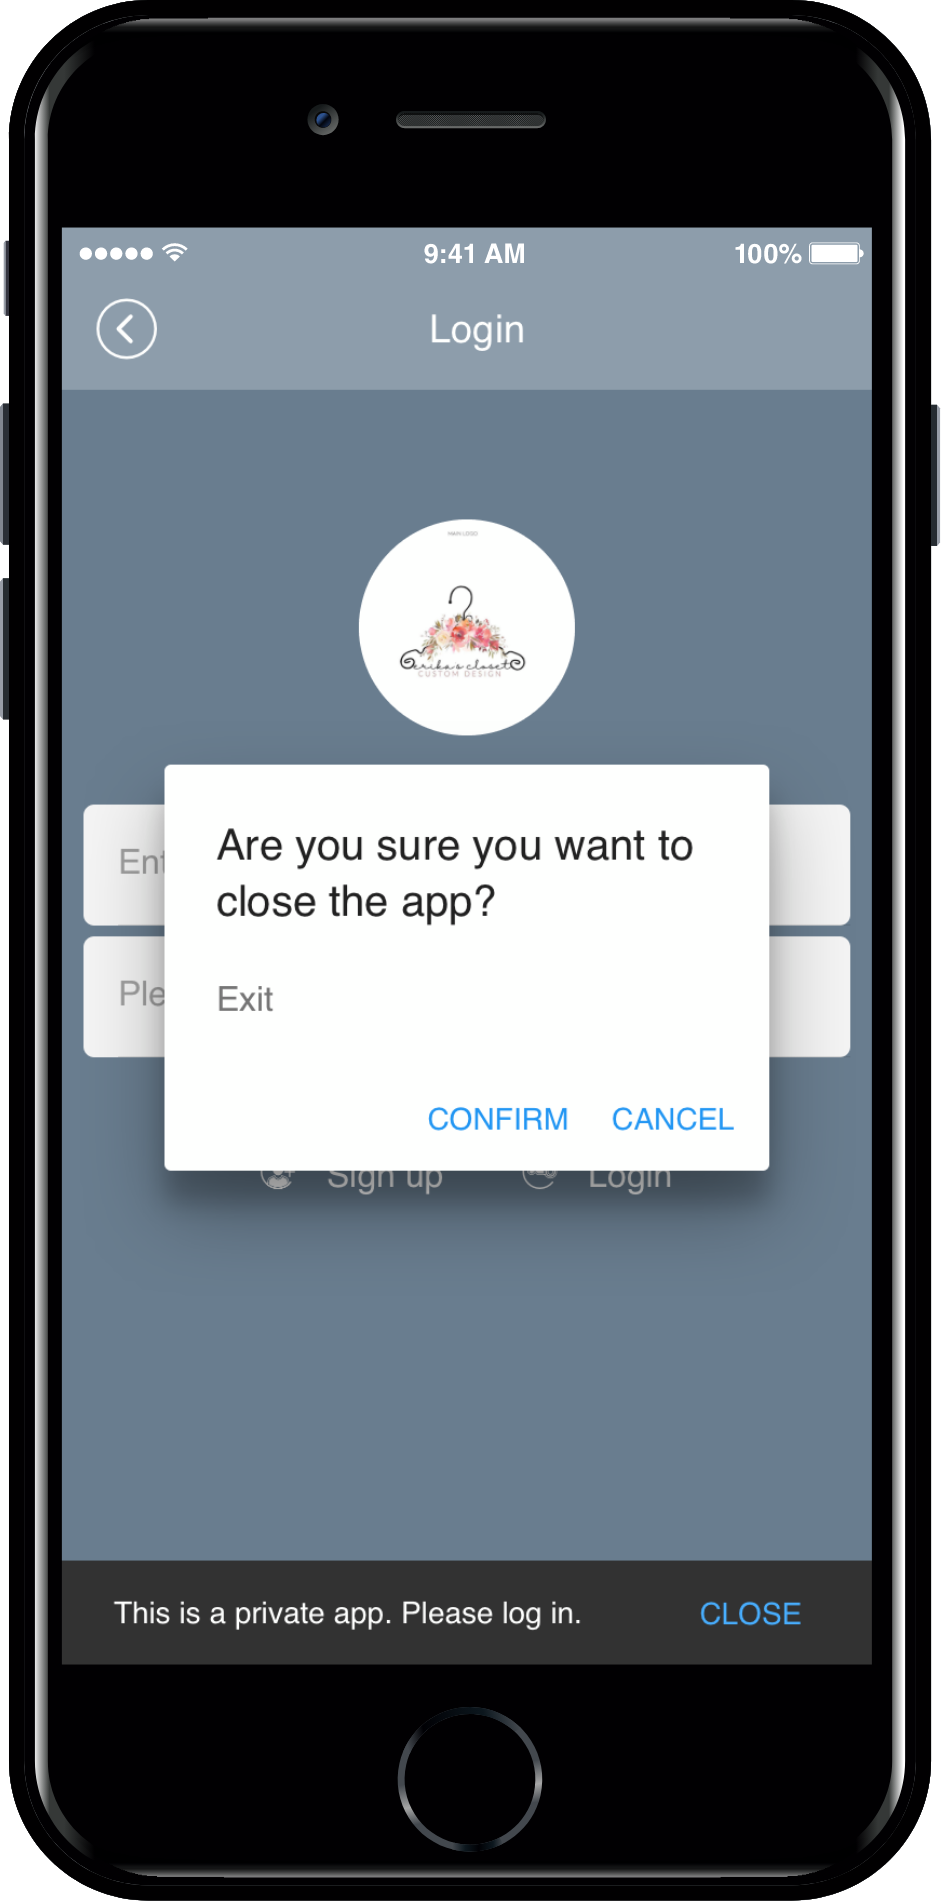
When you run the private app you won’t have direct access to the app.\
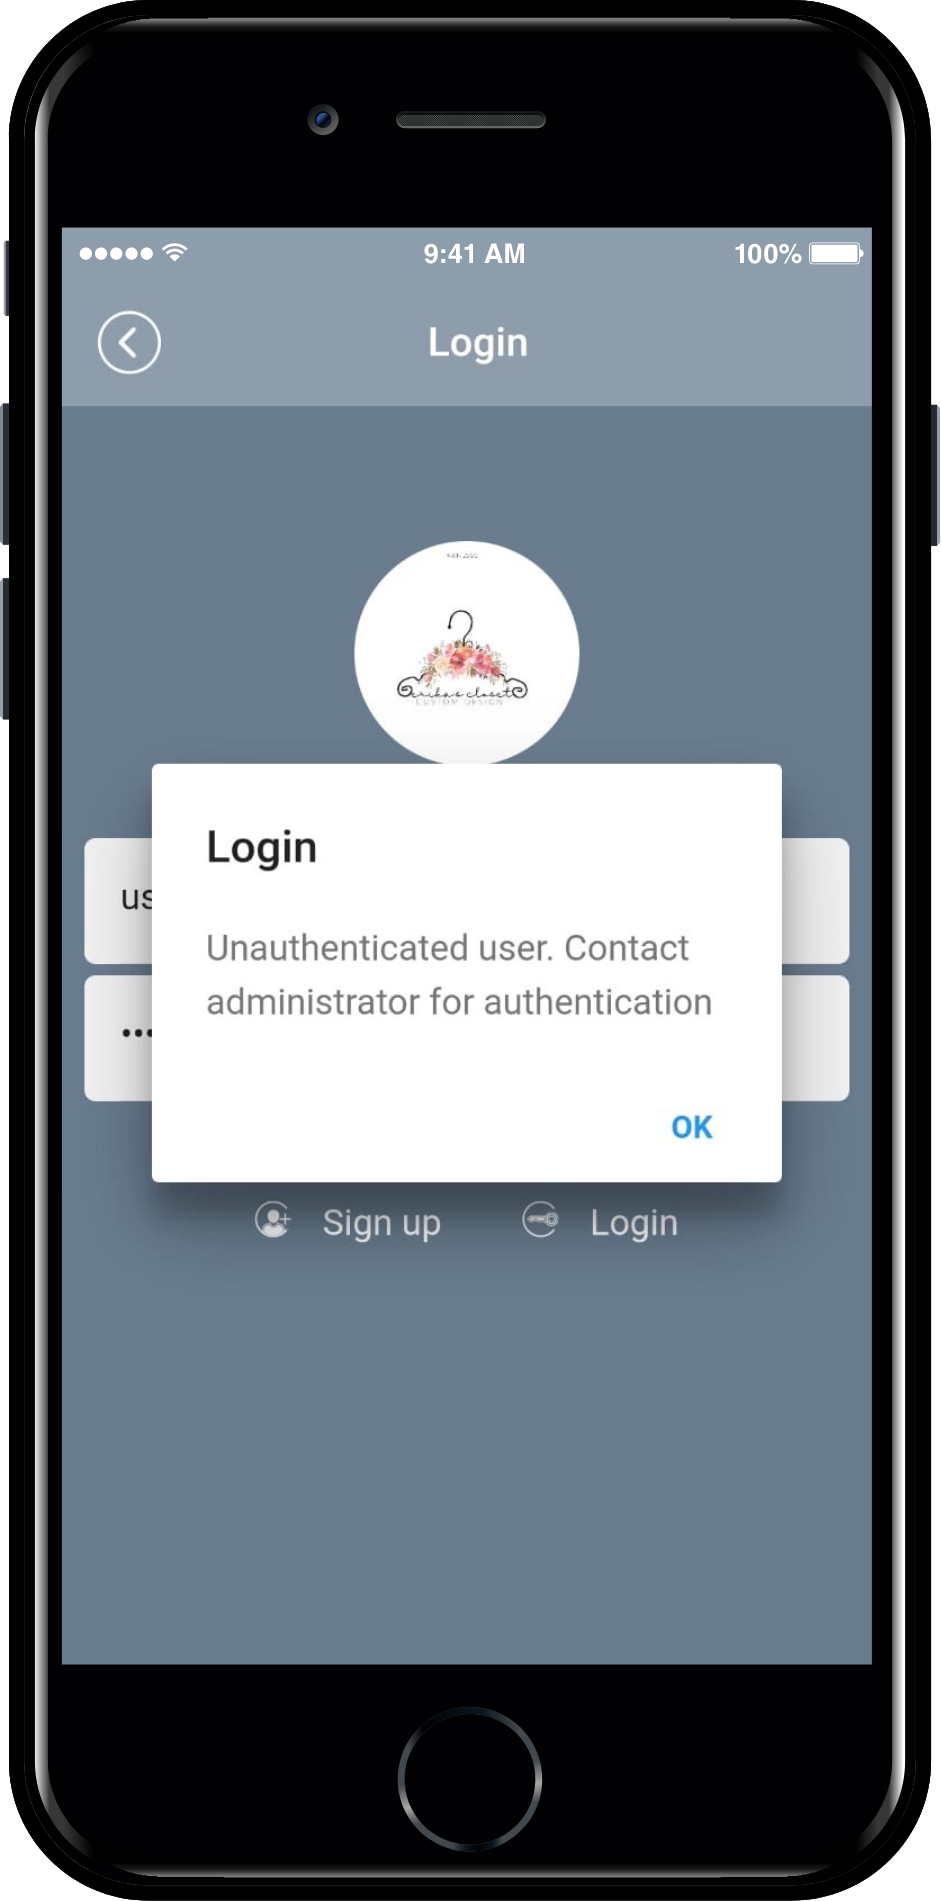
\&#xNAN;**‘This is a Private app. Please log in.’** Message appears.\
Also, if the user is not authorized to even after registering **‘Unauthenticated user. Contact Administrator for authentication’** message appears.
Therefore, **even if a user registers for the private app, the app can not be used without the administrator’s approval. Users can use the app after admin approval.**\
The administrator must check and approve the members who signed up on the app operation page.
**▶Unauthorized Member → Change to ‘Certified’**
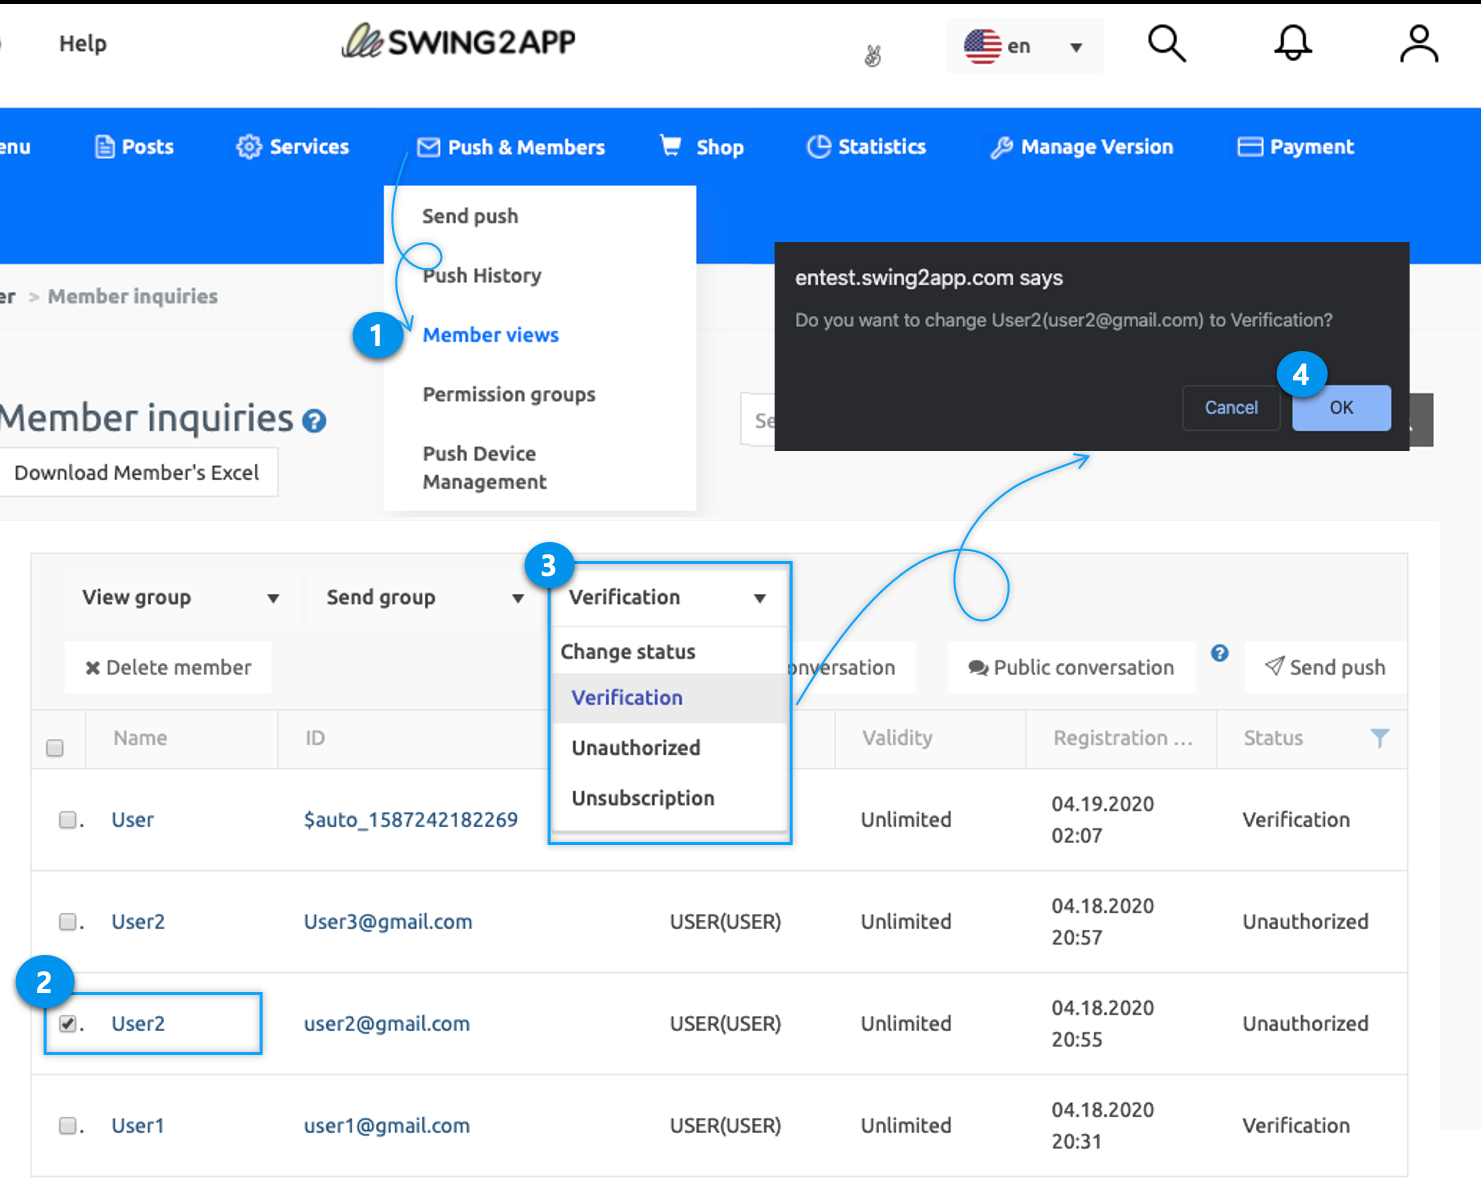
1. Go to **Manager** and select **Push & Members.** From the drop-down list click **Members View.**
2. In the member inquiry page, you can check the list of members registered in the app with their status. Now, select the member you wish to authorize.
3. Change the status of the unauthorized member to verified by selecting **Verification** from the **Change Status** drop-down list.
4. Click **OK.**
We will check the list of members who applied for membership in the private app and let the administrator know how to process membership approval.
You can check the list of members whose status changed to ‘Authentication’.
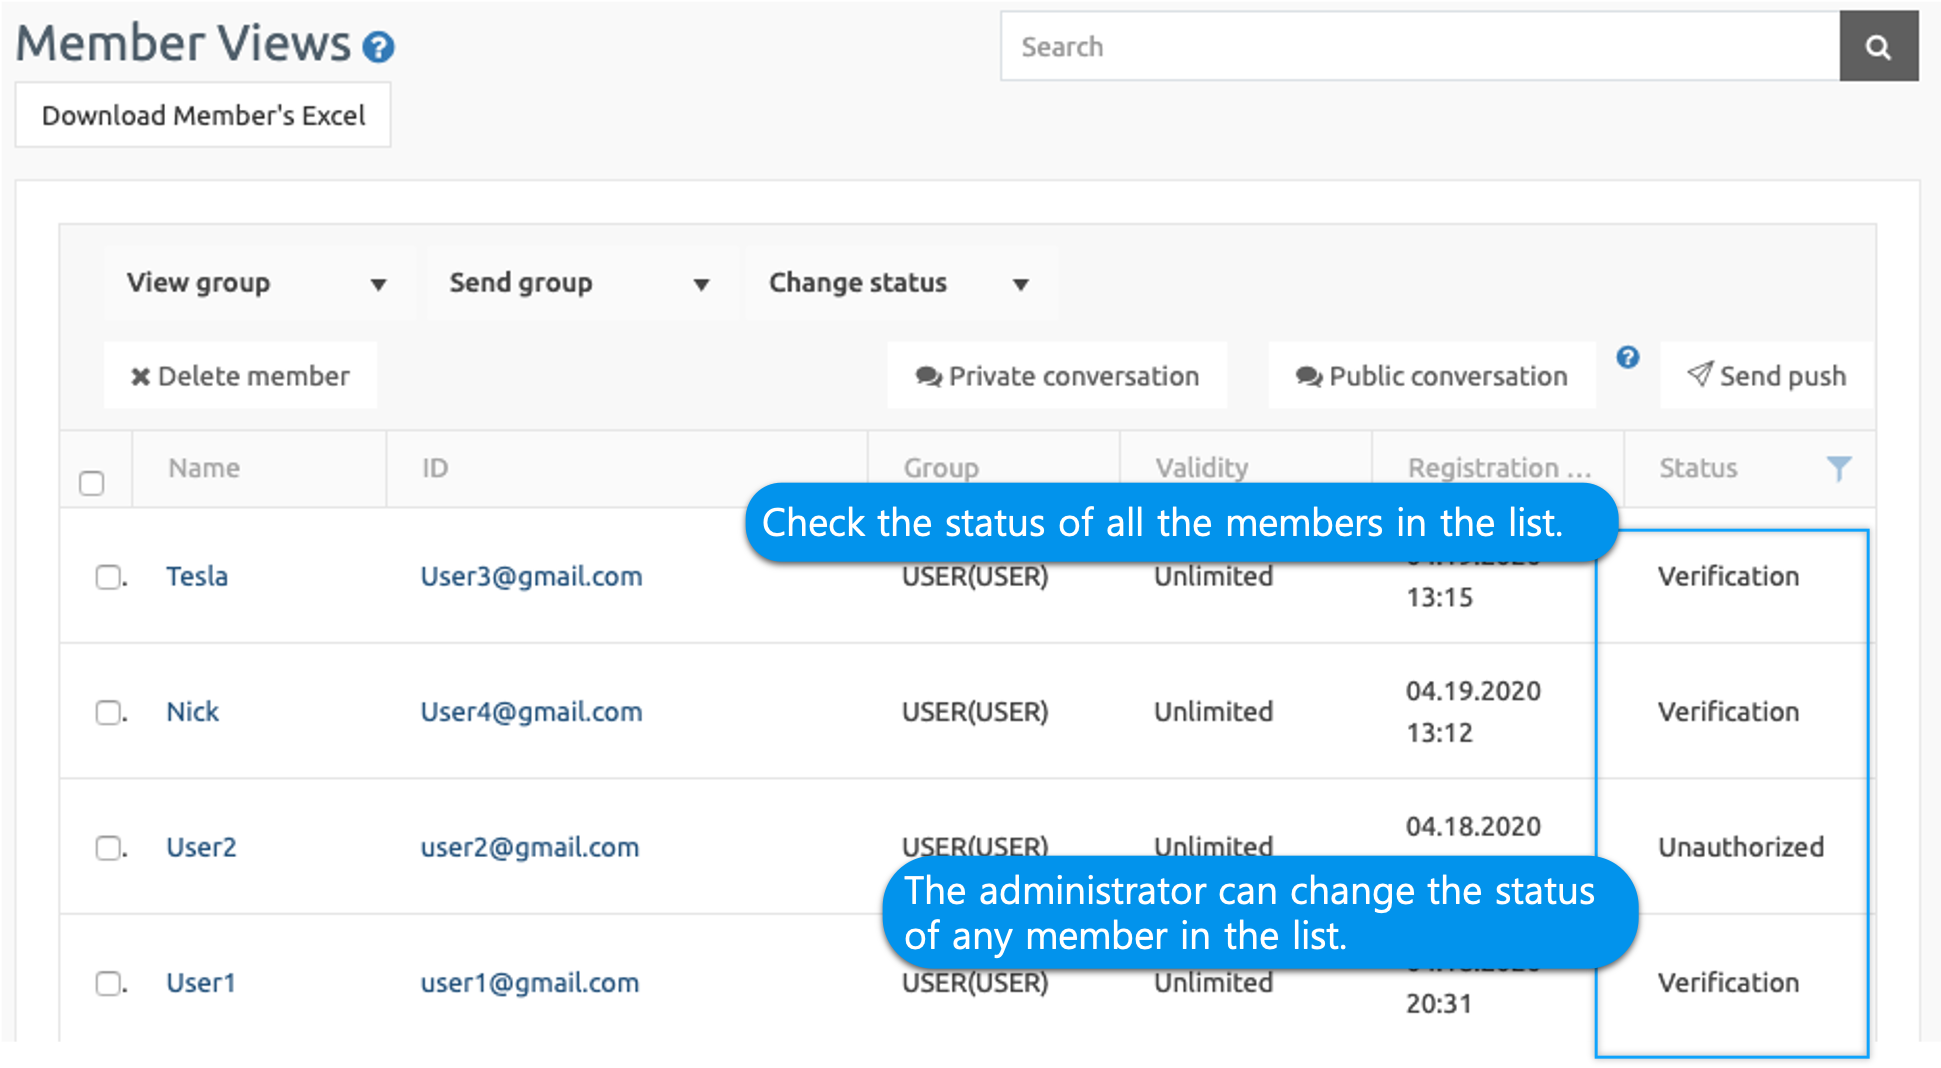
Therefore, administrators who use the \[Admin Approved Private] app, please change the unauthenticated member into ‘Certified’ in the member inquiry page.
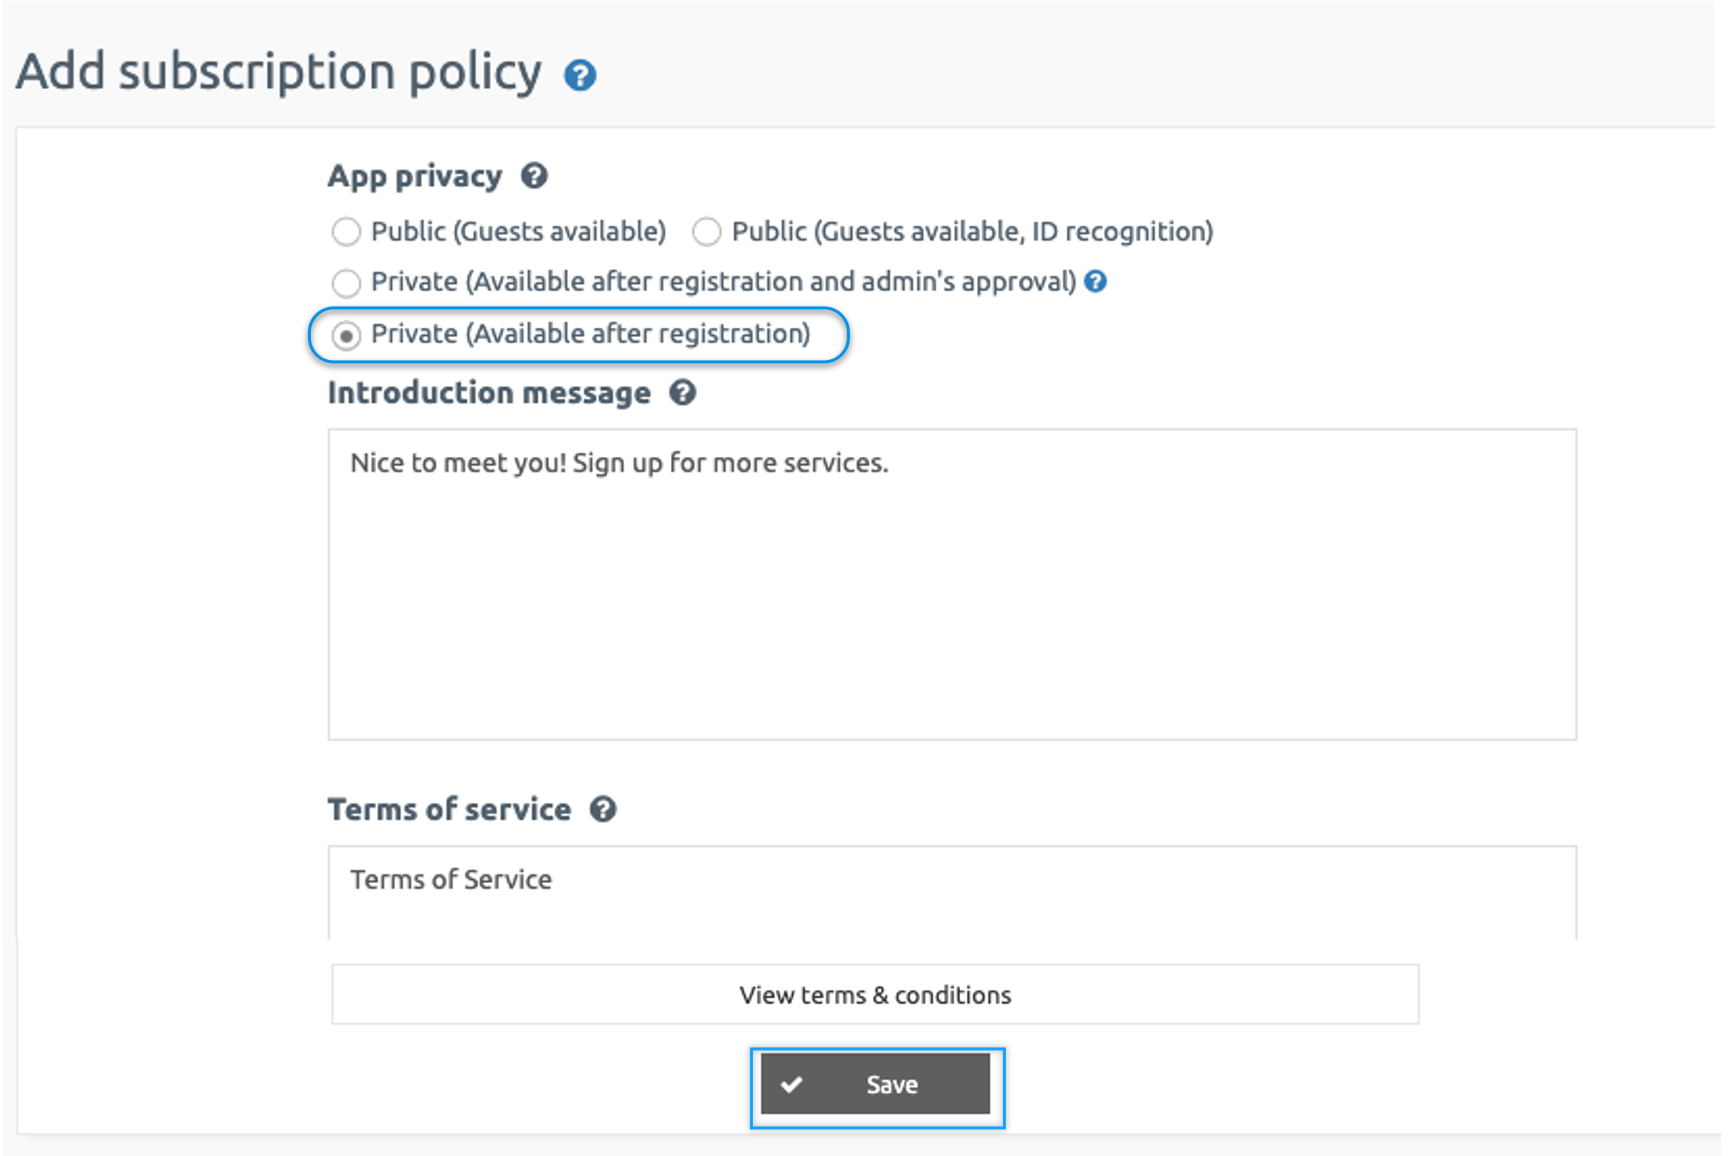
### **2. Private – available when registering**
In the app subscription policy, set the App Privacy to **Private (available after registration)** and click the **Save** button at the bottom.
**▶App Launch Screen**
Like the first private app, you won’t have direct access to the app when you launch it.\
And if you sign up, you can use the app immediately without the administrator’s approval.