> For the complete documentation index, see [llms.txt](https://documentation.swing2app.com/llms.txt). Markdown versions of documentation pages are available by appending `.md` to page URLs; this page is available as [Markdown](https://documentation.swing2app.com/manual/swingshop/product-exposuremanagement.md).
# Product Management - Product Exposure Management
**Product Management-How to Use Product Exposure Management**
The purpose of using the product exposure management is to display the menu on the main page of the shopping mall.
When listing products that you want to show as an event, when promoting your flagship product in a shopping mall, or making a sale or showing a product that is about to run out of stock, you can expose it as a topic.
This menu is available as an option, and is not a choice.
Please check on how to use product exposure management.
### **1. Product Exposure Management Page**
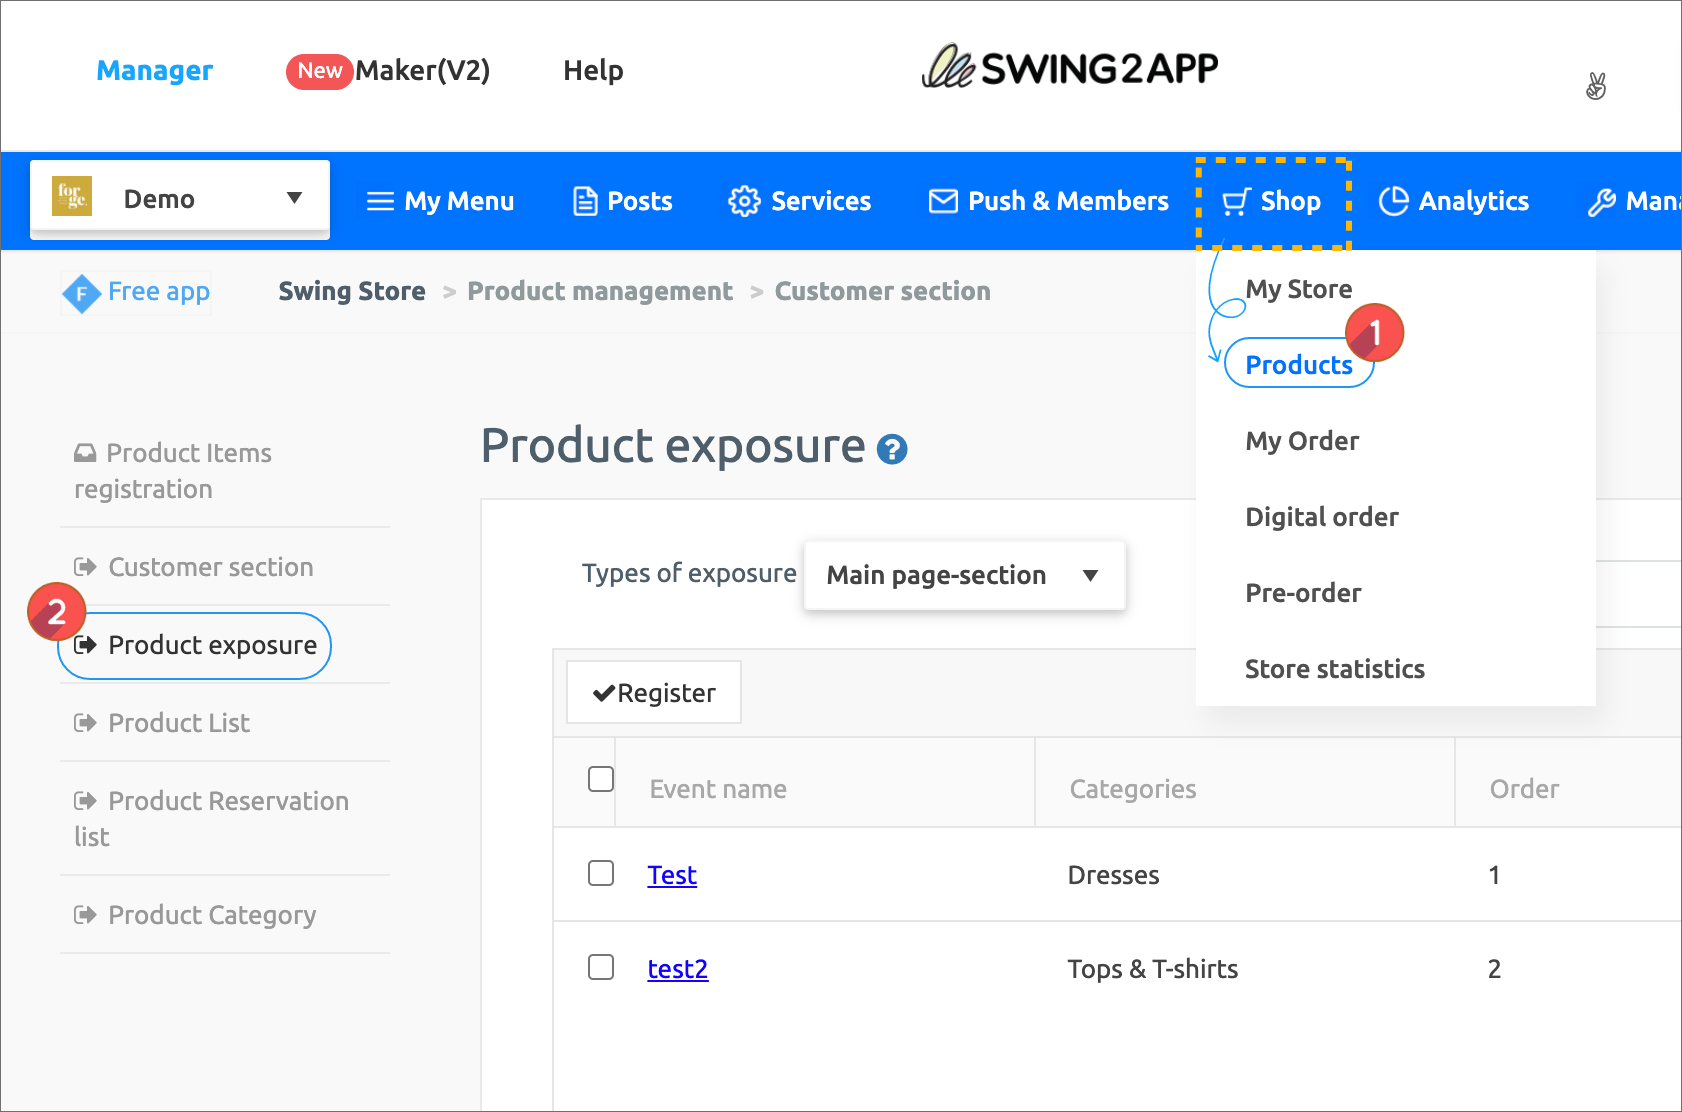
**Go to the Shop → Product → Product Exposure page.**
### **2. Select Product Exposure Page-Main Page Collection**
Let’s see how the post search menu (full bulletin board search) looks like in the app.
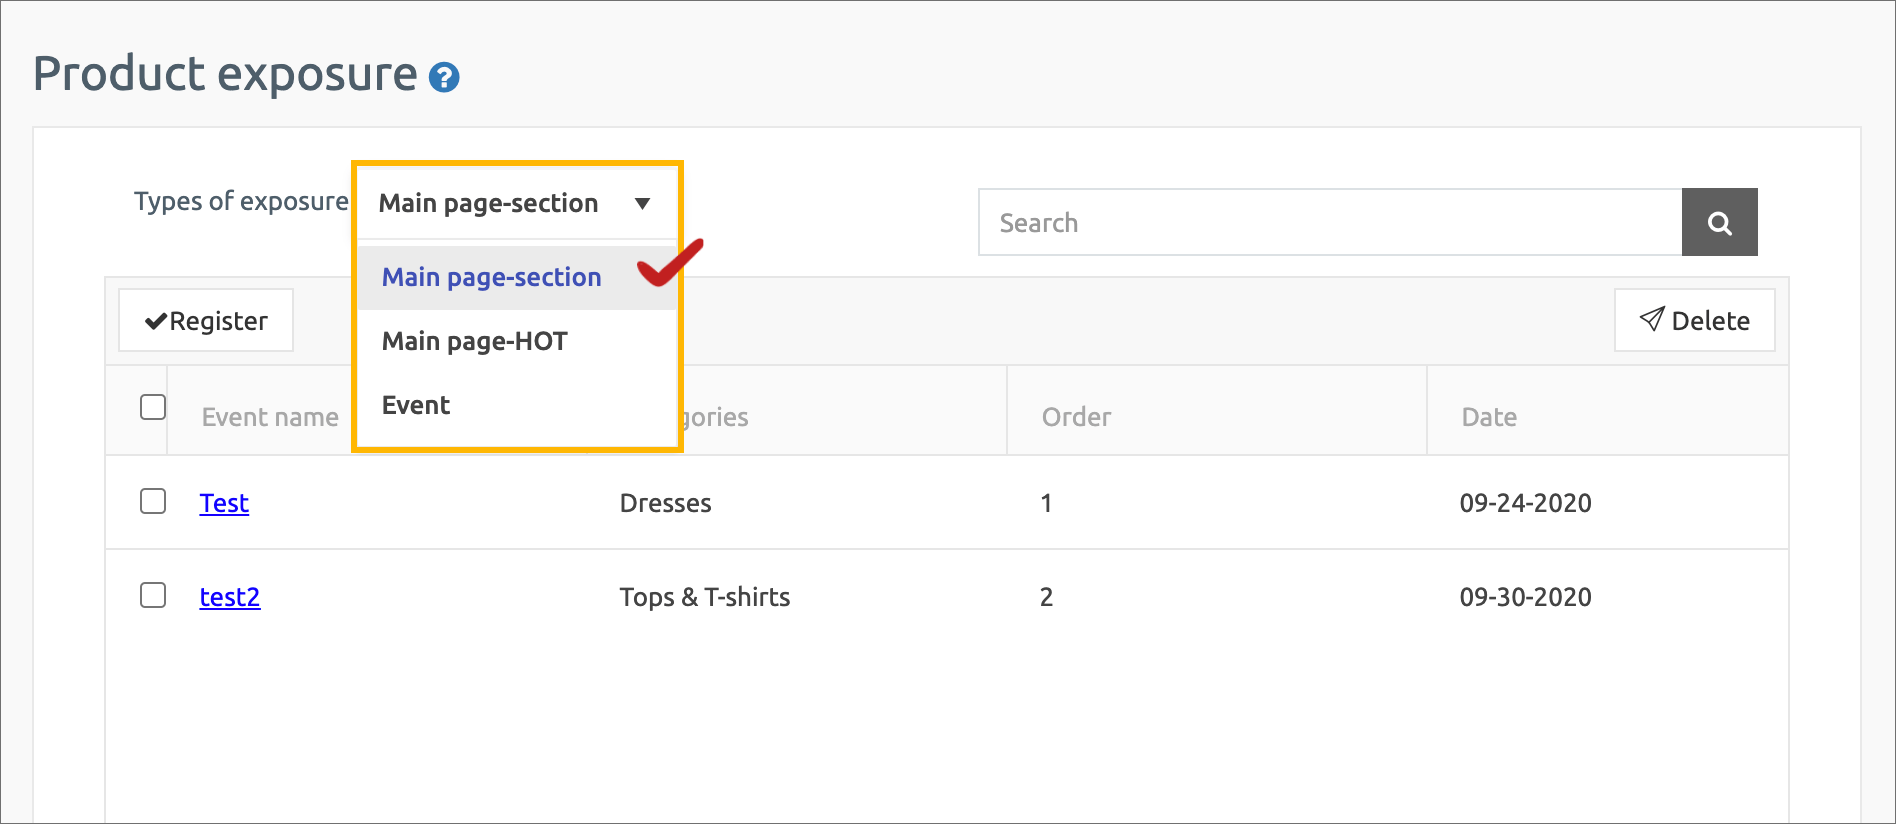
Exposure type is provided as a main page-collection, main page-HOT, events.
Currently it is only available as a main page-collection. Please wait a little bit as it will be fixed soon.
**Select \[Main Page-Collection]** and register.
### **3. Register the product to be exposed**

Register the items that will be exposed in the main page collection.
1. Click the \[Register] button, the product registration window appears.
2. Event Name: Enter the name (title) of the collection
3. Category setting: Set the category to be displayed on the main page.
4. Priority: Please enter the order you want to see. (Lower order are placed first)
5. Representative image: Attach the representative thumbnail image of the collection.
6. Event Description: Enter an article that describes the collection.
7. Press the Save button to complete.
### **4. Registration completed**
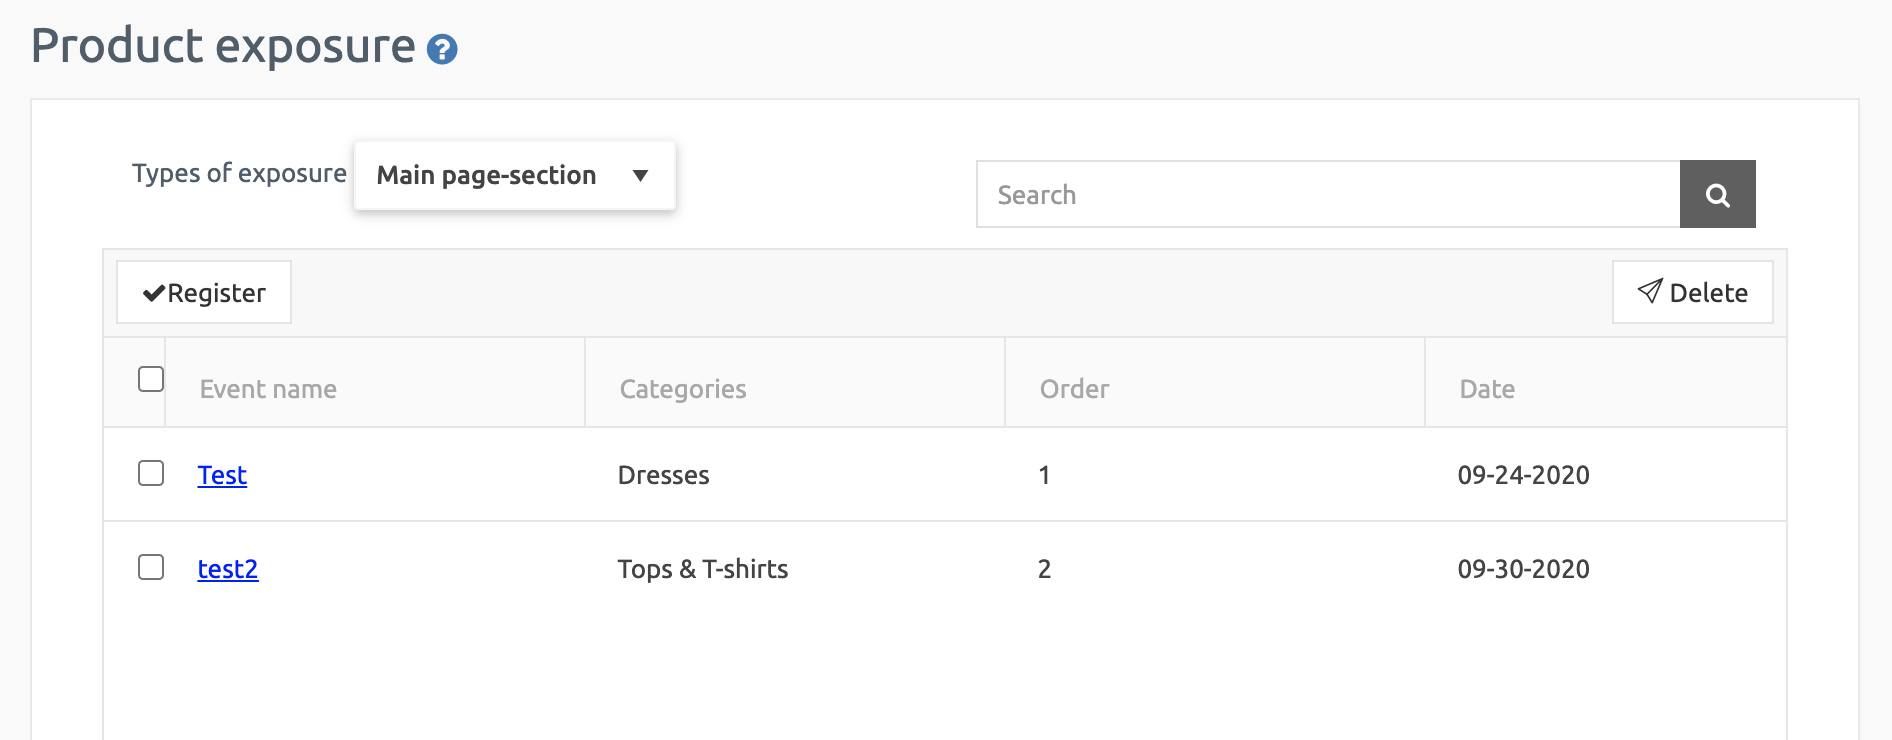
You have registered the product you want to expose.
You can place multiple collections, so tap Register to add a new one.
### **5. Applying the shop mall main page in Maker(V2)**
★Registered product exposure management is shown on the \[Shop Main Page] page.
In order for the product management page to appear in the app, the main page of the store must be applied to the app.
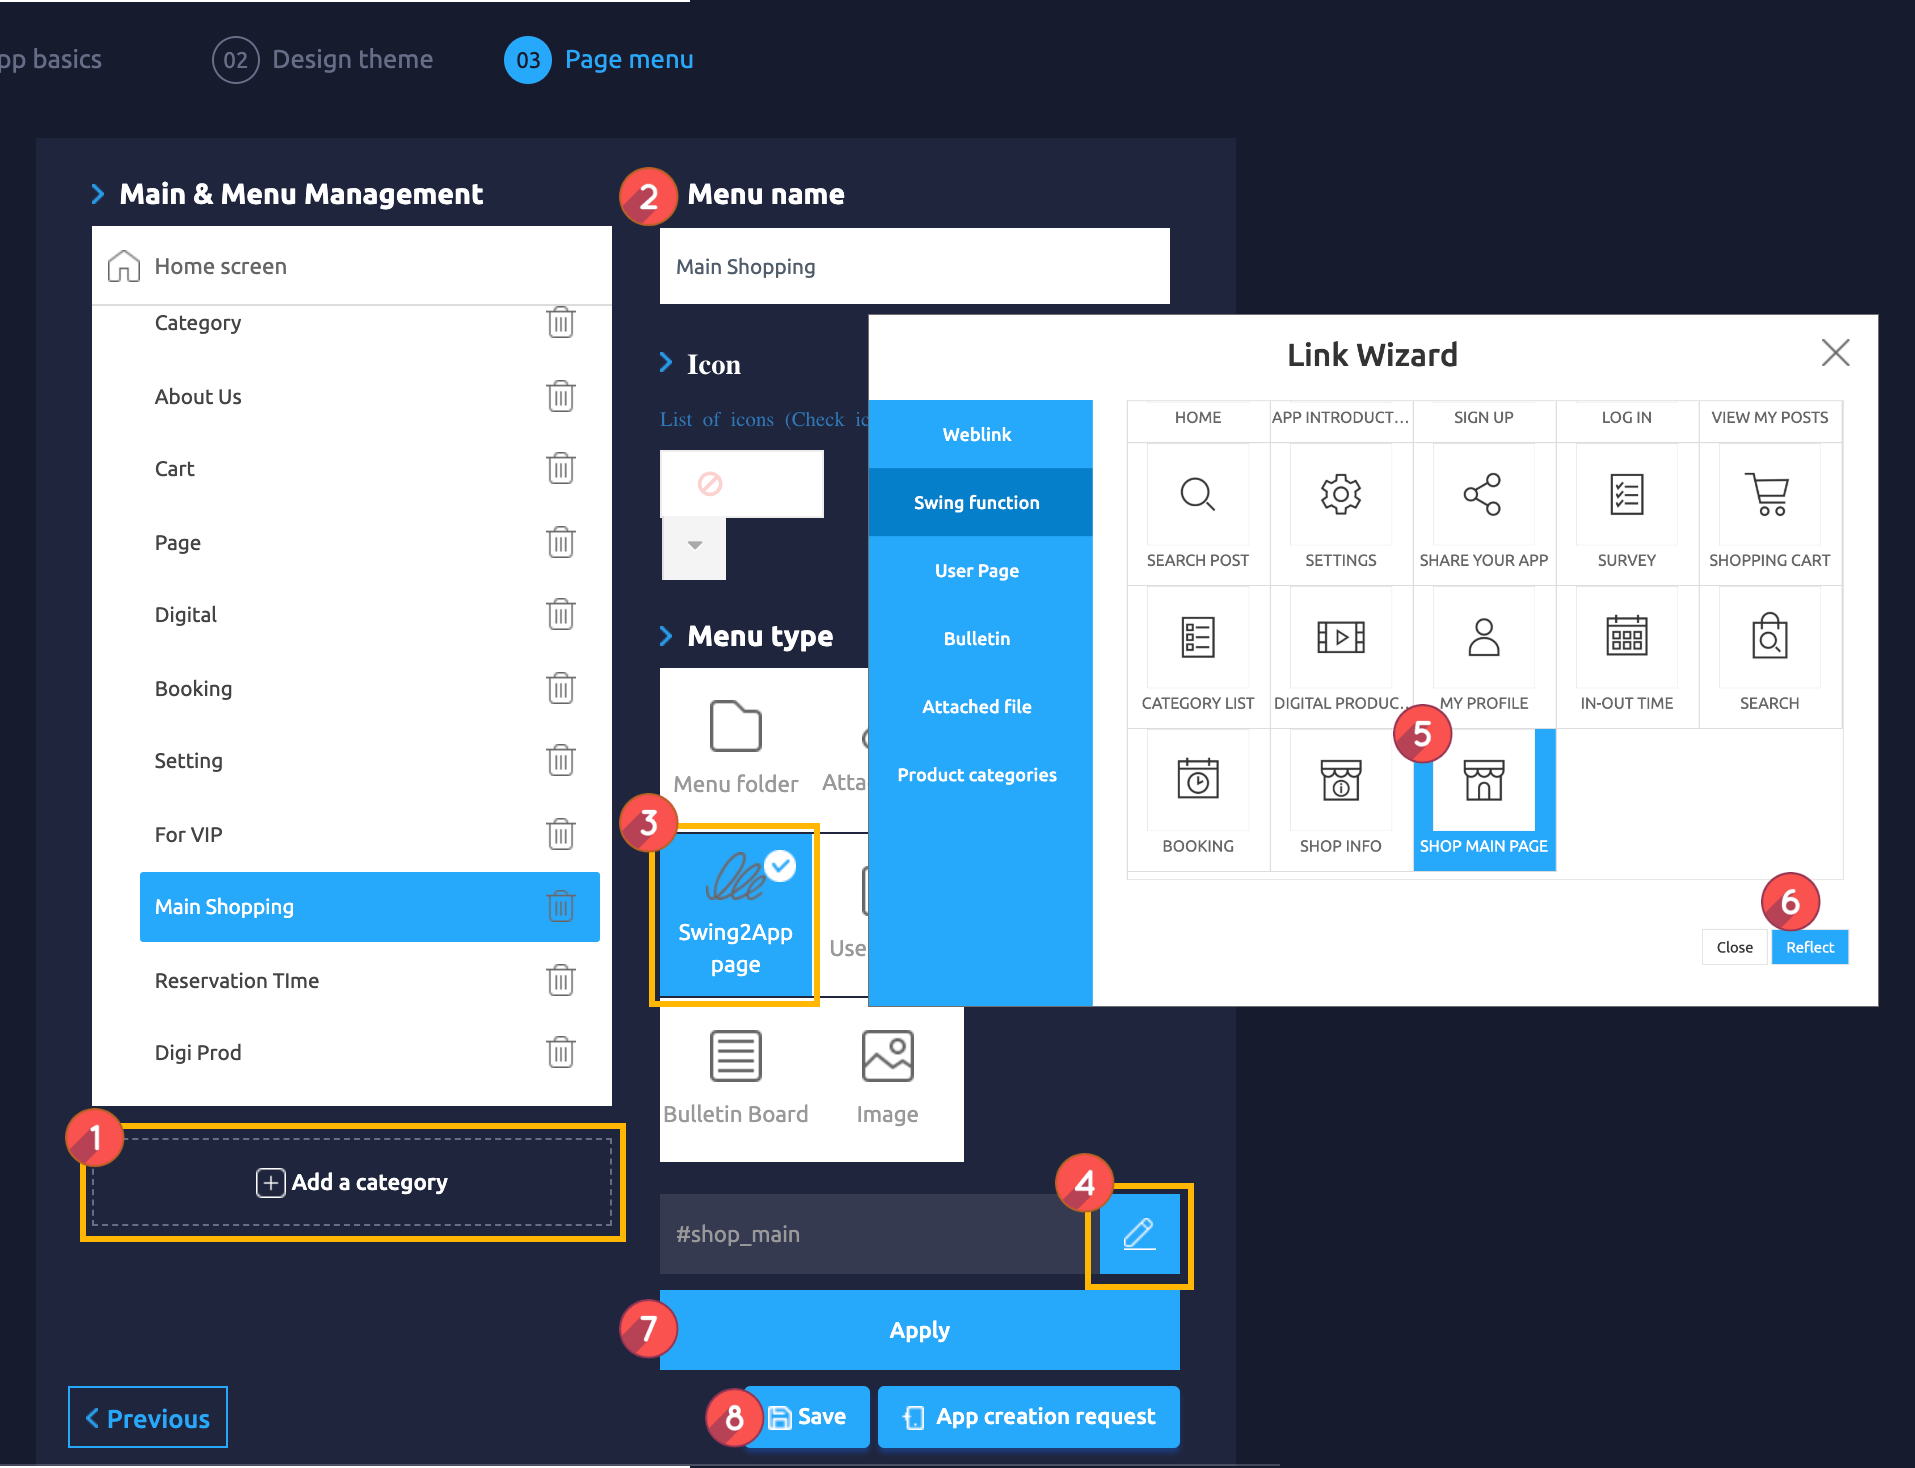
Maker(V2) Page → Move to Step 3 Page Menu
1. Select Home screen and click **Add a Category.** A new menu item will appear.
2. Select the new menu item and change the name in **Menu Name.**
3. Select **Swing2App Page.**
4. Click on the **Link Wizard** icon. The **Link Wizard** pop-up window will open.
5. Select a **Shop Main Page** from the list.
6. Click on **Reflect**
7. Click on **Apply.**
8. Click on **Save.**
\*\*If you do not apply the main page of the shopping mall, you will not be able to see even if you register a lot of products in product exposure management.
Therefore, once you have registered the product to be exposed in product exposure management, please come to the app production page and apply the main swing2app page of the shopping mall to the app.
### **6. App launch screen**
**Let’s run the shopping mall app and see how the product exposure management page registered above will look like in the app.**
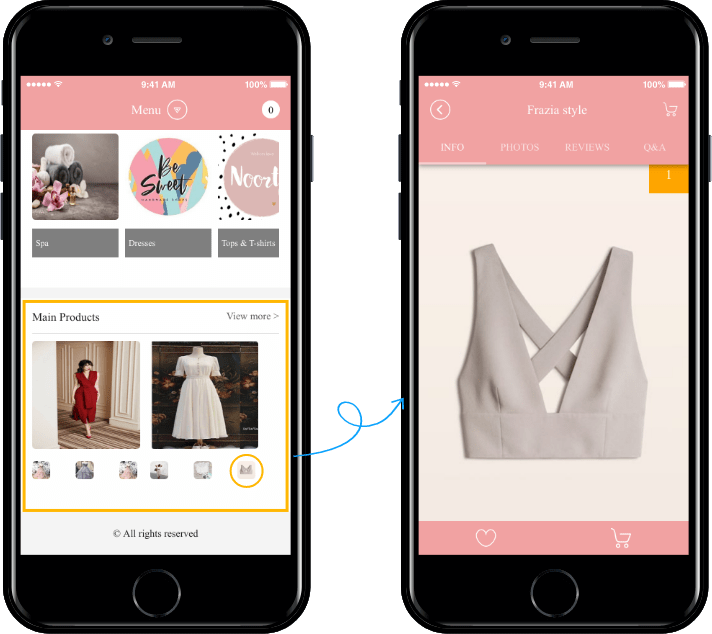
The **\[Shop Main]** page is applied to the home page.
If you scroll down a little, you will see a menu called **\[Main Product]** at the bottom.
**\* The \[Main Page-Collection] registered above is displayed in \[Main Product] in the app.**
If you select the small image icon under the thumbnail image, it will move to the registered category.
**\[Check the app launch screen with the product exposure management menu applied as a thumbnail]**