> For the complete documentation index, see [llms.txt](https://documentation.swing2app.com/llms.txt). Markdown versions of documentation pages are available by appending `.md` to page URLs; this page is available as [Markdown](https://documentation.swing2app.com/manual/maual/appbasic/toolbar-remove.md).
# Remove Push App Toolbar
**How to remove the push toolbar from push-only apps**
 **What is the Push Toolbar?**
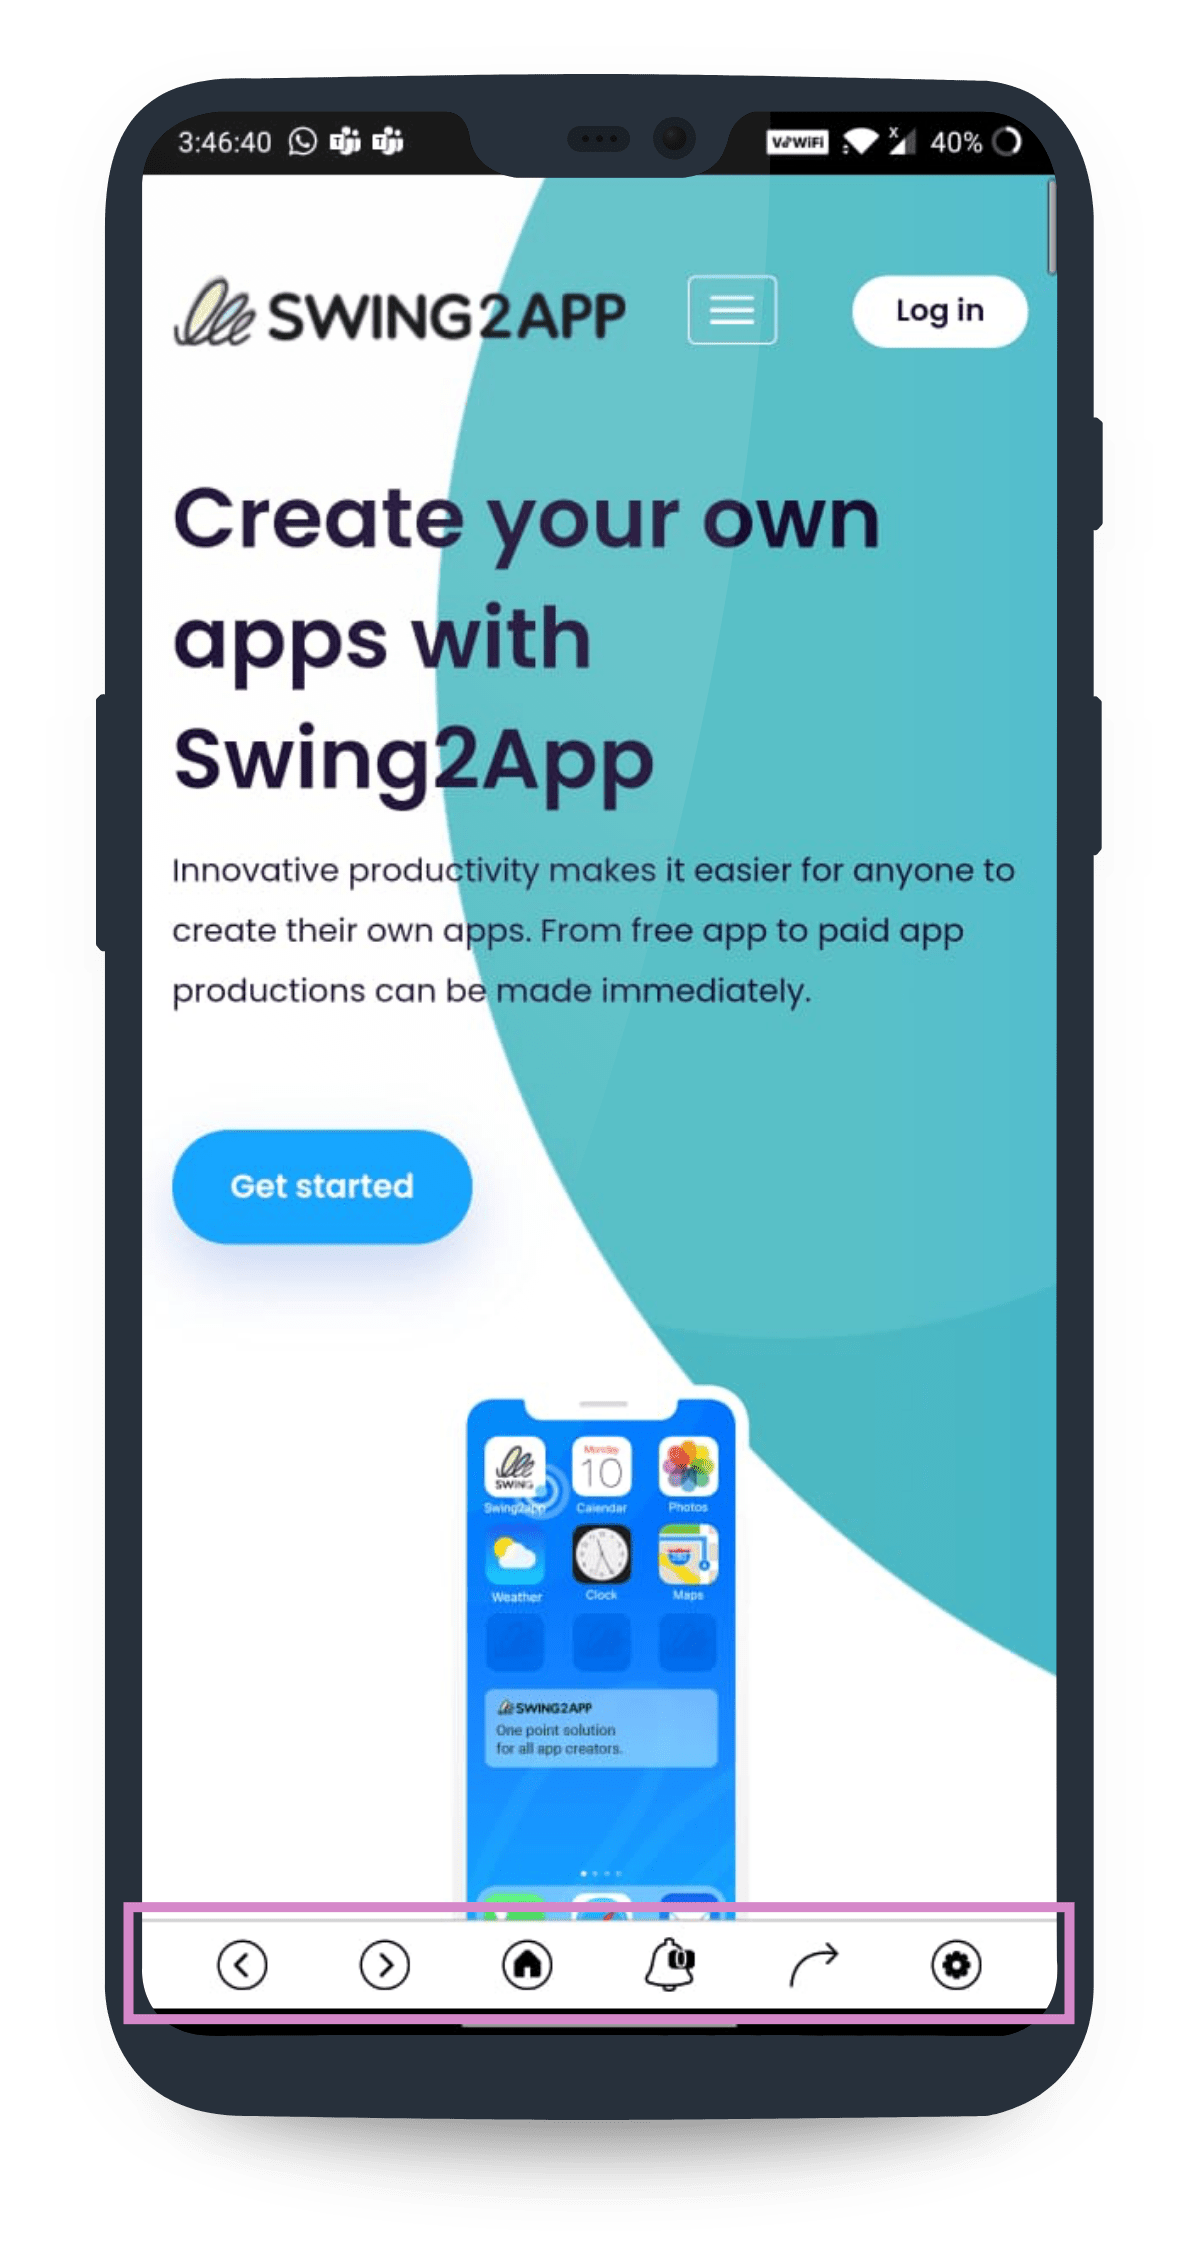
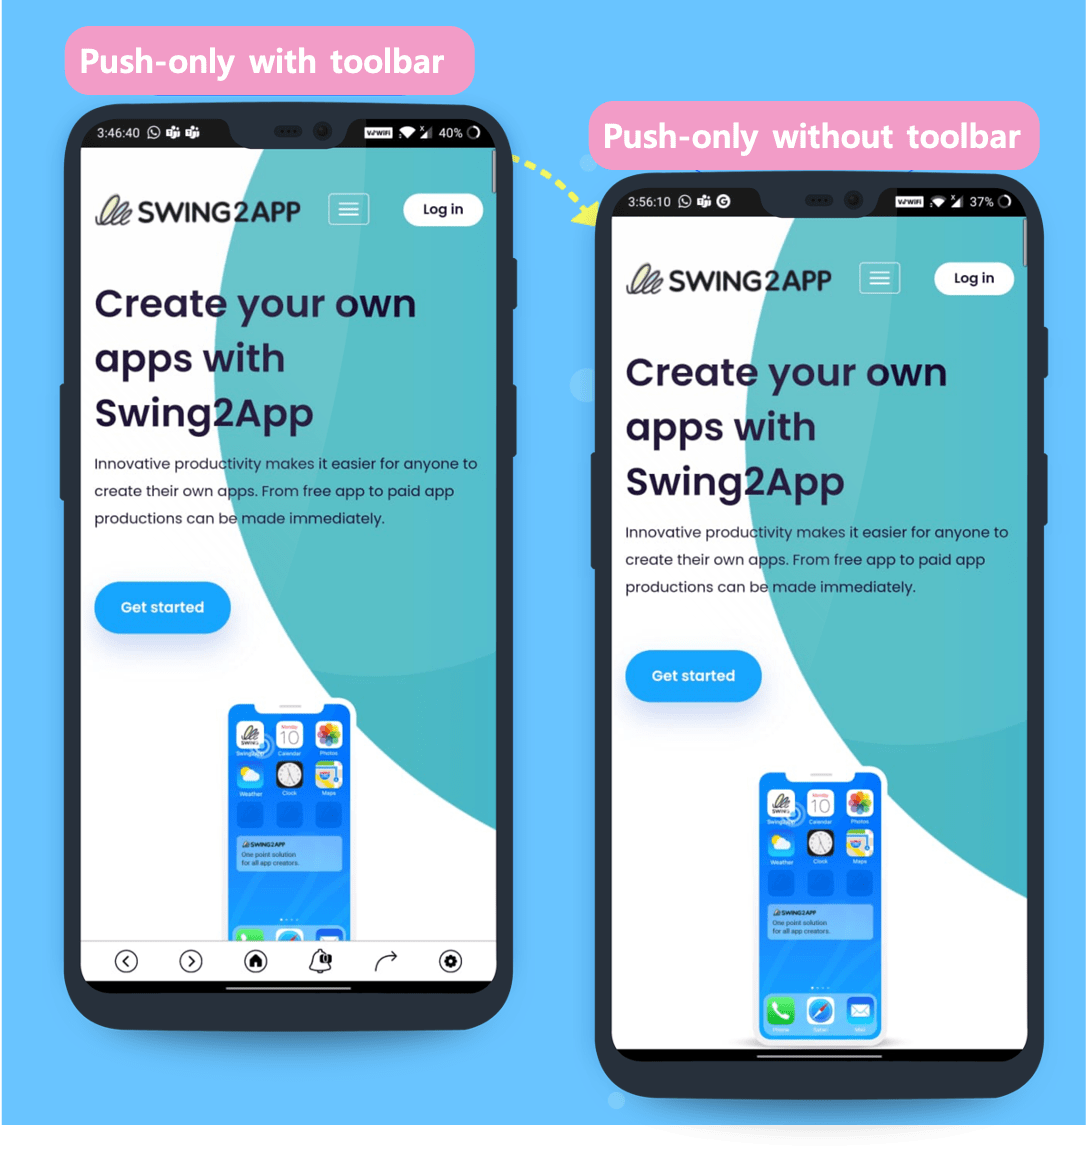
The push tool bar is created at the bottom of the app screen, as you can see in the image when producing a push-only app.
Unlike web view apps, push-only apps can send push notifications, so push toolbars are created together.
Toolbars are available with all-to-next step, home screen movement, push notification list, sharing, and push setup buttons.
Toolbar is a function that is automatically set and provided when producing push apps, so users were not able to delete it themselves before.
Now available as an app production option, you can choose whether to use the toolbar or remove it! (Update August 2020)
You can remove the toolbar if the app design doesn’t suit you or if you don’t need the feature.
The process of producing push apps is all the same. You can check the use of push toolbars at the design theme stage.
Please check the method below.
### **Stage 1 App Basic Information**
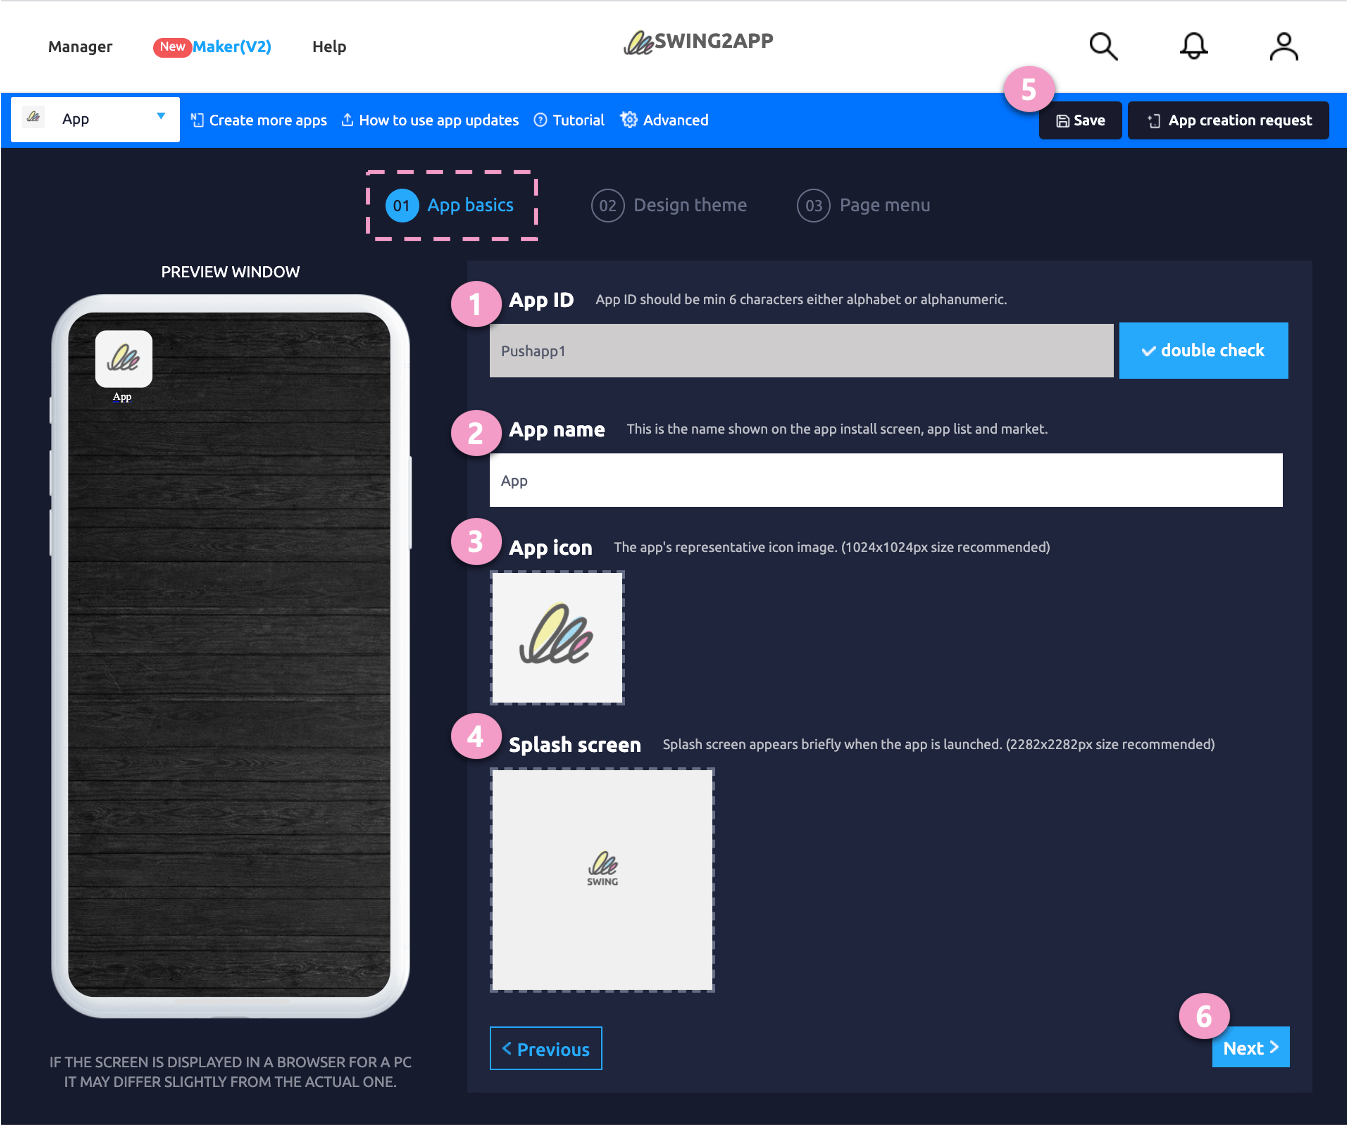
After logging in to the Swing homepage \[Maker (V2)] Step 1 Basic App Information
1\) Enter App ID: This is an app unique identifier and cannot be changed after setting.
2\) Enter the app name
3\) App icon image
4\) App standby screen image registration
5\) Select \[Save] button
6\) Select the \[Next] button.
**\*For the app icon image and standby screen image, first create an image according to the size indicated on the screen and then register.**
Please make the icon and standby screen first by viewing the production guideline manual!
**\*Except for the app ID, the app name, icon, and standby screen image can be modified and updated without restrictions.**
Modifying the basic information of the app is reflected only when you update to the new version by pressing the \[App Creation Request] button.
### **Stage 2 design theme**
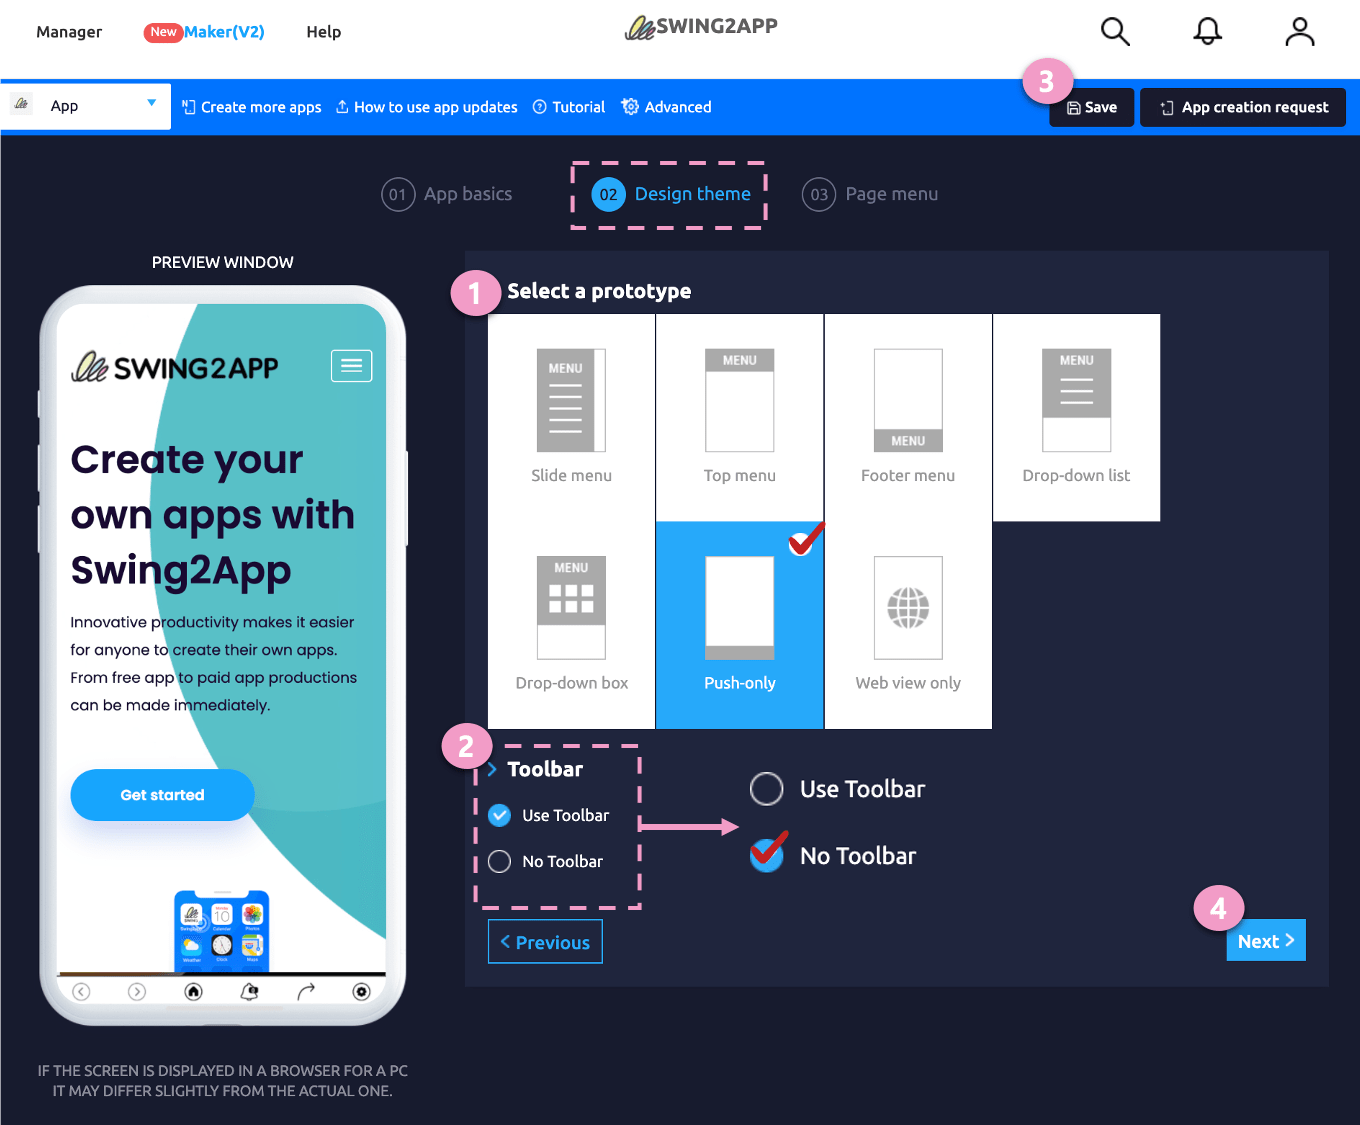
1\) Prototype selection: ‘Push only’ selection
2\) Select whether to display the toolbar
The default setting is checked as’Use Toolbar’.
\*If you are not using the toolbar, please check ‘Remove Toolbar’.
3\)\[Save] button
4\) Select the \[Next] button.
**\*Apps created for push-only and web-view only cannot be changed to general prototypes.**
In other words, it cannot be changed from push-only → to a prototype such as slide or top or footer.
The opposite is also the same. Cannot change from general prototype → push or web view prototype
If you need to change to a generic prototype, you need to create a new app.
**\*When using the push toolbar again, check whether the toolbar is displayed → ‘Use tool bar’.**
After saving, you must re-create the app.
It is reflected only when you update to the new version by pressing the \[App Creation Request] button.
**\*If you select to remove the push toolbar and create an app, a push app is created without a toolbar.**
Functions such as checking the list of push notifications and sharing buttons provided in the toolbar will not be available.
Because it is a push app, push sending is possible without problems.
### **Step 3 page menu**
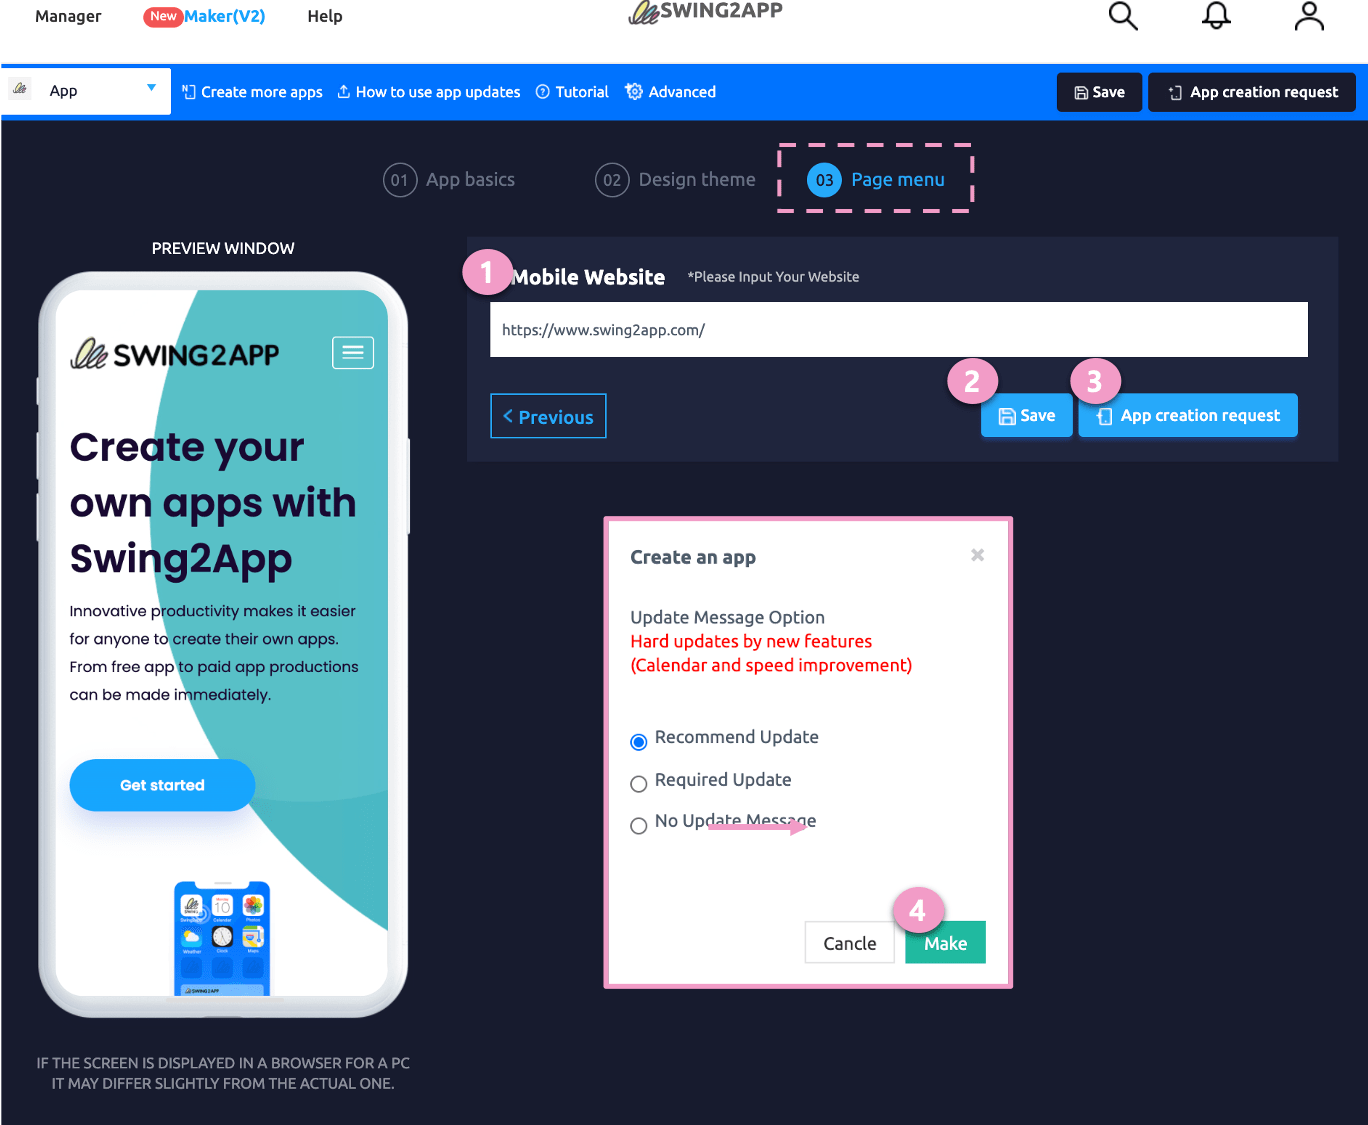
1\) Enter site address: Enter the URL address of the link you want to apply to the app.
\*When entering a link, be sure to enter the hyperlink http\://
2\) \[Save] button
3\) \[App Creation Request] button
4\) Click the \[Create] button to complete.
**\*The URL link address applied to the app can be changed without restrictions.**
You don’t have to create it again, just press the save button and it will be reflected in the app.
> **Other push app related usage methods**
**1) How do I change the web link address after creating a push app?**
Changing the web link address applied to the app is the same.
Page Menu → Enter the URL link to be changed in the site address field → Select the Save button
\* Editing the web link address is automatically reflected in the app by pressing the save button.
\*If you run the app again after closing, it will be applied to the changed website.
**2)Sending a push**
You can send push notifications after making an app with the push version.
In the app operation page → Push & Member → Send push menu, enter the message title and content, and then select and send the web link to be linked.
Reservation push sending is also possible.
Please refer to the manual below for how to send a push from the push app.
**☞**[**Sending push from push app**](/manual/appmanage/pushmember/pushapp-push.md)
3) Check the web link that does not apply to the push app. (Same for web view app)
Among web links, there are sites that do not work with the app, that is, embezzlement is prohibited.
\* Portal sites such as Naver and Daum, sites provided by the portal (moddo, Store Farm Web, etc.), YouTube, and SNS sites (Instagram, KakaoTalk, Facebook) are representative sites that prohibit embedding!
In particular, there are many users who want to link their own Naver blog or Daum Cafe through web view or push.
These sites do not work properly even if an error occurs or is displayed when linked to the app.
\* In particular, these apps cannot be released on the Play Store or App Store.
Therefore, please do not apply the above links to web-view apps and push apps.
It is okay to put the link in the external menu from another prototype, but please make sure that the link to the app link itself is not used as the above site address.
**What is the Push Toolbar?**

The push tool bar is created at the bottom of the app screen, as you can see in the image when producing a push-only app.
Unlike web view apps, push-only apps can send push notifications, so push toolbars are created together.
Toolbars are available with all-to-next step, home screen movement, push notification list, sharing, and push setup buttons.
Toolbar is a function that is automatically set and provided when producing push apps, so users were not able to delete it themselves before.
Now available as an app production option, you can choose whether to use the toolbar or remove it! (Update August 2020)
You can remove the toolbar if the app design doesn’t suit you or if you don’t need the feature.
The process of producing push apps is all the same. You can check the use of push toolbars at the design theme stage.
Please check the method below.
### **Stage 1 App Basic Information**

After logging in to the Swing homepage \[Maker (V2)] Step 1 Basic App Information
1\) Enter App ID: This is an app unique identifier and cannot be changed after setting.
2\) Enter the app name
3\) App icon image
4\) App standby screen image registration
5\) Select \[Save] button
6\) Select the \[Next] button.
**\*For the app icon image and standby screen image, first create an image according to the size indicated on the screen and then register.**
Please make the icon and standby screen first by viewing the production guideline manual!
**\*Except for the app ID, the app name, icon, and standby screen image can be modified and updated without restrictions.**
Modifying the basic information of the app is reflected only when you update to the new version by pressing the \[App Creation Request] button.
### **Stage 2 design theme**

1\) Prototype selection: ‘Push only’ selection
2\) Select whether to display the toolbar
The default setting is checked as’Use Toolbar’.
\*If you are not using the toolbar, please check ‘Remove Toolbar’.
3\)\[Save] button
4\) Select the \[Next] button.

**\*Apps created for push-only and web-view only cannot be changed to general prototypes.**
In other words, it cannot be changed from push-only → to a prototype such as slide or top or footer.
The opposite is also the same. Cannot change from general prototype → push or web view prototype
If you need to change to a generic prototype, you need to create a new app.
**\*When using the push toolbar again, check whether the toolbar is displayed → ‘Use tool bar’.**
After saving, you must re-create the app.
It is reflected only when you update to the new version by pressing the \[App Creation Request] button.
**\*If you select to remove the push toolbar and create an app, a push app is created without a toolbar.**
Functions such as checking the list of push notifications and sharing buttons provided in the toolbar will not be available.
Because it is a push app, push sending is possible without problems.
### **Step 3 page menu**

1\) Enter site address: Enter the URL address of the link you want to apply to the app.
\*When entering a link, be sure to enter the hyperlink http\://
2\) \[Save] button
3\) \[App Creation Request] button
4\) Click the \[Create] button to complete.
**\*The URL link address applied to the app can be changed without restrictions.**
You don’t have to create it again, just press the save button and it will be reflected in the app.
> **Other push app related usage methods**
**1) How do I change the web link address after creating a push app?**
Changing the web link address applied to the app is the same.
Page Menu → Enter the URL link to be changed in the site address field → Select the Save button
\* Editing the web link address is automatically reflected in the app by pressing the save button.
\*If you run the app again after closing, it will be applied to the changed website.
**2)Sending a push**
You can send push notifications after making an app with the push version.
In the app operation page → Push & Member → Send push menu, enter the message title and content, and then select and send the web link to be linked.
Reservation push sending is also possible.
Please refer to the manual below for how to send a push from the push app.
**☞**[**Sending push from push app**](/manual/appmanage/pushmember/pushapp-push.md)
3) Check the web link that does not apply to the push app. (Same for web view app)
Among web links, there are sites that do not work with the app, that is, embezzlement is prohibited.
\* Portal sites such as Naver and Daum, sites provided by the portal (moddo, Store Farm Web, etc.), YouTube, and SNS sites (Instagram, KakaoTalk, Facebook) are representative sites that prohibit embedding!
In particular, there are many users who want to link their own Naver blog or Daum Cafe through web view or push.
These sites do not work properly even if an error occurs or is displayed when linked to the app.
\* In particular, these apps cannot be released on the Play Store or App Store.
Therefore, please do not apply the above links to web-view apps and push apps.
It is okay to put the link in the external menu from another prototype, but please make sure that the link to the app link itself is not used as the above site address.