> For the complete documentation index, see [llms.txt](https://documentation.swing2app.com/llms.txt). Markdown versions of documentation pages are available by appending `.md` to page URLs; this page is available as [Markdown](https://documentation.swing2app.com/manual/appmanage/board/hashtag-search.md).
# How to use hashtag search option

**▶ What is the hash-tag provided by Swing2App?**
Hash-tag is a tag search function that finds all search terms entered with hash-tag (#).
The hash-tag search option provided by Swing2App can be used in the bulletin board.
You can set different search options for each app.
**\*App launch screen-hash tag example**
**▶ How to use hash-tags**
1\. Create a hash-tag search option\
Go to the Manager → Services → Bulletin Board page.\
Select the \[Create bulletin board] button → to go to the \[Advanced Style] menu which is the 4th item in the ‘Board and function setting’ window.\
In the Advanced Style menu, select the Hash-tag Search option \[Add Options] button, enter the search option you want, and save it.
2\. If you created a search option, enter a search tag for the post.\
Manager → Posts and go to the board you just applied the hash-tag.\
When entering a post, enter a search term in the hash-tag item.
3\. Apply the bulletin board to the app.\
Maker(V2) → Page menu → Apply the created hash-tag bulletin board to the app and save.
**Board Management-Move hash-tag search option**
1. Go to **Manager.** Select **Services** and click on **Bulletin Board** from the list.
2. Either click on **Create Bulletin Board** to create a new board or click on **Settings** to edit the existing board.
3. Select **Customize** so that you can select board UI and permission as per your requirement.
To set Hashtag settings, please select **Advanced style.**
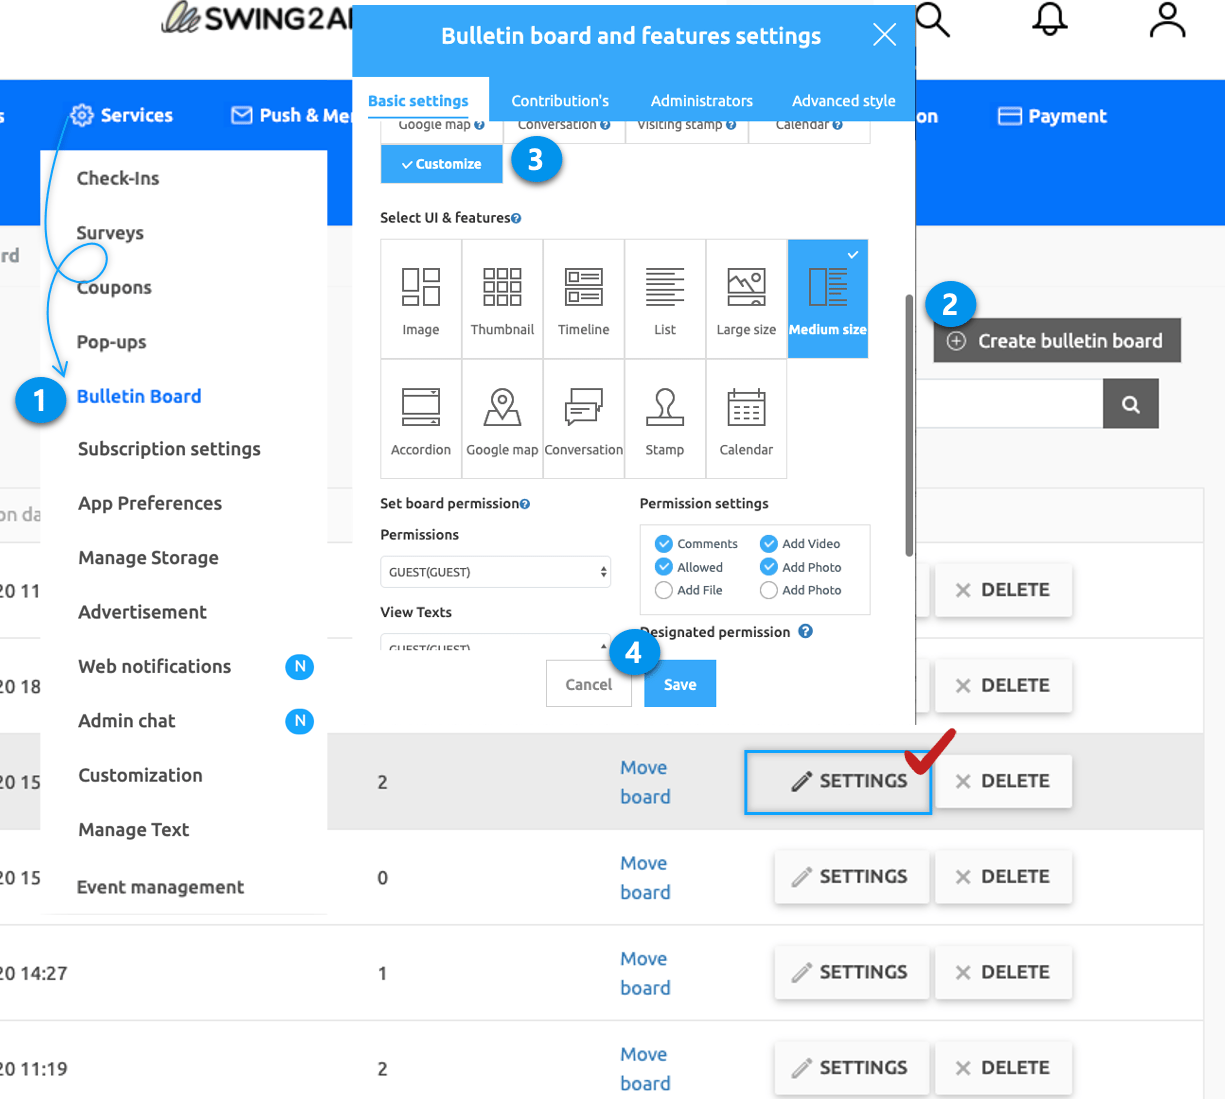
In **Advanced style,** select the post settings as per your requirement and select Hash-tag settings
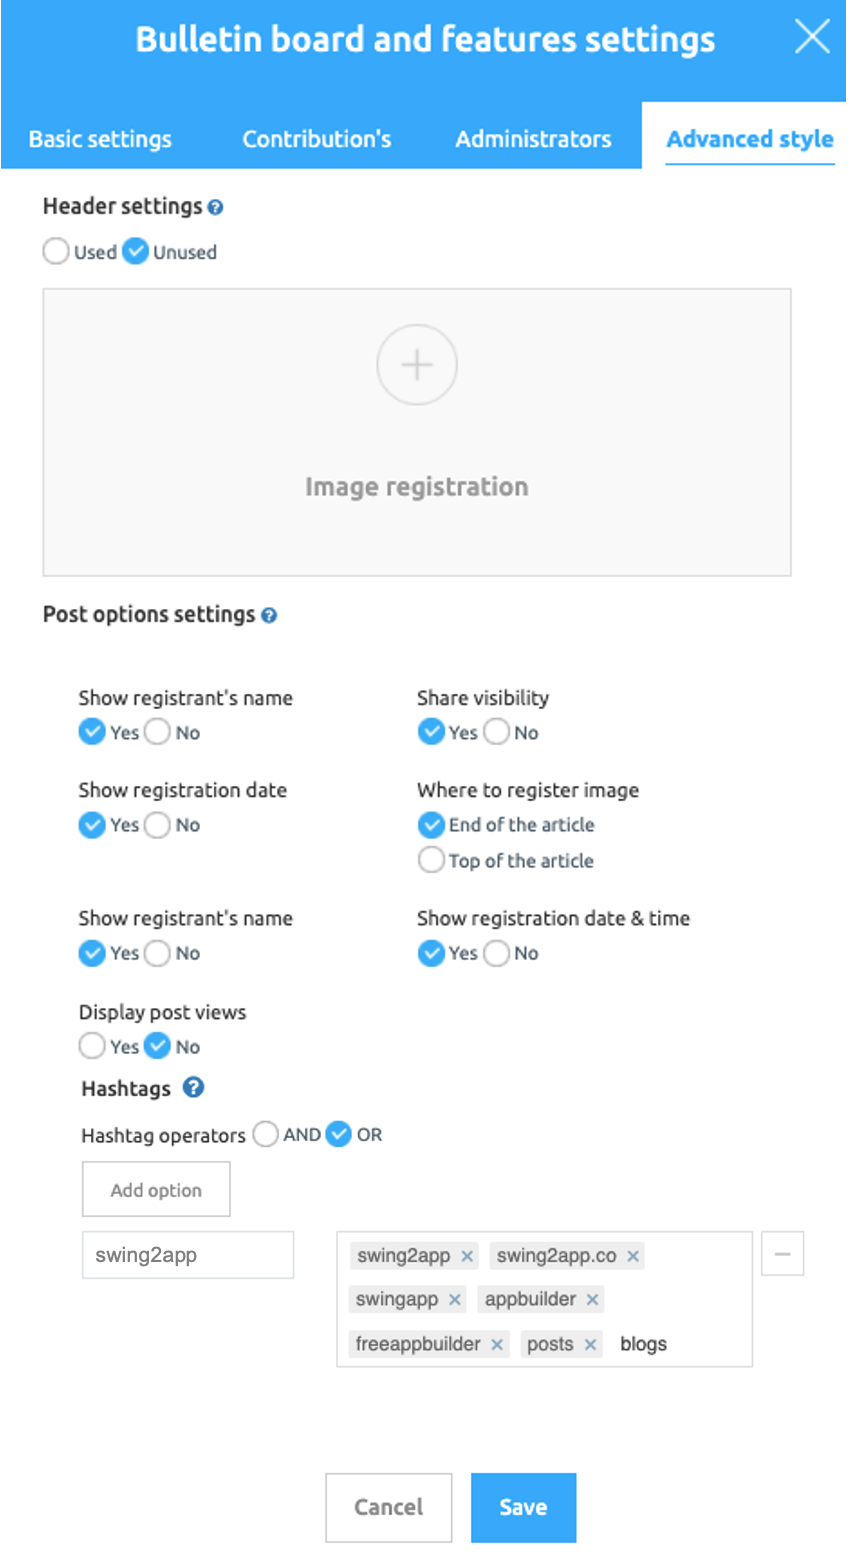
### **1. Create a hash-tag search option**
In the hash-tag search option, select
1. Add the option button to display the hash-tag input window.
2. Enter the option name.
3. Enter the option value.
4. Press the Save button to complete the hash-tag input.
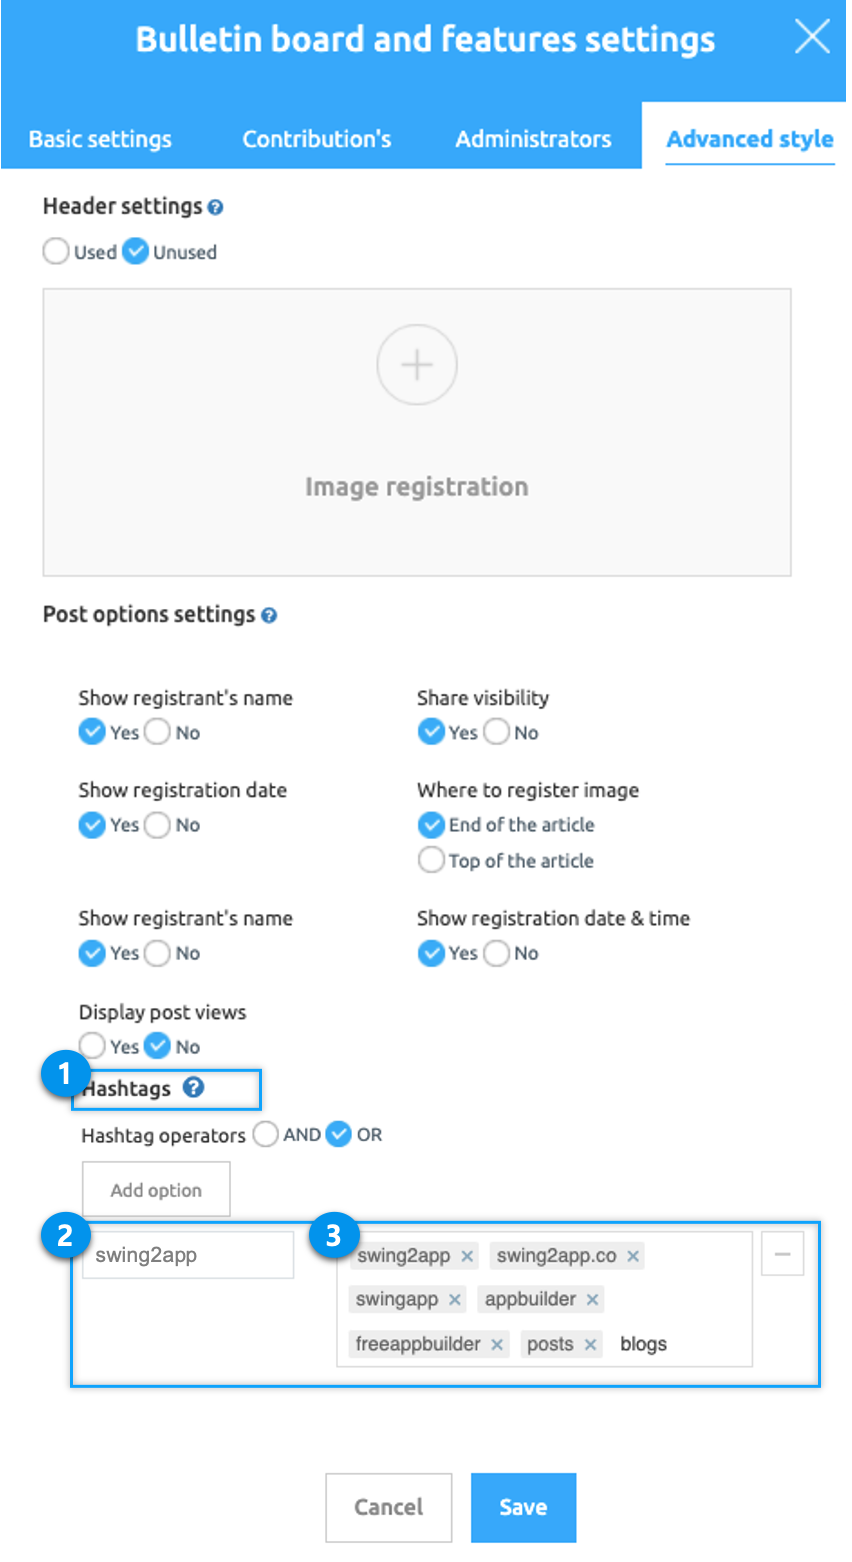
\*Option name – The name to classify the search term in the app\ \*Option value-Enter the search term to be searched by hash-tag\
\*When you enter an option value, the hashtag area is specified when you enter after entering the search term.
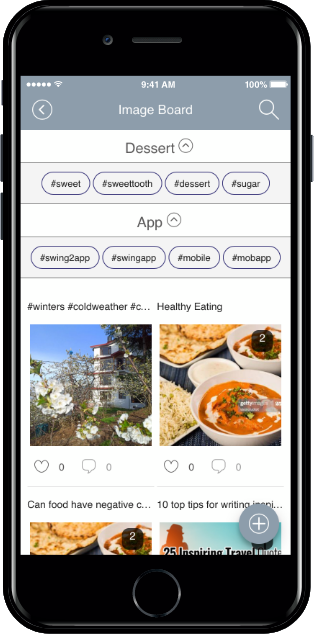
**▶ App Launch Screen – Hash-tag**
If you move the board with hash-tag on the mobile app, you will see a banner called **Tags**(name you used in add options) at the top.\
When you select the banner, you’ll see the option value (hash-tag search term) you entered above below the banner.

### **2. Hash-tag Operator**
You can add hash-tags as described below in the image.\
If you run multiple hash-tag options, you can use the hash-tag operator to set the value.

\
\&#xNAN;**★What is a hash-tag operator?**\
The options feature allows you to set the value that is retrieved when you add several hash-tag search options.\
You can use the hash-tags ‘AND’ and ‘OR’ operators.
> **\*AND: Shows only posts that meet the intersection and search terms.**\
> \&#xNAN;**\*OR: Shows all posts including unions and search terms.**
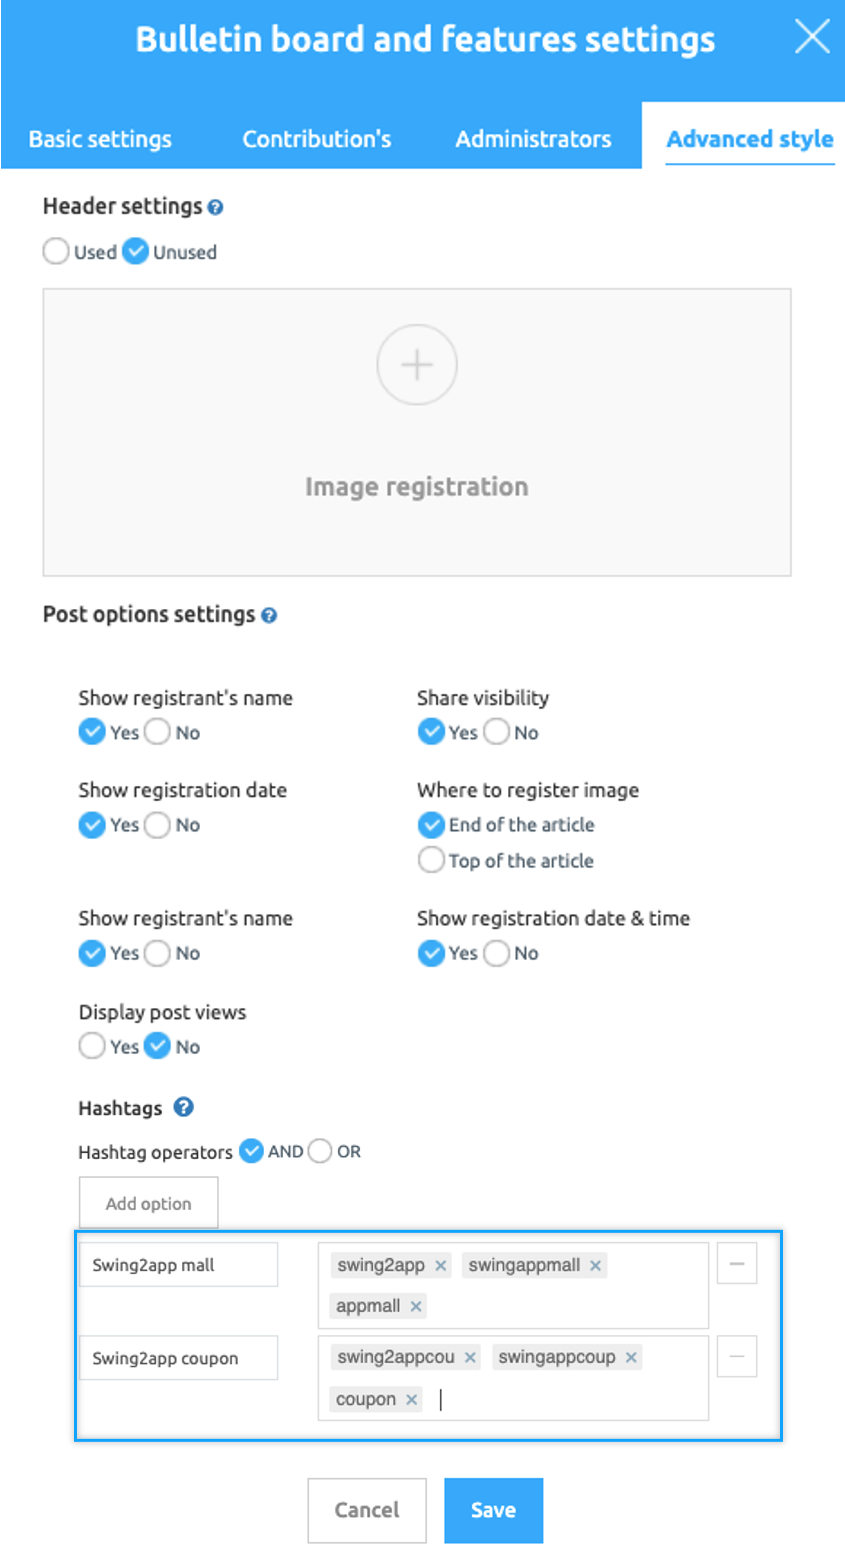
Two options have been added here, Job Search and Local Search.\
\&#xNAN;**-Use ‘OR’ if you want to search and show both business and region selections**\
\&#xNAN;**-Use ‘AND’ if you want only selected regions from the business categories to be shown.**\\
**▶ App Launch screen \_ Apply hashtag operator (AND)**

Therefore, if the hash-tag operator has created multiple search options,\
And If you want to see all the values you choose, select ‘OR’.\
If you want to filter out the values that correspond to the condition, you can select ‘AND’.
### **3. How to add a hash-tag search option. Checking with gif images**
**If you applied the hash-tag feature on the board, you will need to go to that post and enter the hash-tag.**\
**The hash-tags of posts and bulletin boards must be entered to match each other then the only search is possible.**
### **4. Entering hash-tag search terms in posts**
Hash-tags are different from regular posts, so entering the same search terms in the body of a post doesn’t make it searchable.
It is a feature that helps you search for tags. You need to enter a word to find your search as a hash-tag query.
1. Go to **Manager.**
2. Select **Posts.**
3. Click on the board to apply hashtags in the body of the post.
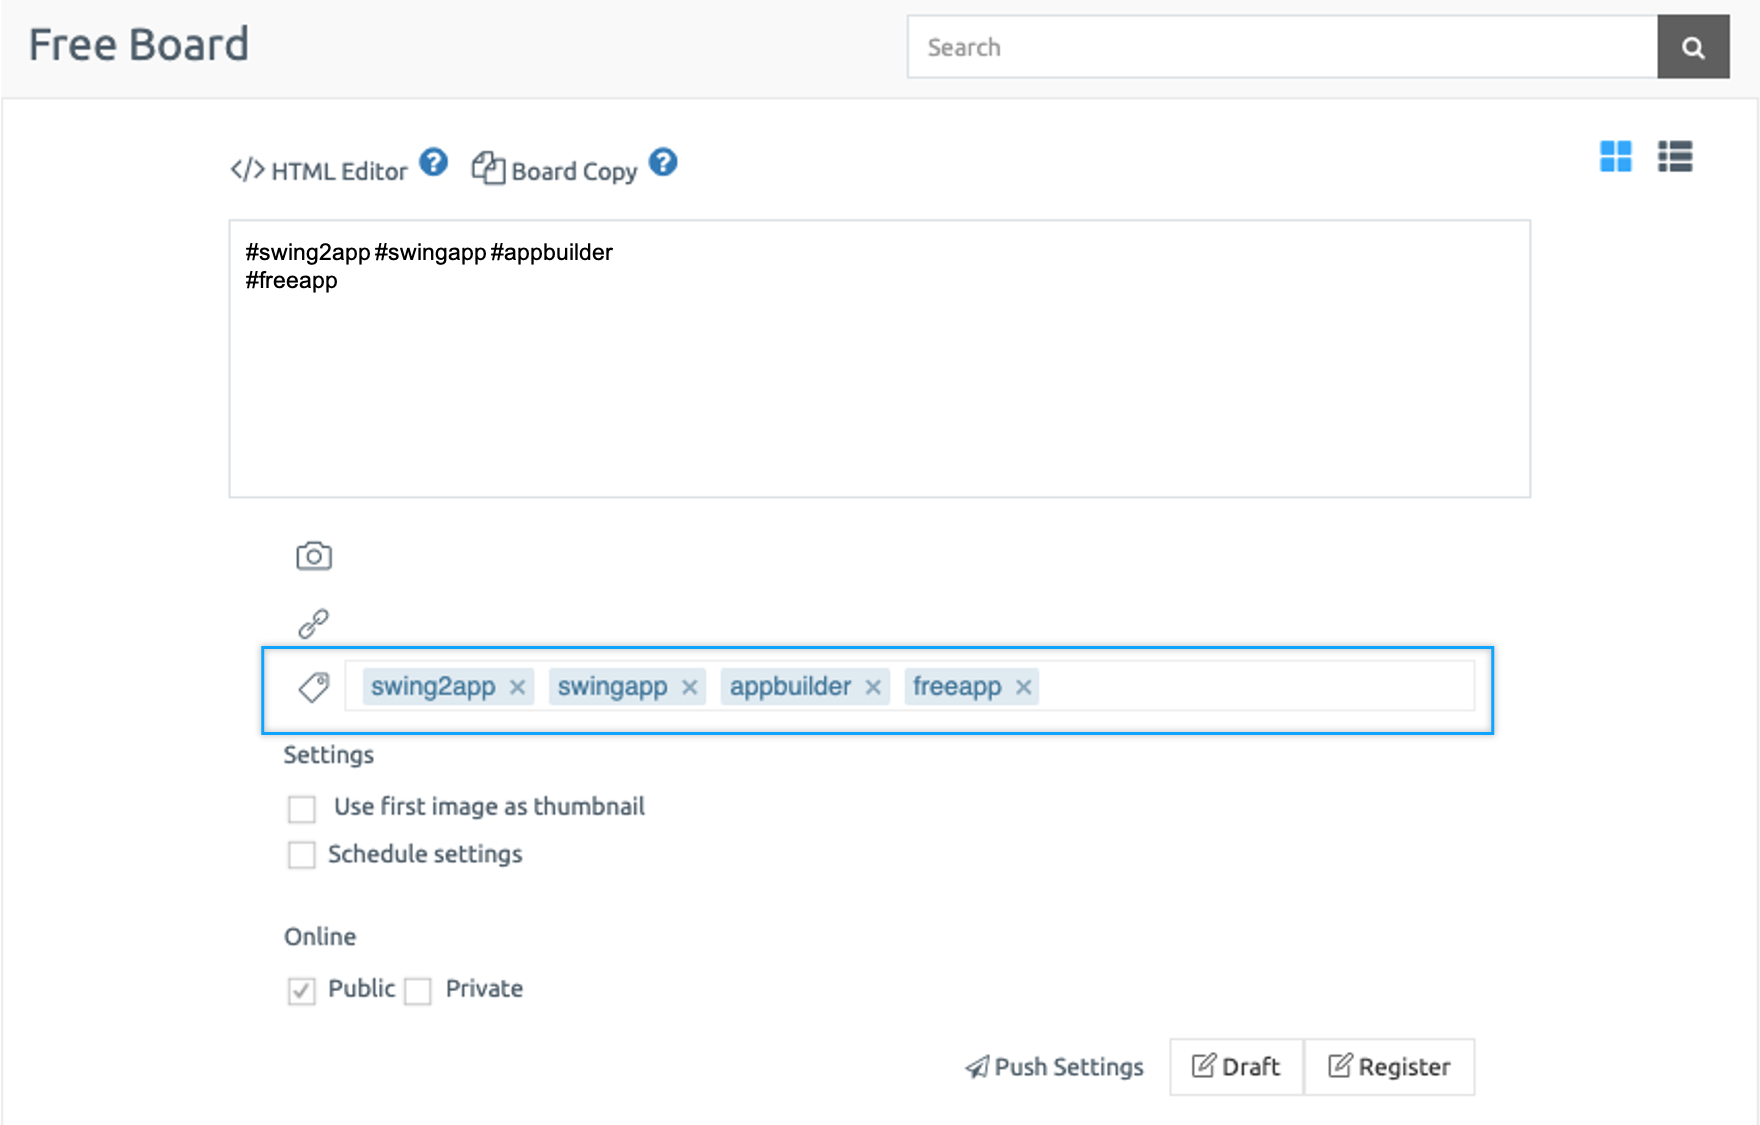
If you look at the bottom of the post, you can see the \[Hash-tag] icon.
As you typed the hash-tag option value, and you enter the same keyword and hit enter, the hash-tag is applied.
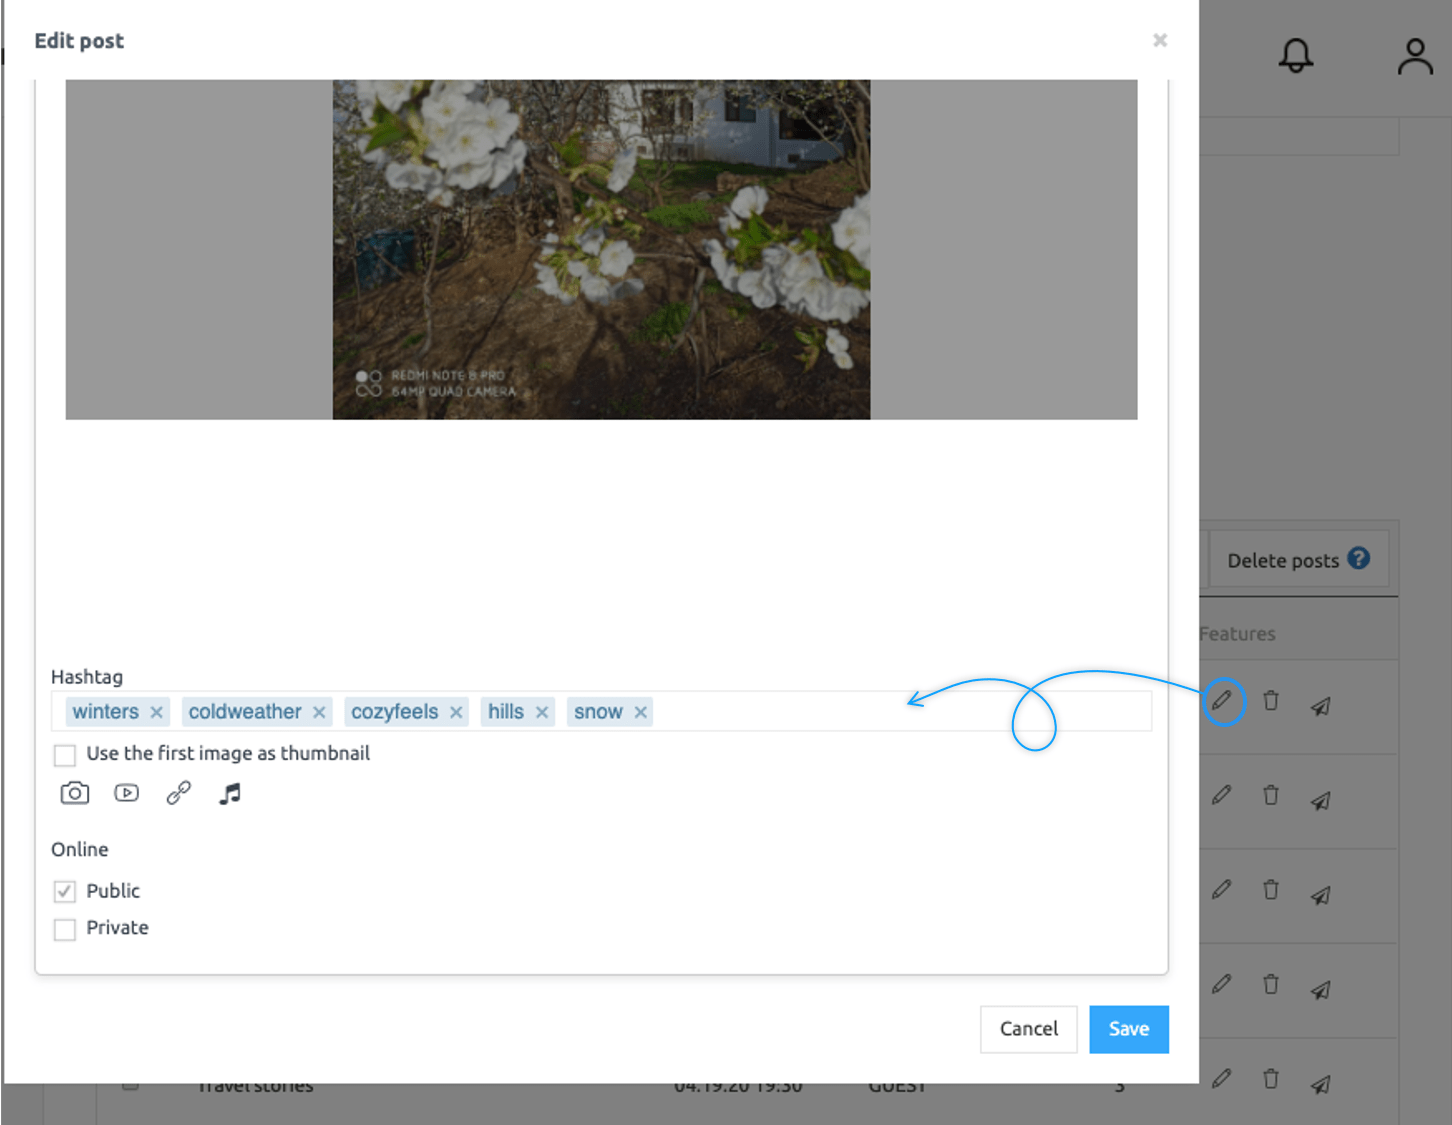
**▶ If you add or edit a hash-tag on an existing post**
If you want to add a hash-tag to the existing post only.
1. Select the post you want to edit and click on the edit icon(pencil)
2. In the pop-up window, enter a search term in the hash-tag column.
3. Click **Save.**
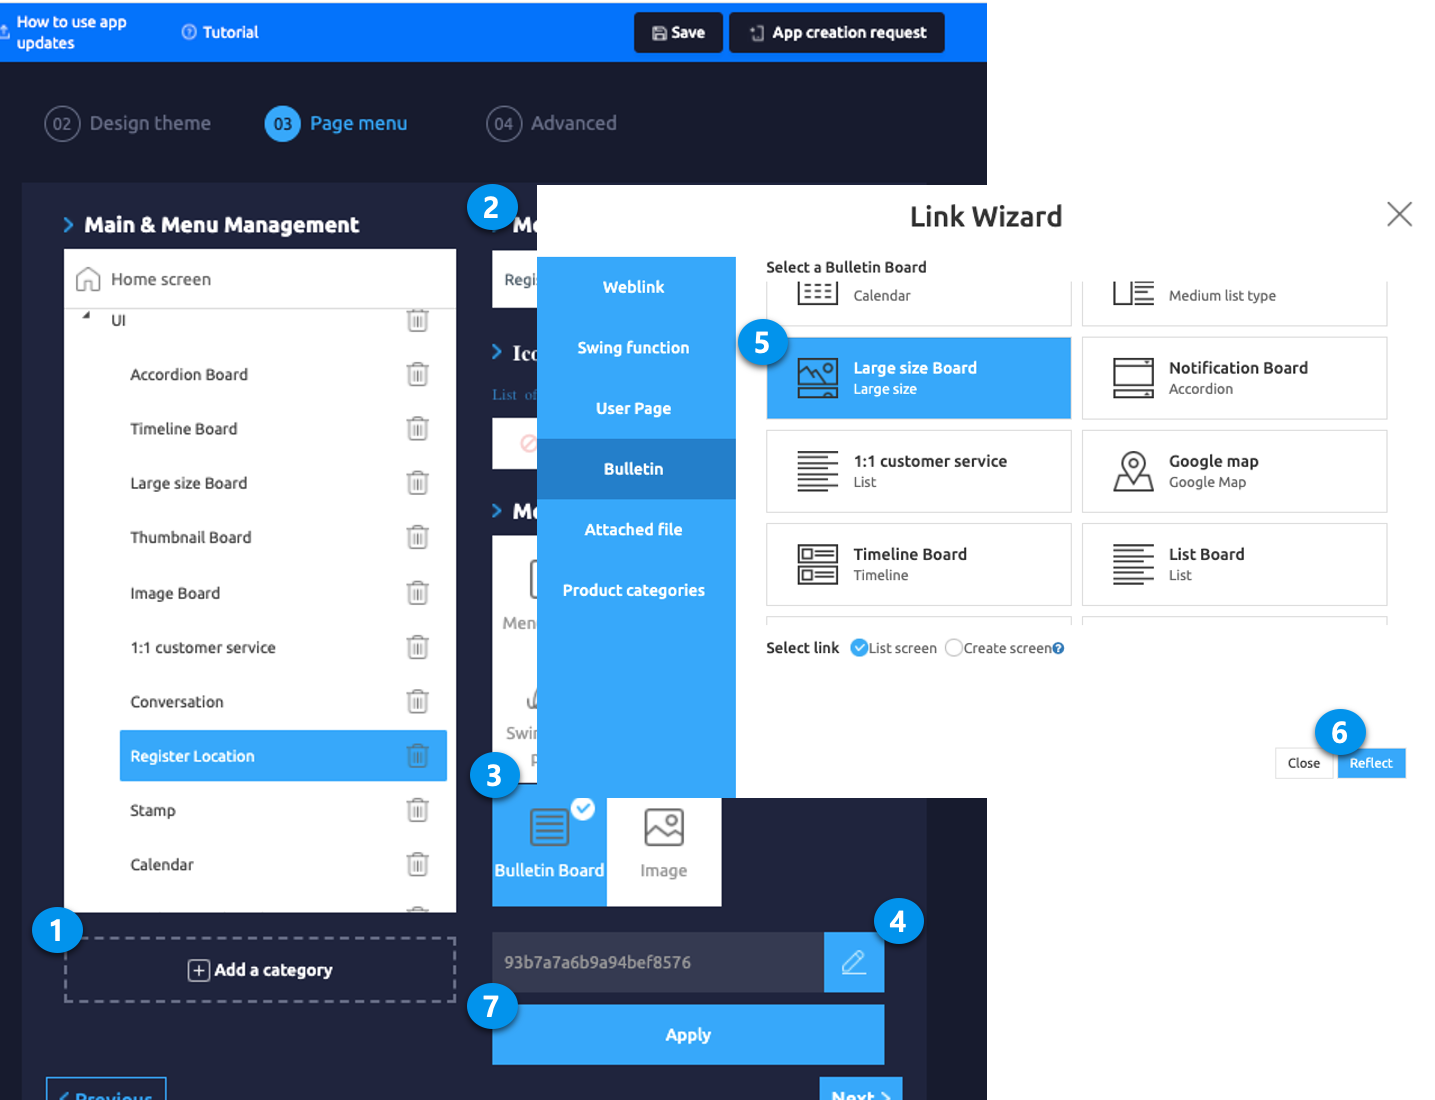
### **5. Apply hash-tags to the app**
Now, finally, you need to apply the bulletin board to your app so that you can use the hash-tag bulletin board in your app.
Go to **Maker(V2)** and select the **Page menu.**
1. From the menu set by default, click the **Add a category** to add a new menu.
2. Edit the name of the added item in **Menu Name.**
3. Select **Bulletin Board** in the **Menu Type.**
4. Click on **Link Wizard**(pencil icon).
5. Select the board from the list of Bulletin Boards in the Link Wizard window.
6. Click on **Reflect.**
7. Click on **Apply** and then **Save.**