Swing2App Manual
Help CenterFAQContact UsBuild an app
  • Swing2App
  • Swing2App Update
  • FAQ
    • FAQ(Frequently Asked Questions)
      • Frequently Asked Questions (FAQ)
      • App Creation FAQ
      • App Operations & Features FAQ
      • App installation and download FAQ
      • Registration and Login FAQ
      • App Preview FAQ
      • Swing Shop FAQ
      • Billing FAQs
      • Paid App Passes & Tickets FAQ
      • Paid usage and uploading FAQ
      • Unlimited Usage and Package FAQ
      • Push sending FAQs
      • PlayStore FAQ
      • App Store FAQ
      • AdMob FAQ
      • Affiliate Program FAQ
      • Customization FAQ
  • Manual
    • App production manual (V3)
      • Start App Creation With MakerV3 Screen
      • Manual on How to Create an App In MakerV3 Screen
      • STEP1 Basic Information
      • STEP2 Prototype
      • STEP3 Page
        • How to Create a Home Screen For an App
        • Registering a menu icon image
        • How to use: Menu Exposure Settings
        • Set menu settings: Access permissions
        • Page Design - UI KIT
        • Page Design - eStore Page
        • Page Design - eStore Deals
        • Page Design - Product Category
        • Page Design- Page Templates
        • Page Design - Image Page
        • Page Design - HTML Editor
        • Page Design - Sign Up, login & Settings Page.
        • Page Design - Search Posts Page
        • Page Design - View Favorite Page
        • Page Design - View Coupons Page
        • Page Design - Share Your App Function
        • Page Design - App Introduction Page
        • Page Design - Admin Chat Page
        • Page Design - Chat List Page
        • Page Design - Surveys Page
        • Page Design - View My Posts Page
        • Page Design - Attendance Check Page
        • Page Design- Web Link
      • STEP4 Complete App Creation
        • How to create an additional app
        • How to update an app
        • App launch screen by update type
    • App production manual(V2)
      • App basics
        • Guide to create an app
        • App Update Type And Method
        • App Launch Screen Update Type
        • Push or WebView version creation method (super simple app creation)
        • WebView App Manual(production and operation)
        • Push App Manual(production and operation)
        • Remove Push App Toolbar
        • App Production
        • Guide to create App Icon Image
        • Guide to Create an Idle Screen Image
        • Image Editing Tool
      • Design Theme
        • Prototype UI Design
        • App Main Design Style
        • App Navigation Styles
        • Applying Slide Prototype
      • Page Menu
        • Page Menu – Main Menu Management
        • Creating an App Home Screen
        • How to use Web Link
        • Home screen: Applying App Introduction Page
        • How to use file attachment
        • How to use the image attachment
        • How to use Product category
        • How to use Weblink-linkeditor
        • How to use User Page
        • How to create an Image Page
        • How to create a web template page
        • How to create HTML editor page
        • Swing2App Page – Signup, Login, Settings
        • Swing2App Page – Search Post
        • Swing2App Page – View Favorites
        • Swing2App Page – View Coupon
        • Swing2App Page – Share App
        • Swing2App Page – App Introduction
        • Swing2App Page – Admin Chat
        • Swing2App Page – How to read my article
        • Swing2App Page - Survey
    • App Production Application TIP
      • Sending a push using the push API
      • Insert GIF image
      • Create a Flash style home screen
      • Change App Loading Icon
      • Set device mode (switch app screens)
      • How to use the app review button
    • App operation manual
      • Bulletin board management
        • Create a bulletin board
        • Bulletin board type, design style
        • Bulletin Board – How to Enter Posts
        • Bulletin Board – Post Schedule Settings
        • Set post detail options
        • Bulletin Board – How to Attach Files
        • Register video post(how to register a video)
        • Bulletin Board – How to Attach Music Files
        • How to enter post comments and comments
        • How to set up Bulletin Board Permission
        • Bulletin board authority setting
        • How to create a Form in Bulletin Board
        • How to write a bulletin board
        • How to use the list screen and creation screen
        • How to set up a bulletin board post alarm
        • Set Up a Board Administrator
        • Google Map Bulletin Board
        • Google Map Bulletin Board Advanced setting
        • HTML Editor Writing
        • Report and manage posts
        • Block posts
        • Create bulletin board by membership level
        • Bulletin board thumbnail image registration
        • Search Post Functions
        • Post Management Options
        • How to use the bulk registration bulletin board
        • Copy Bulletin Board
        • Copy Post
        • Move a post
        • How to delete bulk posts
        • Group Chat
        • Create a Secret Bulletin Board (1:1 Customer Service)
        • Create a link for a post
        • How to Use Calendar
        • Calendar Application - How To Use
        • How to create and register a stamp
        • Stamp application: Issue coupons upon completion of stamps
        • How to use the bulletin board header
        • Using 2 hash-tags Options
        • How to use hashtag search option
        • Download Posts
      • Service management
        • How to use Pop-up
        • Check-ins
        • Surveys
        • Resource Management – Capacity Management
        • Coupon Management: Create and Issue Coupon
        • How to use Admin Chat [1:1 Chat]
        • Chat Administrator Page – Chat List
        • Chat Administrator page – Chat settings
        • How to use chat list
        • Unified Notification Settings
        • App Policy Management – App Subscription Policy
        • App Terms of Use And Privacy Policy
        • App Policy Management-Membership Form
        • App policy management – How to set up a membership completion message
        • Membership Form-ID Setting
        • App Terms and Conditions, Privacy Policy
        • Create a Private App
        • App string management
        • Link Wizard
      • Push & Member Menu
        • Send push
        • Send Push from Push Version App
        • Push Posts
        • Display messages after getting push notifications
        • Delete or Mark as Read Push Notifications
        • Push history
        • Member Inquiry - Check Member Information
        • Member Inquiry - Setting up an Associate Administrator
        • Member Inquiry - Create User Account
        • Setting up an App Administrator
        • Permission Group Settings-Membership Rating
        • Admin Screen: Change App member's name
        • How to use Push device management
      • Analytics
      • Version control
        • Version management-App production and market registration history
        • How to apply for App Store Upload
        • How to apply for Google Play Store Upload
        • How to apply for a mobile web upload
      • Payment
        • Introduction of paid products and payment methods
        • Payment-How to use my payment status
        • How to Use 1000 SMS Tickets
        • WebView Lifetime Paid App
        • PushOnly Lifetime Paid App
        • How to use mobile web registration
        • Budget package
        • AdMob Power Package
        • Large Storage Packages
        • Online Stores – Coupon
      • Full Search Function
    • SwingShop
      • Apply for Swing Store
      • Swing Store Product Type
      • Introduction of pages provided by Swing Shop
      • How to Apply a Swing Store Menu to your App
      • Swing Shop - Shopping Mall Main Page How to Use
      • Shopping Mall Main Page Slide Image
      • Store Management - Basic Information Settings
      • Store Management - Shipping Management
      • Product Management - Set how to receive goods
      • Product Management - Product Category Registration
      • Store Management-Policy Settings
      • Product Management - Physical Product Registration
      • Product Management - Digital Products: PDF File Registration
      • Product Management - Digital Products: Video Files Registration
      • Product Management-Digital Products: Authorized Sales
      • Product Management-Digital Products: Coupon Registration
      • Product Management-Reservation system product registration
      • Product management - Reservation system, Time reservation product registration
      • Product management-Reservation System Operation TIP
      • Product Management - Product Post Management
      • Product Management- Product Inquiry, Reservation Product Inquiry
      • Product Management - Product Exposure Management
      • Order Management
      • Reservation Order Management
      • Store Statistics
      • Swing2App Page-shopinfo
      • Swing2App Page-Search
      • Swing2App Page - Category List
      • Swing2App Page-mypage
      • Swing2App Page - Cart
      • Swing2App Page-digital products
      • Product Modification - Modify a registered product
    • Affiliate program
      • How to apply for affiliate program
  • Web App - Webview, Push
    • Web App - Webview, Push
      • Swing2App WebView App
      • Swing2App Push App
      • webview app manual
      • Pushapp manual
      • How to create a push app or webview app easily
      • Push-app toolbar
      • How to use the first run address in webview and push app
      • WebviewApp basic settings and advanced setting options
      • Push App Toolbar - Introduction: How to Use and Functions
      • Registering a Push Notification Icon Image
      • Progress Bar Color Settings
      • Remove progress bar (not in use)
  • App Guide
    • How to use Swing2App Preview
    • Application operation
      • How to convert and use paid apps.
      • How to install APK file on your phone
      • How to install apps by sharing
      • Free app conversion method after Paid period ends/expires
      • Download the app after accessing the mobile Swing2App site
      • Download the app using the app installation link address
      • If you can not install the free version of the app (APK file), please check!
      • If you can not install the paid version app (APK file), please check!
      • Find App Password
      • Registering and changing your app profile picture
      • How to re-register with the same ID after leaving the app
      • Share app
      • App – Share your Bulletin Board Posts
      • How to use the App Administrator menu
      • App Administrator menu: Chat
      • App Administrator Menu: Registering Stamp
      • App Administrator Menu: Use Coupon
  • STORE
    • Play Store
      • How to create a Google Developer Account
      • Create a Google Developer - Business Account
      • Google Developer Account Identity Verification
      • Launching Play Store App
      • Setting up Play Store app auto-updates
      • Transfer your app to another developer account on the Play Store
      • How to change the name of Play Store Developer
      • Delete Play Store app
      • How to use Google Help Center
      • Issuing Google Maps API Key
      • Invite a Play Store Developer Account
      • How to get app updates released on the Play Store
      • Launch the Play Store Private App (Alpha release)
      • Check Play Store App Installs
      • Reply to Play Store app reviews
      • Play Store Developer Page
      • Play Store prior notice
      • Linking Play Store Privacy Links
      • Play Store App Search TIP
      • How to restore Play Store app
      • Update the Play Store App
    • App Store
      • App Store Apple Developer Account Registration
      • Check app store app downloads
      • How to use the App Store Customer Center
      • Delete apps from the App Store
      • AppStore App Rejection Cases
      • App Store TestFlight
      • How to invite Swing2App account on App Store Connect and share information on App Store Upload form
    • AdMob (Google AdMob Ads)
      • Admob Banner Ad Frequency Settings
      • Admob Operation Precautions
      • How to apply AdMob plug-in
      • AdMob Plug-in check
      • What is AdMob plugin setting?
      • How to join AdMobs, create an Ad Unit ID
  • Developer Document
    • Server Side API Specifications
      • Sending a push notification By API
    • Webview (Webview, Push only) Development tool
      • Implementing Google and Facebook Login in WebView
      • Website Member Integration Guide
        • Wix Website User Integration Guide
        • WordPress Website Member Integration Guide
      • Javascript API Documentation
  • Policy
    • Store Policy
    • Limit on the Number of Devices for Free User
    • Swing Store Terms and Conditions
Powered by GitBook
On this page
  • STEP.1 Purchase of the pass and upload ticket
  • STEP.2 Store upload request
  • STEP.3 Complete the upload application, upload the contact in charge
  • STEP.4 Store launch completion (release after review)
  • Frequently Asked Questions
Edit on GitHub
  1. App Guide
  2. Application operation

How to convert and use paid apps.

Last updated 1 year ago

How to switch and use swing2app paid apps (paid version)

*Free version app: Use for personal use *but the store cannot be distributed

*Paid version app: Store distribution (PlayStore, App Store, OneStore can all be released)

For free, paid, and free commercial use according to the purpose of operating the Swing2App app, you can check the helper manual below for more details.

If you wish to launch the store, you will need to use the paid app and purchase a subscription and store an upload ticket.

Please check the manual below to find out how to use the paid app!


Check out the manuals and tips for creating the app.

After production is complete, you can switch to the paid app.

All of the Swing2App apps can be made free of charge, and there is no limit to using all functions with the free version app until the store is distributed.

Therefore, if you do not have any problems after fully testing with the free version app, you can purchase a paid app pass and switch to the paid version.

The usage period for all non-limited items is fixed.

*Because the date of use starts counting immediately after purchase, be sure to purchase it when proceeding with the store upload.

STEP.1 Purchase of the pass and upload ticket

Please select a paid app pass and purchase a store upload ticket as well.
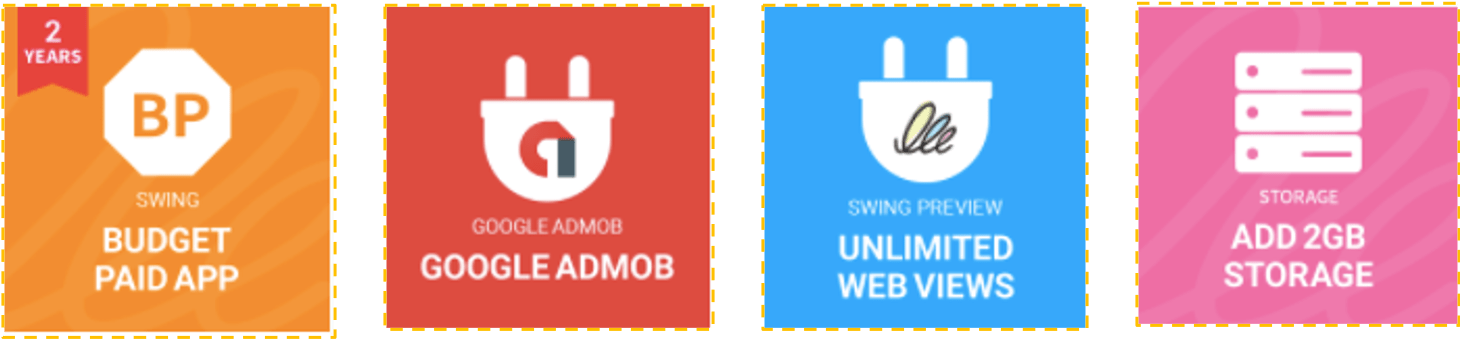
Tip: Vouchers range from Basic, Expandable, Premium, and more.

Depending on the product, you need to check the services and functions offered for each product!

When you click the Buy button, you can check the details of the services and instructions provided by the voucher. Therefore, be sure to check your product before you buy it.

If you are unsure of the contents, please leave the inquiry board. We’ll help you with more details.

â–¶ Package deals

In addition to regular tickets, you can also check out the various packages offered by the Swing2App.

Please check the products that fit your app.

Packages are much cheaper for the duration of use than to purchase a regular subscription.

So if you’re thinking of using the app for the long term, rather than monthly, please check the package slot and purchase it.


STEP.2 Store upload request

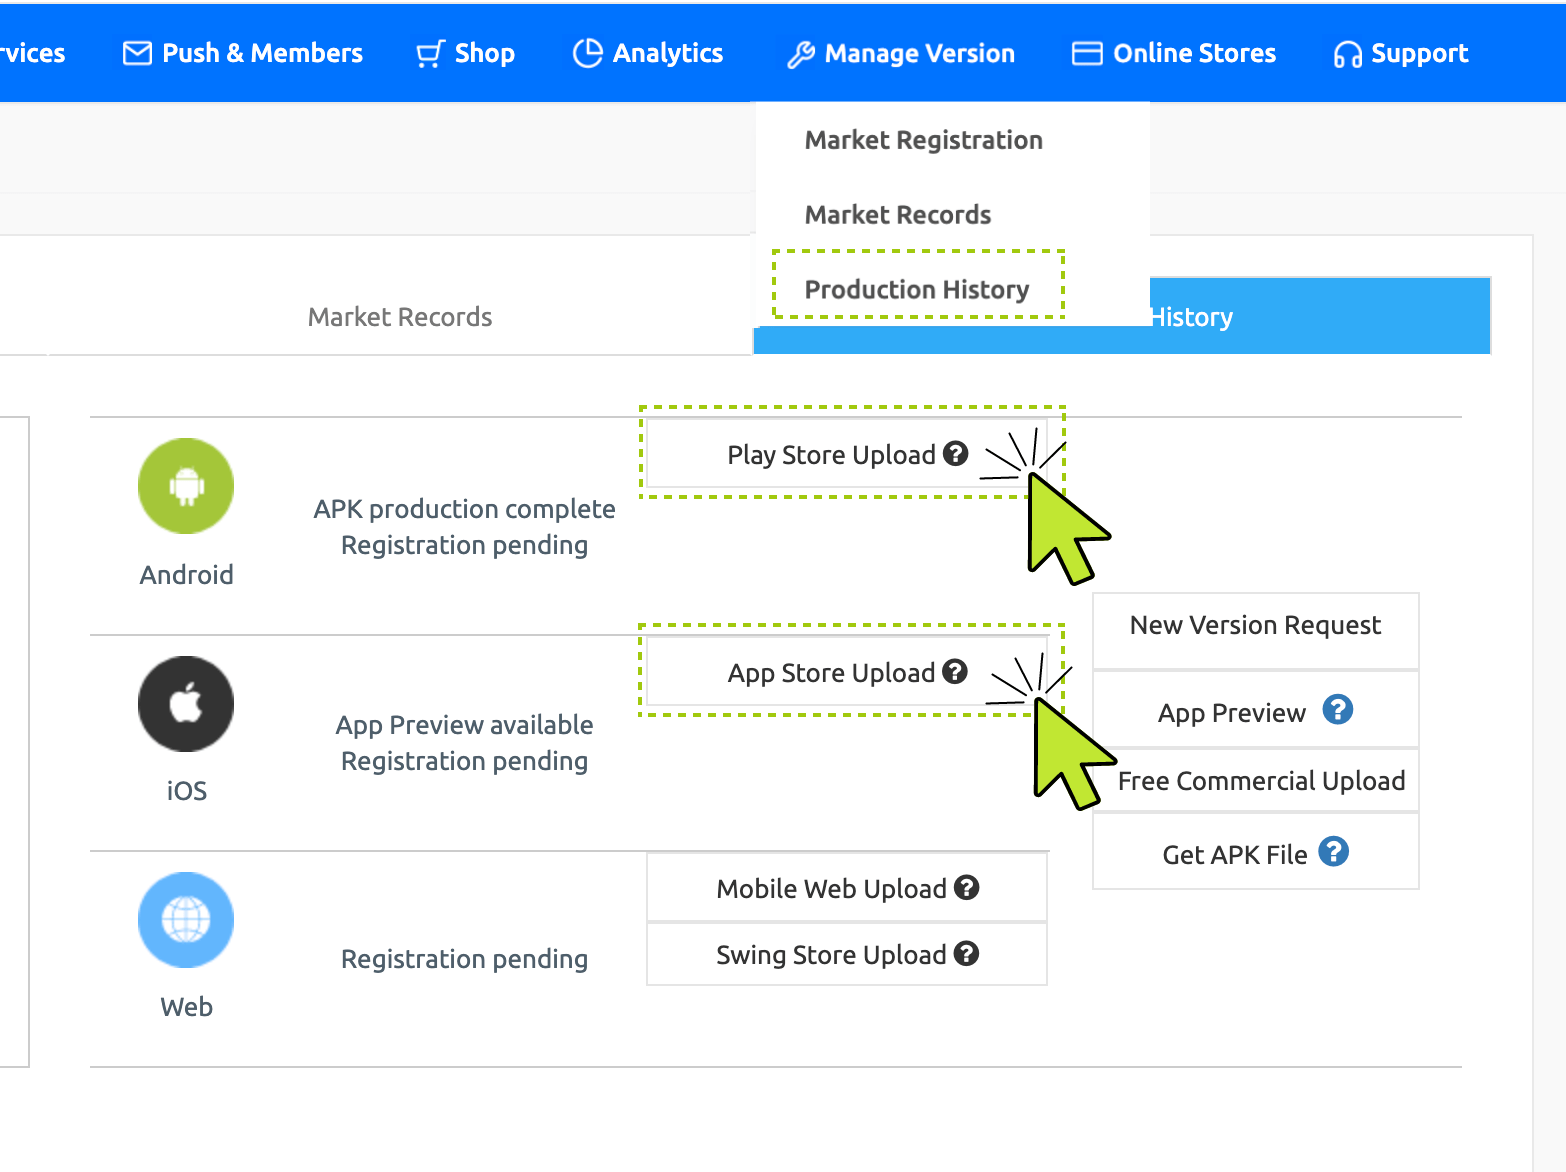
If you have purchased both the pass and upload ticket above, please go to the Manager → Manage Version → Production History page, and proceed with the upload request.

If you click the Play Store Upload Application or App Store Upload Application button, an application window will appear.

You must enter the app information you want to release in the store and click the Apply button to submit your application as a Swing2App.

* After purchasing an upload ticket, you must proceed with the application as described above. Once you pay, the application is not accepted!


STEP.3 Complete the upload application, upload the contact in charge

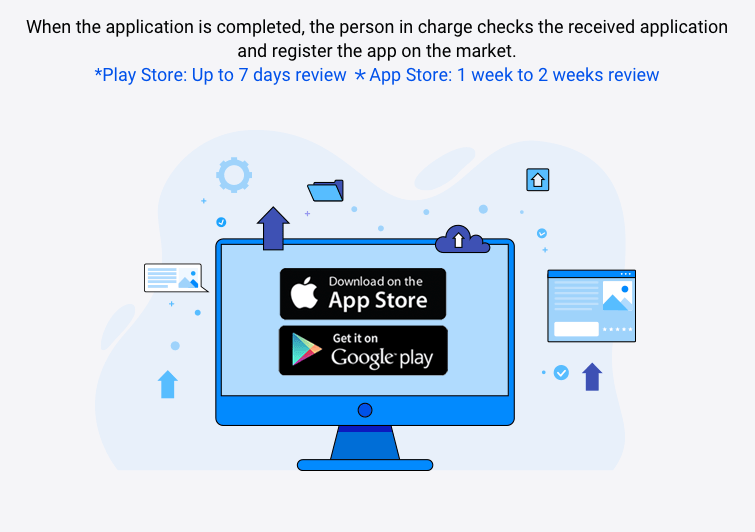
Once the application is completed, the PlayStore upload representative of Swing2App‘s store upload representative will start uploading the user’s app to the Store.

*Play Store review period: 7 days

*App Store review period: 7 days

Due to the length of the screening time for each store, you will need to wait for the review period after you apply for the upload.

-When you start uploading, we’ll send you a policy and important announcement email for each store.

-After a normal release, a ready-to-release email and text (if the user number is registered) will be sent.

-If the examination is refused, the reason for refusal and action will be announced, and the retrial will be made without the additional cost of the upload ticket.


STEP.4 Store launch completion (release after review)

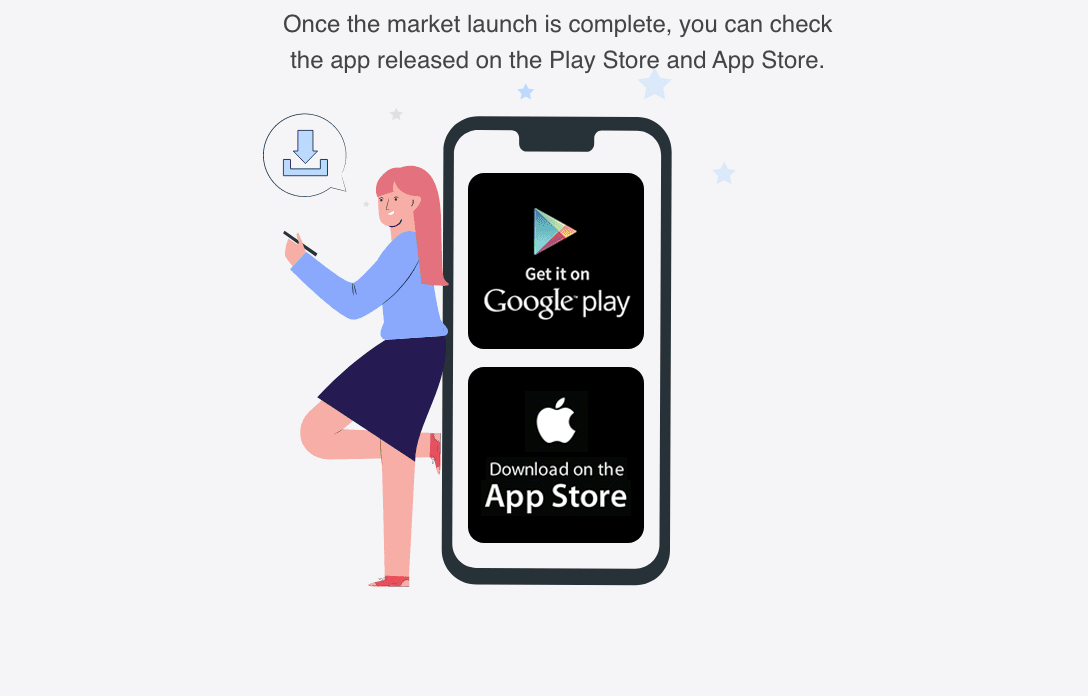
Once the store is launched, you’ll be able to see apps released from the PlayStore and App Store

The App Store is exposed when you search for your app name immediately after the app is launched.

The PlayStore doesn’t immediately search for names when the app is released.

*Google checks how active the app is to prevent indiscriminate launches and then turns it into exposure.

Therefore, you’ll have to install a lot of apps, manage reviews, ratings, etc., so that you’ll be exposed to app name search over time.

You’ll need to check the store policy so you don’t have to worry about using the app later.

Must-have! Please check.


Frequently Asked Questions

Q. How can I manage and operate the app when using the paid app? (What is different from the free version?)

Use of paid apps is the same as free apps.

There is no change in the operation method by switching to a paid app, so you can manage the app creation and app operation pages of the Swing to App site.

Q. I updated the app, do I need to update the store again?

Yes, if you updated the app, you must update the new version of the app to the Play Store/App Store, etc.

At this time, you need to re-apply by repurchasing the store upload ticket that needs updating.

Do you know that the app menu and content modifications are automatically reflected once saved?

When re-creating (updating) the app – it is only necessary when changing the app name, icon/standby screen, and design theme!!

Q. If you release the Play Store directly, do you need to purchase only the pass and not the [Play Store Upload Ticket]?

Yes, just purchase the pass and switch to the paid version of the app.

You can register directly to the Google Play Store console without purchasing an upload ticket.

Please see the posting below for how to register the Play Store app.

Q. Is the user unable to upload the App Store? Is it just acting?

Yes, the App Store requires development knowledge and is only accessible to developers because it requires code used in the app.

Therefore, the App Store cannot be released directly by the user and must be released only through the agency.

Q. I bought a pass and uploaded the app to the Play Store, but I get a debug error message.

The debug message is the message that appears when you upload the free version app.

Normally, when you purchase a pass, the app automatically switches to the paid version. So, just upload the app to the Play Store.

Occasionally, an app may have been created a long time ago, or there may be a case where it is not possible to recognize the usage right due to a time difference.

At this time, please re-produce the app only with the new version by pressing the [App Production Request] button on the app production page.

If you create a new version, the app is converted to a paid version, so you can register without problems from that version.

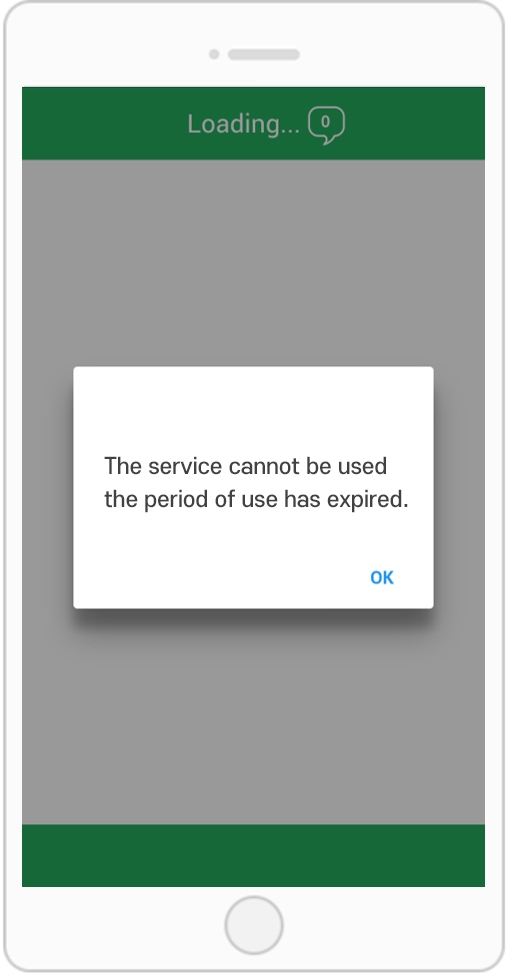
Q. What happens if the period of use expires while using the paid app?

If you do not pay again after the paid app period expires, the use of the app will be suspended.

Apps released to the Store will not be deleted or deleted.

However, when the app is initially launched, the message’The expiration date has expired’ appears and the app is stopped and terminated.

Refer to the image) *App run screen after the expiration date

Users who have previously downloaded the app from the market are also restricted from using the app as the corresponding message appears.

If you pay again, the message does not appear and you can use the app again normally.

If you want to use the app again for free, delete the app installed on your mobile phone after the end of the period and re-create the app as a new version.

Since the paid period expires, the corresponding version is a free version.

You can use it as a free app.

Store distribution is not possible because it is converted to a free app.

Q. When will the number of days of use for paid app passes be counted?

Paid app vouchers are counted from the day the payment was made.

For example, if payment is made on March 4, the usage period starts on the 4th.

Therefore, if you need to upload an app to the market, please purchase a paid pass and an upload ticket after app creation is complete.

☞

☞

☞

☞

☞

☞

See How to use Swing2App
Check the process of app creation
Manager → Online Store → Swing paid app plan
https://swing2app.com/view/app_work_history
[How to apply for Play Store upload]
[How to Apply for App Store Upload]
Check store terms and conditions
[To see how to register (release) the Play Store app]