> For the complete documentation index, see [llms.txt](https://documentation.swing2app.com/llms.txt). Markdown versions of documentation pages are available by appending `.md` to page URLs; this page is available as [Markdown](https://documentation.swing2app.com/manual/tip/home-flash.md).
# Create a Flash style home screen
**TIP to Create App) Create Flash Style Home Screen**
Flash is a style that automatically converts images, which is a popular way to create screens in apps.
Swing2App does not provide a flash function, but you can apply the function of swing2app sufficiently.
We will show you how to create a Flash style home screen using Swing2App’s web template page creator.
**★ Flash Style Home Screen**
**We will show you how to create a Flash style home screen like in the above image.**
+The app applies a template page.
+You can apply the gif image that you have created to the top header image.
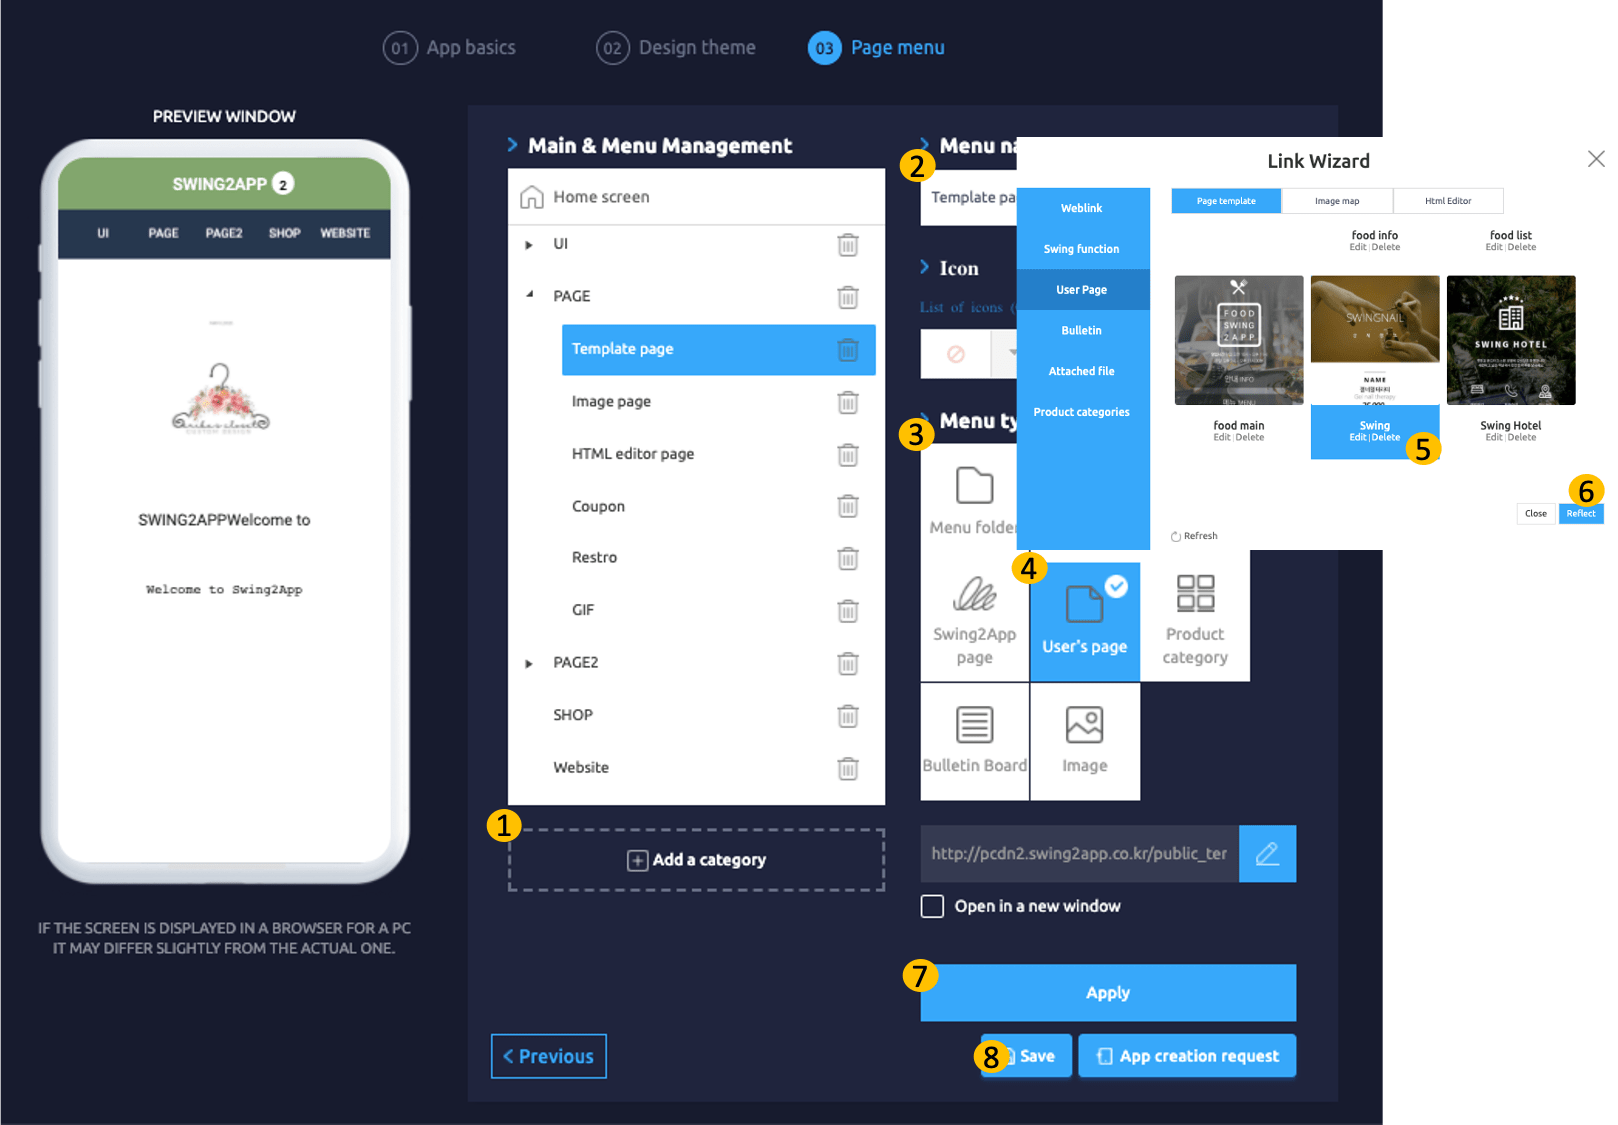
### **STEP.1 Create a web template page**
Go to **Maker(V2)** page and click on the **Page menu.**
1. Click on **Add a Category.** A new item with be added to the menu items.
2. Change the name of the new item added from in **Menu Name** option.
3. Select the **User’s page** from **Menu Type.**
4. Click on the **Link Wizard icon**(pencil icon).
5. Select **Page Template** from the **User’s Page** tab and click **New** to select a web template from the list of Swing2App templates. Edit page as per requirement and save.
6. Click **Reflect**.
7. Click **Apply.**
8. Click **Save**.

### **STEP.2 Web Template Creator**
**1. New Page: Selecting a Page Type**

If you select the **\[+ New]** button at the bottom, you can check the page tool types of various industries provided by Swing2App (10 industry templates available).\
Select the desired page and press the \[Add] button.\
\
\&#xNAN;**\*\* I have chosen the \[Details] page of the nail industry here.**\
There is no need to select the same page as the manual.\
You can select the page you want to work with according to the design of your app.\\
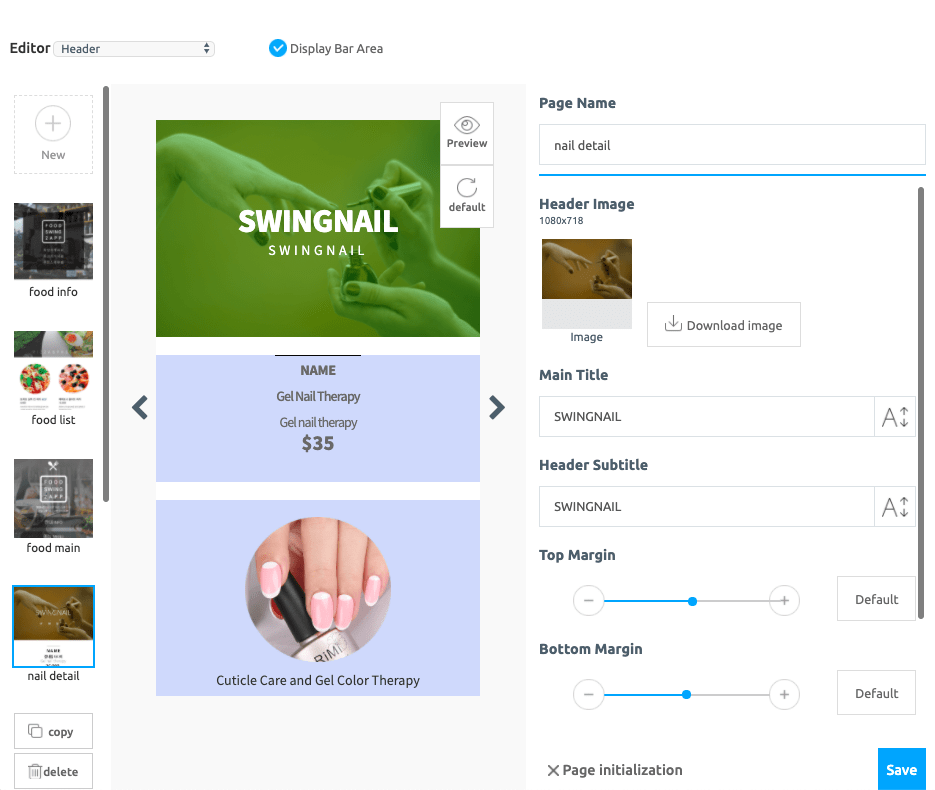
The nail-detail page has been opened.\
\&#xNAN;**\* The Web Template page is a tool for editing and applying images and text to the template tool provided by Swing2App.**\
**You can check the page edits on the left side of the screen, and edit the image and text to match the app’s personality on the web edit screen on the right.**
**2. Attach Images**\\
Before attaching an image, there is something you have to do first.\
To work like the app home screen shown above, it’s called gif.
You need to create a moving gif file first.\
\&#xNAN;**\*\*Can you see the header image size?**\\
Make sure to check the 1080 x 718-pixel size. \ If the size is not correct, the gif file will go into the regular picture file (png, jpg).\ Please work according to size beforehand.
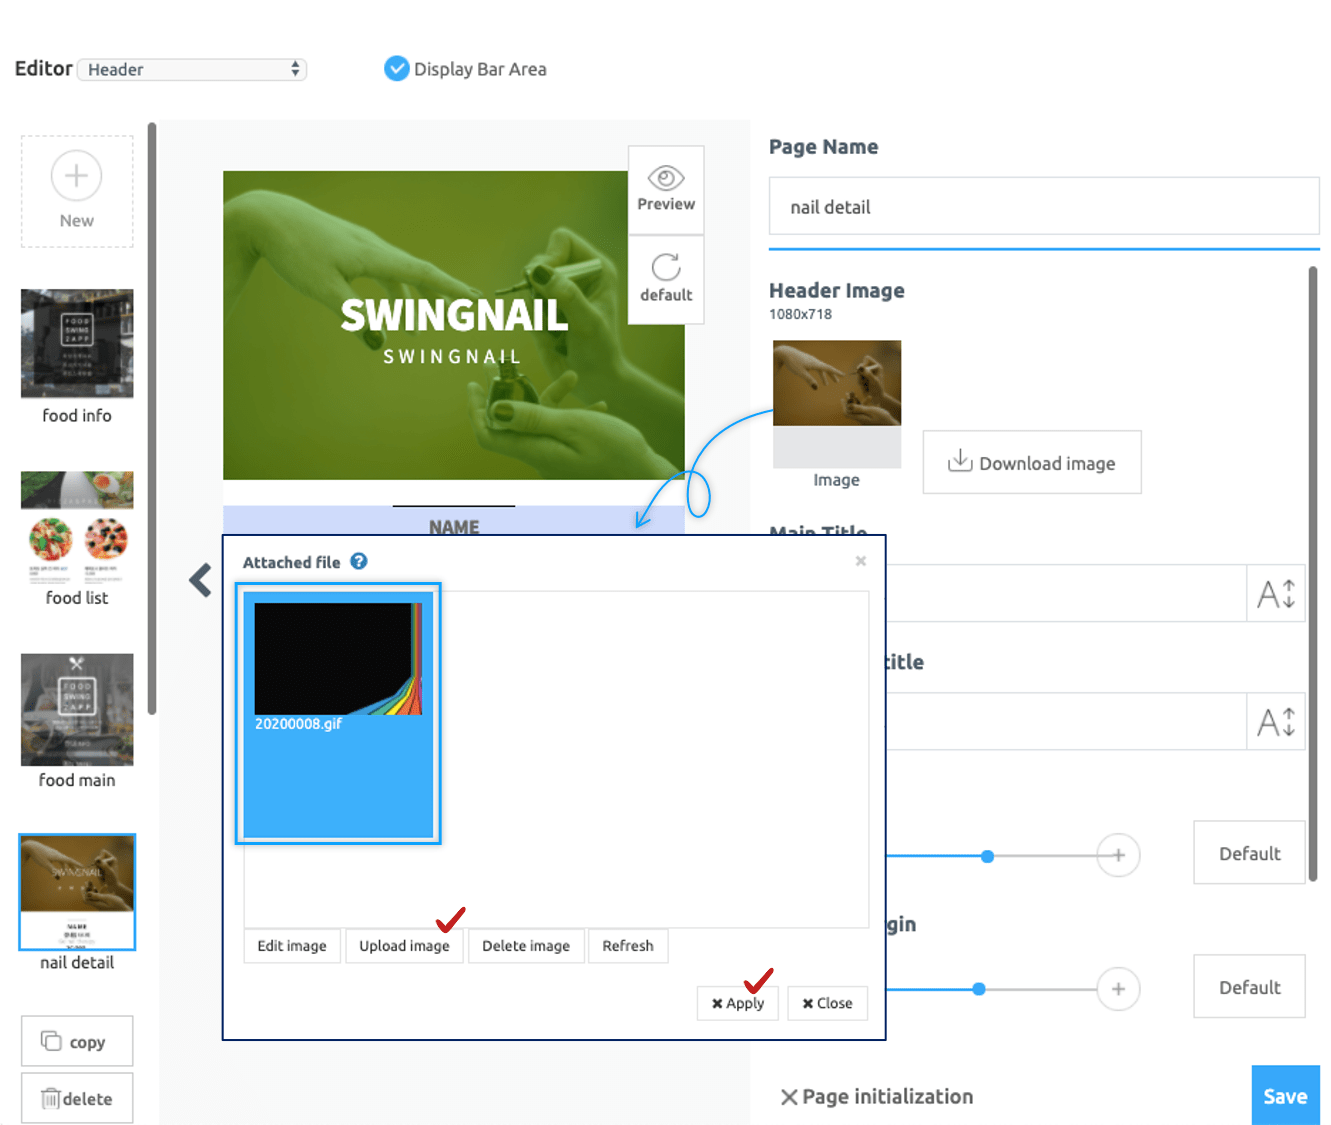
Selecting the header image part opens the file attachment window.\
Select \[Upload] button here and select the desired image file and press \[Apply].
**★ Notice**
GIF files are not visible in regular files.\
Therefore, **you need to change the setting to ‘All Files’ at the bottom of the file window to see the gif files**.\
Change to all files and select the gif file you have already worked on.
**3. Edit text**\\
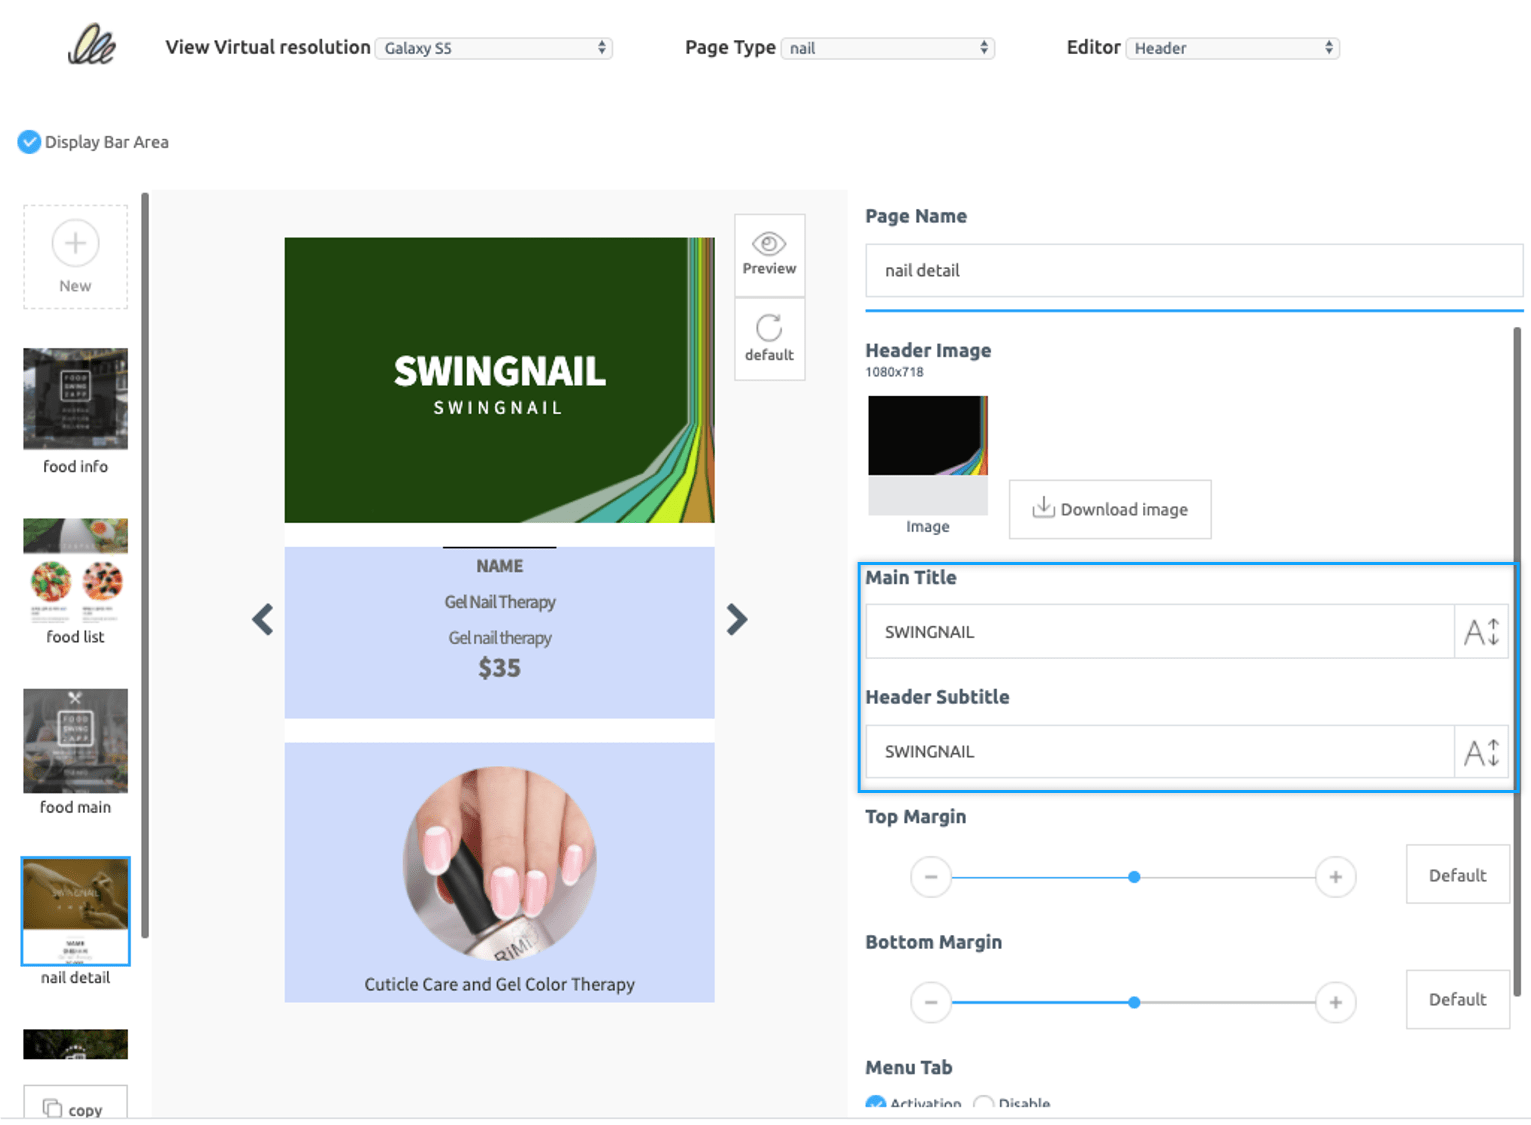
If you have attached a gif image to the header, please edit the text (phrase) that corresponds to the rest of the text.
I am editing the main title and subtitle text shown in the header image part.\
If you don’t need the content like me, you can delete the existing text as you can see in the above image.
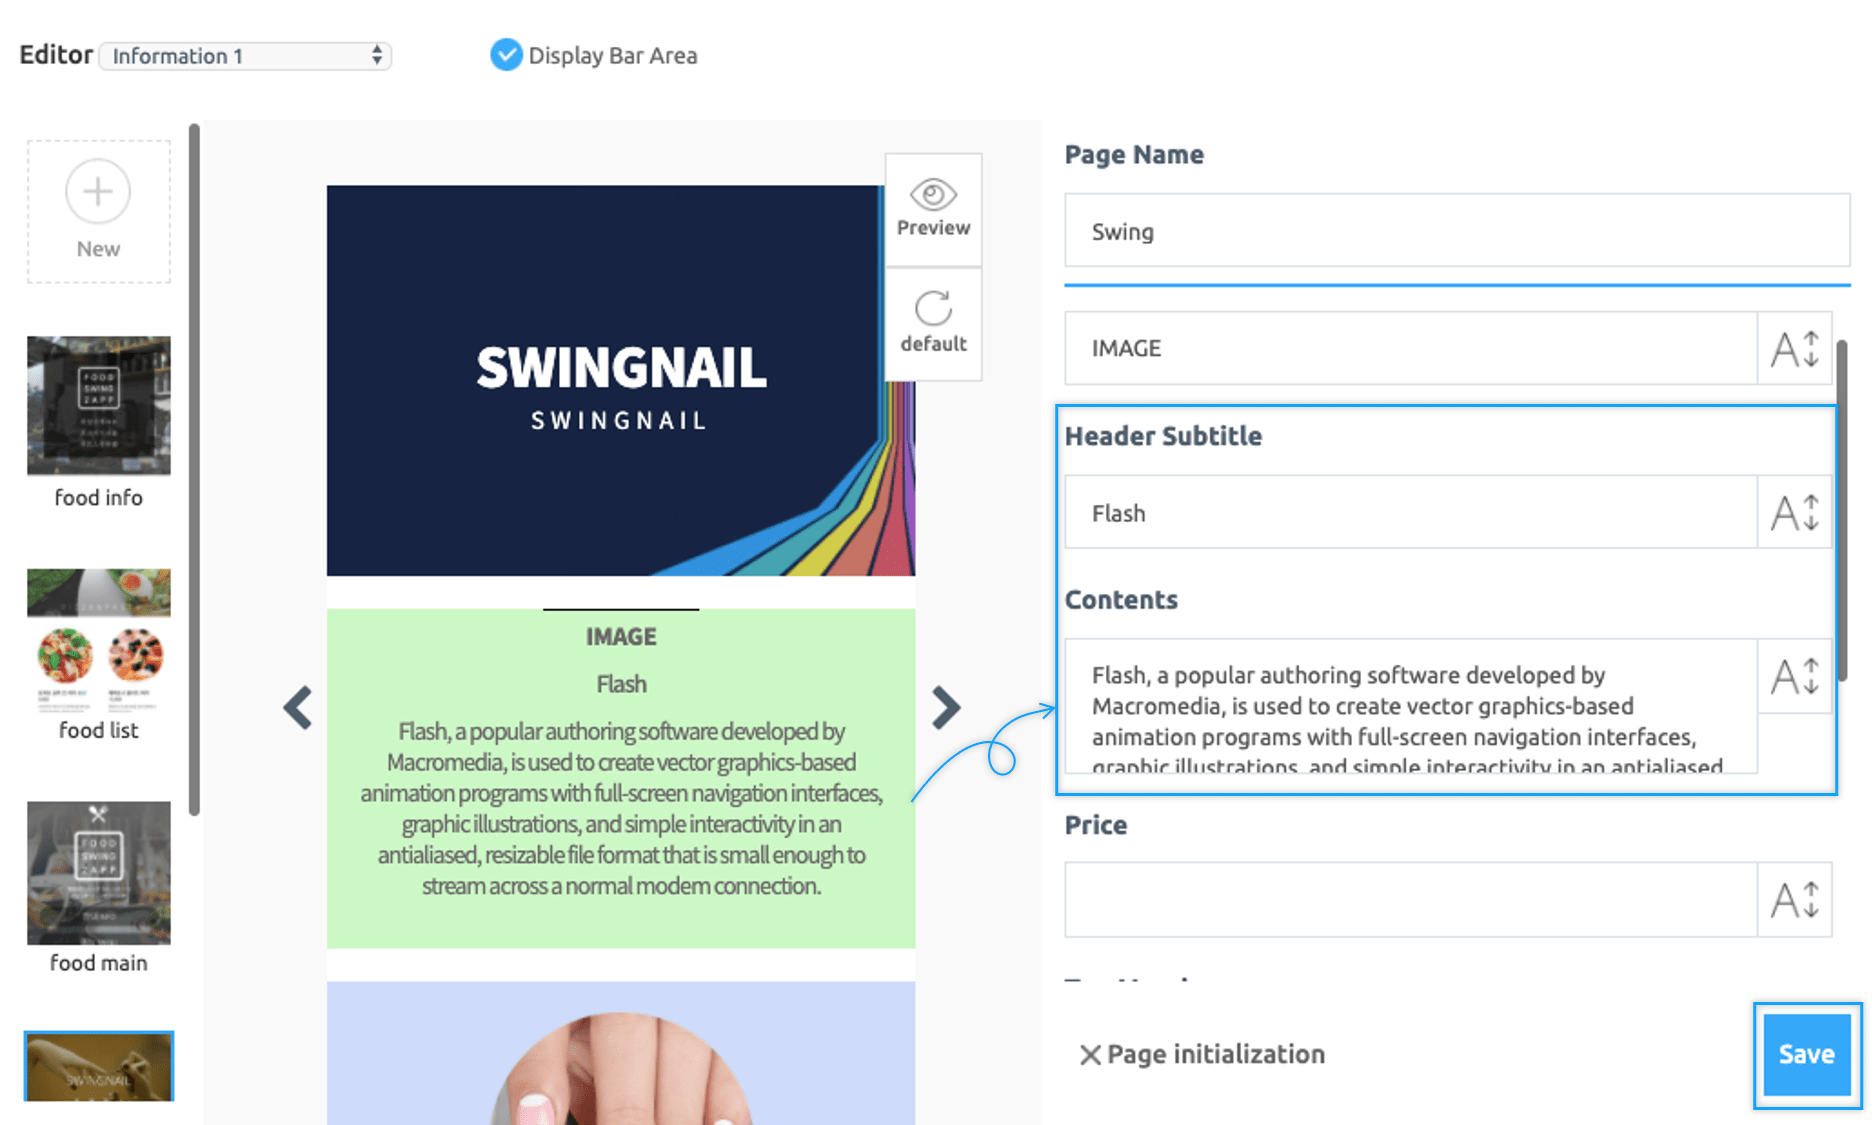
Please edit all the other details on the template page.\ **\*For text, you can set the font size, color, etc. by selecting the font button next to it.**\
If you want to give a different option than the default one, select the font button and edit it.\
When you have finished entering the template content, select the \[Save Data] button at the top to save it.
**★You must also edit the page name. Do not forget!**\ **It appears in the app as the page name.**
### **STEP.3 Apply to Web Template App you created**
Go to **Maker(V2)** page and click on the **Page menu.**
1. Click on **Add a Category.** A new item with be added to the menu items.
2. Change the name of the new item added from in **Menu Name** option.
3. Select the **User’s page** from **Menu Type.**
4. Click on the **Link Wizard icon**(pencil icon).
5. Select **Page Template** from the **User’s Page** tab and select the page in with the flash image.
6. Click **Reflect**.
7. Click **Apply.**
8. Click **Save**.
As you can see in the virtual machine above, you can see the top header image is applied in Flash style.
**★ Notice**
1\) You can create your animated image or write a separate gif file.
2\) However, the image that enters the web template page is listed in the recommended size.
Therefore, you need to make an image for that size.
3\) You can only upload files within 5MB.
4\) When uploading a file, you must set ‘All files’ to open the gif file.