> For the complete documentation index, see [llms.txt](https://documentation.swing2app.com/llms.txt). Markdown versions of documentation pages are available by appending `.md` to page URLs; this page is available as [Markdown](https://documentation.swing2app.com/store/admob/admob-frequencysettings.md).
# Admob Banner Ad Frequency Settings
**AdMob-How to set your banner ad frequency**
When applying Google AdMob ads – banner ads are automatically displayed and entered.
**You can set your ad frequency time in your setting.**
> **-You can set how often your banner ads change.**
>
> **-Banner ads can be customized within 30 to 150 seconds.**
>
> **-You can use it by custom setting to your desired time.**
The AdMob site will show you how to edit the time for banner ads! Please note that
**\[Instructions]**
**\* Google AdMob ads are recommended for automatic settings.**
★Automatic settings automatically set the frequency of ad impressions on the user’s phone, depending on the number of app downloads and the number of times the app was used.
“Google Optimization” automatically sets your ad impressions according to the standards set by Google!!
Advertisement change as often on mobile phones with the app.
Apps with high app installs are also filtered to determine ad impressions.
Therefore, if you specify the time artificially, the above contents are not reflected at all, so the advertising effect may below.
Therefore, we recommend setting the exposure time automatically.
Optionally, you can change the setting time and change it back to Auto.
### **1. Access to Google AdMob site**
Let’s edit the banner ad frequency-time from the ad unit ID you created.
Please go into the site and log in with your AdMob account.
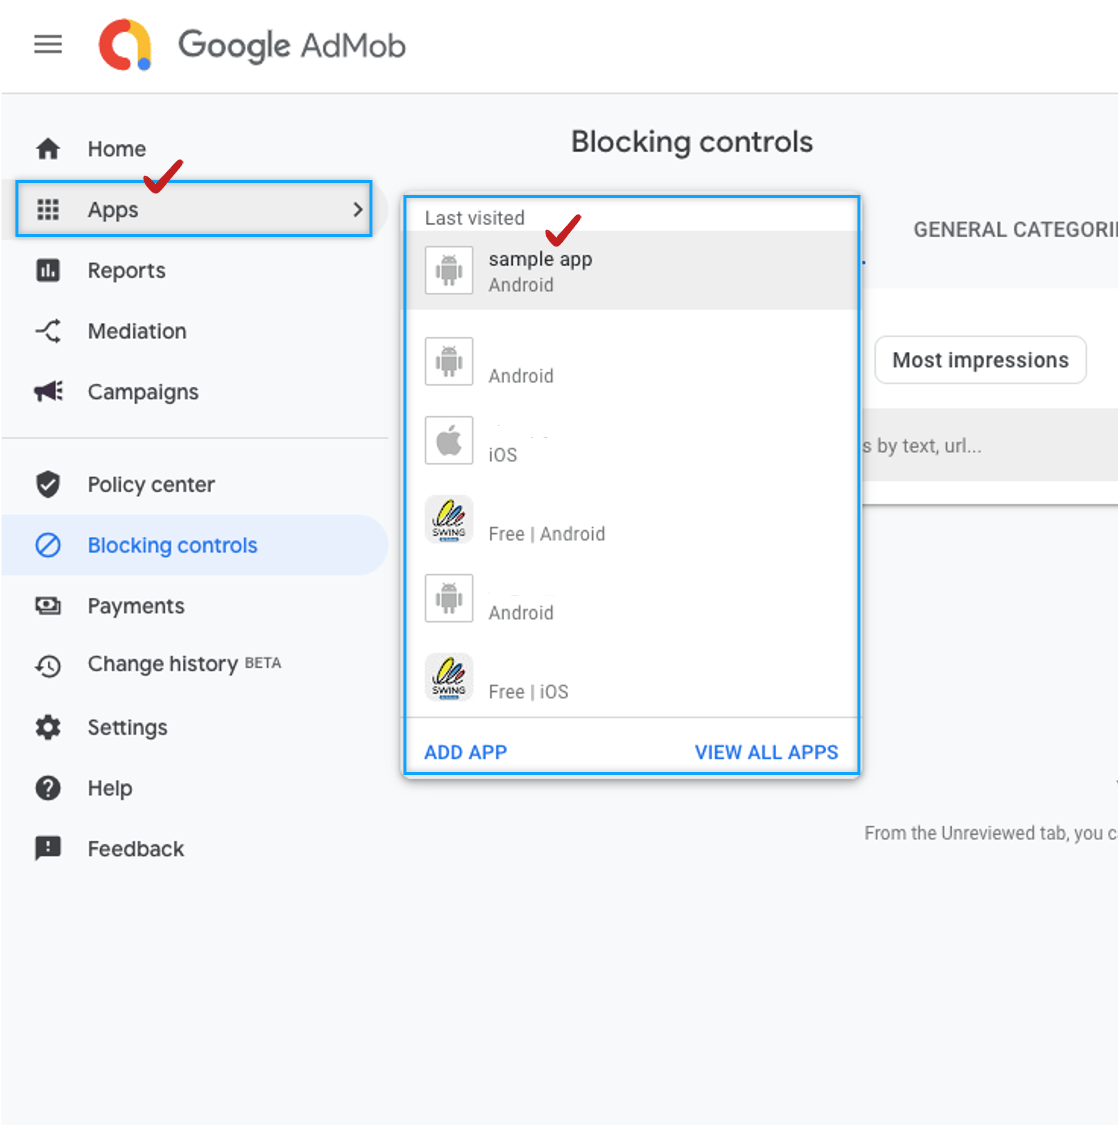
App already in use – Since you already have an ad ID, **select \[App] in the left sidebar, and then select the app whose ad you want to change.**\
\
\*If you apply ads to both Android and iPhone platforms, you need to change them all, so please set them one by one.
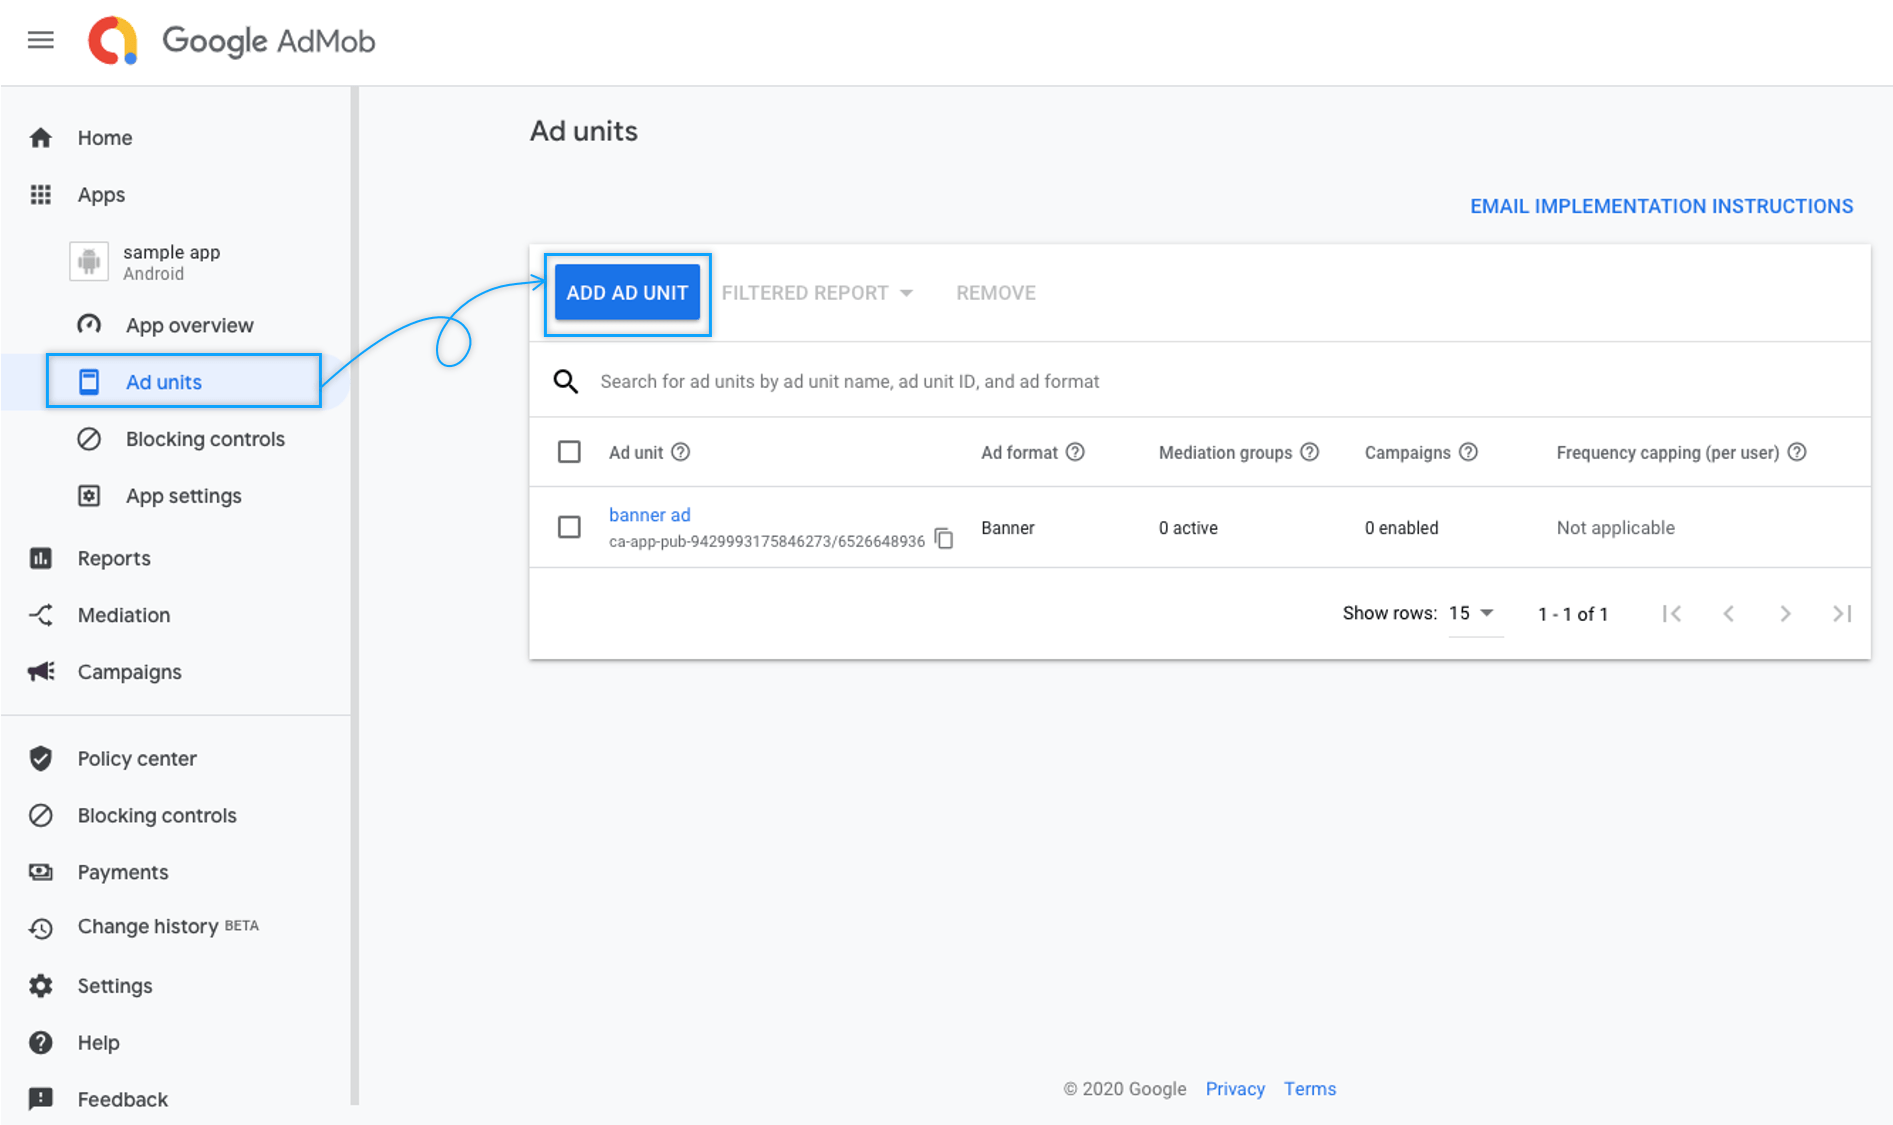
### **2. Ad Units**
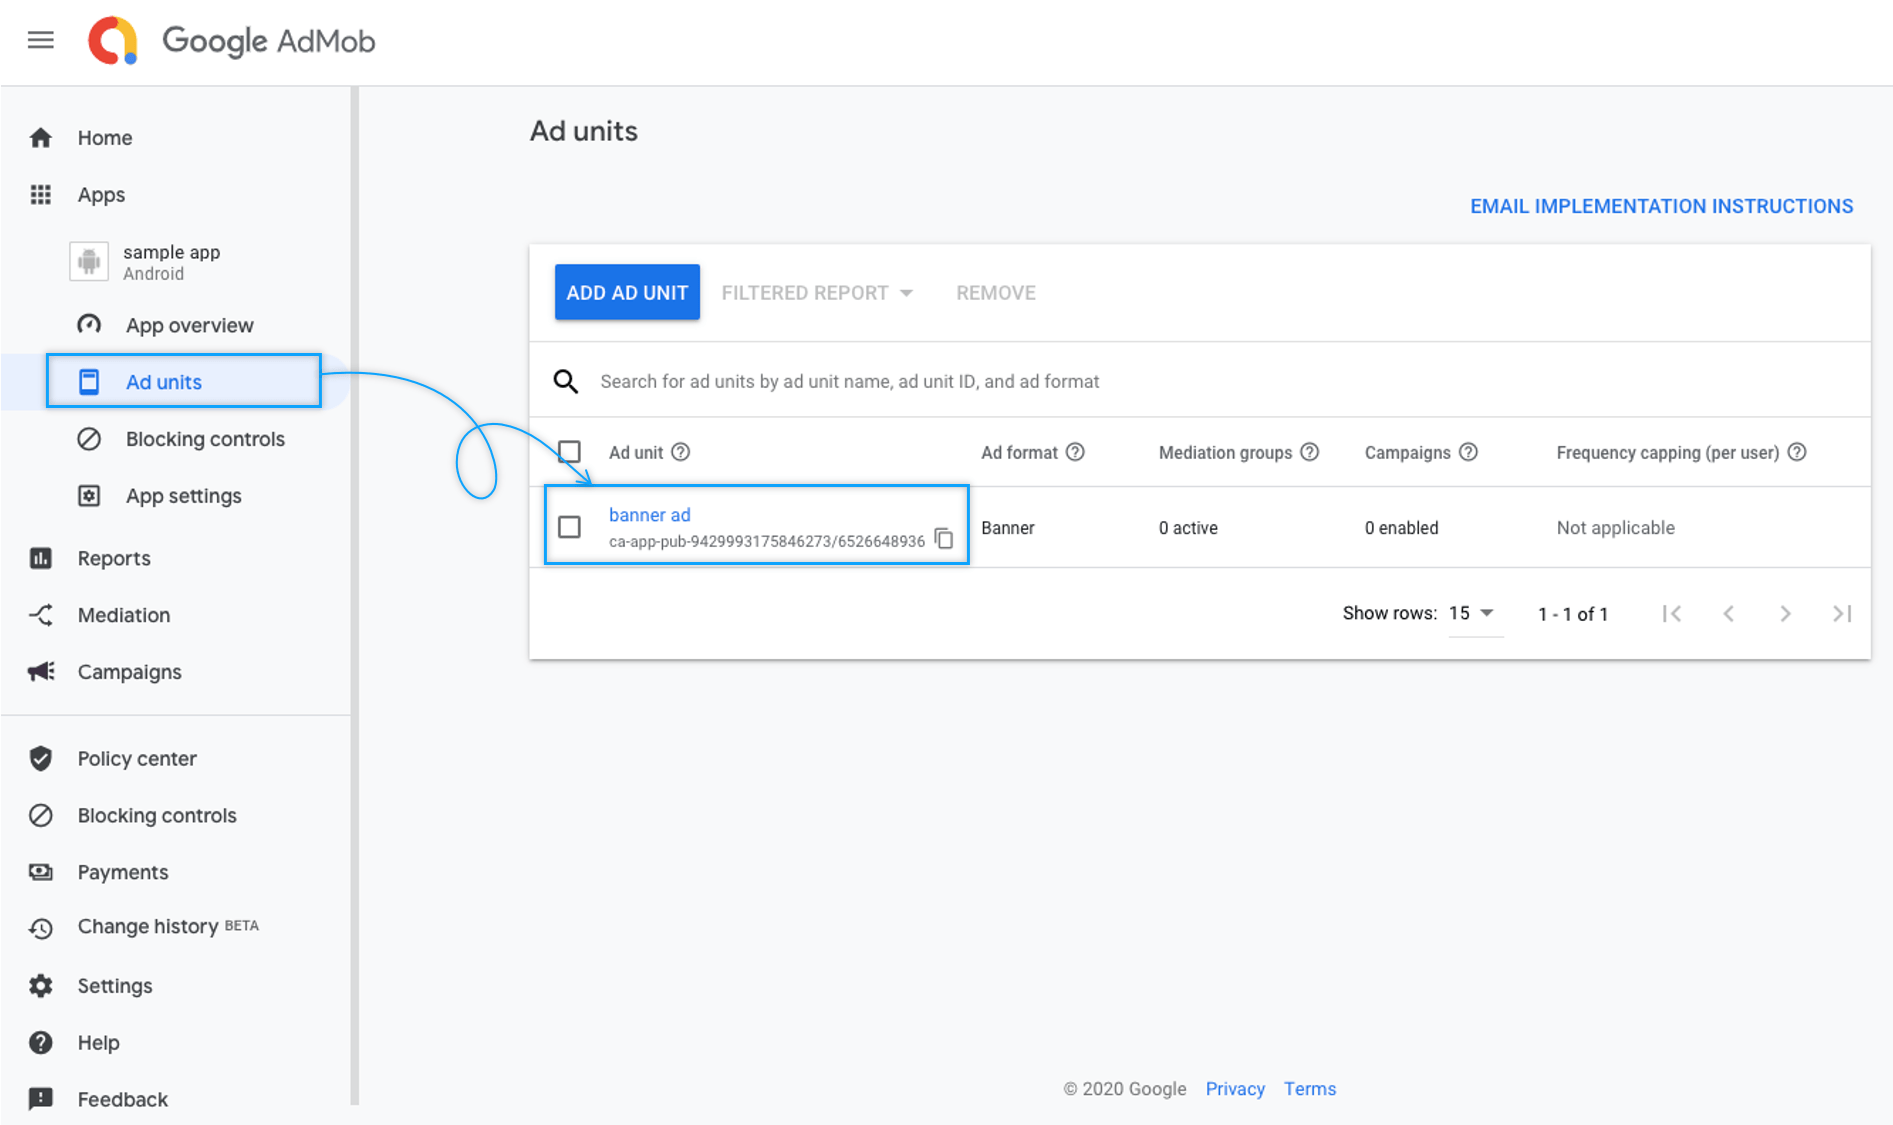
If you go to the app (for Android), you’ll have an ad unit in the left sidebar.
Please select \[ad unit].
Please select \[banner] on the ad unit page.
### **3. Edit Ad Unit**
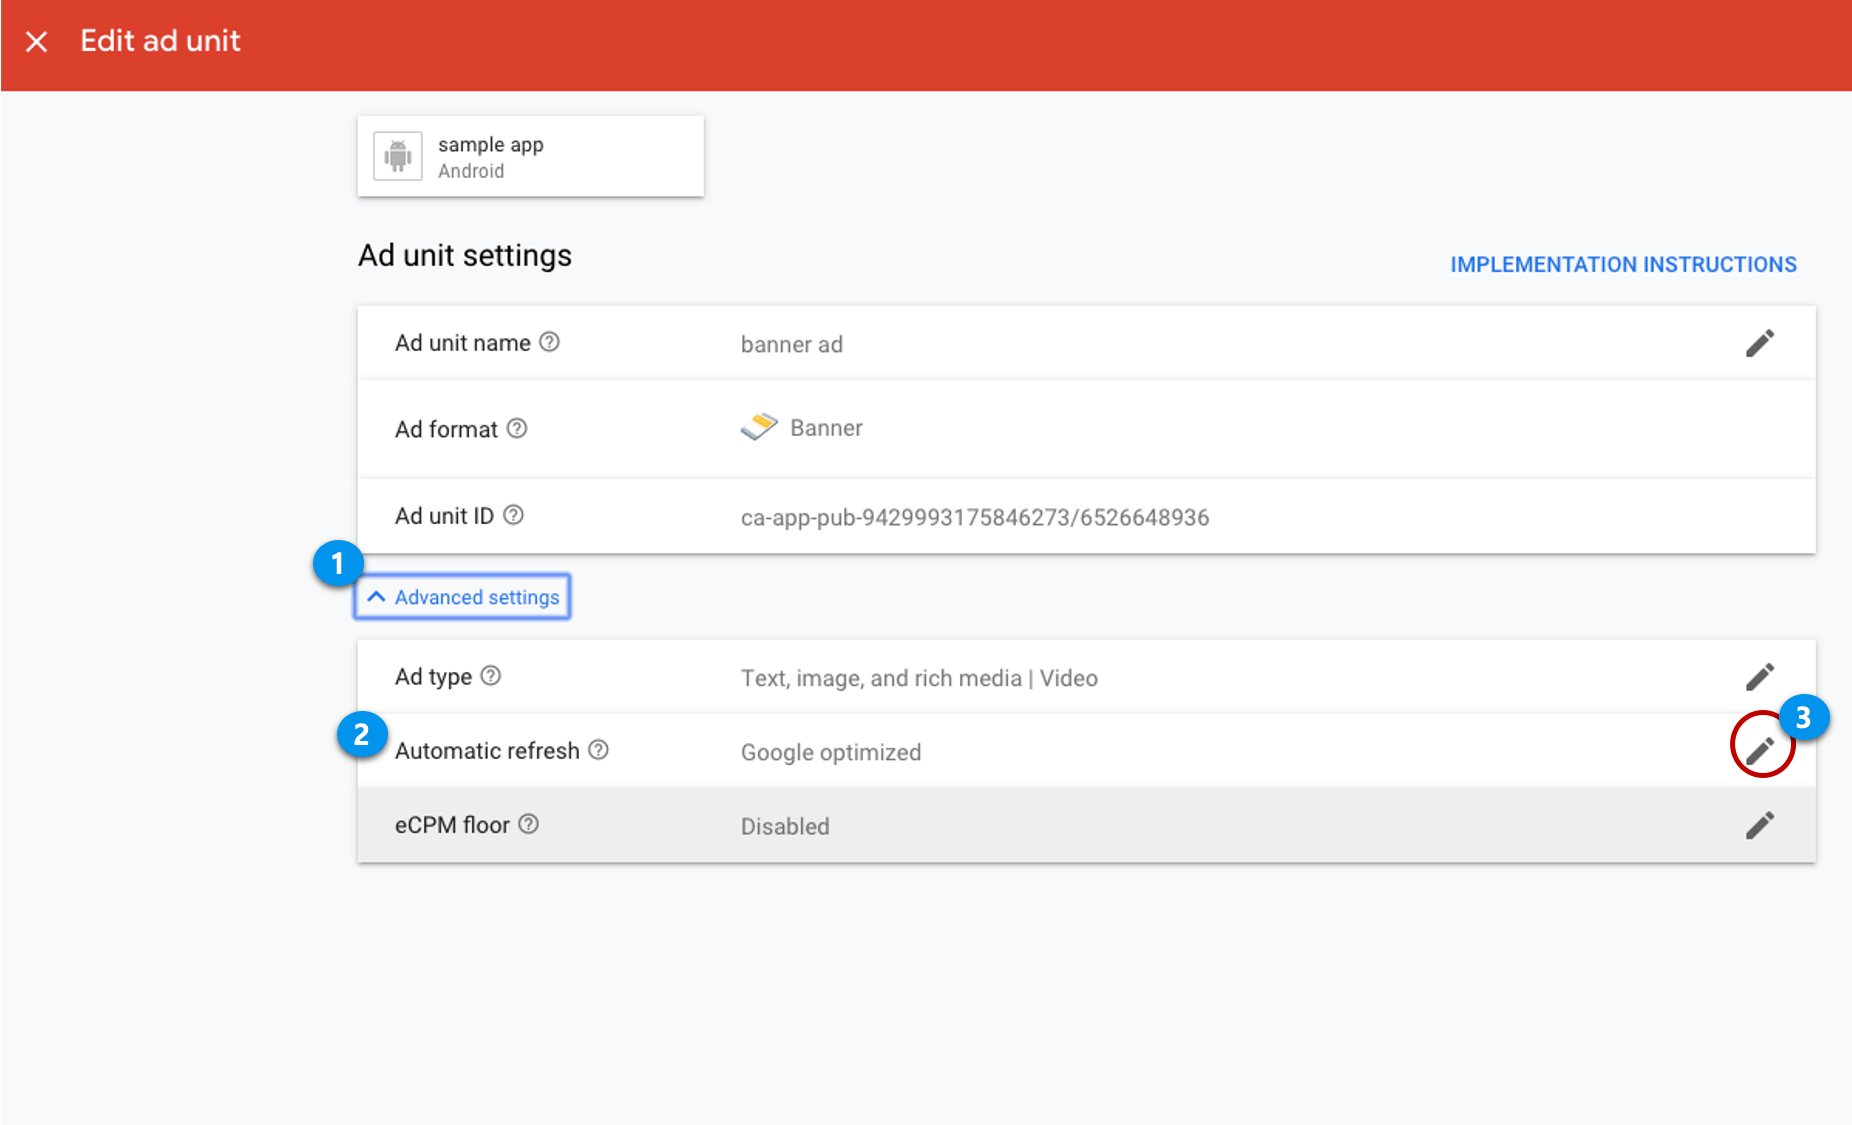
Go to the edit ad unit page. \*I’m already using an ad unit, so I’ll edit it and use it.
**1)Select Advanced setting**
**2) Select Auto-refresh**
**3)Select the pencil icon (create).**
★Automatic refresh will create a new ad request, as shown in the help above, and tell you how often new ads are displayed to you.
Therefore, to set the frequency, you can edit it in the auto-refresh.
### **4. Editing Ad Unit Completed**
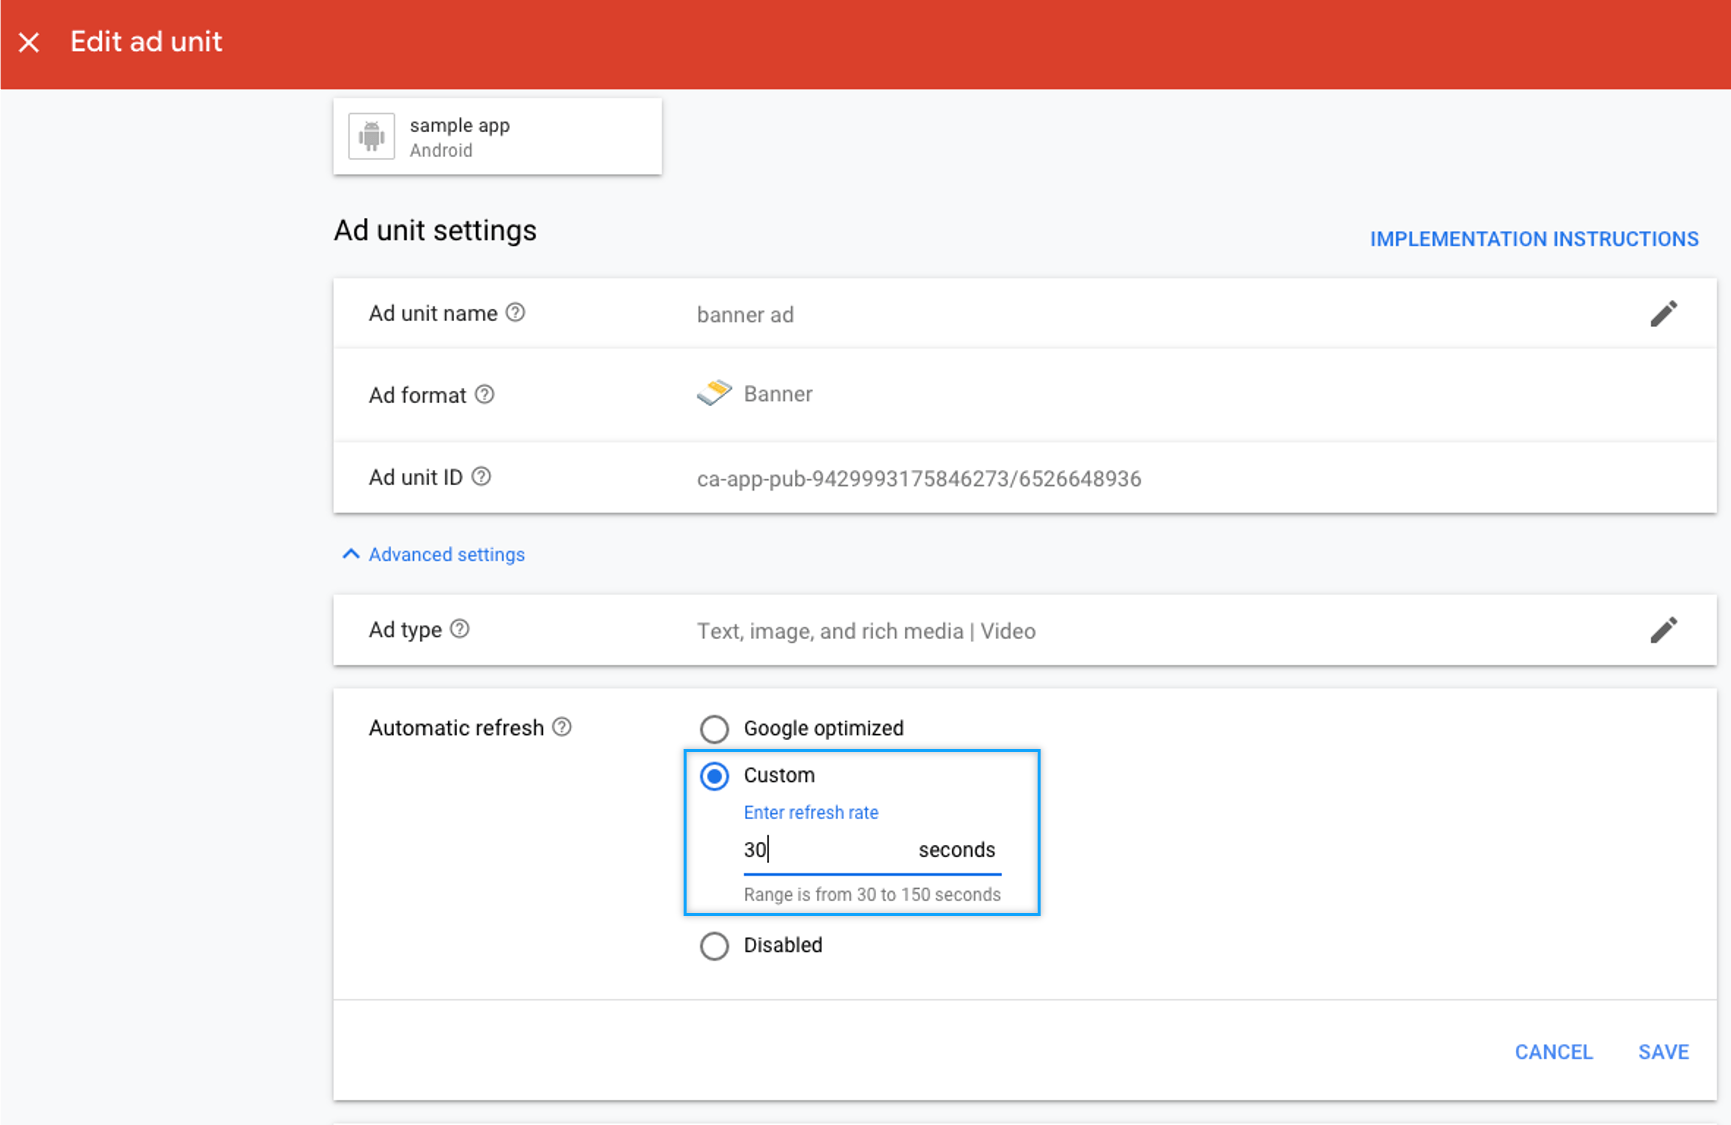
You can enter the refresh rate by selecting \[Custom] in Auto Refresh.
**\*Refresh frequency time is 30 – 150 seconds.** Please enter the correct time.
After entering, press the \[Save] button to complete, and the app will reflect the banner ad frequency time to the changed time.\
\
If you are also working on an iPhone ad, then follow the same steps as you have edit your Android phone ad unit.
### **5. When registering a new ad unit**
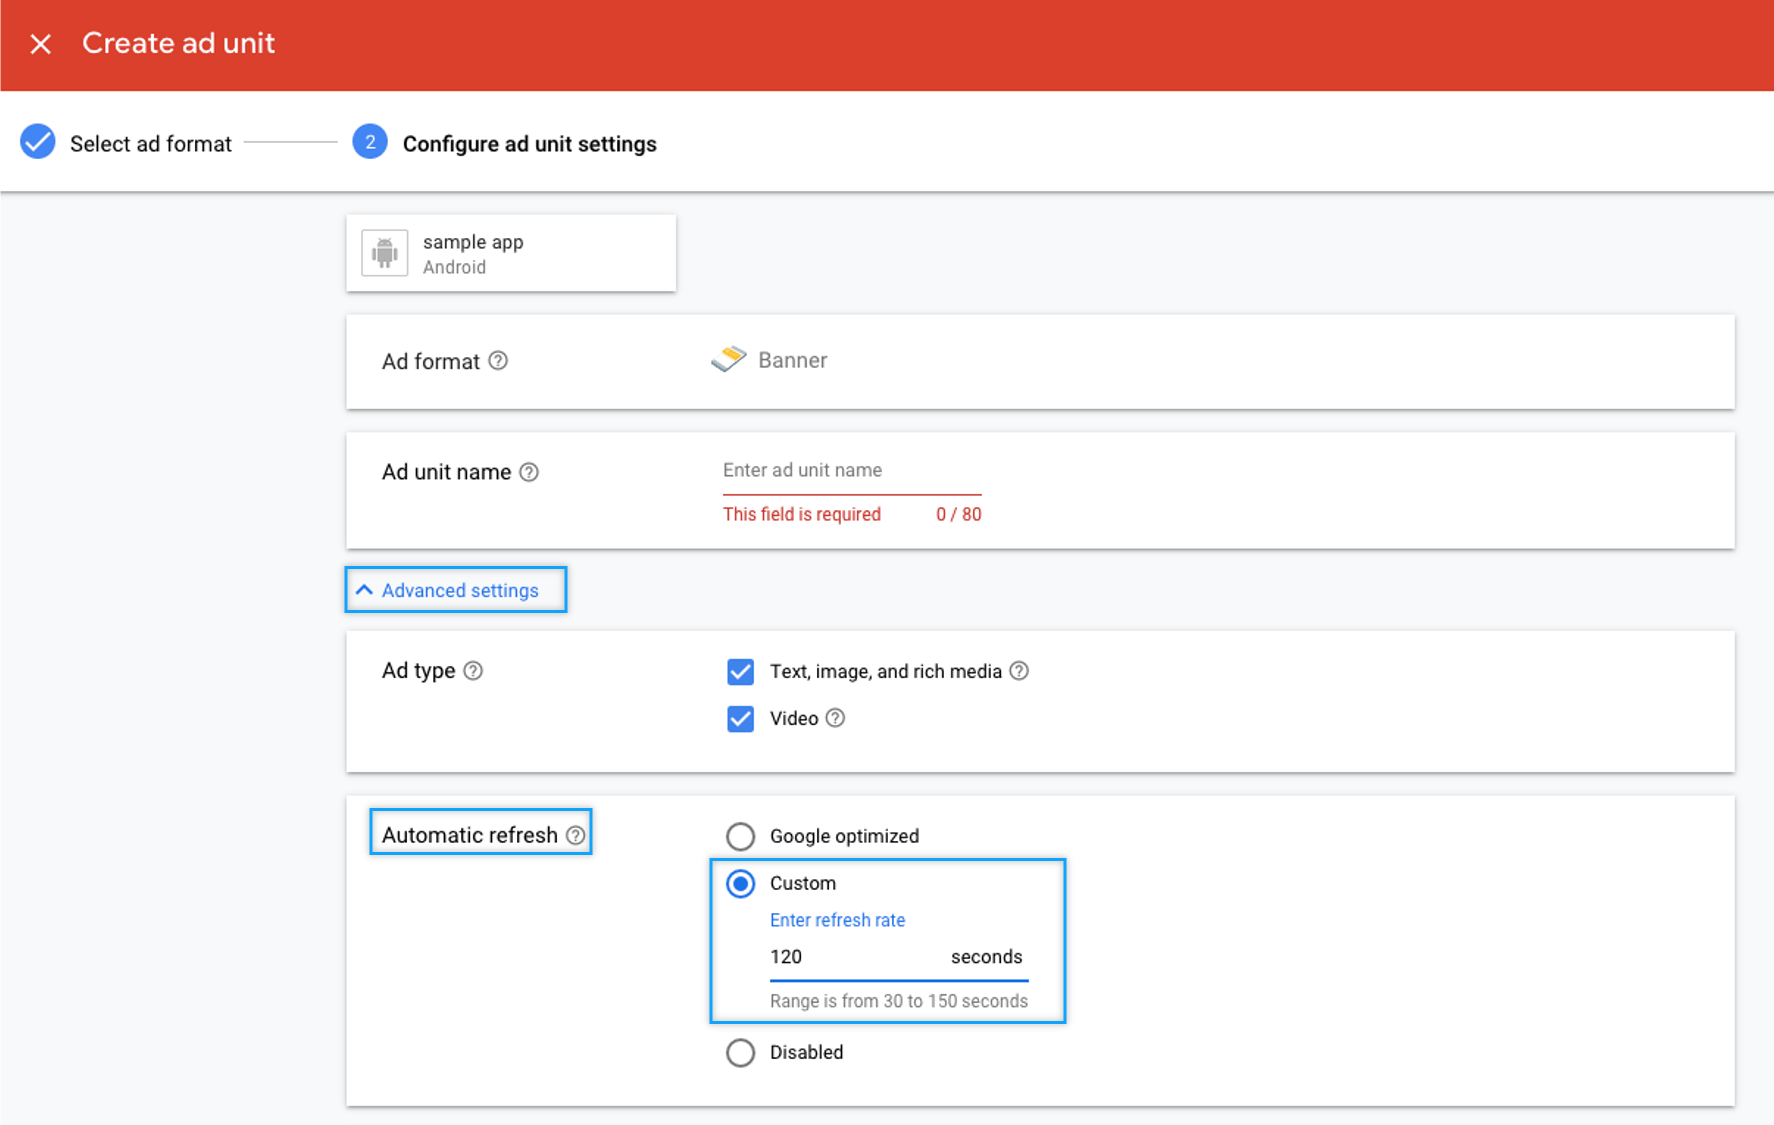
The same method is used to create a new ad unit IDs.\
\
After adding a banner ad format, **select \[Advanced settings] → Auto-refresh → \[Custom] in the ad unit settings configuration and enter the frequency of impressions → Select the Create ad unit button.**
Please proceed in that way.\
\
\*Those who created the app with Swing2App can not put ads directly into the app.
If you ask us, we will apply only for the setting cost.
Please refer to the manual for how to sign up for AdMob and create an ad unit.
**☞** [**Sign up for AdMob service**](/store/admob/admob-register.md)
**☞** [**How to apply for AdMob Plug-In**](/store/admob/admob-plugin-apply.md)
**★ Information**
**Banner ads are changing to new ads based on frequency.**
**Occasionally, we ask you to change your banner ad every time you select an app page or post.**
**Apps are not installed in that way.**
**Please note that this is in violation of google’s policies, so if you edit the ad display format, your ads may be deleted or your AdMob account may be deleted.**
\*\*And as \*\***mentioned above banner ad impression frequency is best set to the automatic setting (auto refresh)-Google optimization.**
The guide to ad exposure time is useful for those who have just released an app.
If you’re running your app to a certain extent, please use it with automatic settings (auto-refresh).
I hope this helps.