> For the complete documentation index, see [llms.txt](https://documentation.swing2app.com/llms.txt). Markdown versions of documentation pages are available by appending `.md` to page URLs; this page is available as [Markdown](https://documentation.swing2app.com/manual/appmanage/pushmember/push.md).
# Send push
**Send push**
It’s easy to understand that push is an advertising message sent by the app.
It’s a promotion channel that makes it easy to deliver announcements, events, and advertisements to members who use the app.
Promote much better because it provides a link to the page containing the content you want to convey.
-Push is also available for free when creating apps in the swing2app.
-You can use it an unlimited number of times, no limit.
### **▶ Sending Push (How to Push)**
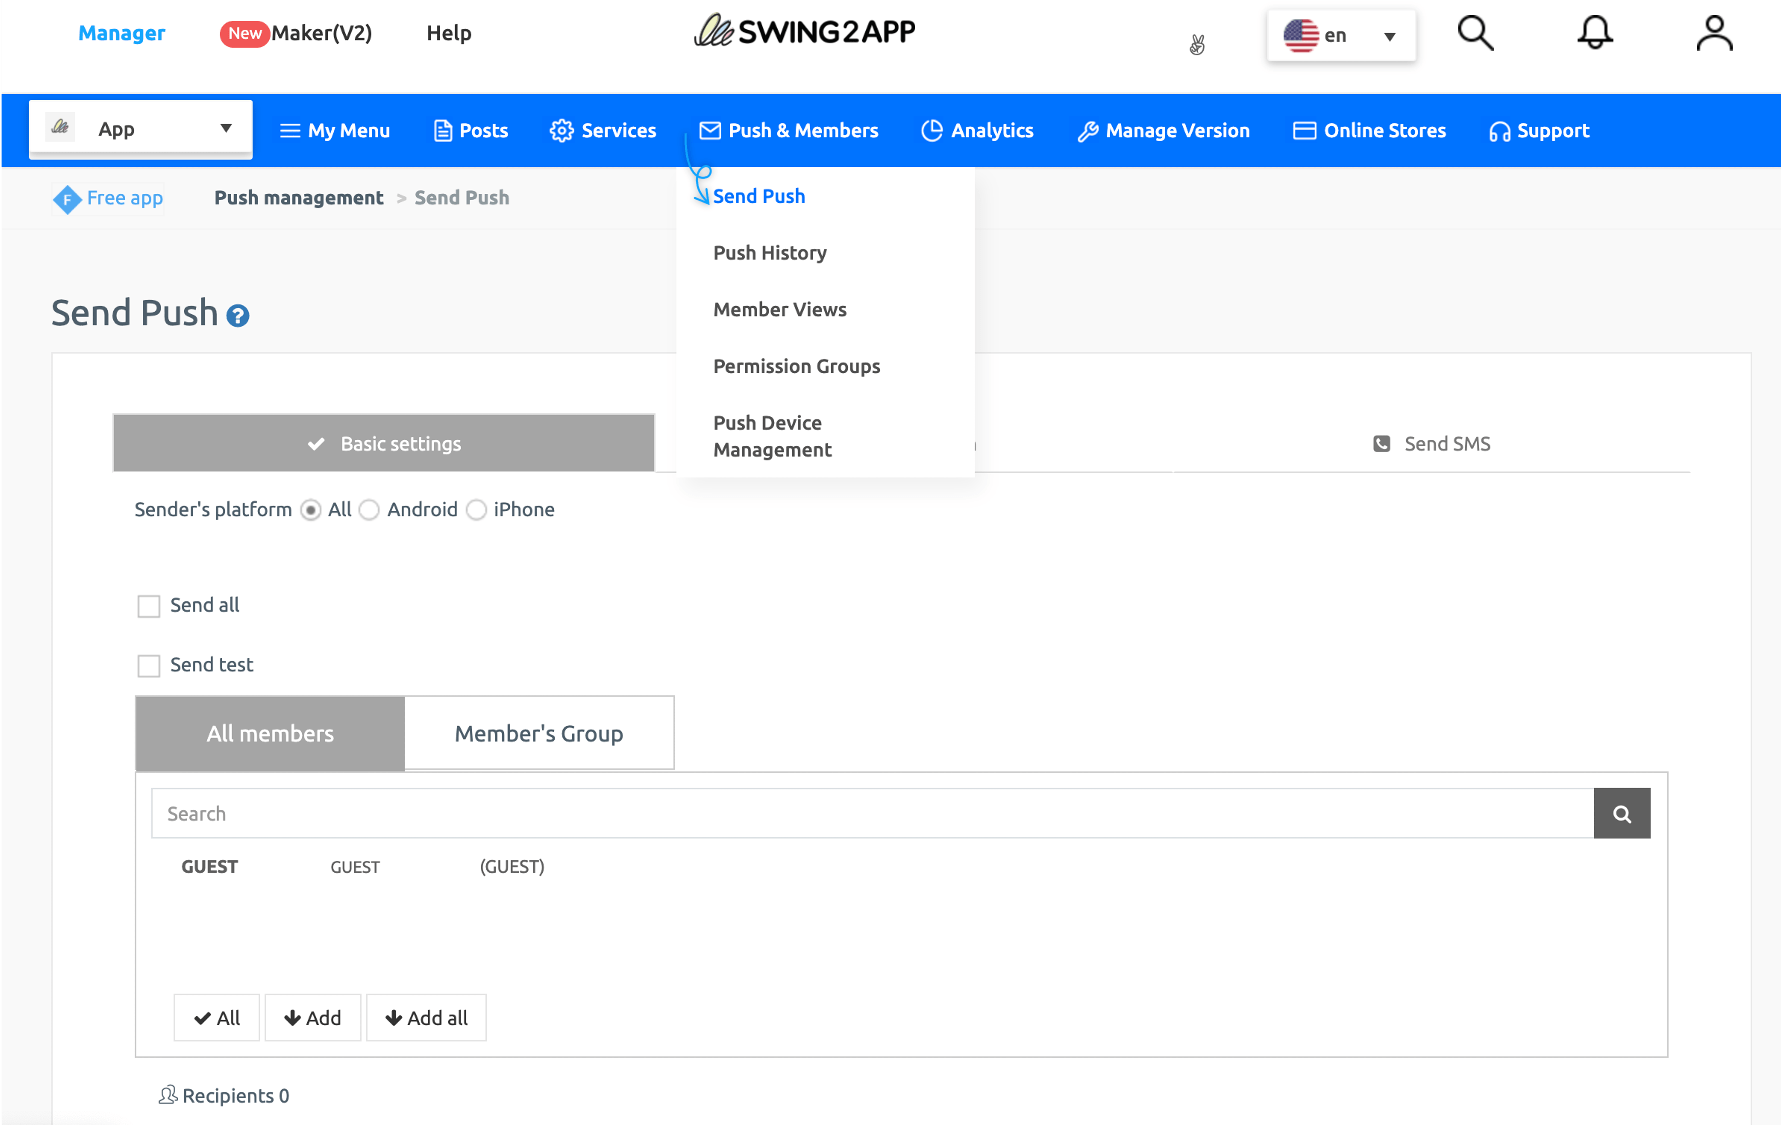
1. Go to **Manager.**
2. Select **Push & Members.**
3. Click **Send Push.**
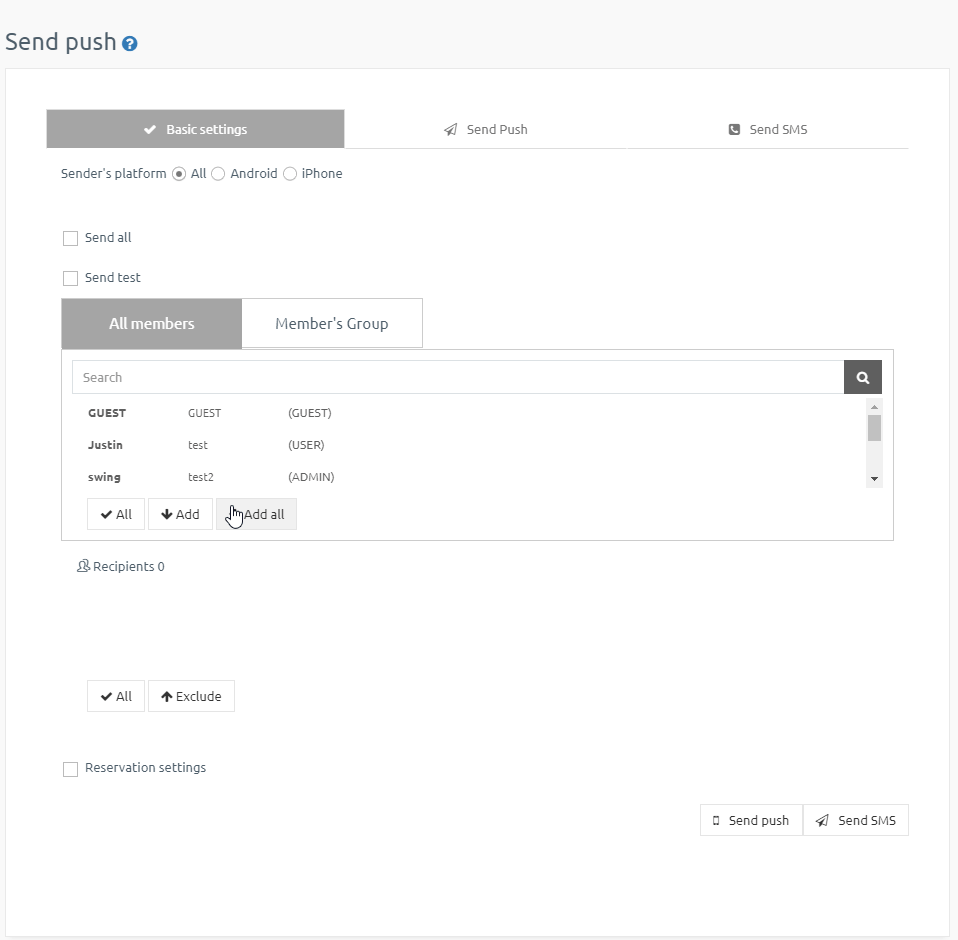
### **STEP.1 Basic Setting**
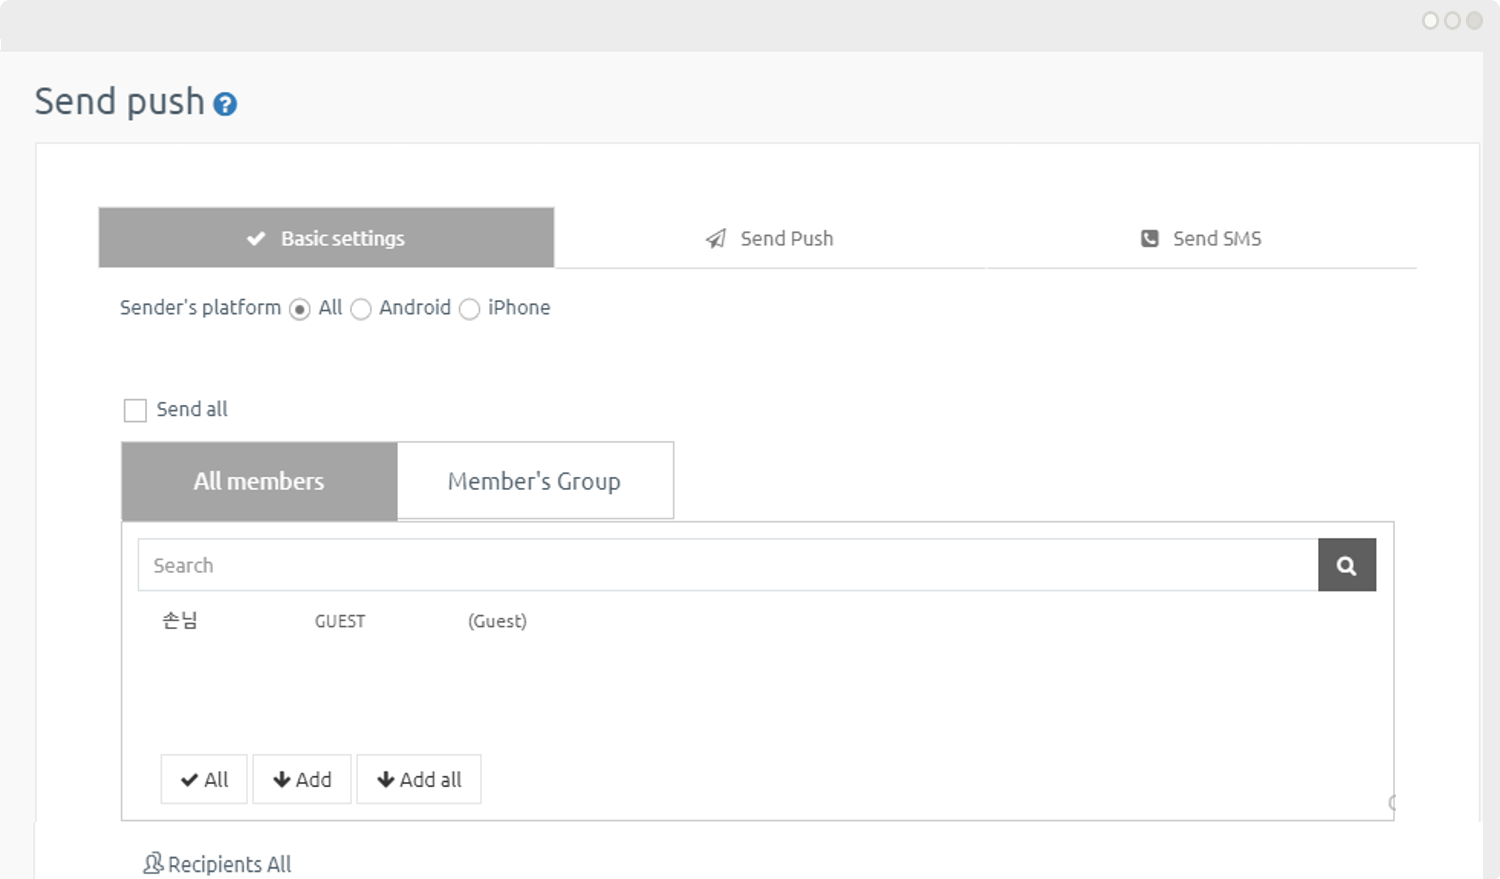
The first step in sending a push is the default setting. You can set the recipient selection, schedule setting, and repeat in the basic settings.
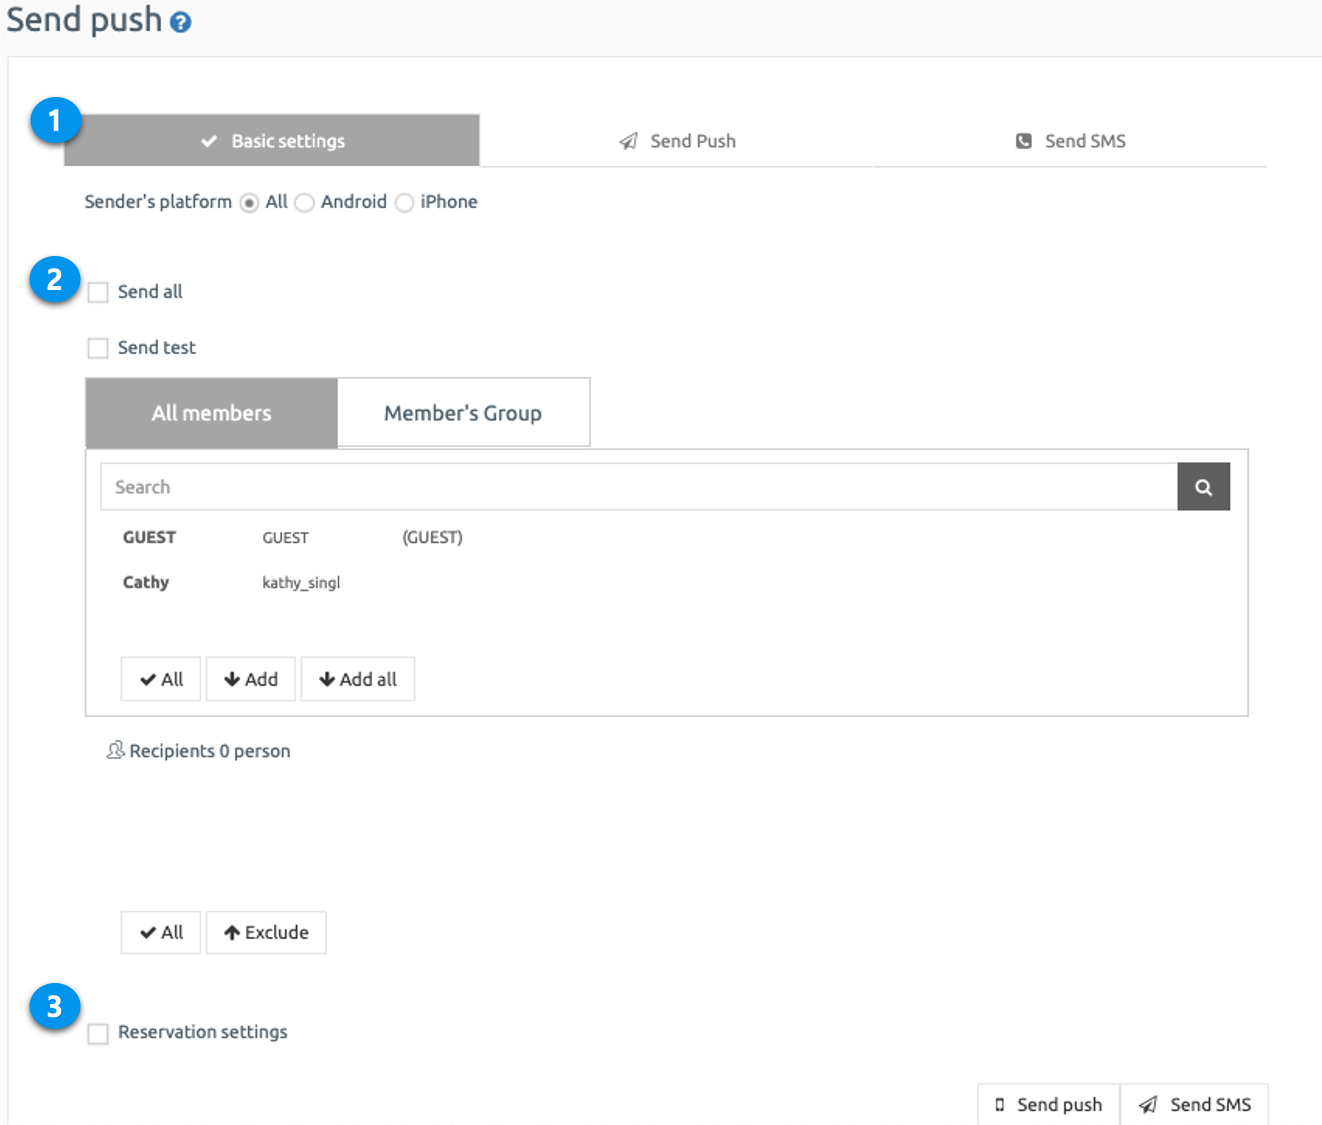
1. **Shipping platform**\
You can choose whether to send it to the entire platform or Android/iPhone separately.\
In general, you choose to send all, but you can also push each platform separately if necessary.\
2. **Select your shipping destination**
1. Send all: You can send a push to all users using the app.
2. Send a specific member: You can send a push by selecting only certain members.
**▶ View how to add a member to send push via gif**
**3. Schedule setting**
Reservation setting is a function that can be sent to the date and time you want to send push.
If you want to send right away, do not check the reservation settings, go directly to push sending.
If you want to set up a reservation, please check and complete the setup below.
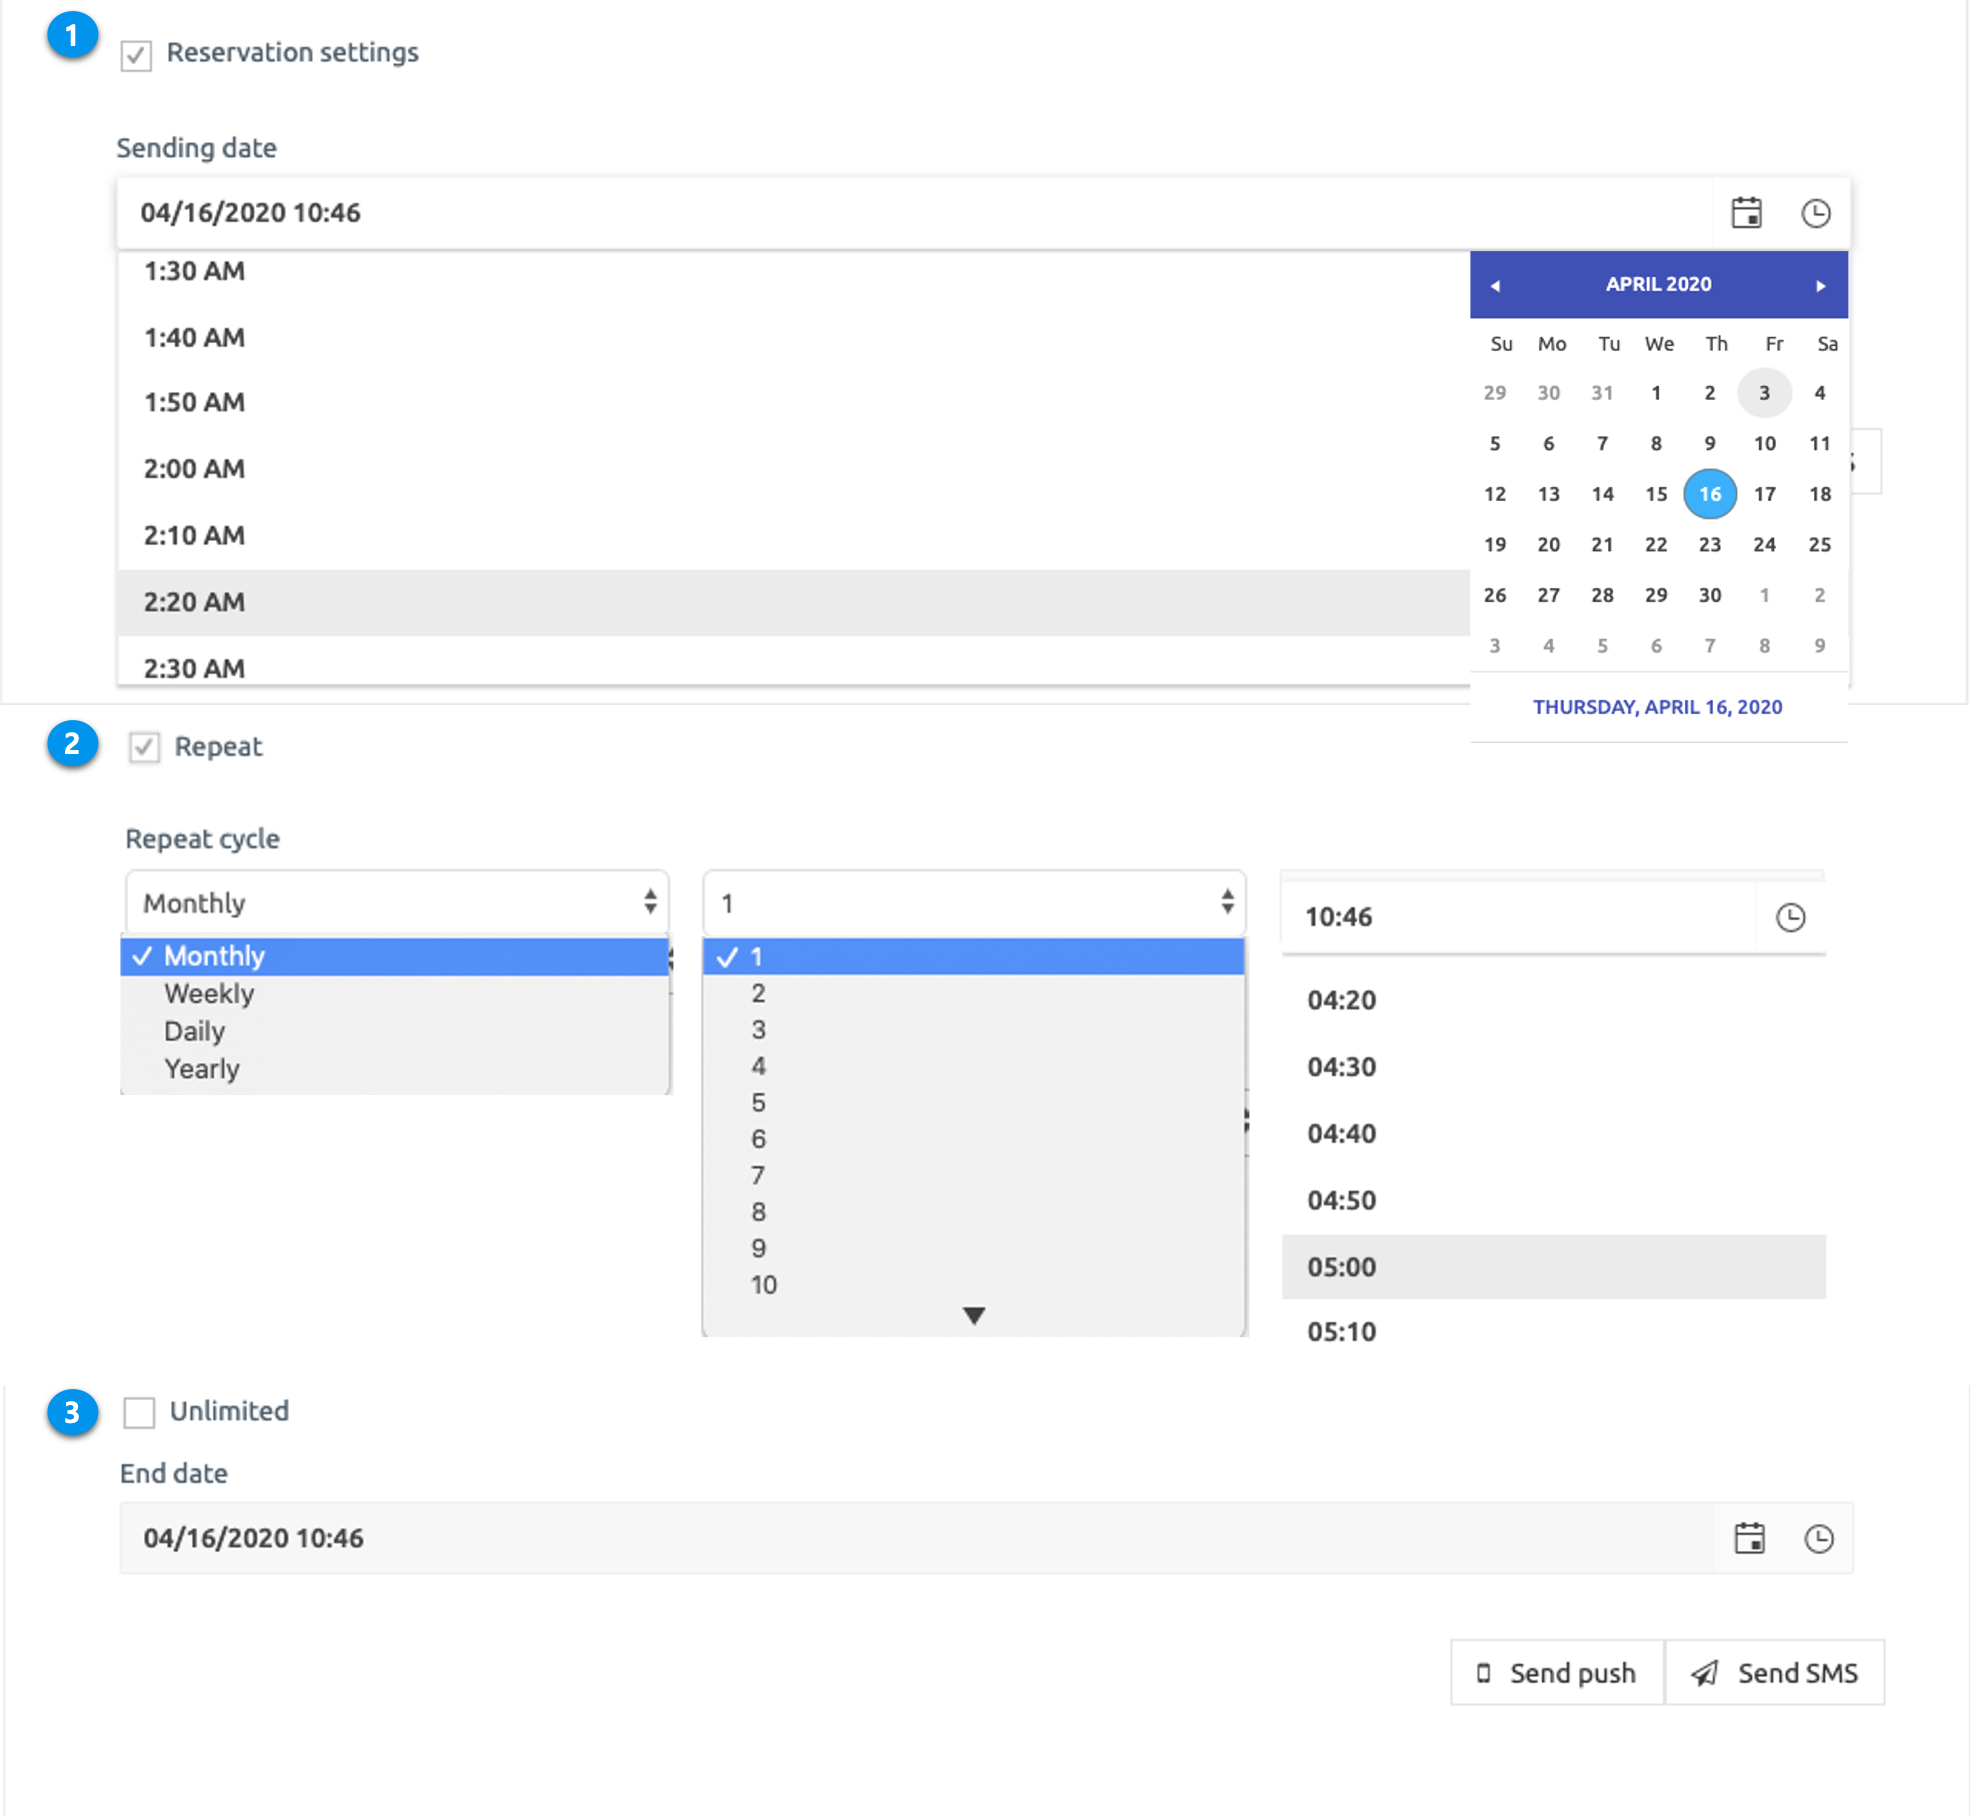
1. After setting the schedule, select the date you wish to send a push to and select the time.
2. Whether to repeat: If you send the push repeatedly, set the repeat cycle-day and time. If you don’t want to repeat it, uncheck it.
3. Unlimited: If you want to send unlimited without a push end date, please check ‘unlimited’. If you want to set a limit, please set an end date.
Once you have completed your push preferences, go to the next step, Send to Push.
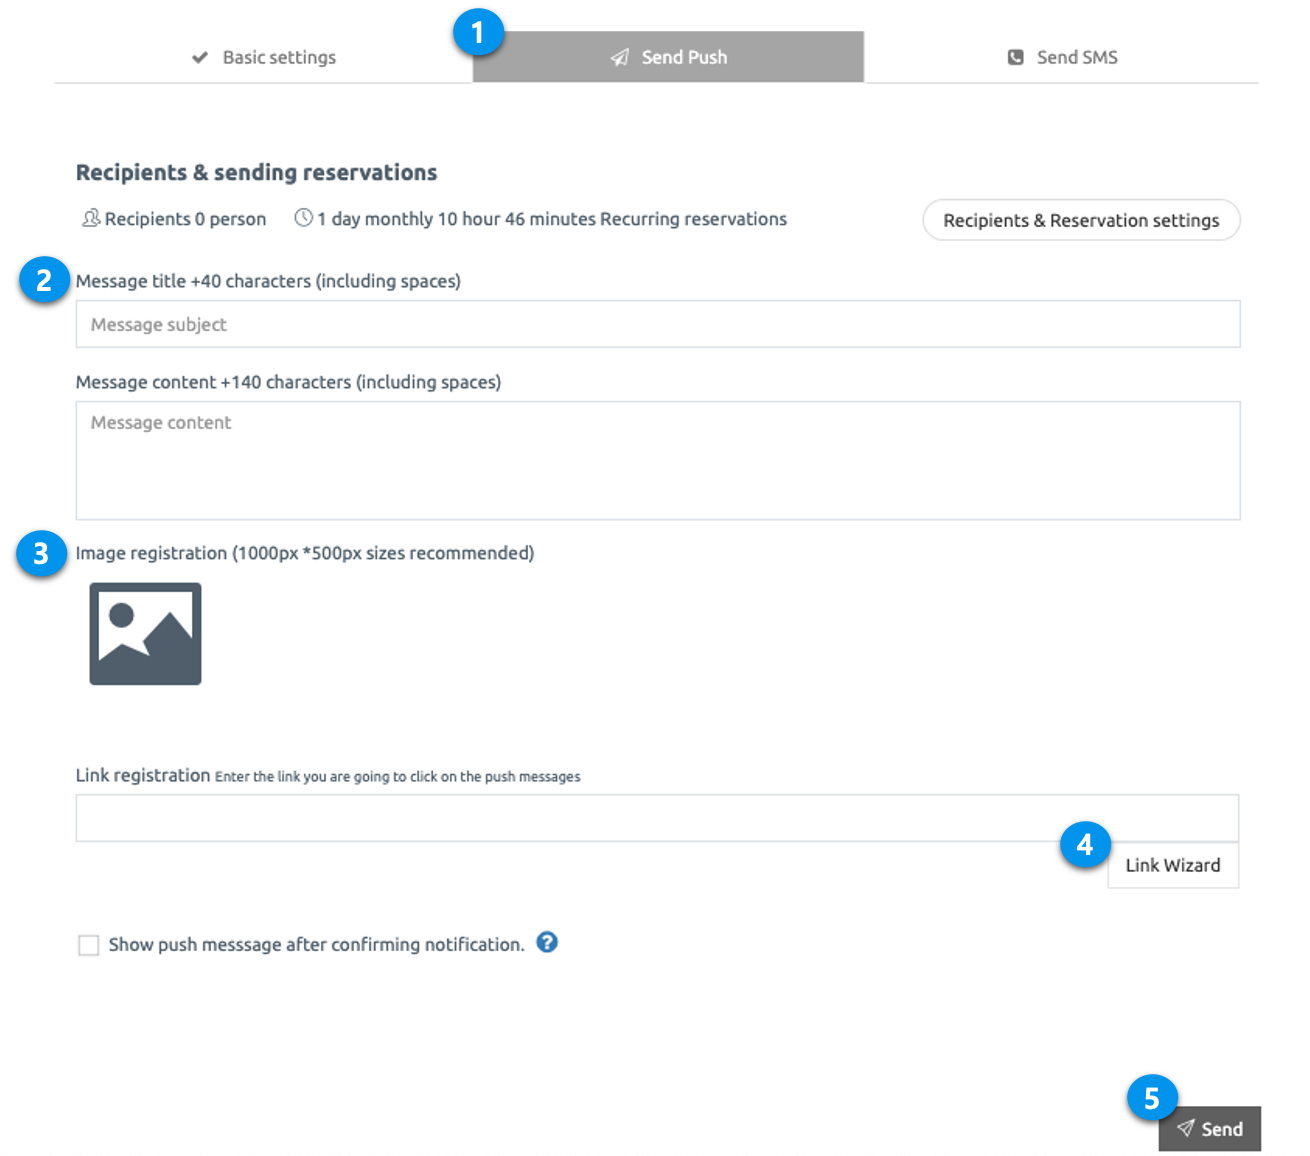
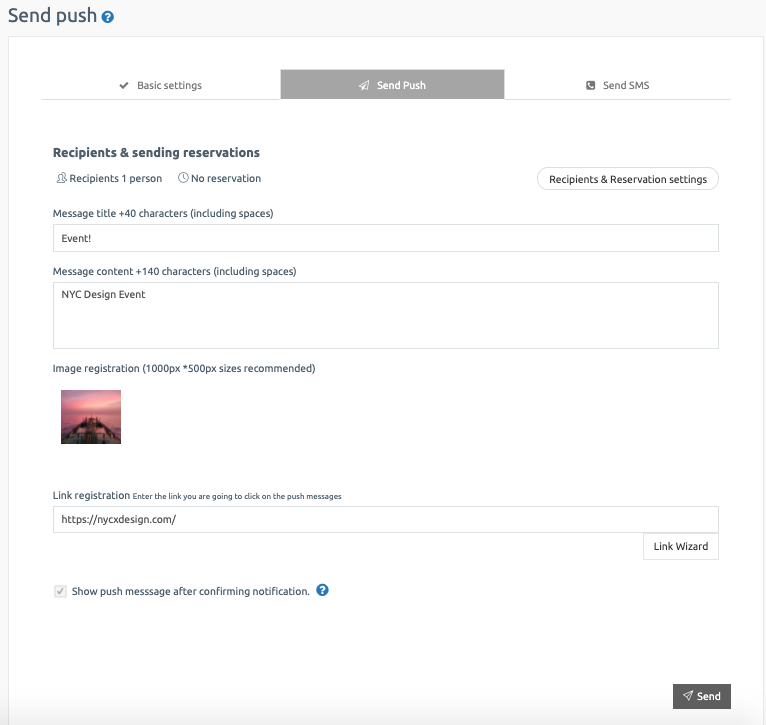
### **STEP.2 Send Push**
1. Push message subject. Please enter the subject. \*Required
2. Message Content: Please do not enter a long content. If there are many characters, it will be cut off. \*Required
3. Image registration: Please register the image to be shown when sending the push. \*You do not need to include the image because it is not required.\
-Images are 1000px width and 500px height\
-Due to the nature of the device, the push image is not visible and is visible only on the Android phone.
4. Link Wizard: Link Wizard is a feature that allows you to apply a link to where to go in the app when you touch the sent push.\
Select the \[Link Wizard] button and select which page to link to when sending push. \*Please check the details below.
5. Send Push: Select the Send button to finish sending.
\
\ **▶ What is the Link Wizard?**
Link Wizard is a menu that can be used to link various functions provided by Swing2App as well as web links (URLs).
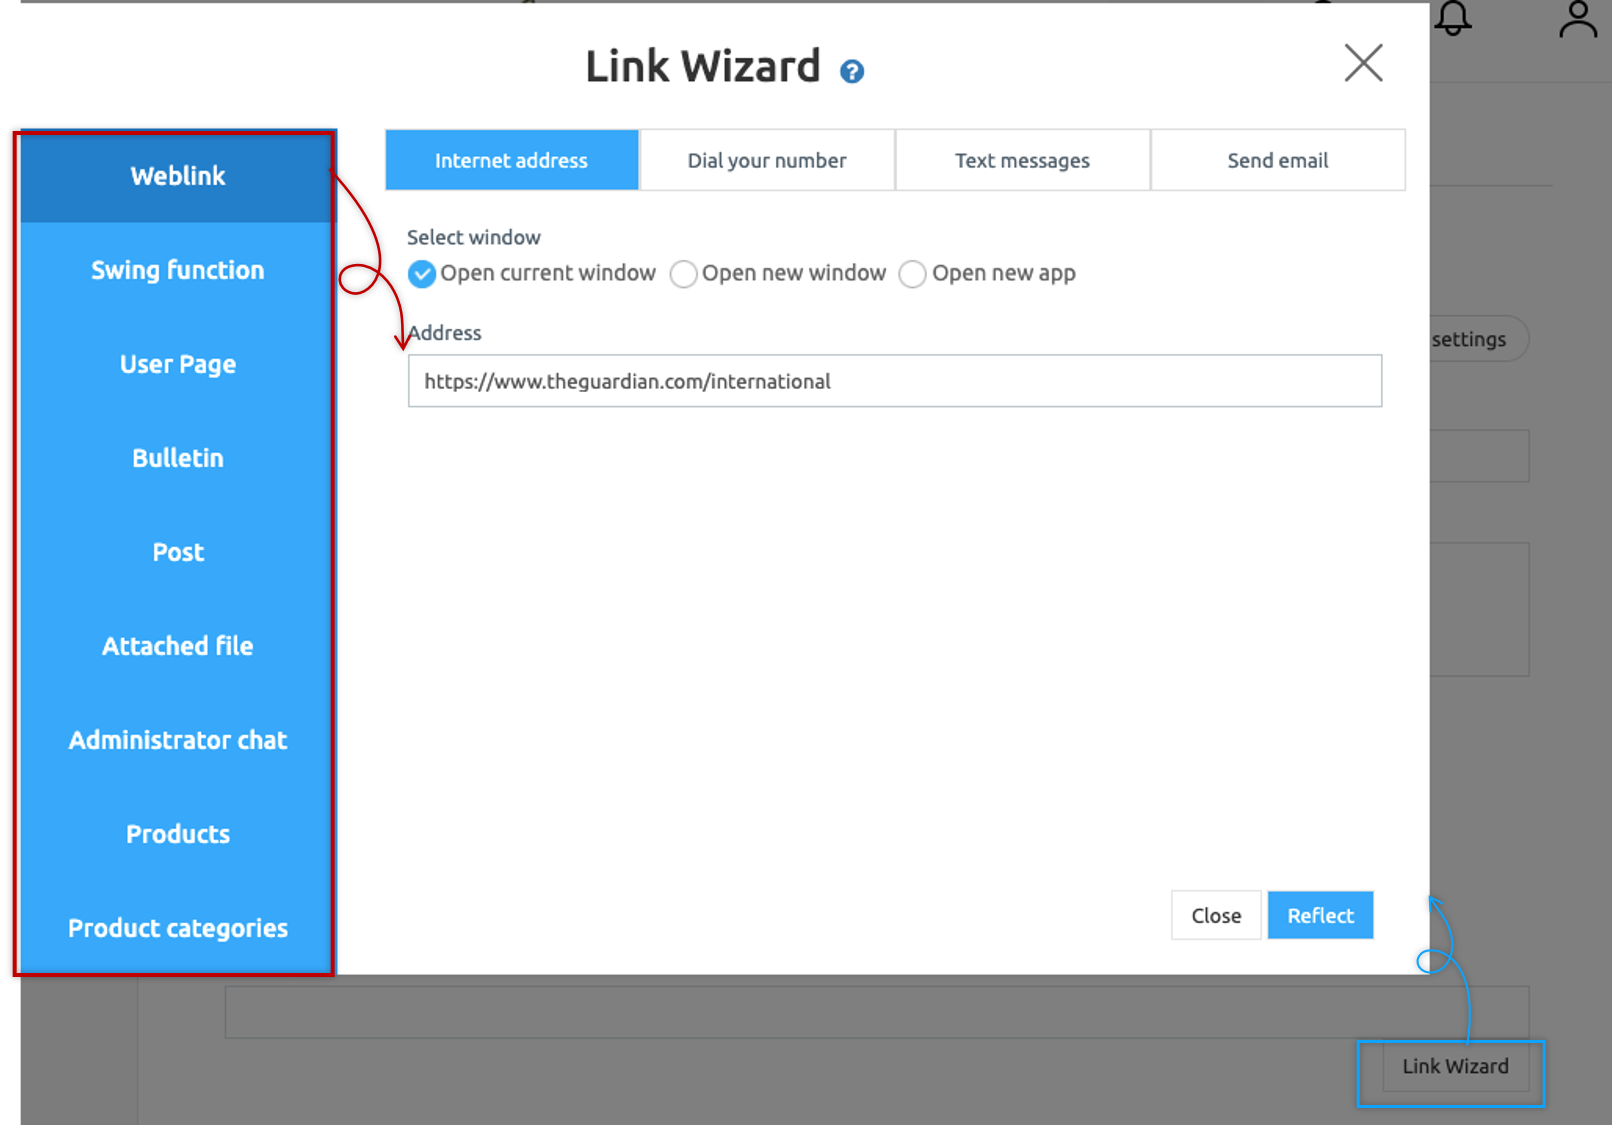
In addition to general Internet site addresses, web links also work with phone numbers, text messages, and emails.
If you enter the link, you will be taken to the linked page when you push.
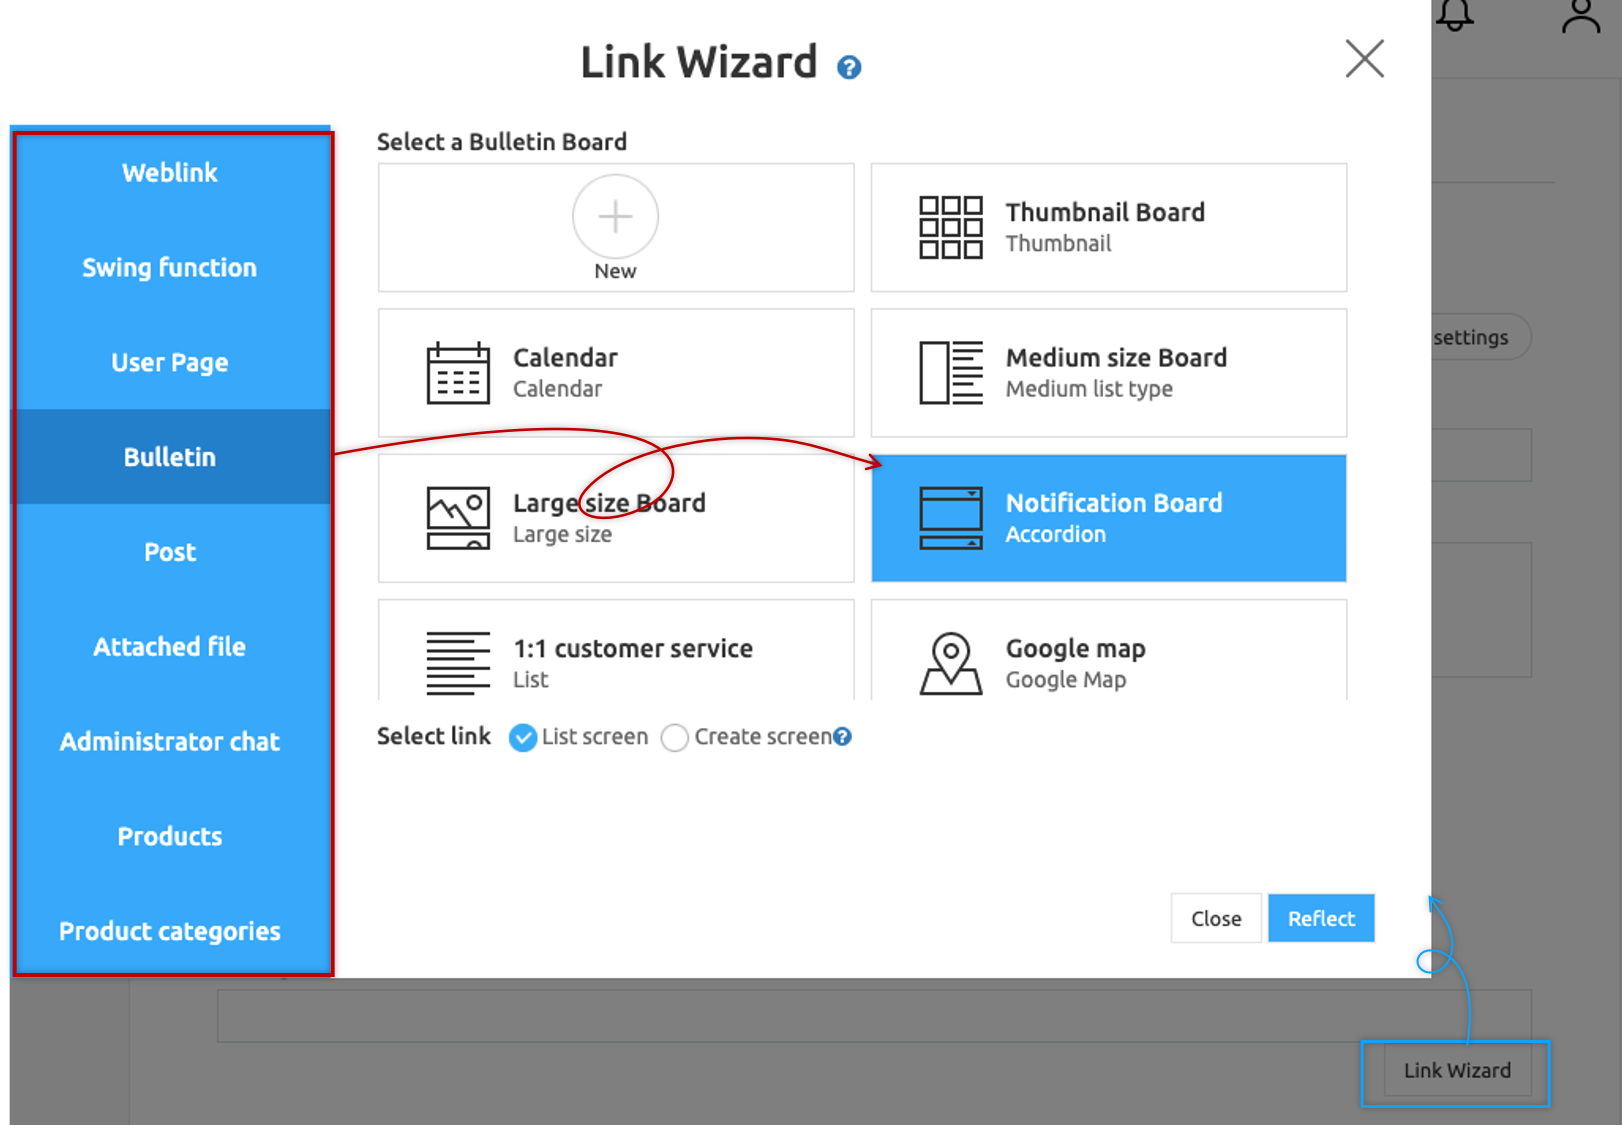
In addition to web links, you can link with functions, pages, bulletin boards, and posts provided by Swing2App.
If you select a bulletin board, you can move to reflect the desired bulletin board among the bulletin board made in the app.
You can search for posts and send pushes to specific posts.
**▶ What is a push message display after checking notifications?**
It can be checked and used only when it is an optional function.
In general, if you touch Push, you’ll go directly to the linked link, whereas, if you set this feature, you’ll see the message first and then go to the link.
**You can use it if you want to show your users push messages.**
\*See the app launch screen image
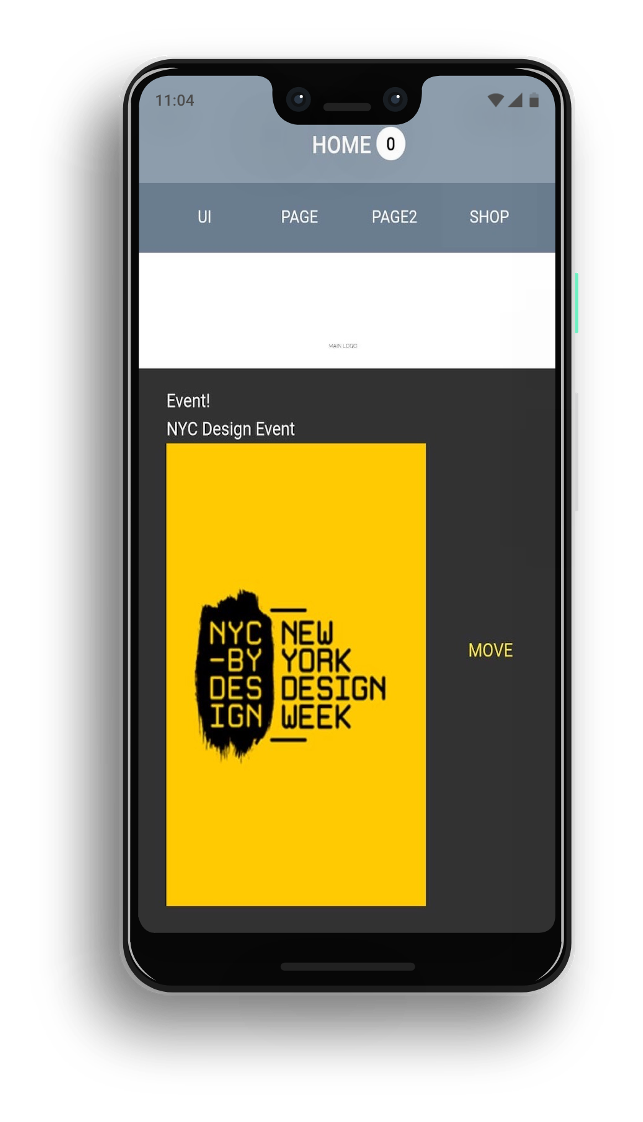
If you select push notifications, a message pops up. \* Title and message written at the push
Press the \[Move] button to go to the applicable link page.
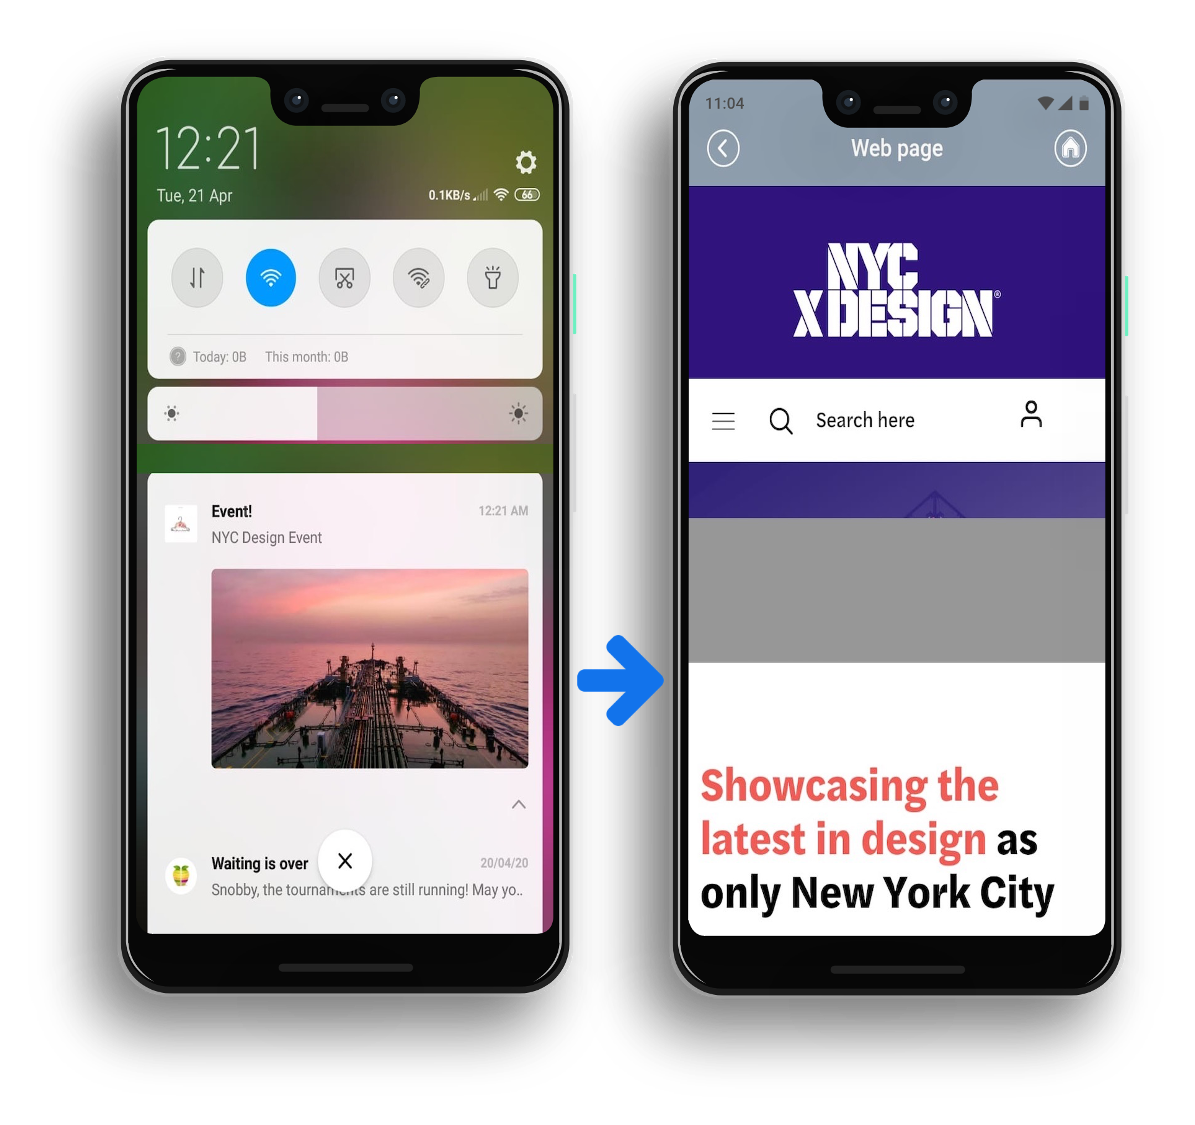
\*You can also check the image applied when sending the iPhone push.
The iPhone does not show the push image, so you can check the image by marking the message.
Show important messages to users first in push, and then check \[Show push message after notification] when moving to a link.
When you send a push, the message is checked first, then the Go button takes you to that link page.
### **STEP.3 App launch screen: Push sent screen**

**When you send a push, a push notification is sent to the user’s mobile phone where the application is installed.**
\*Push must be installed on your phone, then check directly on the phone. (It won’t work for virtual machines and app previews)
Push notifications may vary in speed depending on the number of users who use the app, but they are usually sent within 3 to 10 seconds.
**Select the push notification to go to the linked web link page.**
> **The screen that Push is sent to is different for iPhone and Android phones. Please check through the image below!**
**1) iPhone app push dispatch screen**
On the iPhone, only the push title and message contents are displayed.
Even if you register an image in Push Send, the image does not appear in the iPhone notification window.
**2) Android phone app push sending screen**
On the Android phone, all titles, contents, and images registered in Push Send are displayed.
If you press the button below in the notification window, you can check the registered image.
\*\*Push should be sent when the app is closed to check the notification.
If you send a push while the app is running, it will be displayed in a popup window.
**Therefore, to receive push notifications in the normal route, please send the app while closed.**
**▶ Push notification**
If you did not immediately check the push, you can check using the app push notification list.
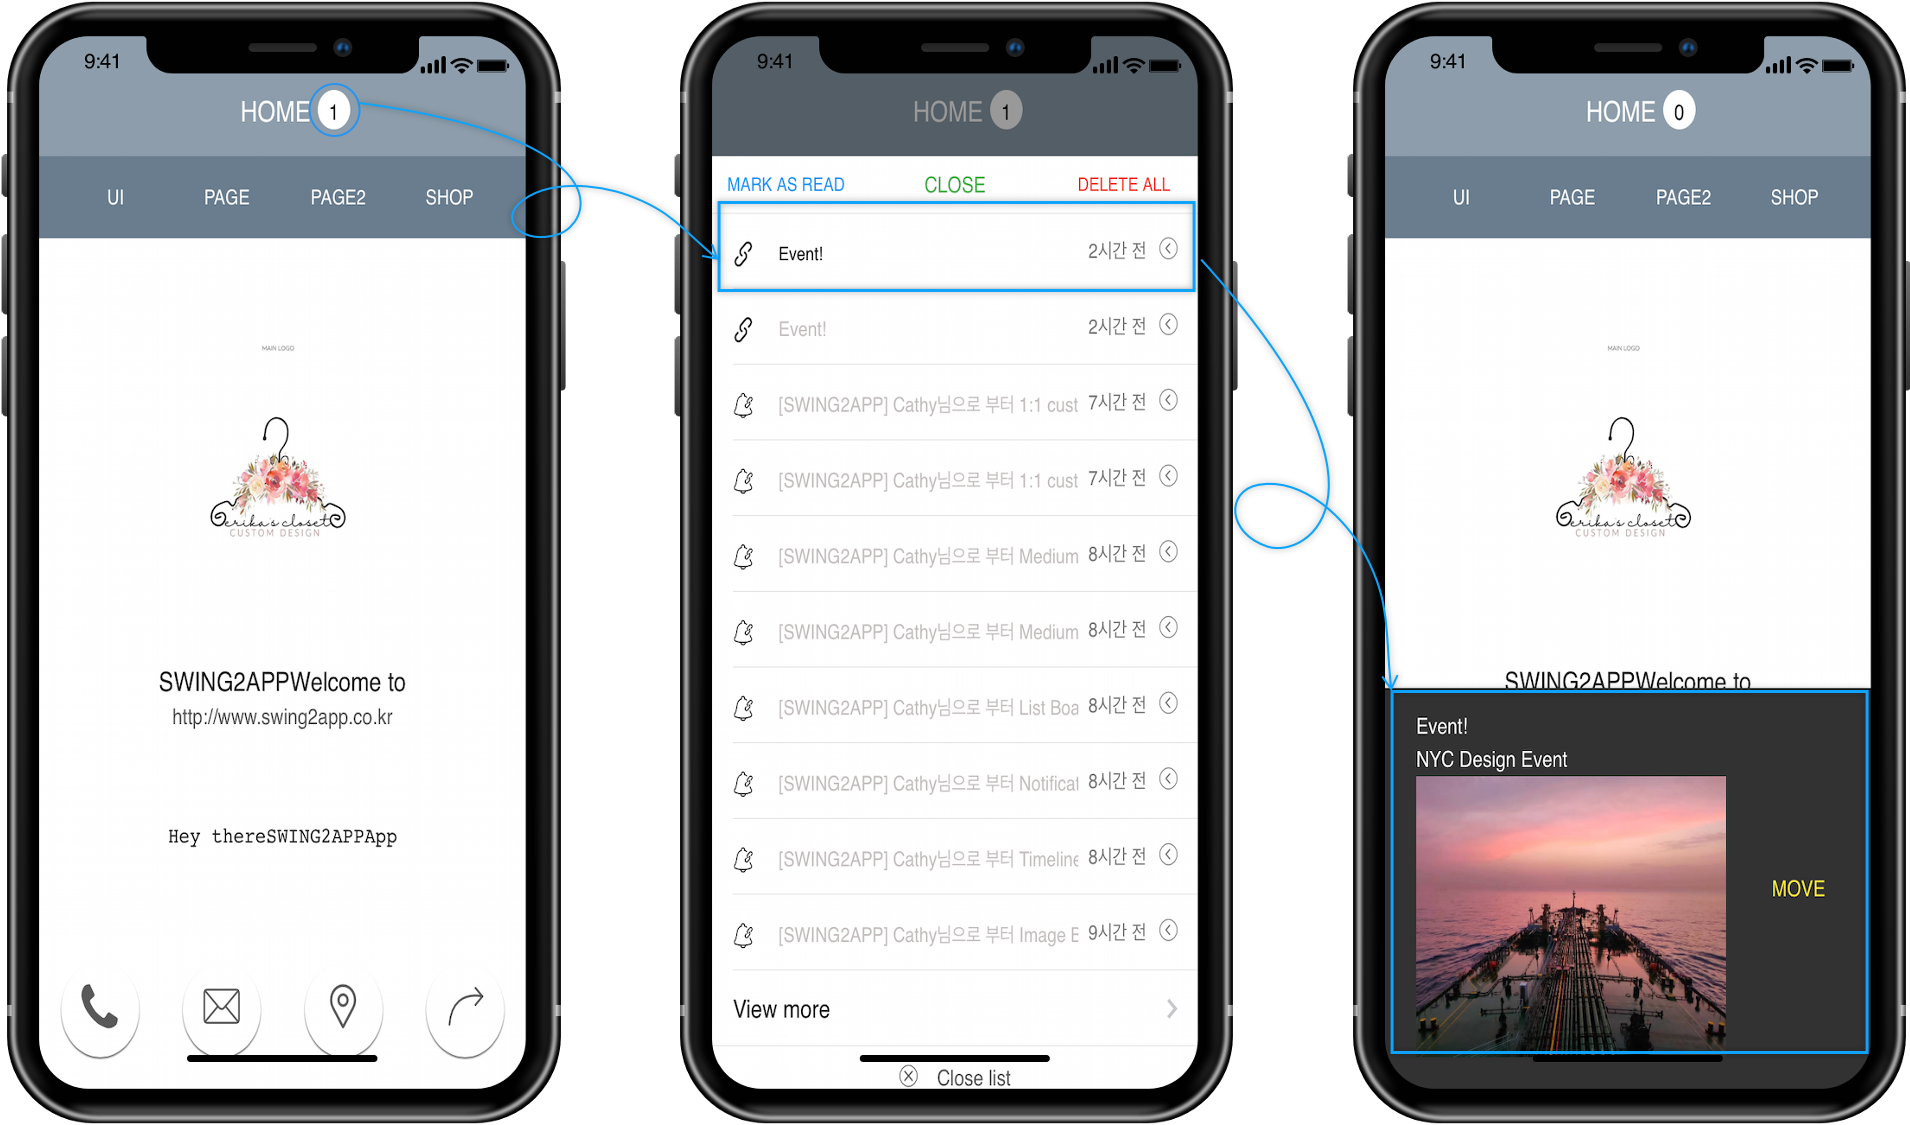
Select the notification button at the top of the main home screen to see a list of pushes. (The location is slightly different for each prototype)
You can check the push you want from the list.
You can delete pushes you receive, process them as read, delete all notifications, and more.
\* Only users who have been registered in the app can use push notifications, read and handle.
The guest cannot use the above functions because there is no log record.
**▶ Push-only app push delivery**
\* Prototype: Push version app made exclusively for push has a special feature sending push.
**1)When sending a push, you cannot select a member, only a full shipment is possible.**
Push-only apps are apps created by applying a website (homepage) link to the app as it is, so there is no member to sign up in the app.
Therefore, the app can not recognize the members, so you can not select members, only the entire shipment.
All of them are marked as guests.
**2)You cannot use the Link Wizard.**
Link Wizard is not available because there is no menu linked to the app.
You can only send by sending a regular web link (URL).
**Therefore, if you are using a push-only app, please make sure to send the contents when pushing. Please check.**