> For the complete documentation index, see [llms.txt](https://documentation.swing2app.com/llms.txt). Markdown versions of documentation pages are available by appending `.md` to page URLs; this page is available as [Markdown](https://documentation.swing2app.com/manual/maual/pagemenu/template-page.md).
# How to create a web template page
**How to create a web template page**
The template page is a web page creation tool provided by the user page – a design template creation tool for each industry.
Users can create web pages by simply entering text, images, and so on, as outlined on the designed page.
By providing templates for each style and industry for web pages that are difficult to design directly, users can easily create pages.

 **Template Page Apply Step**

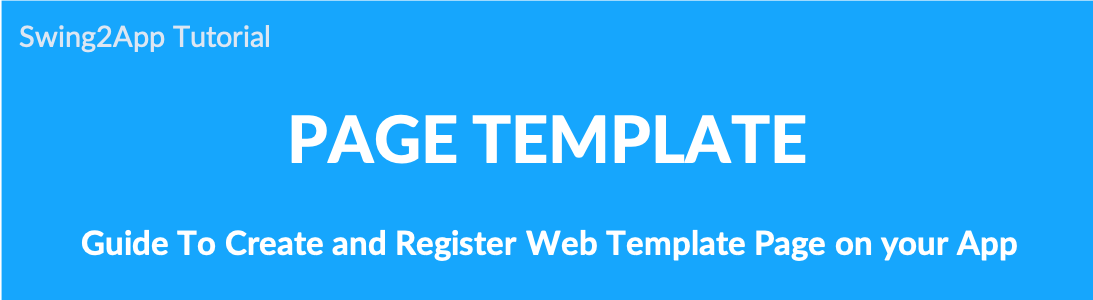
 **Web Template Page Application Screen**

One of the web templates offered by Swing2App is the main page of the \[hotel]
**▶Industry-specific template style to view a group**
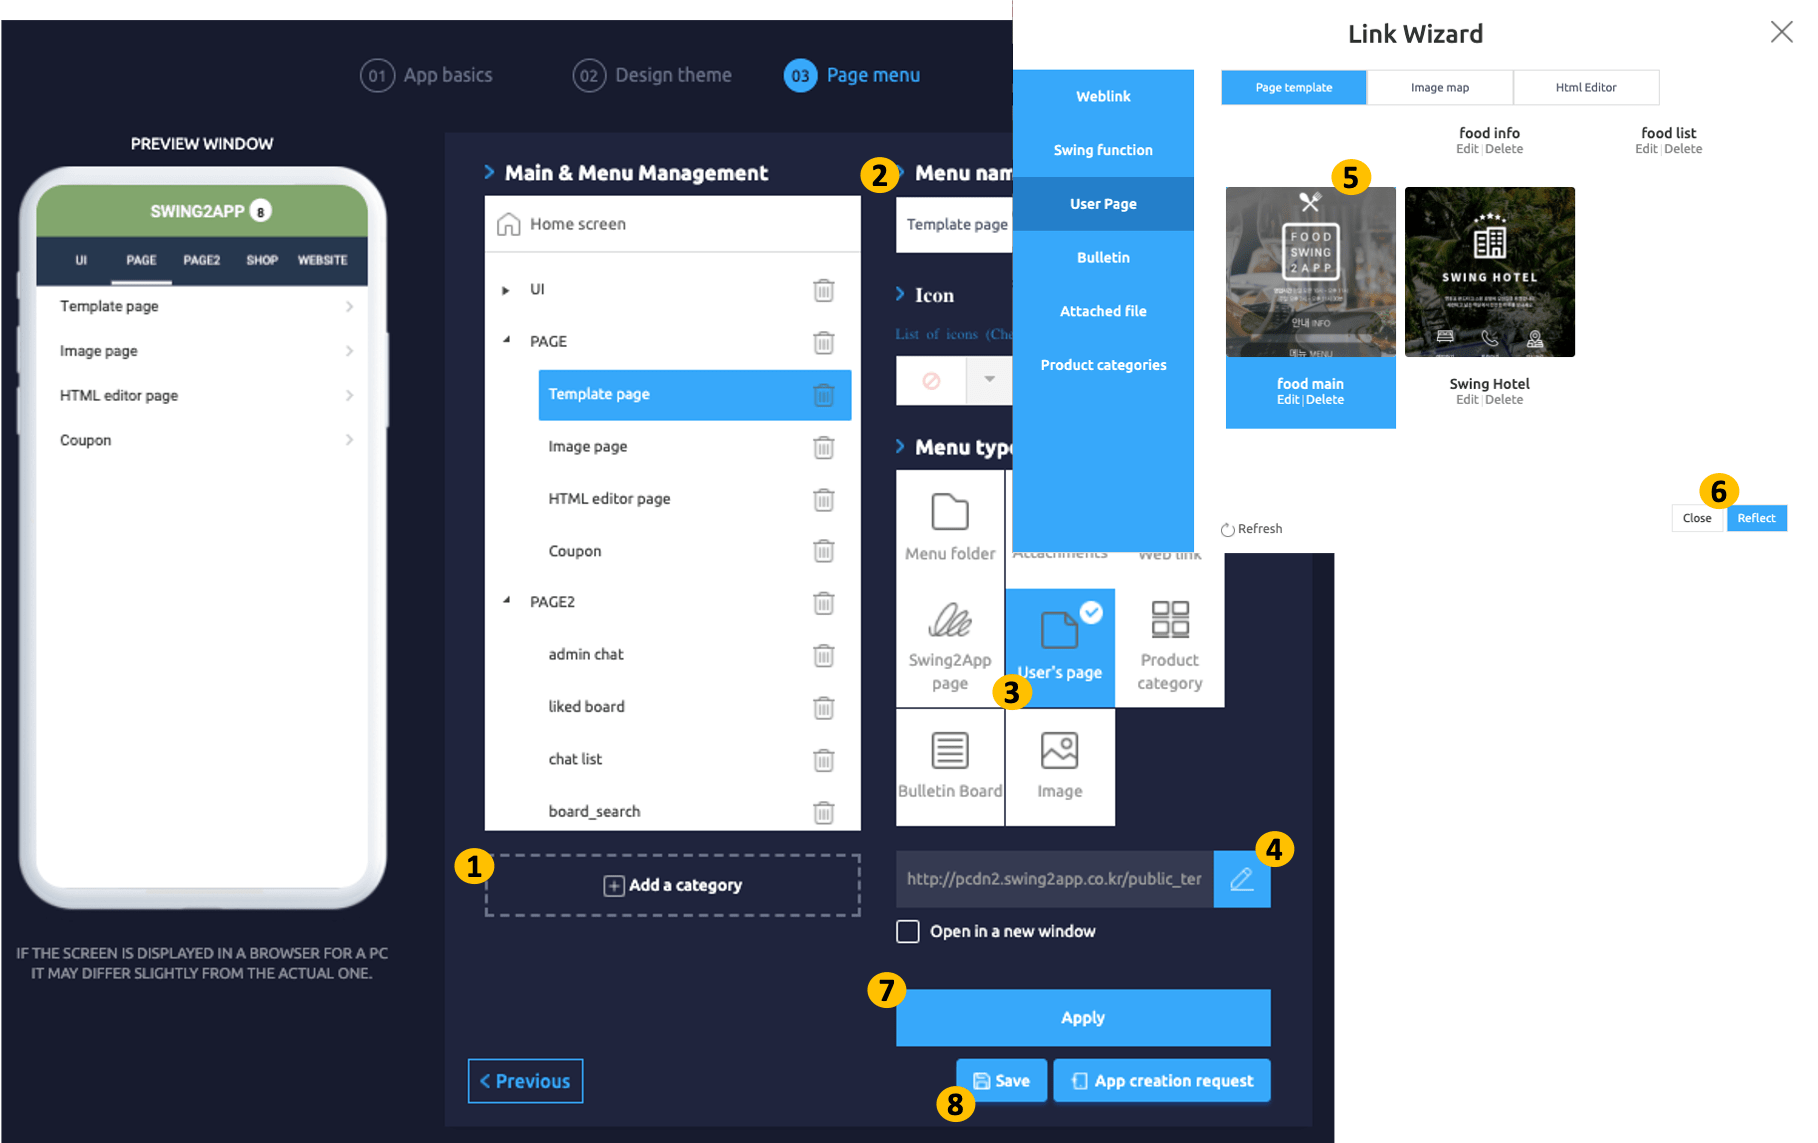
### **STEP.1 Adding template pages**
Go to **Maker(V2)** and click **Page Menu.**
1. Click **Add a category**.
2. You can change the menu name at the top of the home screen (unless you change the name, it will be displayed as the app name.)
3. Select the **User’s Page** menu in the **menu type.**
4. Click the **Link Wizard.**
5. When the Link wizard window appears, select the **Page Template** and click **New.** A template creator window will open.
6. Click on **Reflect.**
7. Press the **Apply** button.
8. Click on **Save.**

### **STEP.2 Template Page Creator**
**1. Create a new page**
Template page creator site.
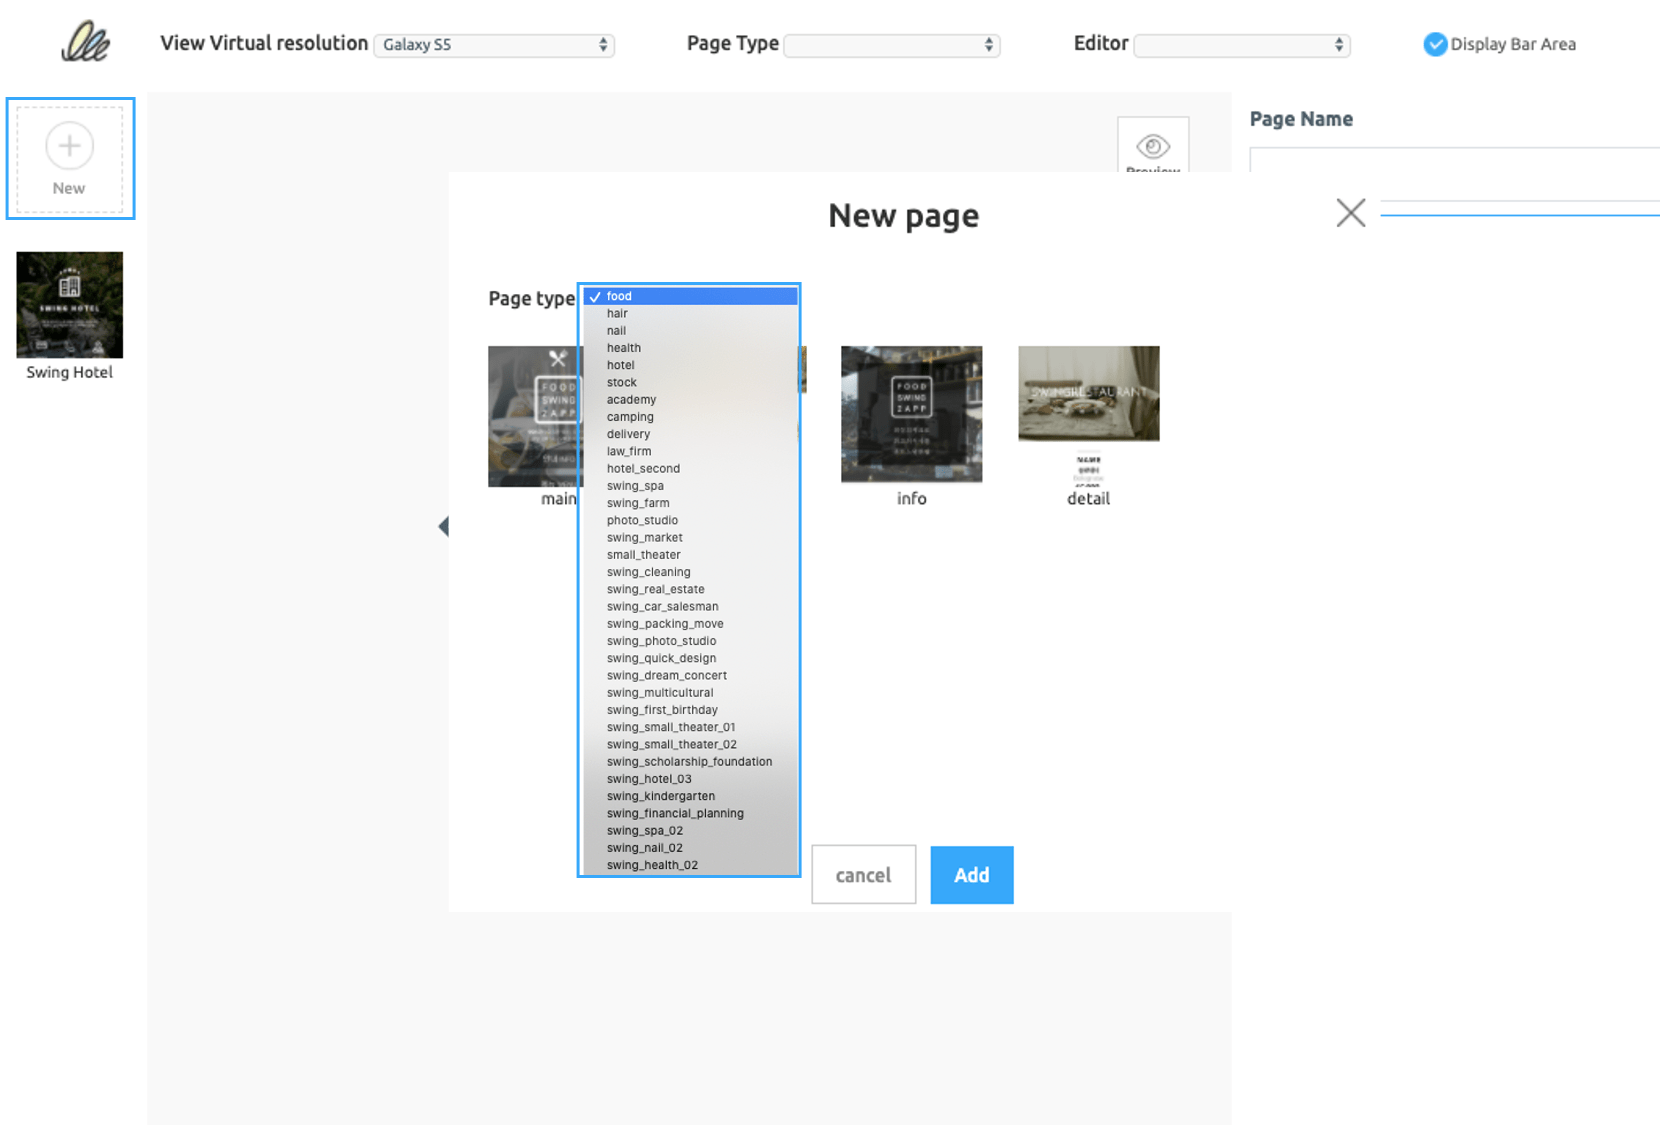
Select **\[+New]** at the bottom of the site to open the **‘New Page‘** window.
Select the page and select the **\[Add]** button.
Currently, Swing2App provides template pages for various industries.
Nail, Health, Hair, School, Restaurant, Law Firm, Delivery, Hotel, Spa, Moving, Market, etc…
The templates are constantly being added and updated.
If you have a design that is the same as or similar to the app you want to create, you can select that page type.
Each template has a main page, a listing page, and an information page. Please use it according to your application.
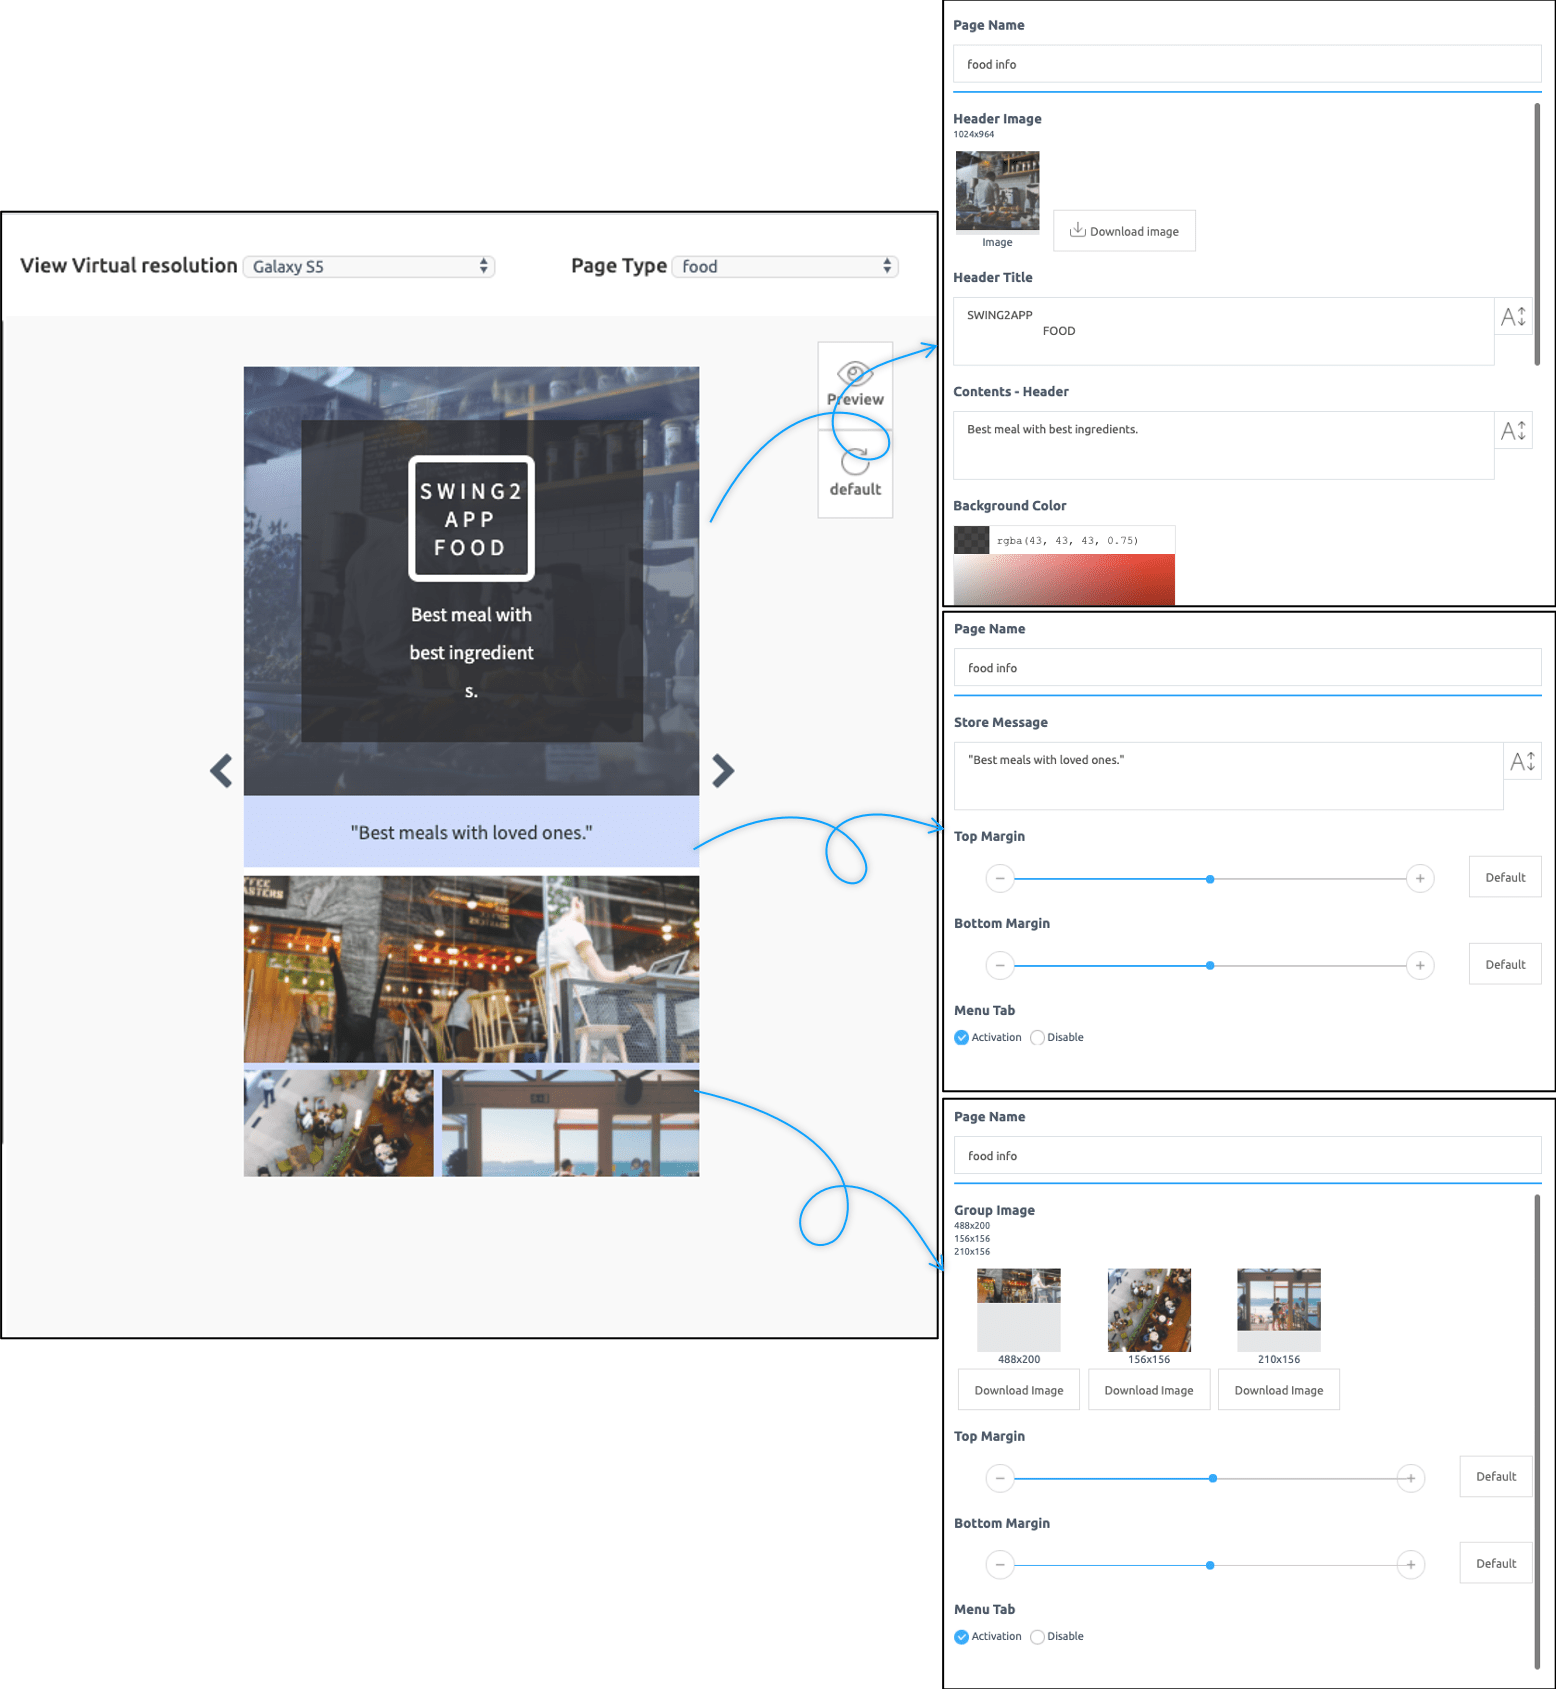
**2. Edit the page area**
Let’s work with the ‘Restaurant’ industry template from various industries.
**1) Edit the main page of the restaurant**
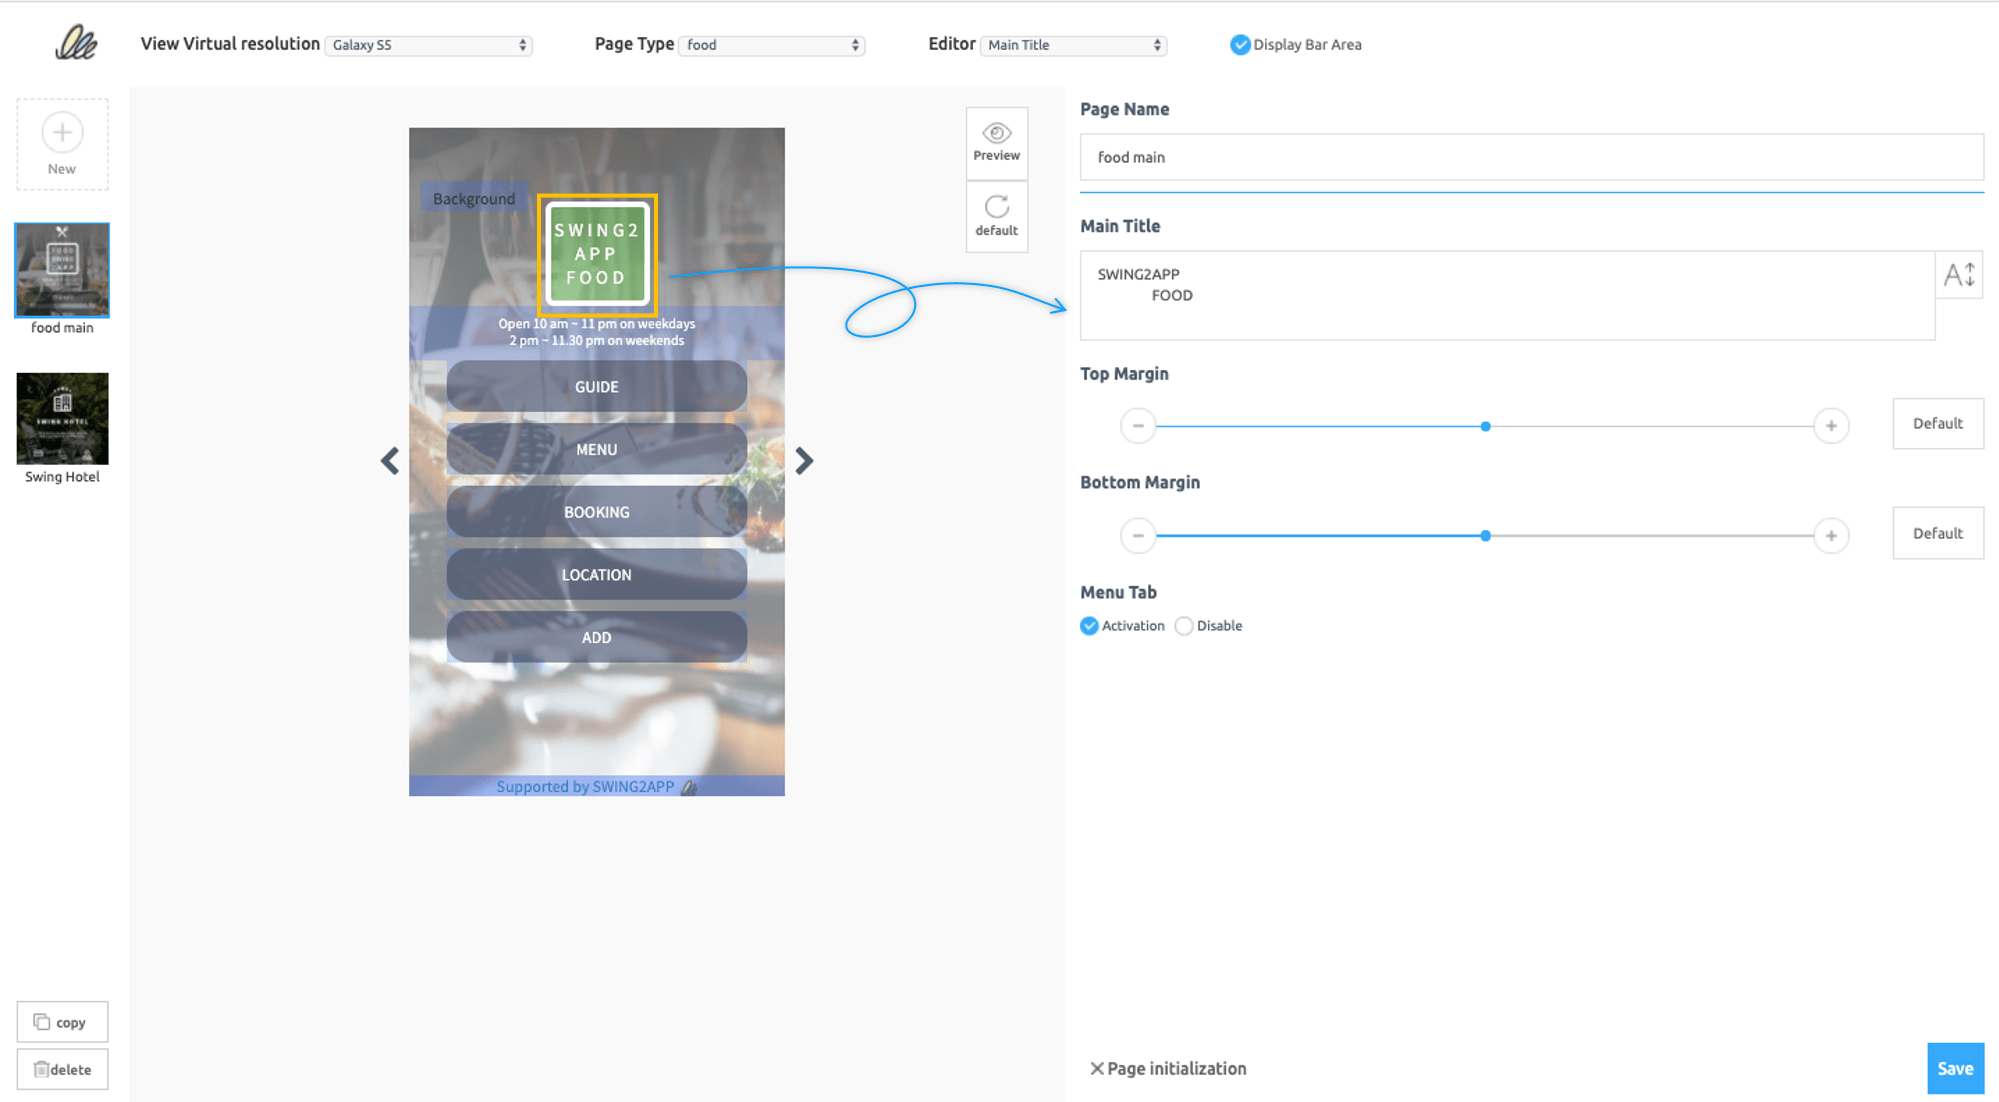
Each area of the page is designed to be editable.\
ex) Main Page\
1\) Main Title – Please enter your restaurant name or app name.\
2\) Opening Hours – Please enter the opening hours of the restaurant.\
3\) Menu (Button) List – You can use the contents you have set.\
You can change the name to the menu you want, attach a link, and click the button to go to another web page.
**2) Edit the restaurant list page**
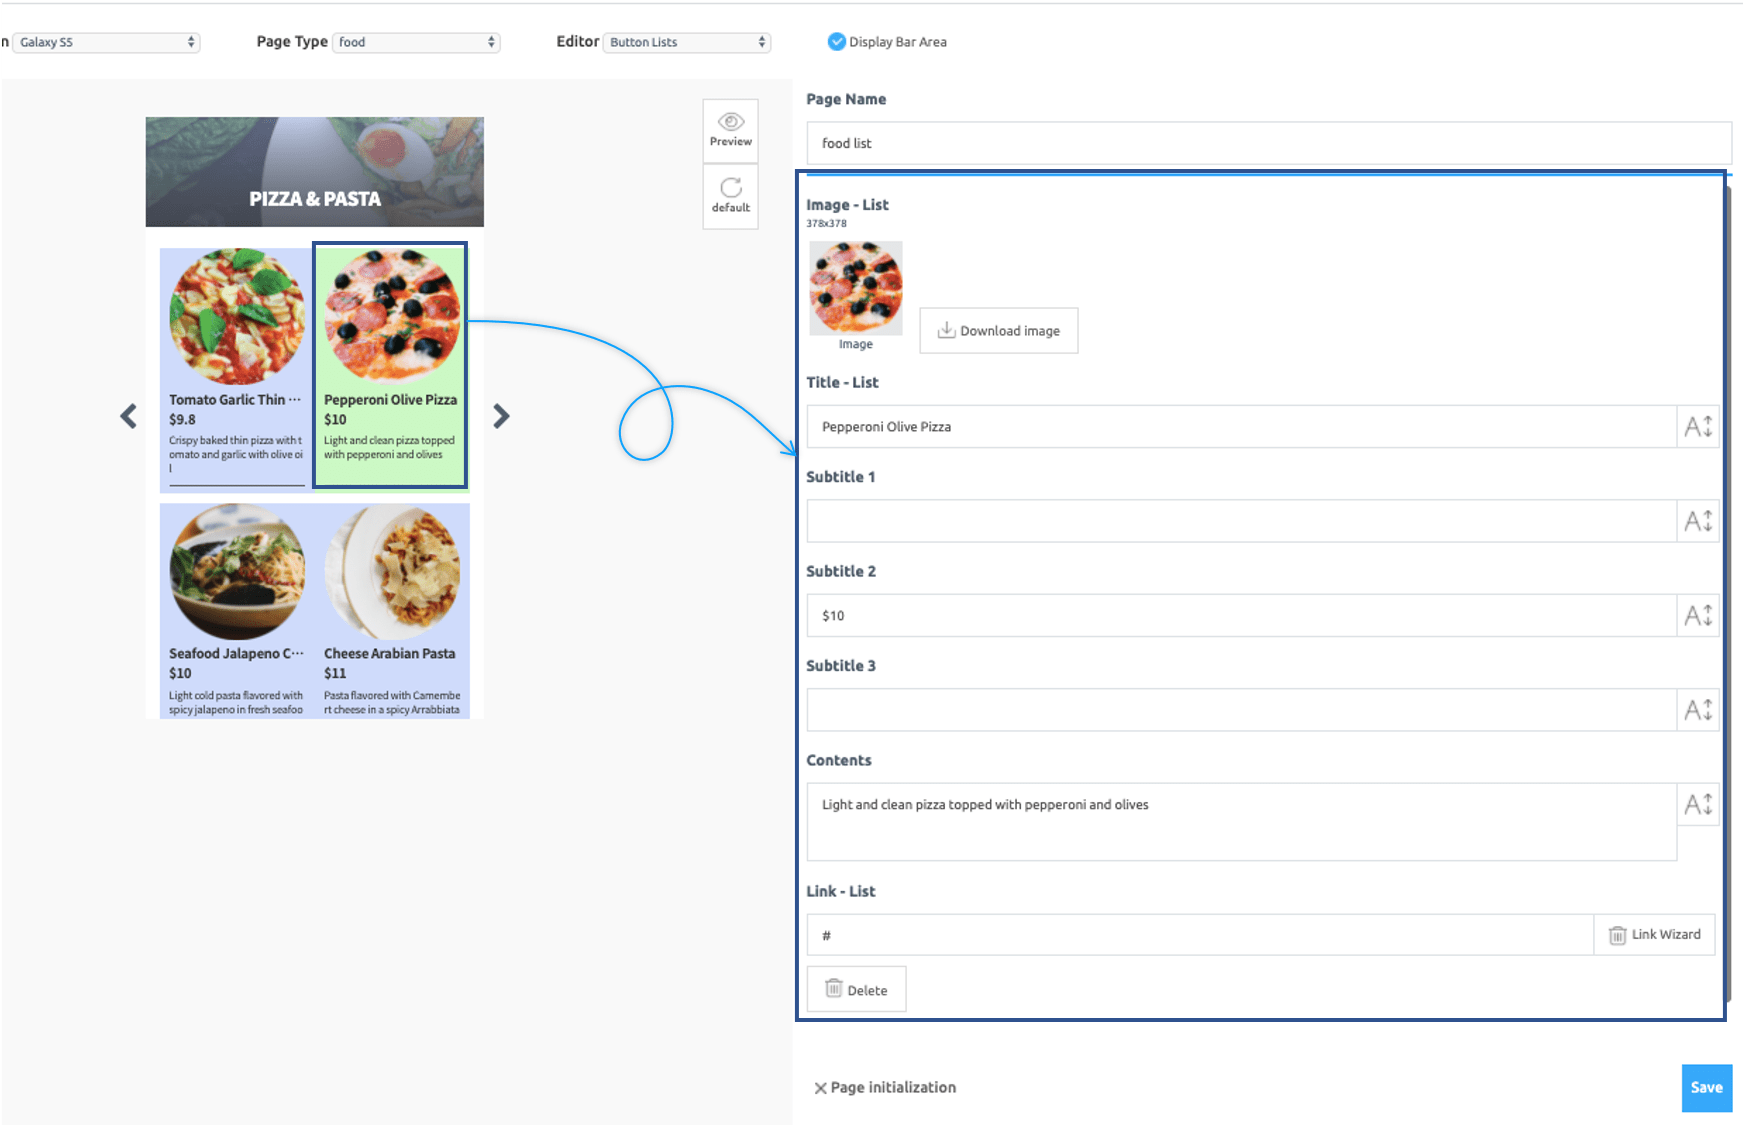
The list page can also be edited by selecting the image, title, and content area of each item.
Please upload the image to the size listed.
When you have finished entering the information, click the \[Save Data] button to save the changes.
We provide all of the designs, styles, and tools that are provided, so you only need to follow the changes listed.
**3. Template page top menu**
**\[Production method]**
You can see various menus at the top of the page production tool.
1. View in a new window – You can open the template page in a new window.
2. Correction area is not displayed – The correction area is captured as a block. If you don’t like it, you can remove the block by pressing the corresponding button.
3. Save Data – After editing the page, press the Save Data button to save the contents.
4. Delete page – If you do not need the page, you can delete it by pressing the Delete button.
5. Initialize page – If you want to work without anything, you can leave the tool alone and delete the set contents.
6. Change to default data – If you want to work and go back to the original page, you can go back by initializing the page.
**4. Using the Link Wizard**
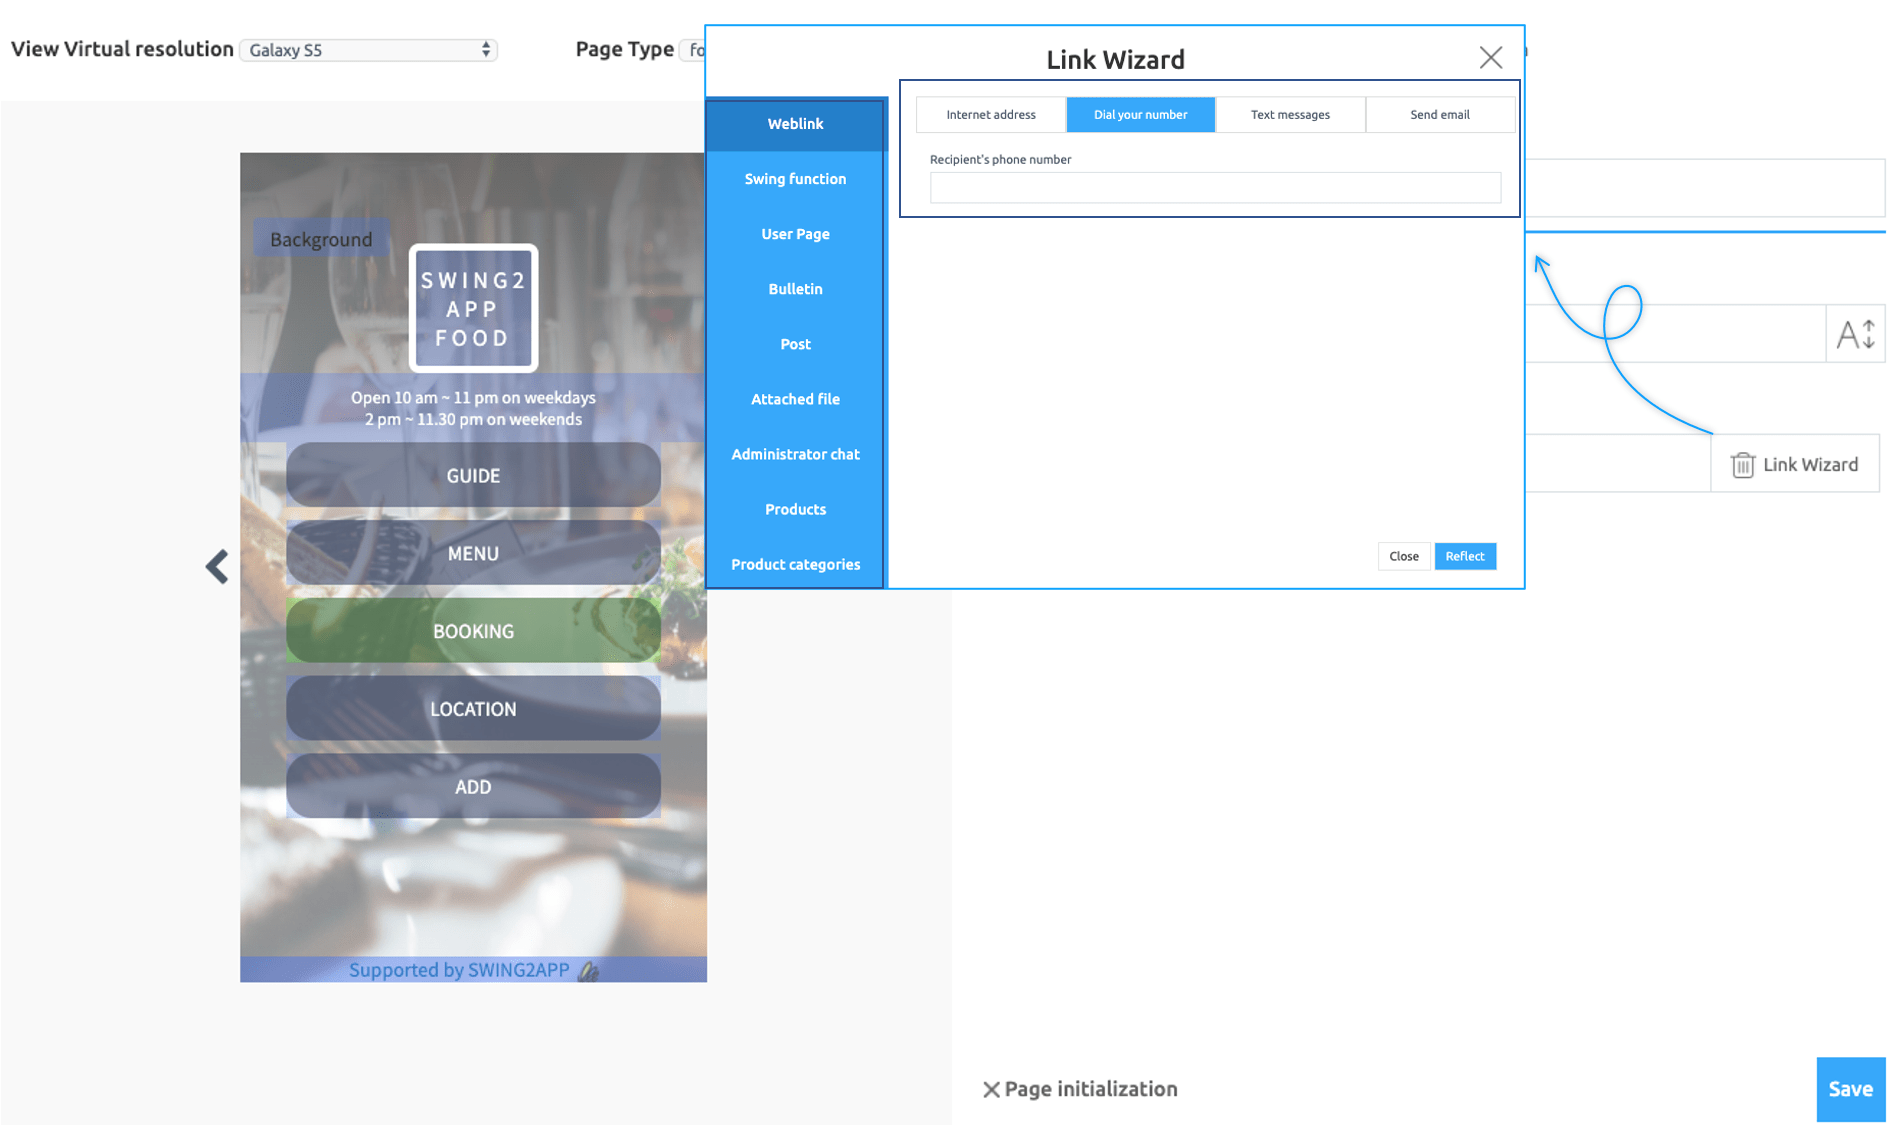
You can link to each menu on the template page.
If you select the \[Link Wizard] button on the right after selecting a button on the template, the Link Wizard window will open.
Here you can apply various menus such as internet address (weblink), bulletin board, user page, specific posts, and file attachments.
### **STEP.3 Apply a template to your app**
Now, if you’ve edited the template above, you’ll need to apply the template page you created to your app.
Go to **Maker(V2)** and click **Page Menu.**
1. Select the menu item for which you want to apply the template page.
2. You can change the menu name at the top of the home screen.
3. Select the **User’s Page** menu in the **menu type.**
4. Click the **Link Wizard.**
5. Select the newly added template page in the User page window and select the ‘Apply’ button.\
(If you do not see the added web template page, refresh it.)
6. Click on **Reflect.**
7. Press the **Apply** button.
8. Click on **Save.**
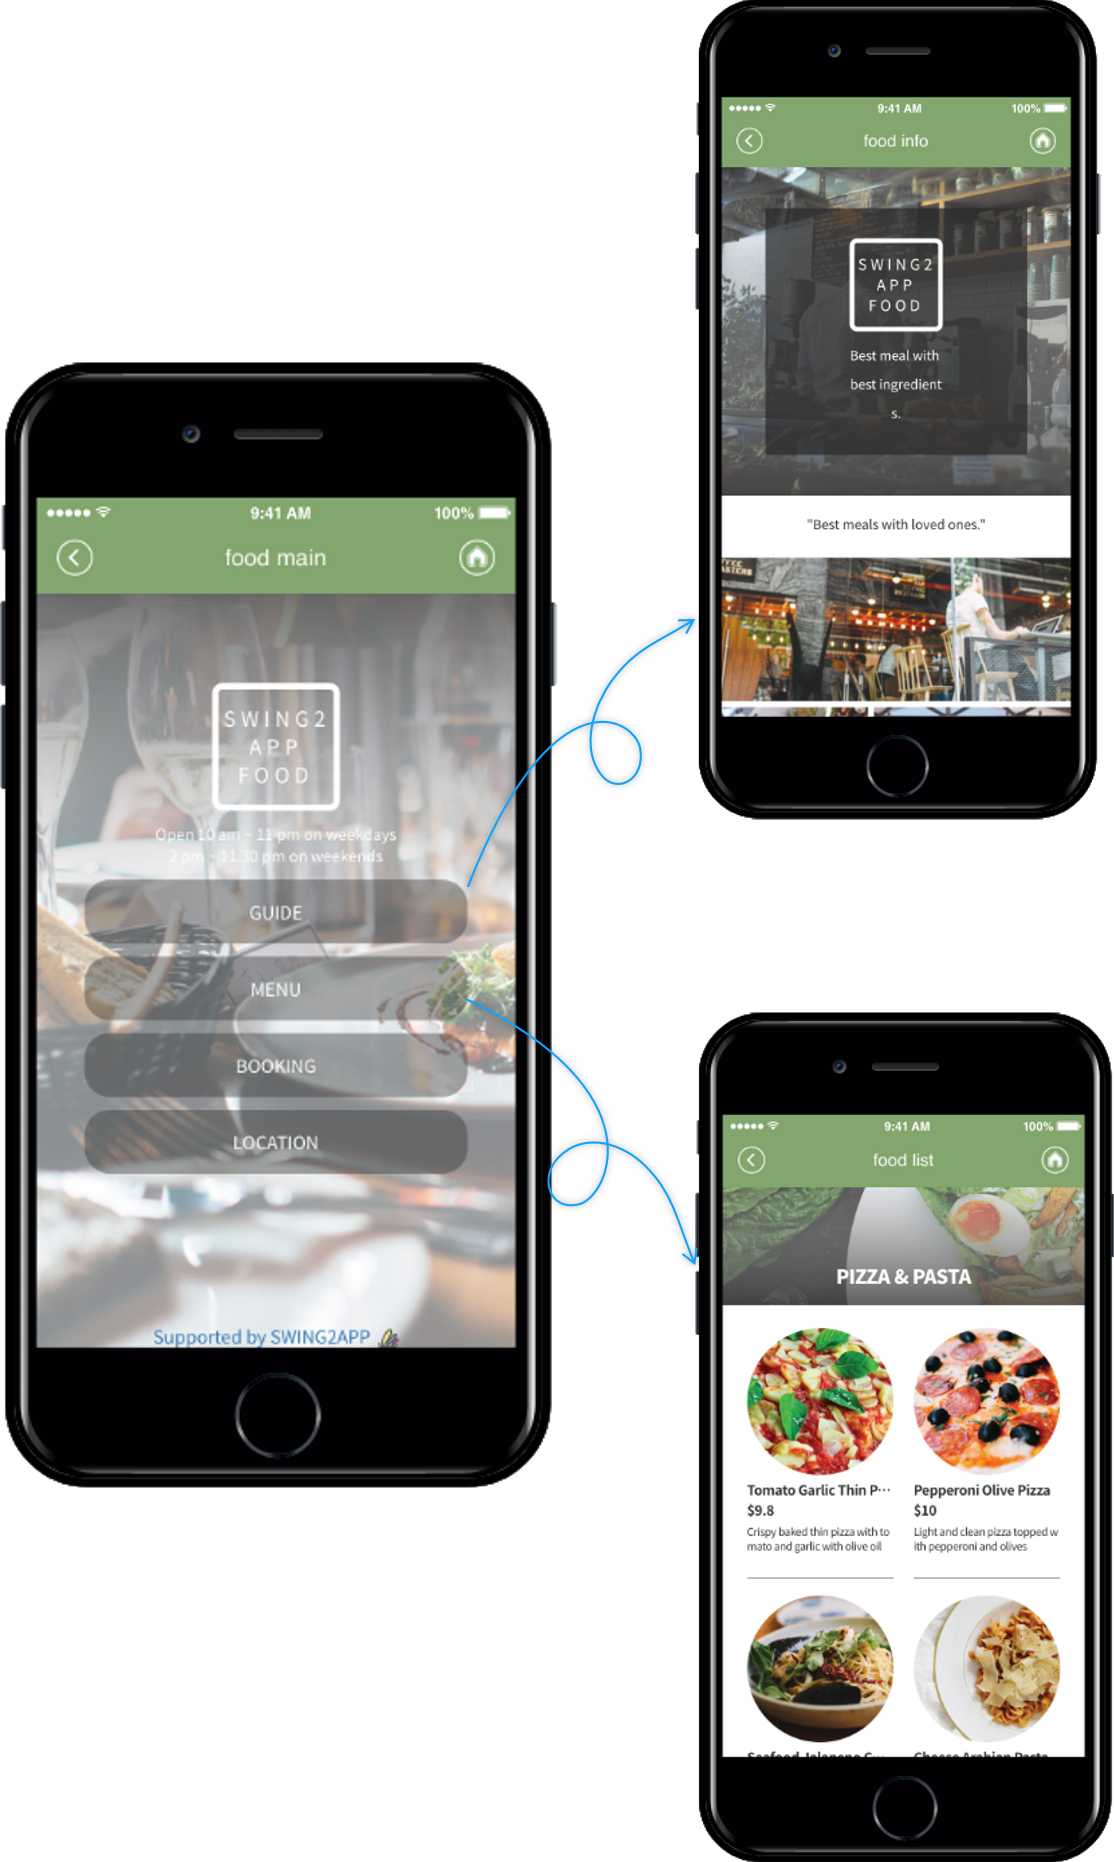
After creating a template, we are back to the app production page – page menu.
You can see how the template page is applied through the virtual machine.
**▶ App Launch Screen – Apply Restaurant Template**
The template page is much easier to work with than you can see in the manual.
We provide all the tools, so users only need to enter according to the tool.
And we will continue to add different design pages for each industry, so please pay more attention.