> For the complete documentation index, see [llms.txt](https://documentation.swing2app.com/llms.txt). Markdown versions of documentation pages are available by appending `.md` to page URLs; this page is available as [Markdown](https://documentation.swing2app.com/manual/appmanage/board/calendar-application-how-to-use.md).
# Calendar Application - How To Use
**How to use the calendar function in various cases**
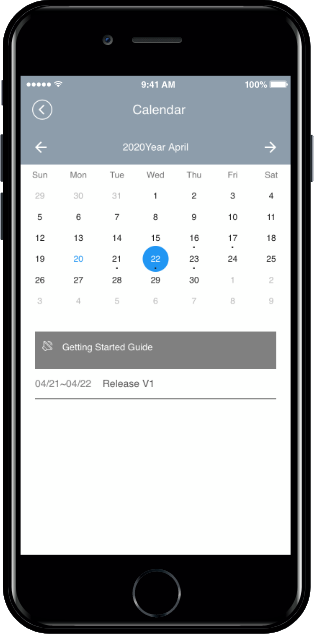
A calendar allows you to easily register important events and businesses that need to manage reservations and record their reservation status by date and time.
Also, it is a function to write important news and announcements.
The calendar can be used in various ways depending on the purpose of the app.
-Only administrators can fill in the schedule, users can use the schedule for notification.
**Please check the manual for details on how to create and operate a calendar.**
**☞**[ **\[See how to use calendar function\]**](/manual/appmanage/board/calendar.md)
***
### **STEP.1 Create a calendar**
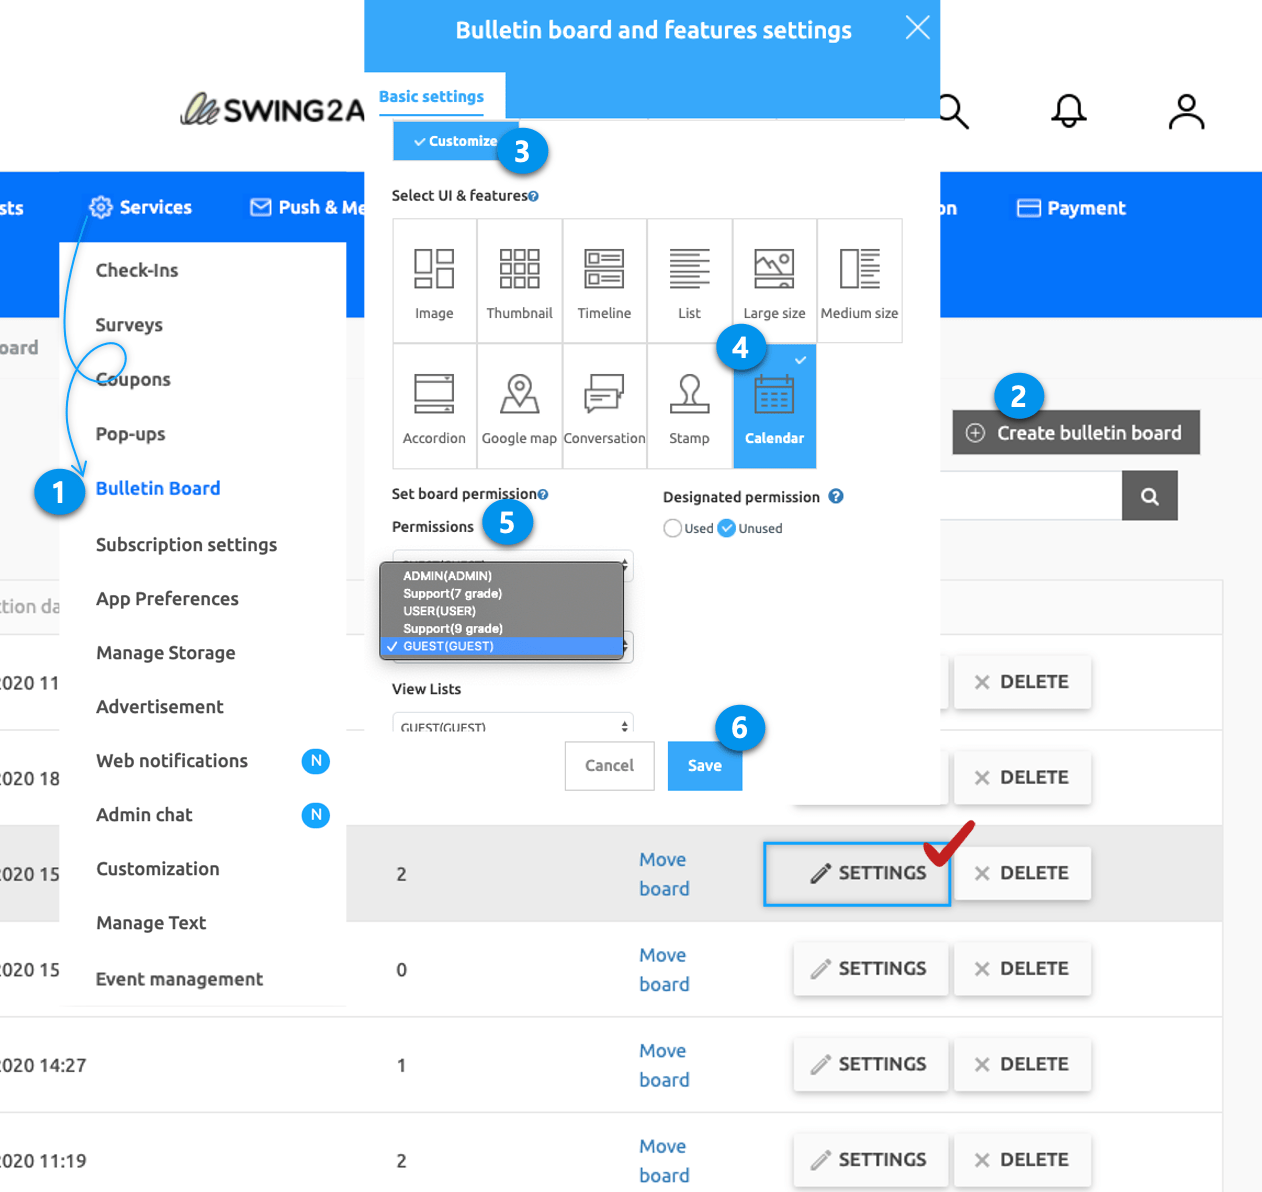
1. Go to **Manager.** Select **Services** and click on **Bulletin Board** from the list.
2. Either click on **Create Bulletin Board** to create a new board or click on **Settings** to edit the existing board.
3. Select **Customize.**
4. Select **Calendar**.
5. Set the permission for the board.
6. Click on **Save.**
***
### **STEP.2 Apply the Calendar Bulletin Board to the App**
Apply the calendar to the app.
**1)When using app production V3 version**
1\)App Maker v3 screen – Select STEP3 page
2\)Select Menu \*If you haven't created a menu yet, you can add a menu by selecting the + shape button.
3\)Enter a menu name.
4\)Select \[UI KIT] from the page design.
5\)Select \[Calendar].
6\) Check the calendar you created, and then select the \[Apply] button. (Hover over the mouse cursor on the page to open the Apply button)
\*Please create a calendar board first.
If you don't have a calendar created, it won't appear on the screen and can't be applied to the app.
\*You can select the \[New] button on the UI KIT screen, or create a board in App Operation-Service Management-Board Management.
7\) Press the \[Save] button at the top of the screen to apply it to the app.
\*Icons are optional, please select only when applying an icon in front of the menu.
**2)When using the V2 version of the app production**
Go to **Maker(V2)** and click on **Page Menu.**
1\. From the menu set by default, click the **Add a category** to add a new menu.\
2\. Edit the name of the added item in **Menu Name.**\
3\. Select **Bulletin Board** in the **Menu Type.**\
4\. Click on **Link Wizard**(pencil icon).\
5\. Select the board from the list of Bulletin Boards in the Link Wizard window.\
6\. Click on **Reflect.**\
7\. Click on **Apply** and then **Save.**
***
### **STEP3. How to use the calendar application**
**We will show you how to use various calendar applications in earnest.**
**1. Calendar application 1: Everyone can create an event**
**★ Example: For community use (university assignments, clubs, etc.) app members can create their schedule to share each other’s schedules.**
Anyone can create events in the app, view event lists, and detailed event posts.
As you can see from the above app launch screen, you can check the schedules created by other users on the calendar screen when you access the app.
Because the app can create a calendar, **if you look at the top right corner of the calendar screen, there is a button with the Write button.**
You can create a schedule by selecting the corresponding button.
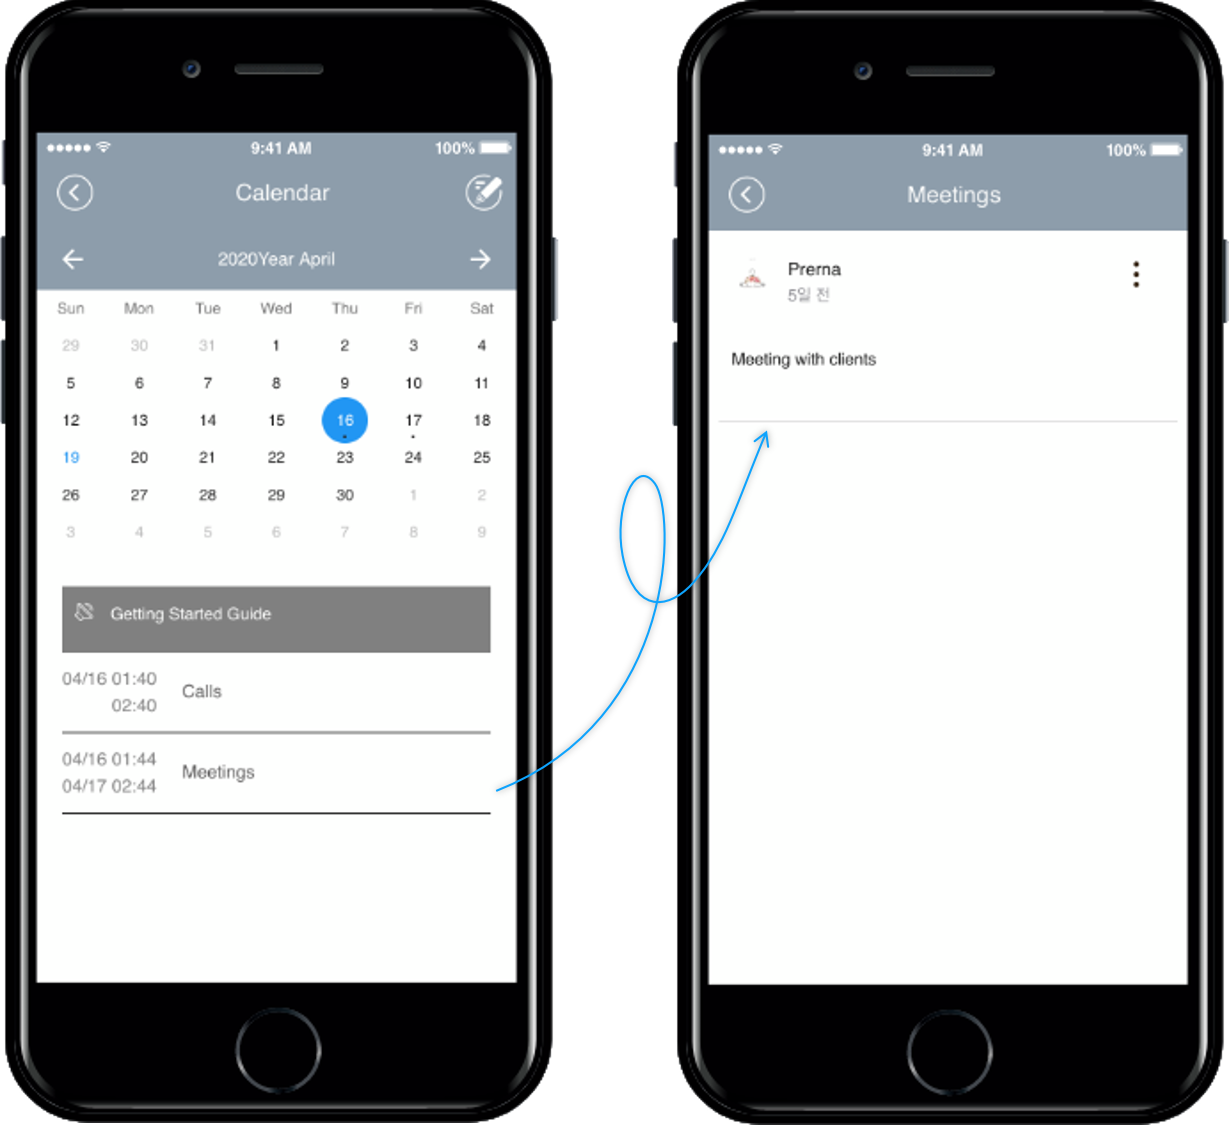
**If you select the event (title) shown in the calendar list screen, you will be taken to the event details page.**
If you go to the detail page in the schedule list, you can check who wrote the article, and you can check the details of the schedule.
**▶ How to create a calendar Application 2**
1. Go to **Manager.** Select **Services** and click on **Bulletin Board** from the list.
2. Either click on **Create Bulletin Board** to create a new board or click on **Settings** to edit the existing board.
3. Select **Customize.**
4. Select **Calendar**. Set the permission for the board.\
\&#xNAN;**–Write permission: user**\
\&#xNAN;**–View detail permissions: User**\
\&#xNAN;**–View List Permissions: User**
5. Click on **Save.**

***
**2. Calendar application 2: Create an event only for administrators**
**★ Applications: In Schools and educational facilities in the application, administrators can use the calendar to announce the timetable and academic schedule to students.**
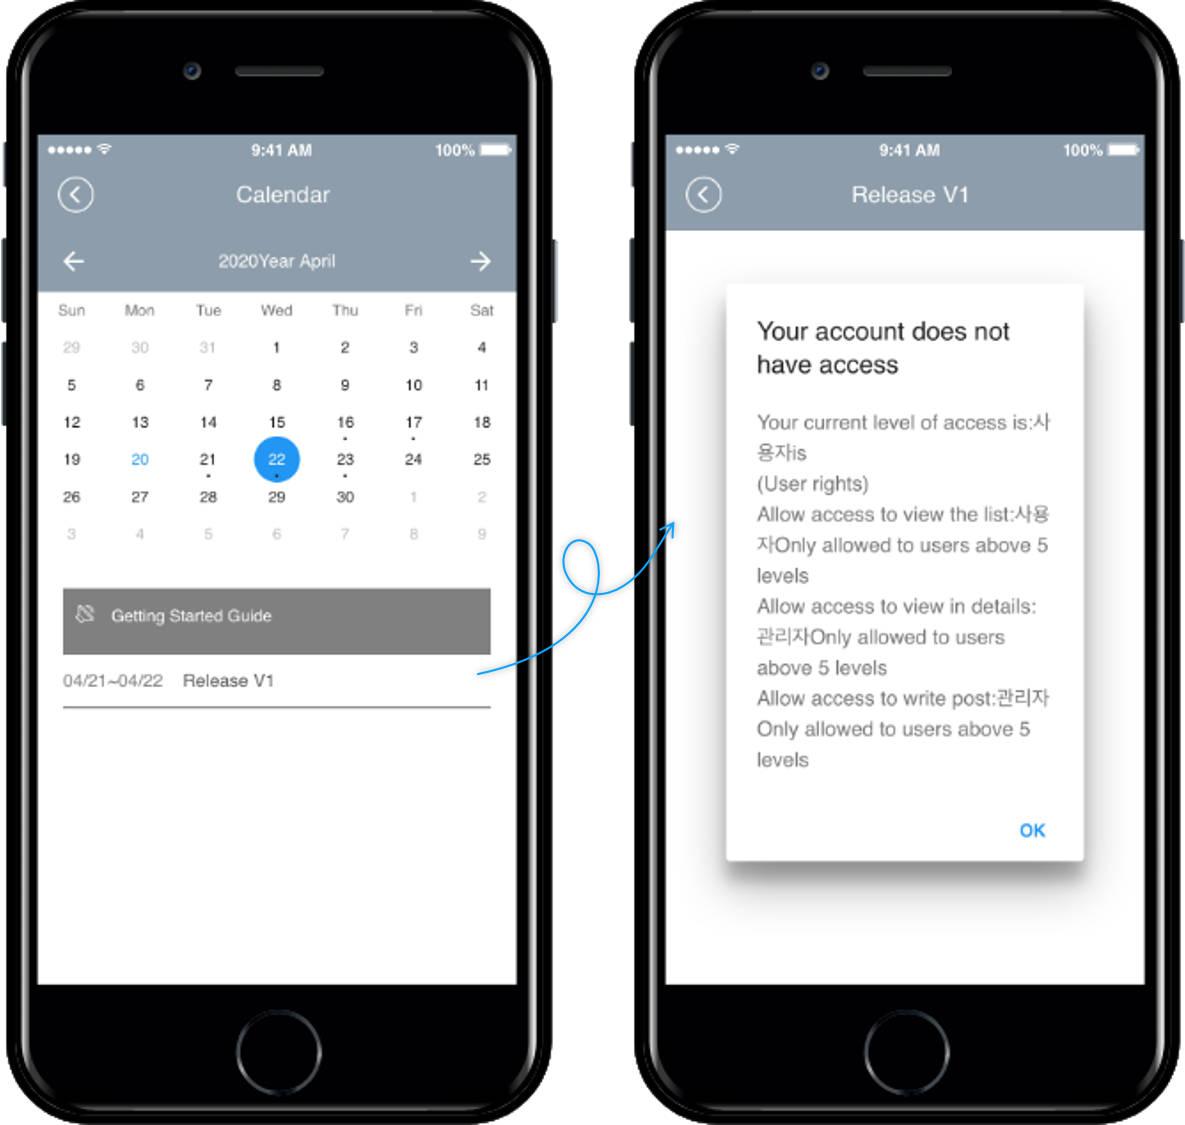
Only administrators can create events, and app users can view calendars – event lists and detailed event posts.
When you log in as an app member, you can check the schedule created by the administrator on the calendar list screen.

If you select the event (title) shown in the calendar list screen, you will be taken to the event details page.
If you go to the detail page in the schedule list, you can see the details of the schedule.
**\*Unlike \[Application 1] above, the writing button is not visible on the calendar screen because users do not have permission to create an event!**
**\*Administrator can create a schedule in the app, swing2app homepage) app operation page – post-management can also be written on the web.**
**▶ How to create a calendar Application 2**
1. Go to **Manager.** Select **Services** and click on **Bulletin Board** from the list.
2. Either click on **Create Bulletin Board** to create a new board or click on **Settings** to edit the existing board.
3. Select **Customize.**
4. Select **Calendar**. Set the permission for the board.\
\&#xNAN;**–Write permission: administrator**\
\&#xNAN;**–View detail permissions: User**\
\&#xNAN;**–View List Permissions: User**
5. Click on **Save.**

***
**3. Calendar application 3: Create an event only for administrators**
Only administrators can create events
When you log in as an app member, you can check the schedule created by the administrator on the calendar list screen.
You can check the reservation status of the day.
You can check the shop notice and the day when the reservation is possible and the day when it is impossible.
**\*Users cannot create schedules, so unlike \[Application 1] above, the writing button is not visible on the calendar screen.**
**\*The administrator can create a schedule in the app, swing2app homepage) App operation page-post management can be written on the web.**
**▶ How to create a calendar Application 3**
1. Go to **Manager.** Select **Services** and click on **Bulletin Board** from the list.
2. Either click on **Create Bulletin Board** to create a new board or click on **Settings** to edit the existing board.
3. Select **Customize.**
4. Select **Calendar**. Set the permission for the board.\
\&#xNAN;**–Write permission: administrator**\
\&#xNAN;**–View detail permissions: User**\
\&#xNAN;**–View List Permissions: User**
5. Click on **Save.**

We’ve learned how to use the calendar to apply it on a variety of case basis.
Please use the calendar freely to suit the operation of the app.