> For the complete documentation index, see [llms.txt](https://documentation.swing2app.com/llms.txt). Markdown versions of documentation pages are available by appending `.md` to page URLs; this page is available as [Markdown](https://documentation.swing2app.com/manual/tip/home-gif.md).
# Insert GIF image

**How to create a GIF by putting a GIF image on the home screen**
**You can create a screen that moves your home screen by putting a GIF image like an attached image.**\
**Please check how to place the image on your home screen through the app-making swing2app post below.**
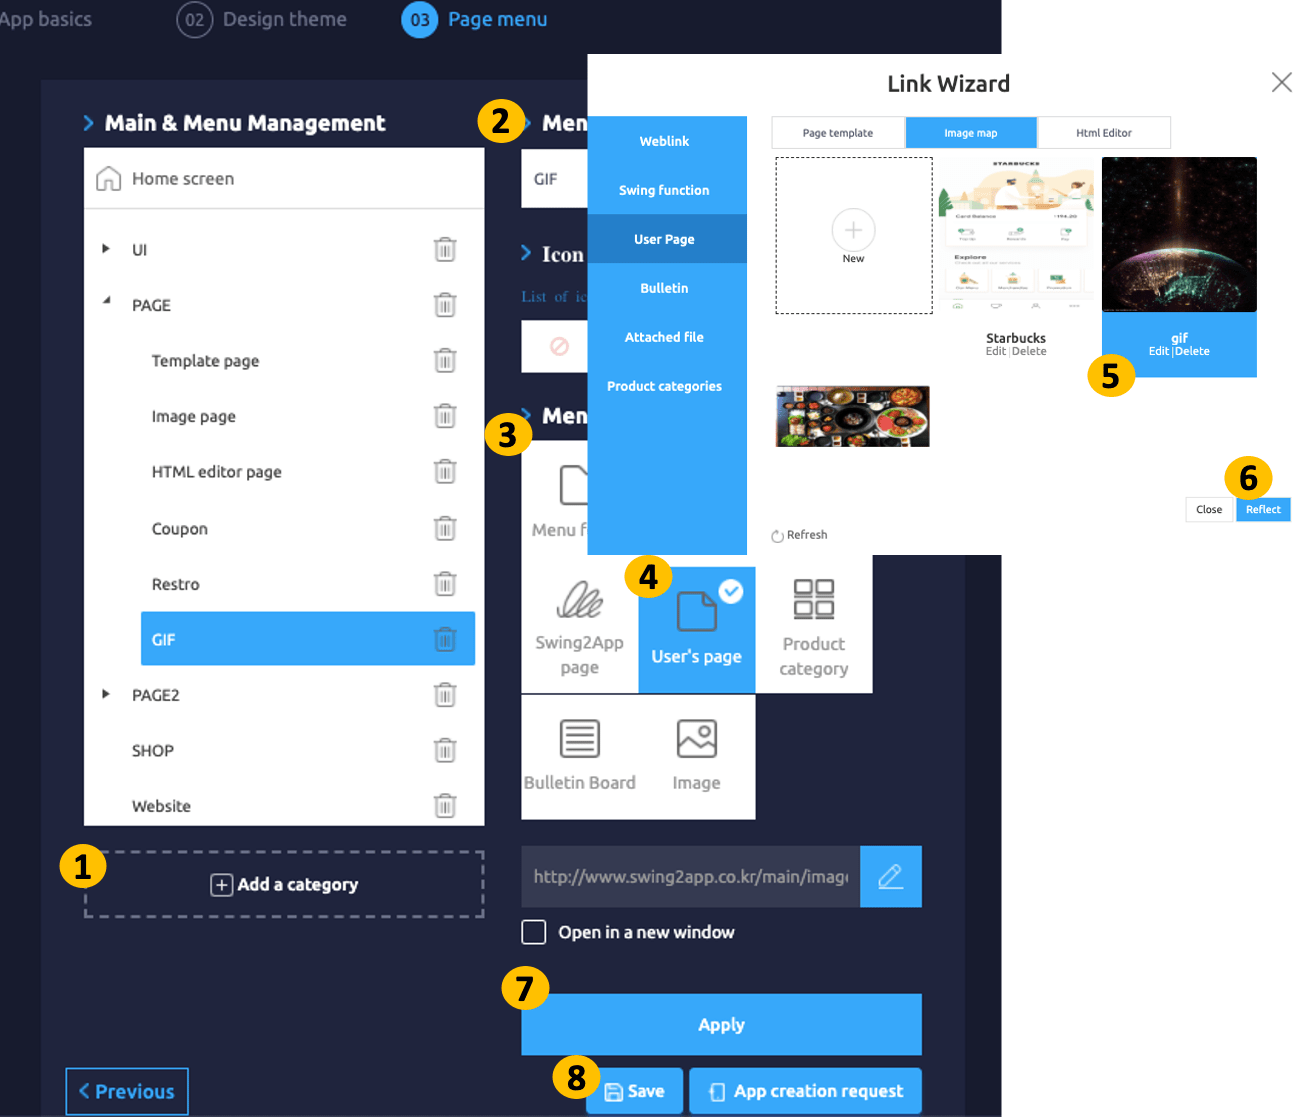
### **1. Attached a GIF image on the image page**
Go to on **Maker(V2)** and click on **Page Menu.**
1. Click on **Add Category.** A new menu item will appear.
2. Select the new menu item and change the name in **Menu Name.**
3. Select the new menu item.
4. Select the User’s page from Menu Type.
5. Click on the **Link Wizard** icon. The **Link Wizard** pop-up window will open. Select the **Image map** to edit the gif in the Image page creation window.
6. Select the image added as a gif in the Link wizard window. Click on **Reflect.**
7. Click on **Apply.**
8. Click on **Save.**
**You can also add an animated image to the image page.**
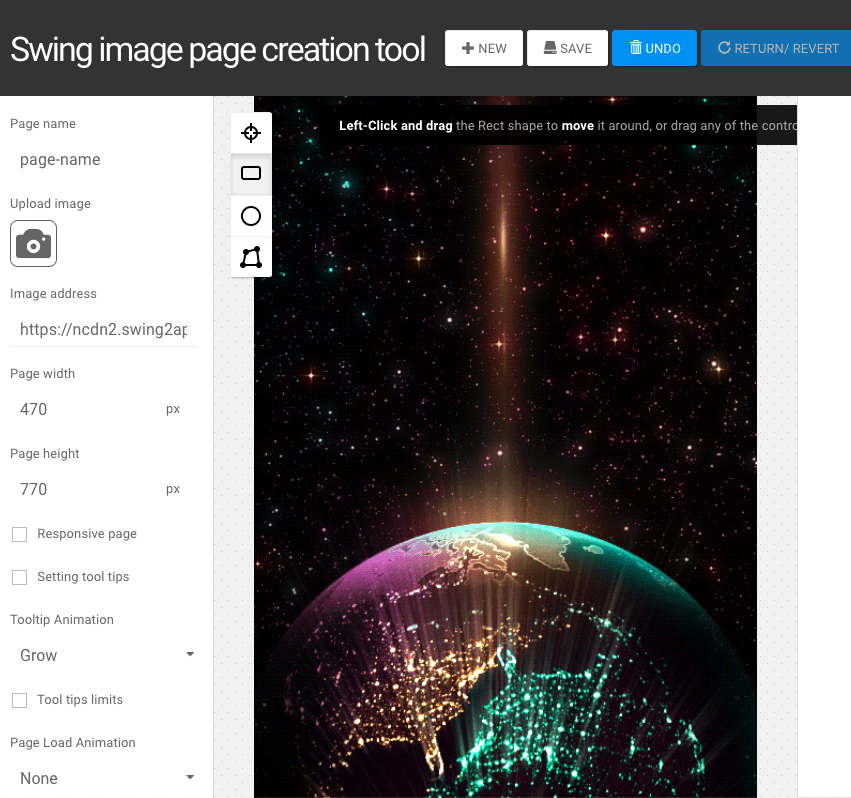
You can put it as an image, but you can also create an animated image as an image page.\ **The advantage of Image Page Maker is that it can be created like a web page, and links can be linked by applying a banner on the image.**\
Therefore, to use this function, select User Page – Image Page and apply the animated image.\ **Likewise, when opening an image file, set ‘All Files’ and attach a GIF file.**
.
**★ GIF image attached important TIP**
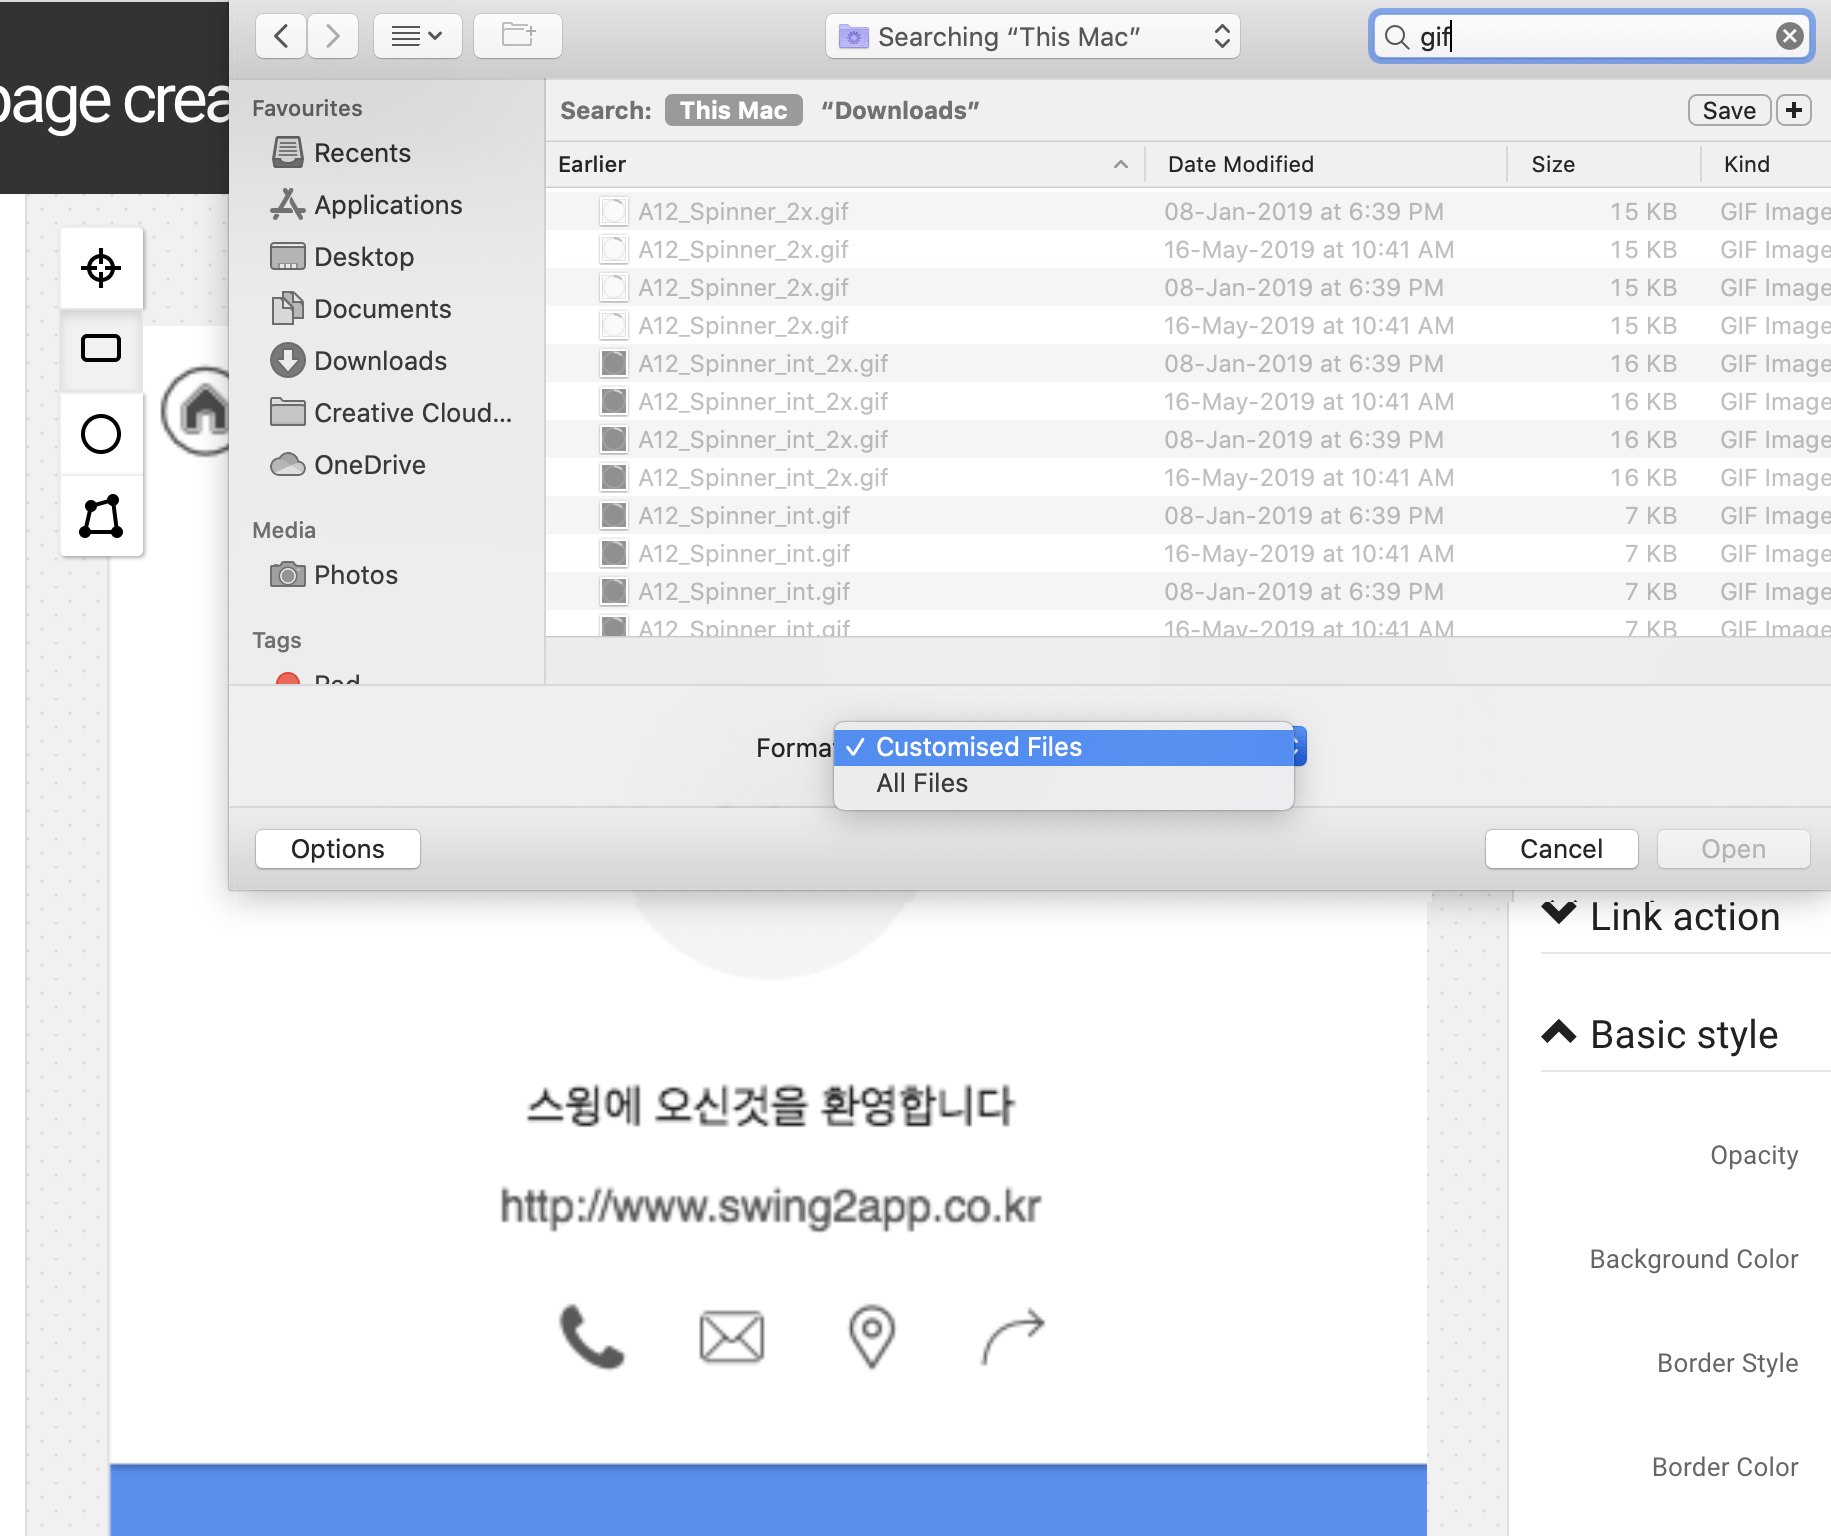
GIF files are not visible in regular files.\
Therefore, you need to change the setting to **‘All Files’** at the bottom of the file window to view the GIF files.\
**Change to all files and select the GIF file you have already worked on.**\\
**Complete !! This is the home screen with the image.**
However, there is a question here.
\*\*Prototype – How do I see the menu name on the image without a toolbar (colored area) that I created in a footer style?\
This is the right way, Design Theme – This is because we applied the style as ‘transparency’ in the app’s main design style.\
We will show you how to change the style to transparent below.
### **2. App main design style: Apply Transparency**
+**If you want to remove the toolbar area on the app home screen like the image attached above, you can use the app’s main design style function.**
\*\*+App main design style can be found \*\***on the Maker(V2) page – Design Theme stage.**\
\
\
**1) Set as default**
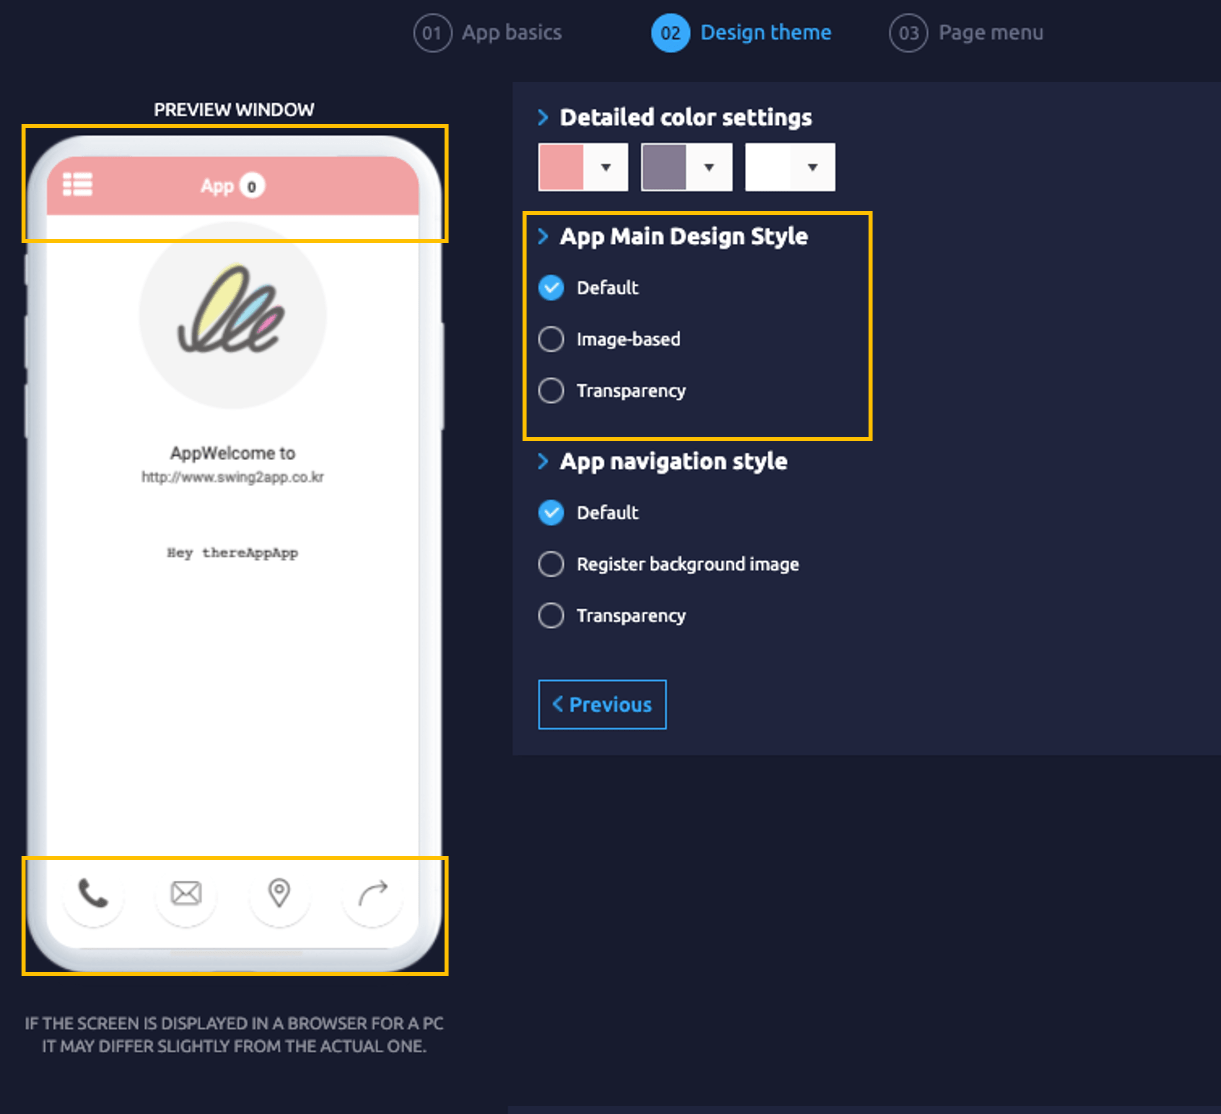
Instead of applying the app’s main design style, we’ll just place the image with the default settings.\
**Then, as it is set from the original swing2app, the prototype: footer style is applied.**\
**As shown in the image above, a toolbar area is created at the top and bottom of the phone screen.**\
The color set in the design theme is shown as it is.\
Doesn’t it look pretty if you have a bar area with colors that don’t match your home screen?\
\
\
**2) App main design style: Choose transparency**
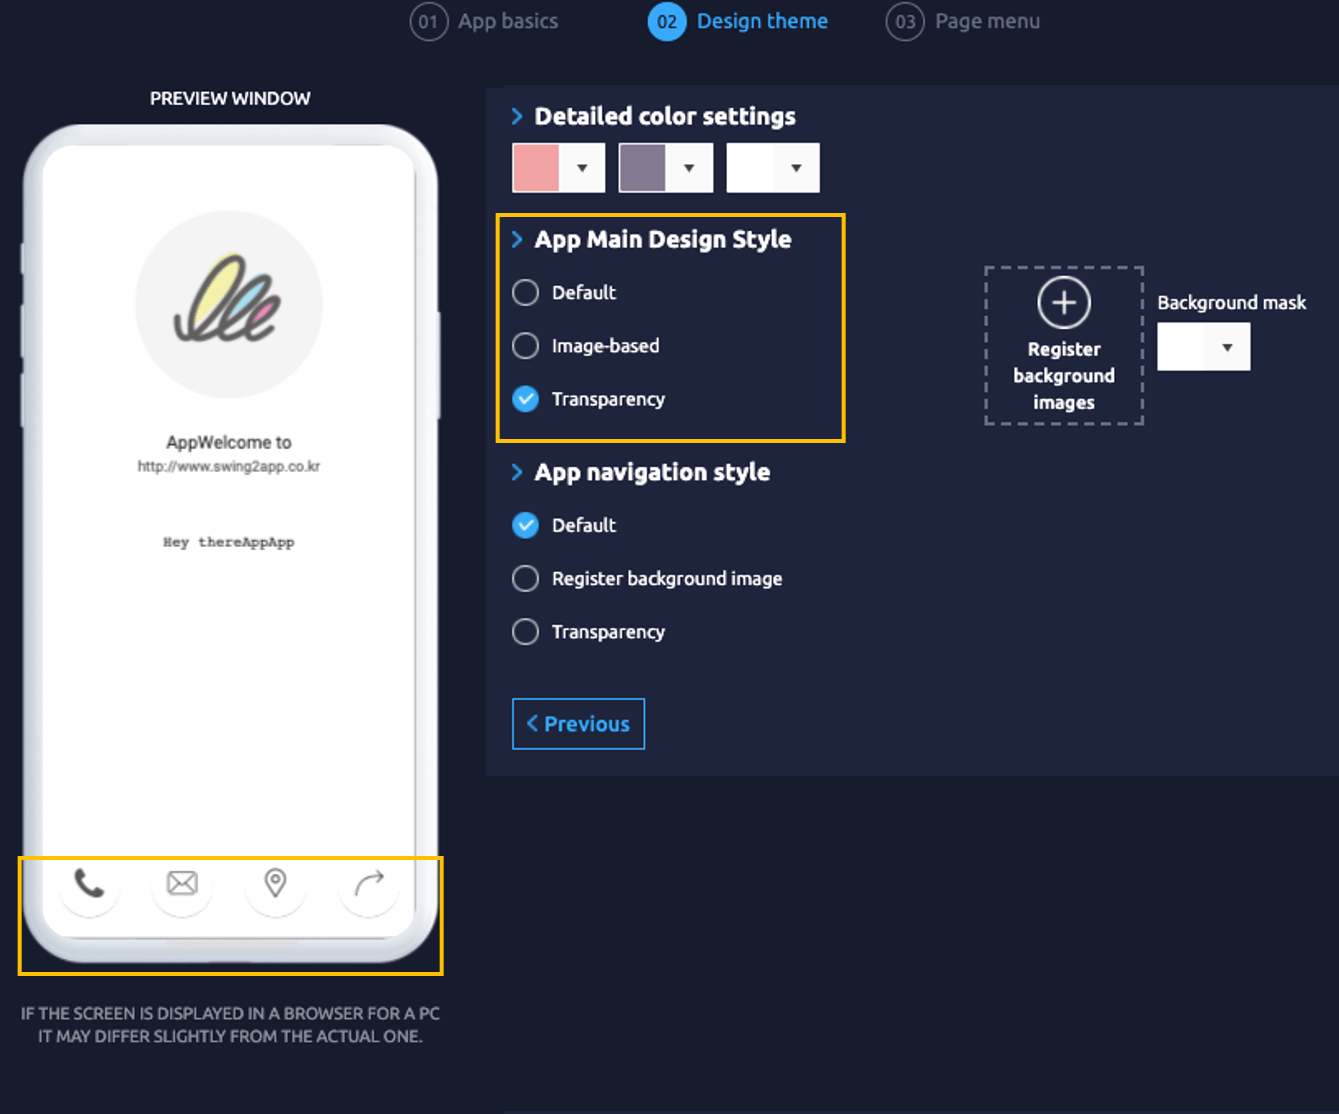
Select **‘Transparency’** as the App Main Design Style and press the **‘Save’** button.\
Then the toolbar area will be missing and the whole screen will be composed as the main page.
The image applied to the home screen can be more emphasized and will look cleaner.\
**The menu (text) color can be changed to a different color, so please edit the text color in the design theme – color to make the text visible on top of the image.**
**★ Information**
**1) You can create your animated image or write a separate gif file.**
**2) To make the image appear fully on the home screen, you can make it in 1024px width and 1680-1980px in height, not more than twice the width.**
**The size will be resized depending on what prototype is applied, so please check the image applied to the virtual machine and adjust the size accordingly.**
**3) You can only upload files within 5MB.**
**4) When uploading a file, you must set ‘Open all files’ to open the gif file.**