> For the complete documentation index, see [llms.txt](https://documentation.swing2app.com/llms.txt). Markdown versions of documentation pages are available by appending `.md` to page URLs; this page is available as [Markdown](https://documentation.swing2app.com/manual/maual/appbasic/app-update.md).
# App Update Type And Method

Instructions on how to update the app in Swing2App
In Swing2App, you can freely modify and update the app design, content, etc.
-When modifying the basic information and design theme of the app, you can edit the content on the app production page, press the \[Save] button, and then press the \[App Creation Request] button to create the app with the new version.
If you press \[App Creation Request], you can use the update type and update display option items.
-The page menu and the contents of the app operation are automatically reflected in the app even if you save it.
### **▶ Swing2App Important Update Information**
**\*Please first check the important information!!**
**1. Step 3, Page Menu during the app creation phase to modify the contents and use all the features of the app operation.**\ **→ Just press the \[Save] button and it will automatically reflect on the app and you do not need to re-create the app.**
**2. Step 2 during the app creation phase \[design theme] – Change prototype, change skin color**\ **→Please re-create by pressing the \[App Creation Request] button. Please select \[Soft Update].**\
\&#xNAN;**→Hard update is recommended for users who have released apps on Play Store, App Store, etc. (see below)**\
★\[Soft Update] is displayed when the app is produced 3 or more times. Only 1 to 3 times can be updated hard.
**3. Step 1 of the app creation phase \[app basic information]-Change the app name, standby screen image, icon image**\ **→Please re-create it by pressing the \[App Creation Request] button. Please select Hard Update!**\*\* → Users who have released apps on the Play Store, App Store, etc. must update the new version of the APK file to the store again after the app is created.\*\*
**\*Important\* Please check when updating apps released on the Play Store and App Store!**
**Soft updates are not officially updated by Apple and Google.**
**Users who have launched the app on the PlayStore and App Store are encouraged to do so without using soft updates → hard updates, and then update the newly created version of the app to the Store.**
By the Play Store, the App Store rules when making a software update, you may receive sanctions, such as deleting the app.
Swing2App does not take responsibility for this option, so please check the contents before proceeding.
### **▶ How to update an app**
**★**In the Swing-to-App, you can edit and update the created app from time to time!!
If you edit the page menu content on the app creation page, just click the \[Save] button and it will be reflected directly in the app.
When modifying the basic information of the app and the design theme, you can update the app with the new version by pressing the \[App Creation Request] button.
→ When requesting to make an app, select ‘App update type’ or ‘Update display option’ to proceed with the update.
As the new version of the app is rebuilt, the existing app is updated.
### **▶ App Update Style**
**1.Update type**

**1) Hard Update**\
A hard update is **a type of update that you download by reinstalling the updated app.**\
\&#xNAN;**\*Hard update can be selected when editing the first-level app basics and second-level design theme.**\
\ **2) Soft Update**\
Soft update does not require you to reinstall the app, it is an updated style that is automatically restarted and downloaded within the app.\
\&#xNAN;**\*Soft Update – Can be used when editing the design theme and must be edited in the first step of the app basic information. You must choose a hard update.**

**2. Display Update Option**
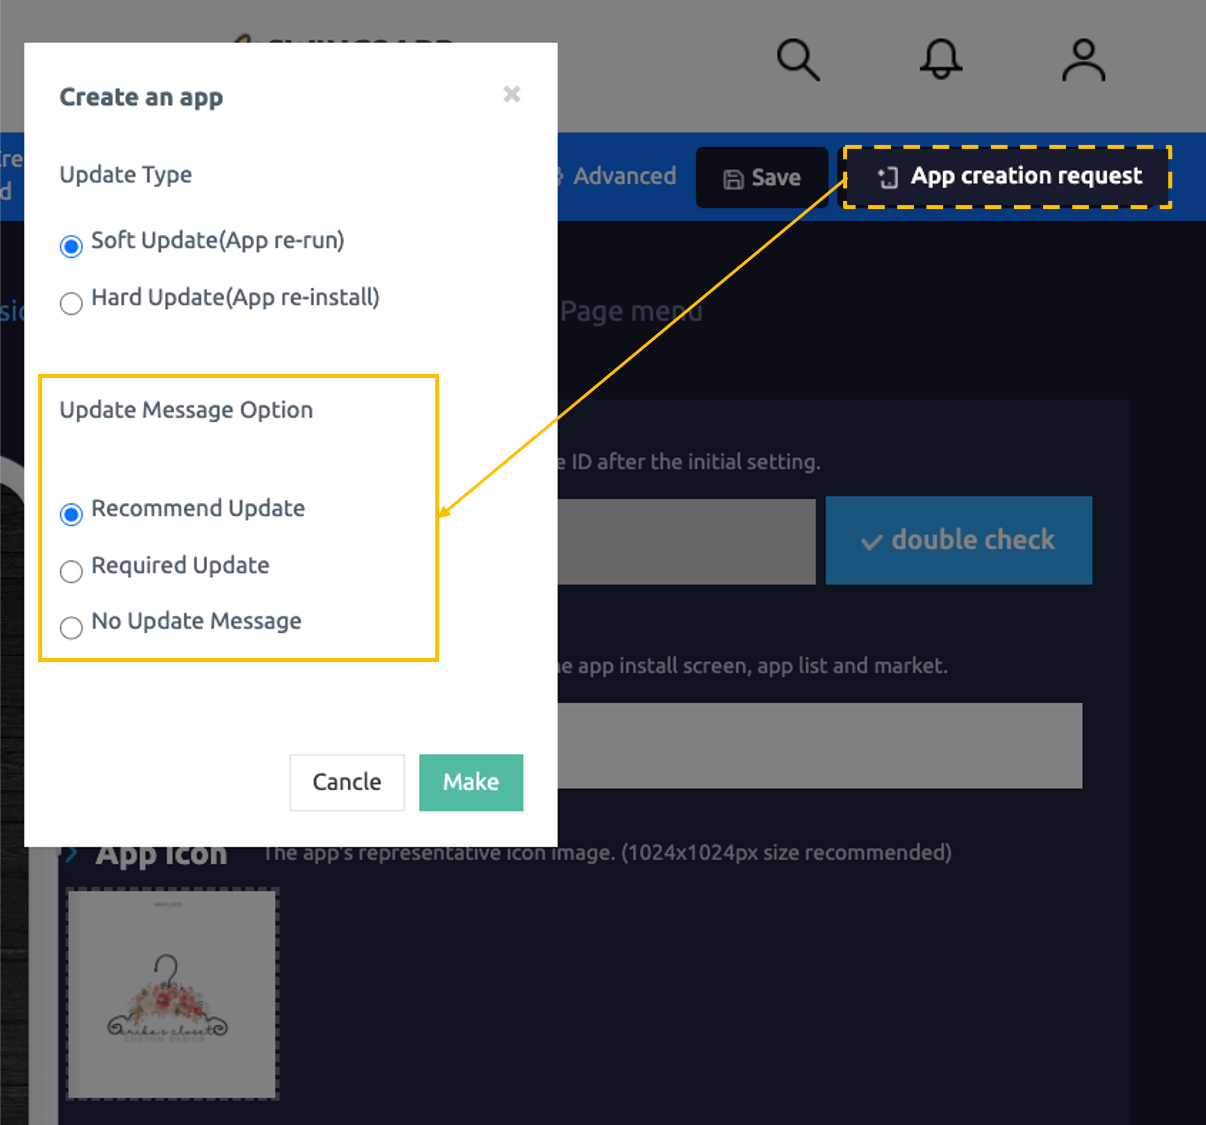
The Display Updates option selects how the update display will look to the user.
**If you need to update to use the app, select ‘Required’.**
**If it is optional, select ‘Recommended’.**
**1) Recommended Update**\
**Ask the user if they want to update, and only the user who selects OK will proceed with the update. (Optional update)**\
\ **2) Mandatory Update**\
**Forces the update without the user’s selection.**
**3) Ignore Update**\
**Make sure that the update notification window does not appear. (It can be set when testing)**
### **▶ App launch screen: Update type**
**If you have checked for updates and important details! Depending on the type of update, let’s check how the update proceeds in the actual app.**
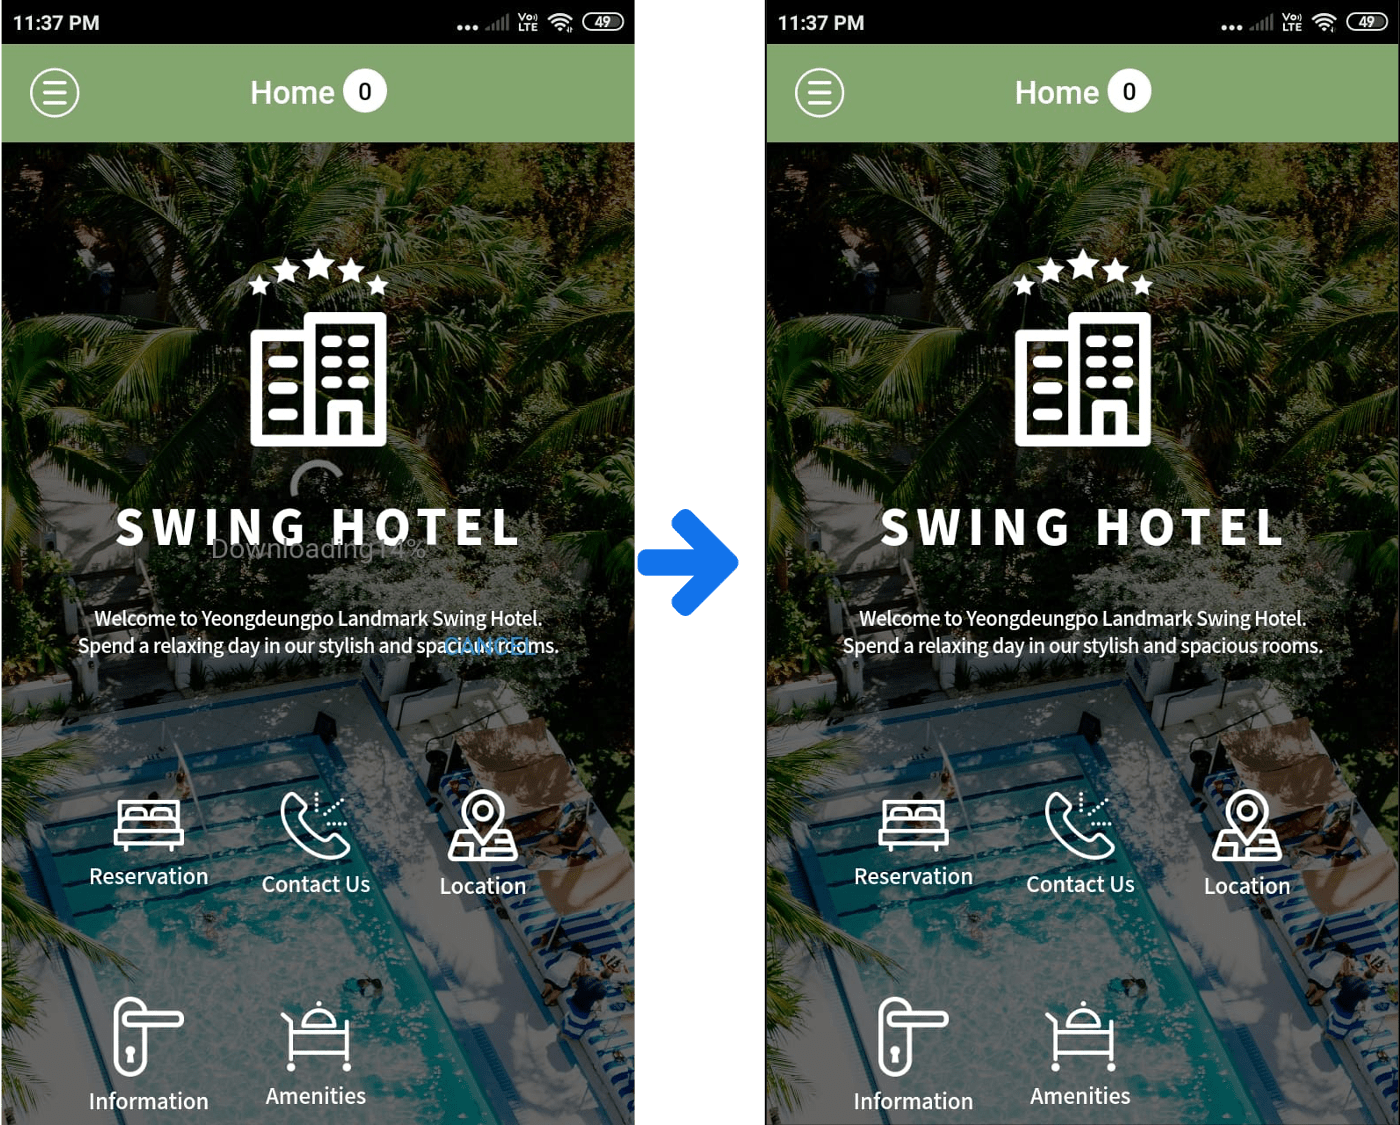
**1. Soft update & Recommended**
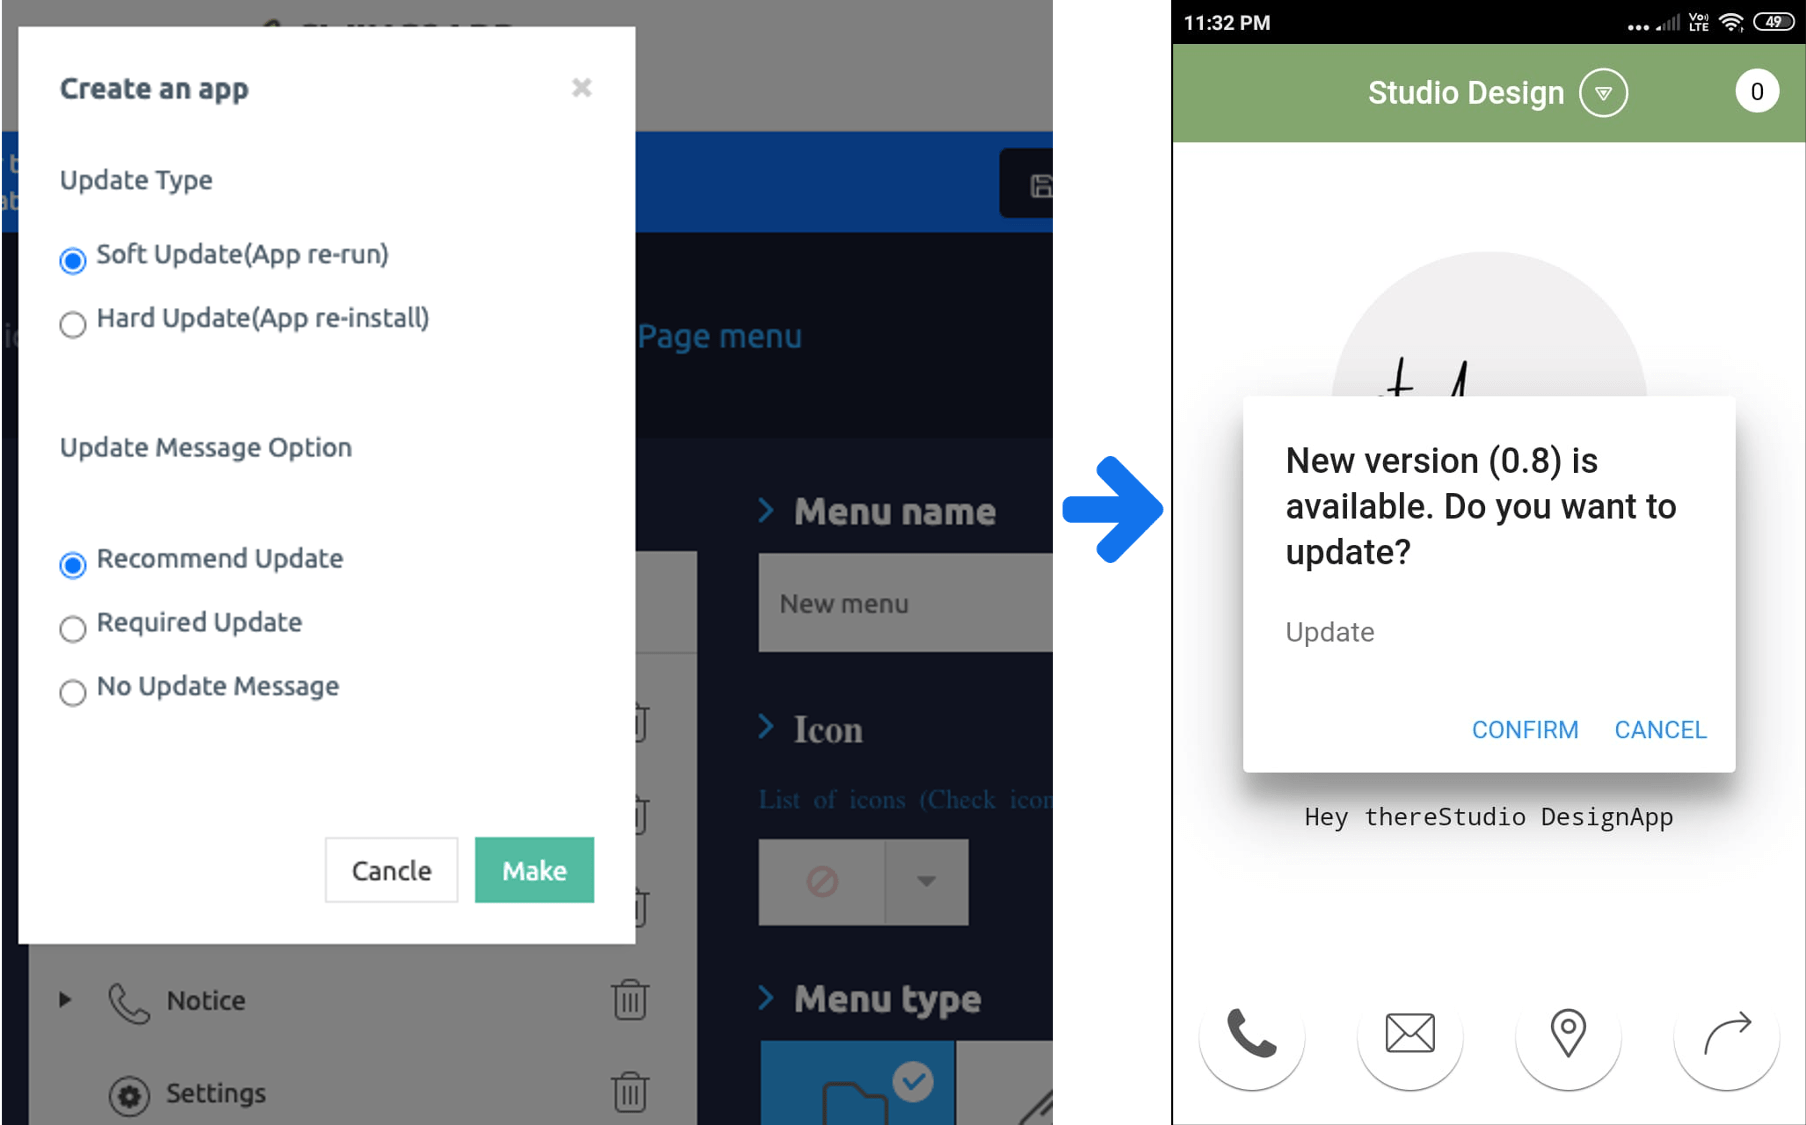
The recommendation comes from a message window asking if you want to update, as in the image above. The update proceeds when the user selects ‘OK’.
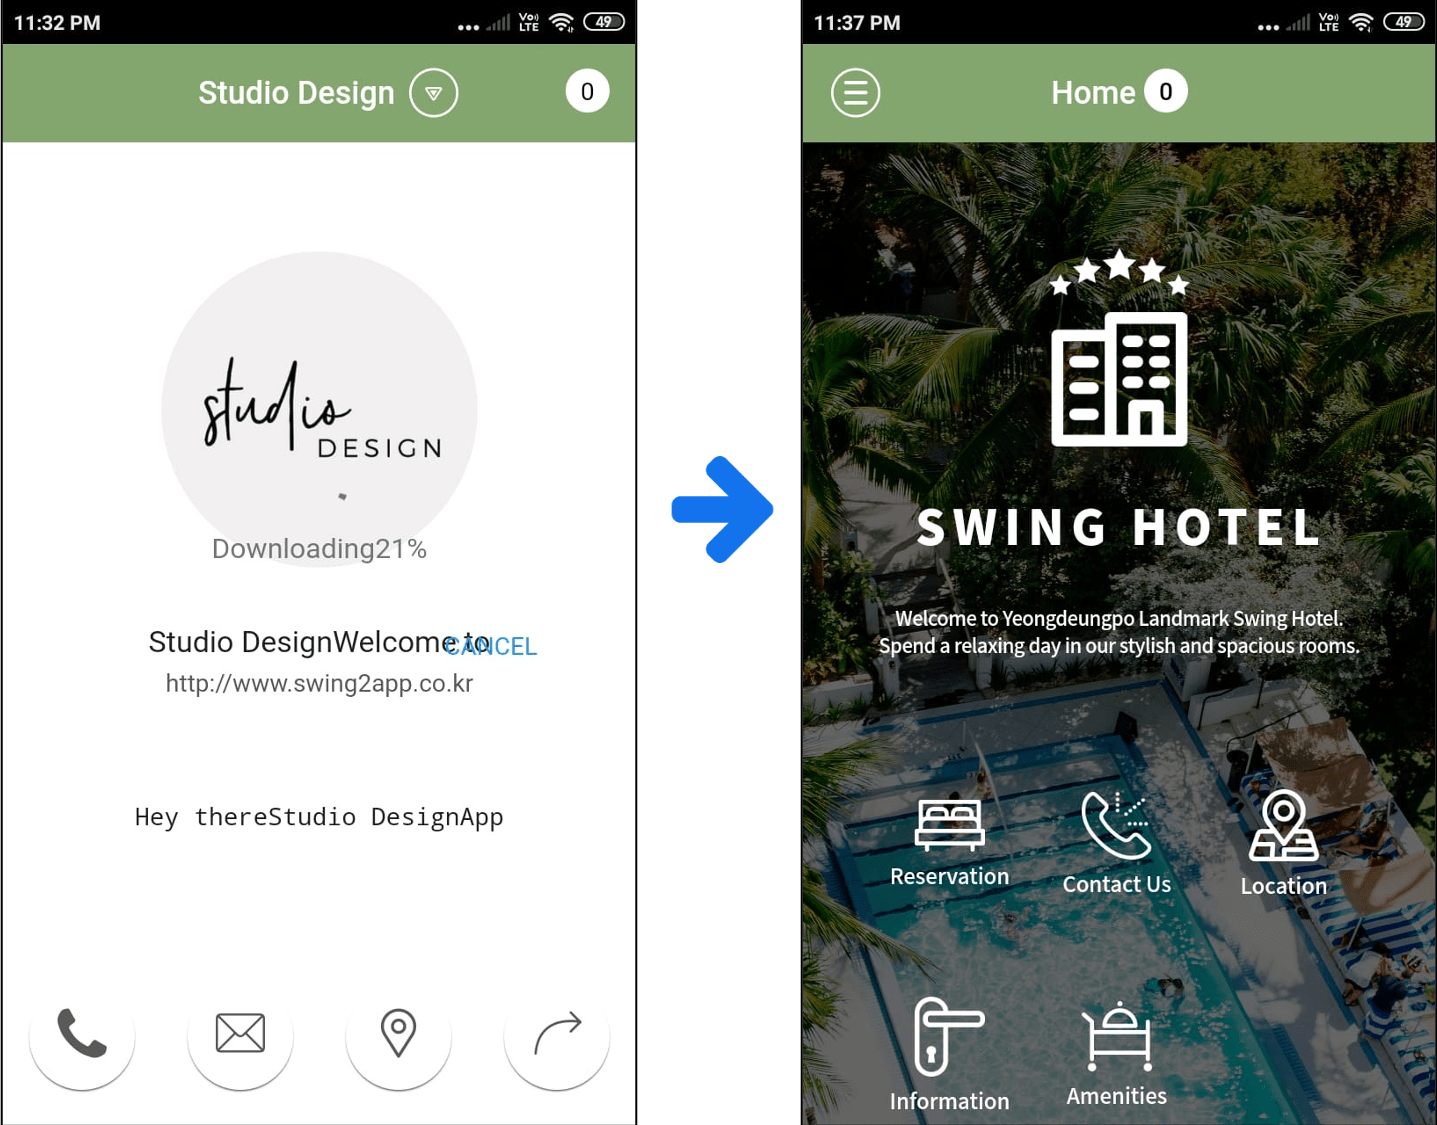
For soft updates, it is downloaded from within the app and **automatically updated without having to reinstall the app.**

**2. Soft Update & Required**
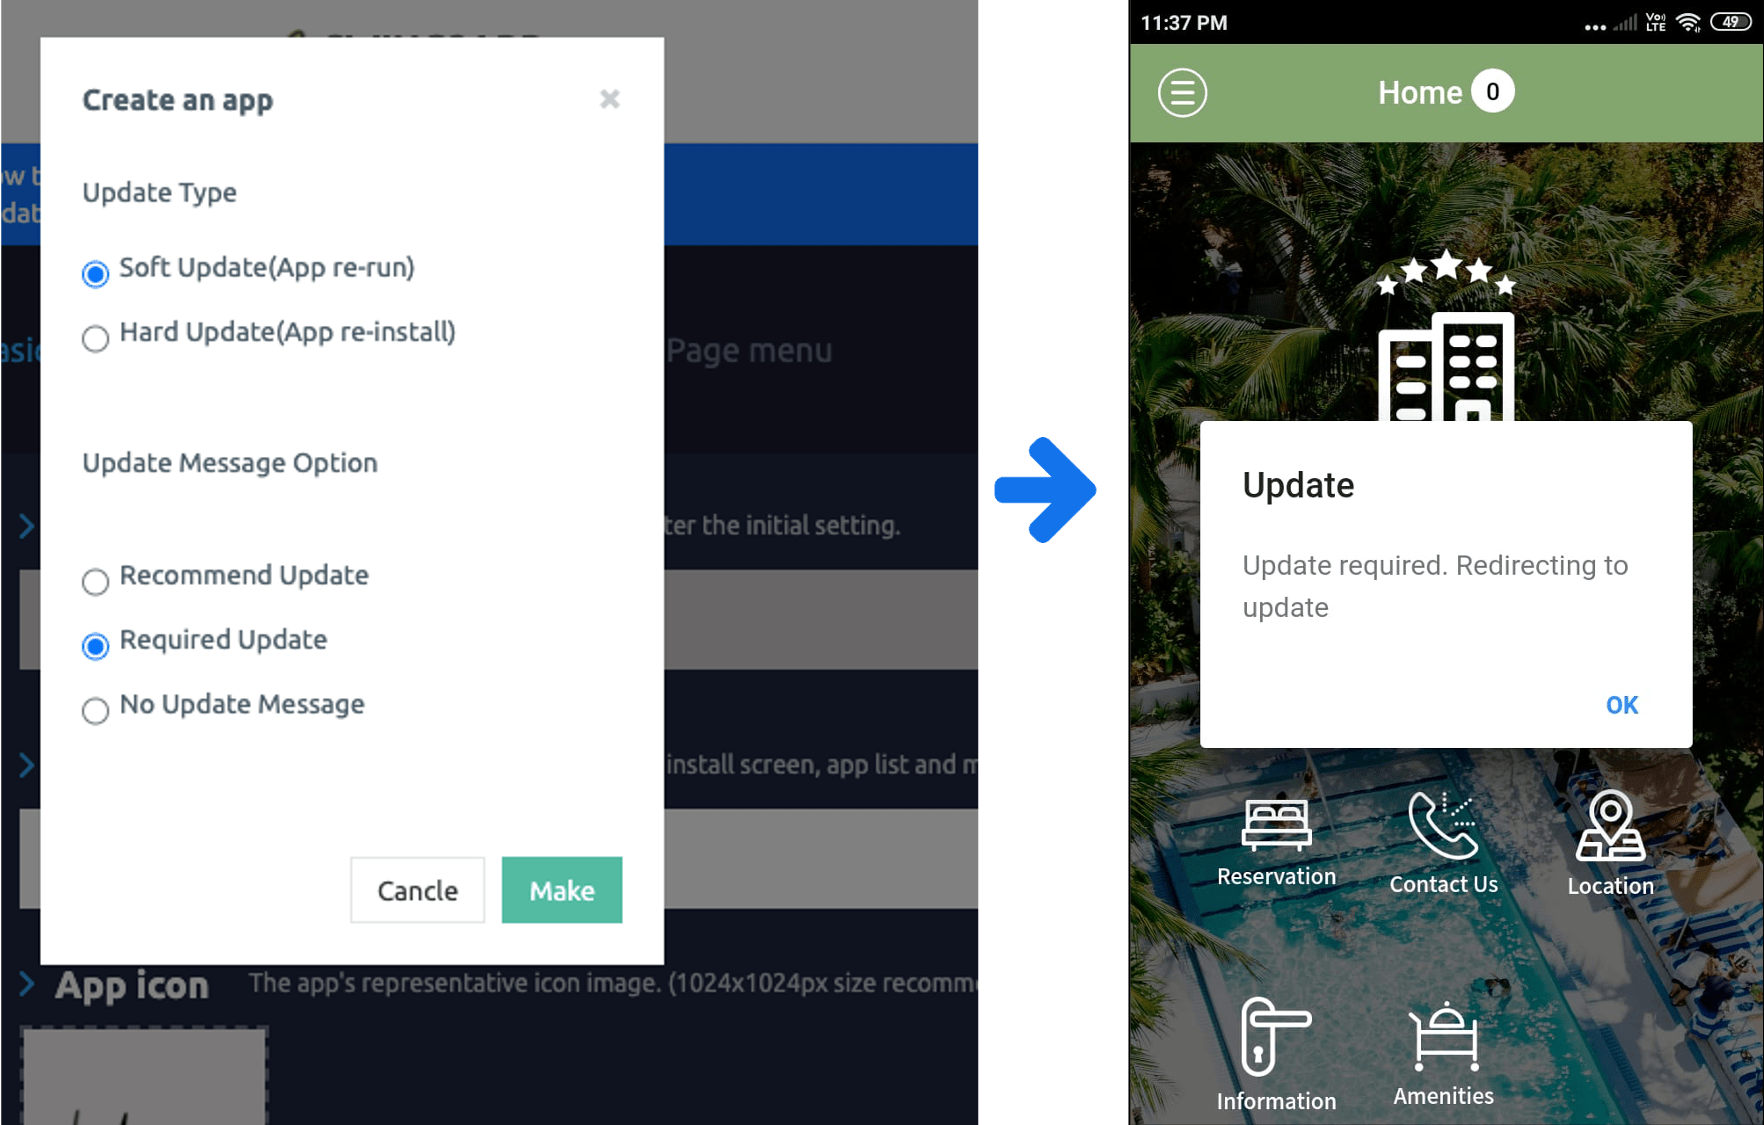
**If you select Soft Update and Required to update the app → Updates in the app will proceed immediately without asking the user.**
**If you select Soft Update and Required to update the app → Updates in the app will proceed immediately without asking the user.**

**3.Hard updates & Recommendations**
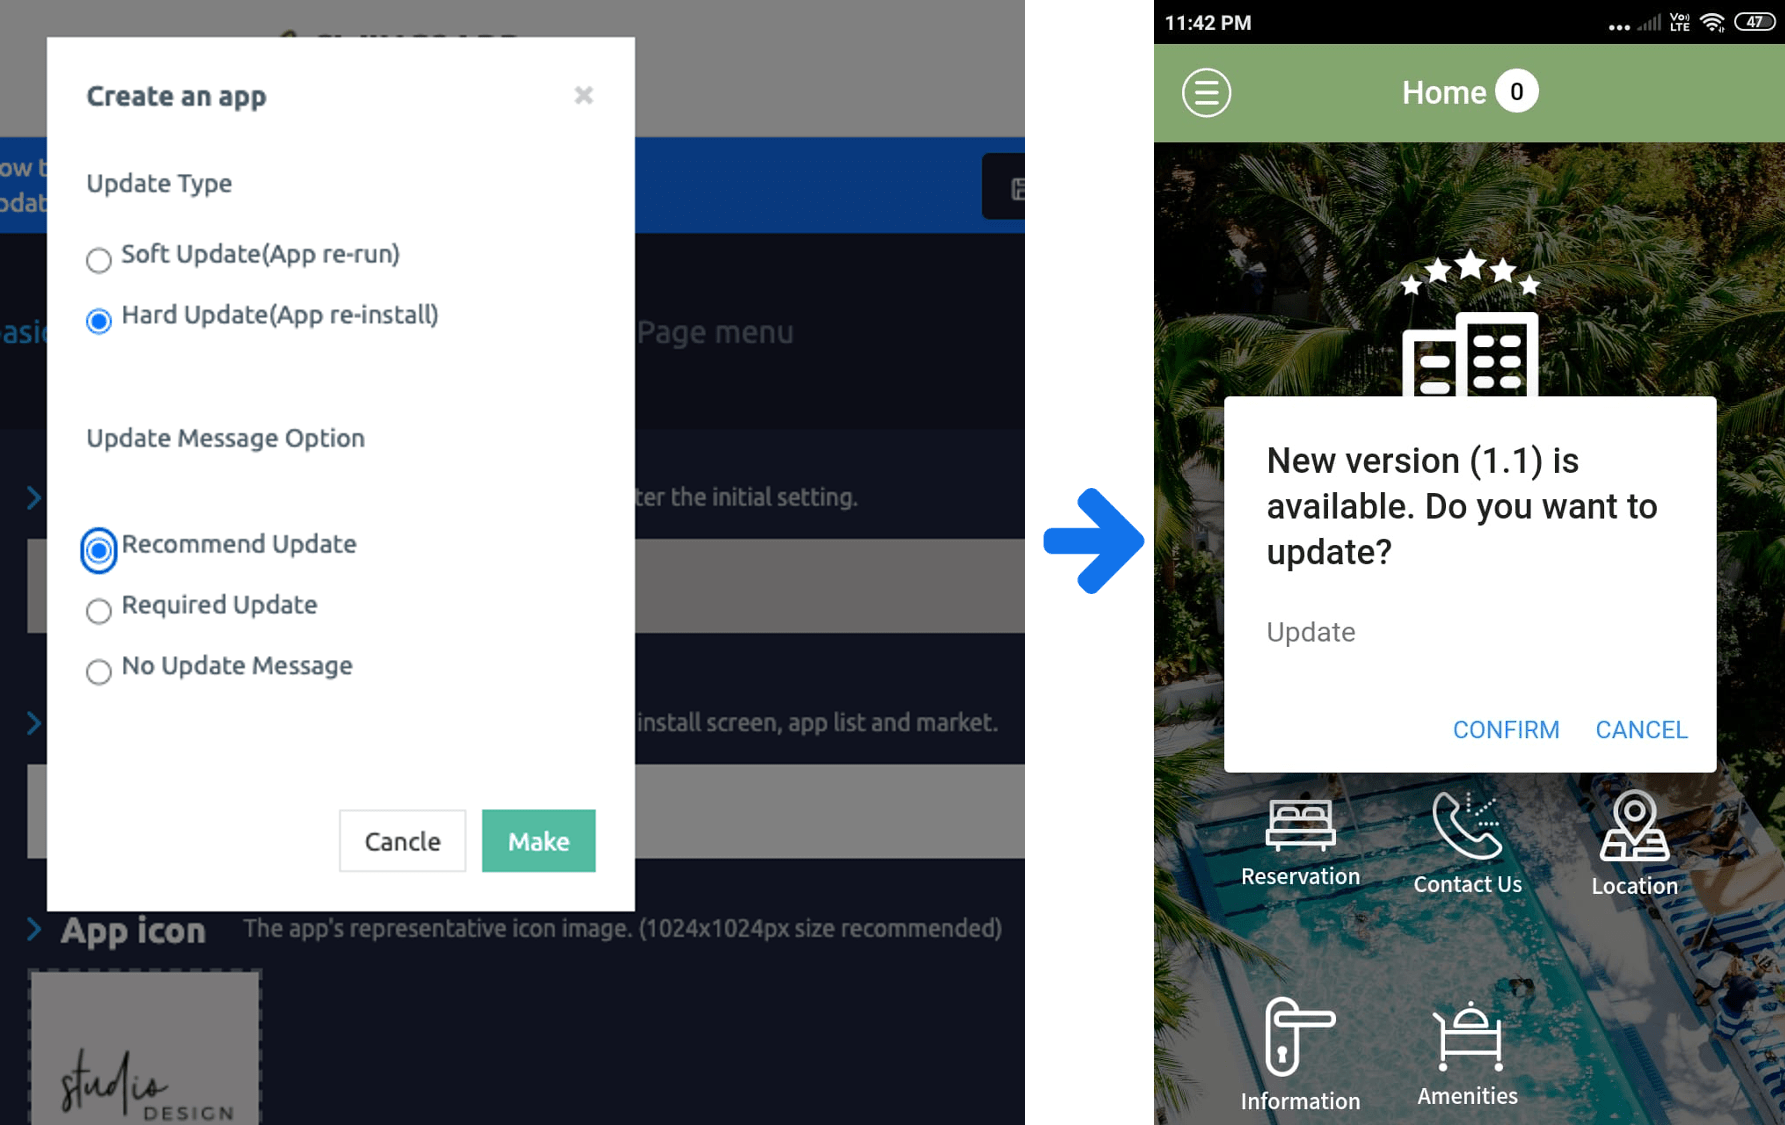
**Hard update, when selecting the recommended → A message window appears asking if you want to update, and the user must select ‘OK’ to proceed with the update.**
Since it is optional, if you select ‘Cancel’, the update will not be performed.

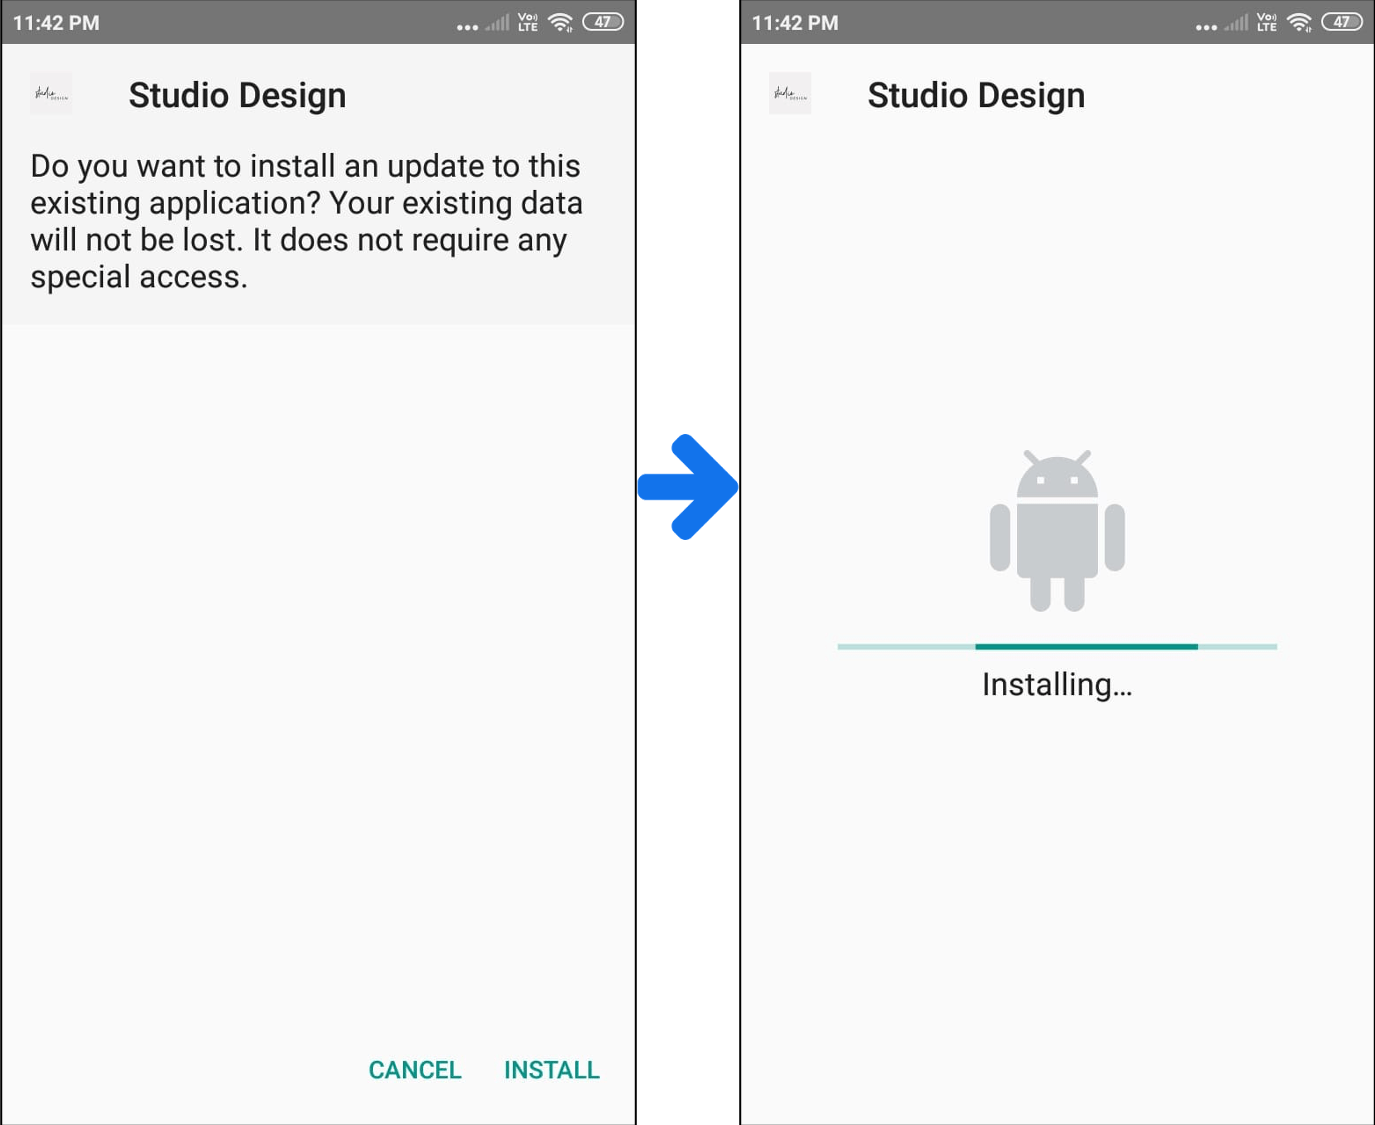
**\[Reinstallation Progress]**
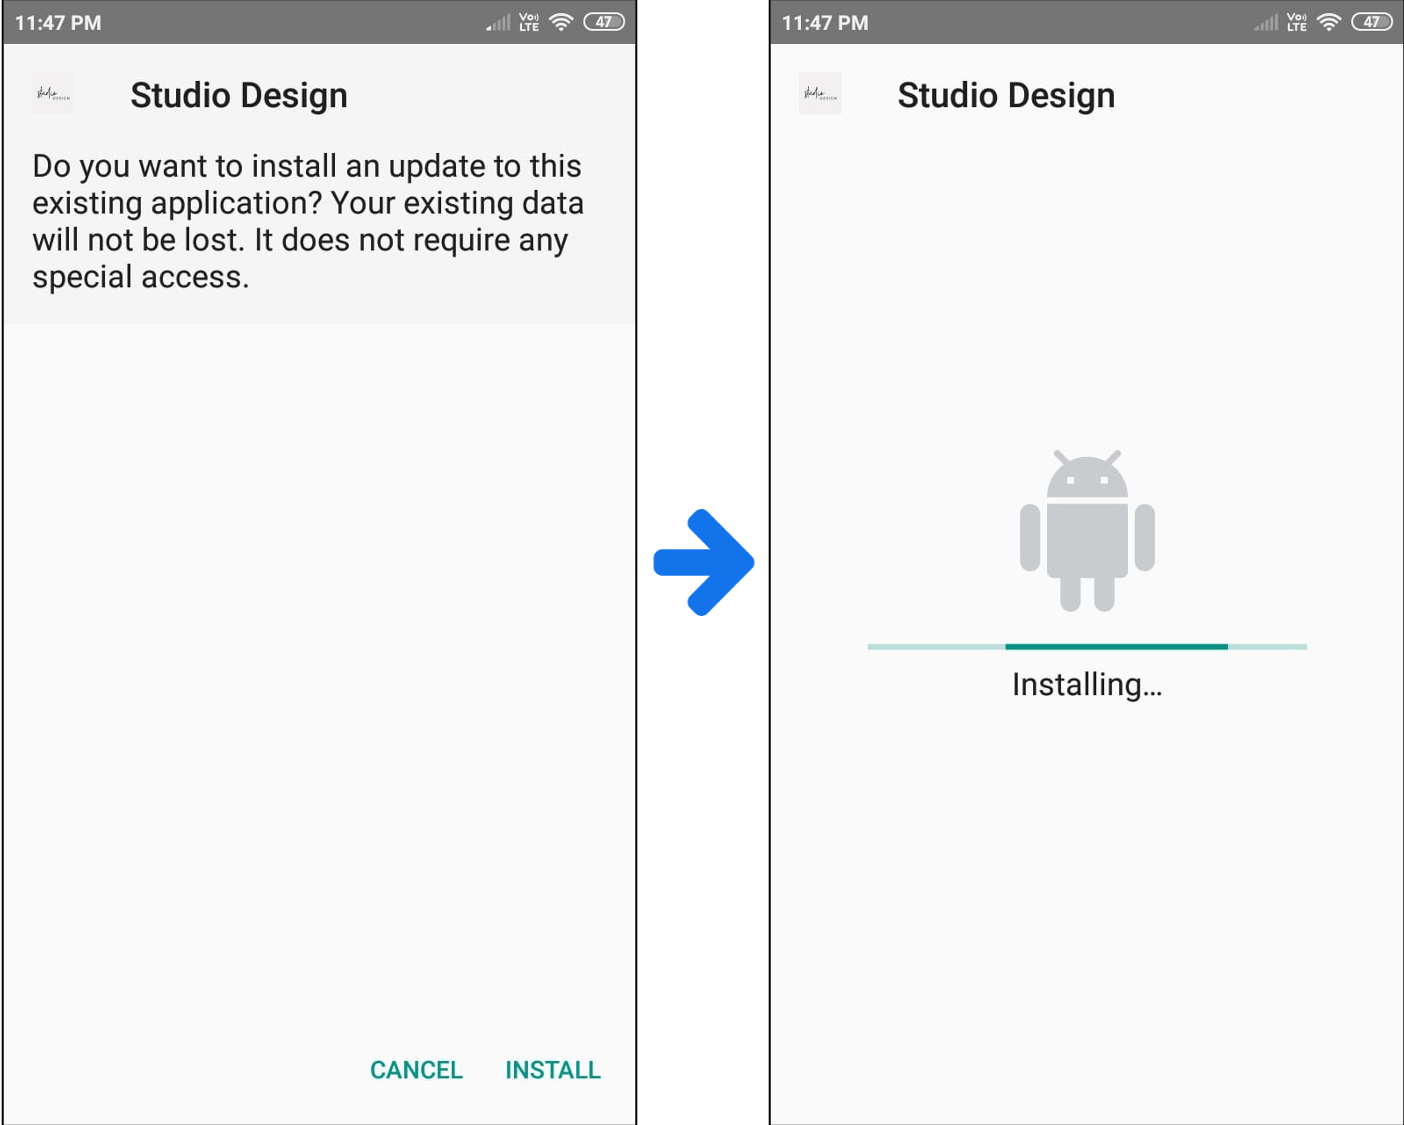
**In case of a hard update, unlike software, it moves to the mobile phone device and installs the new version of the app again.**
It will install the update of the existing application and install it again by overwriting it with the new version of the app.

**4. Hard update& Required**
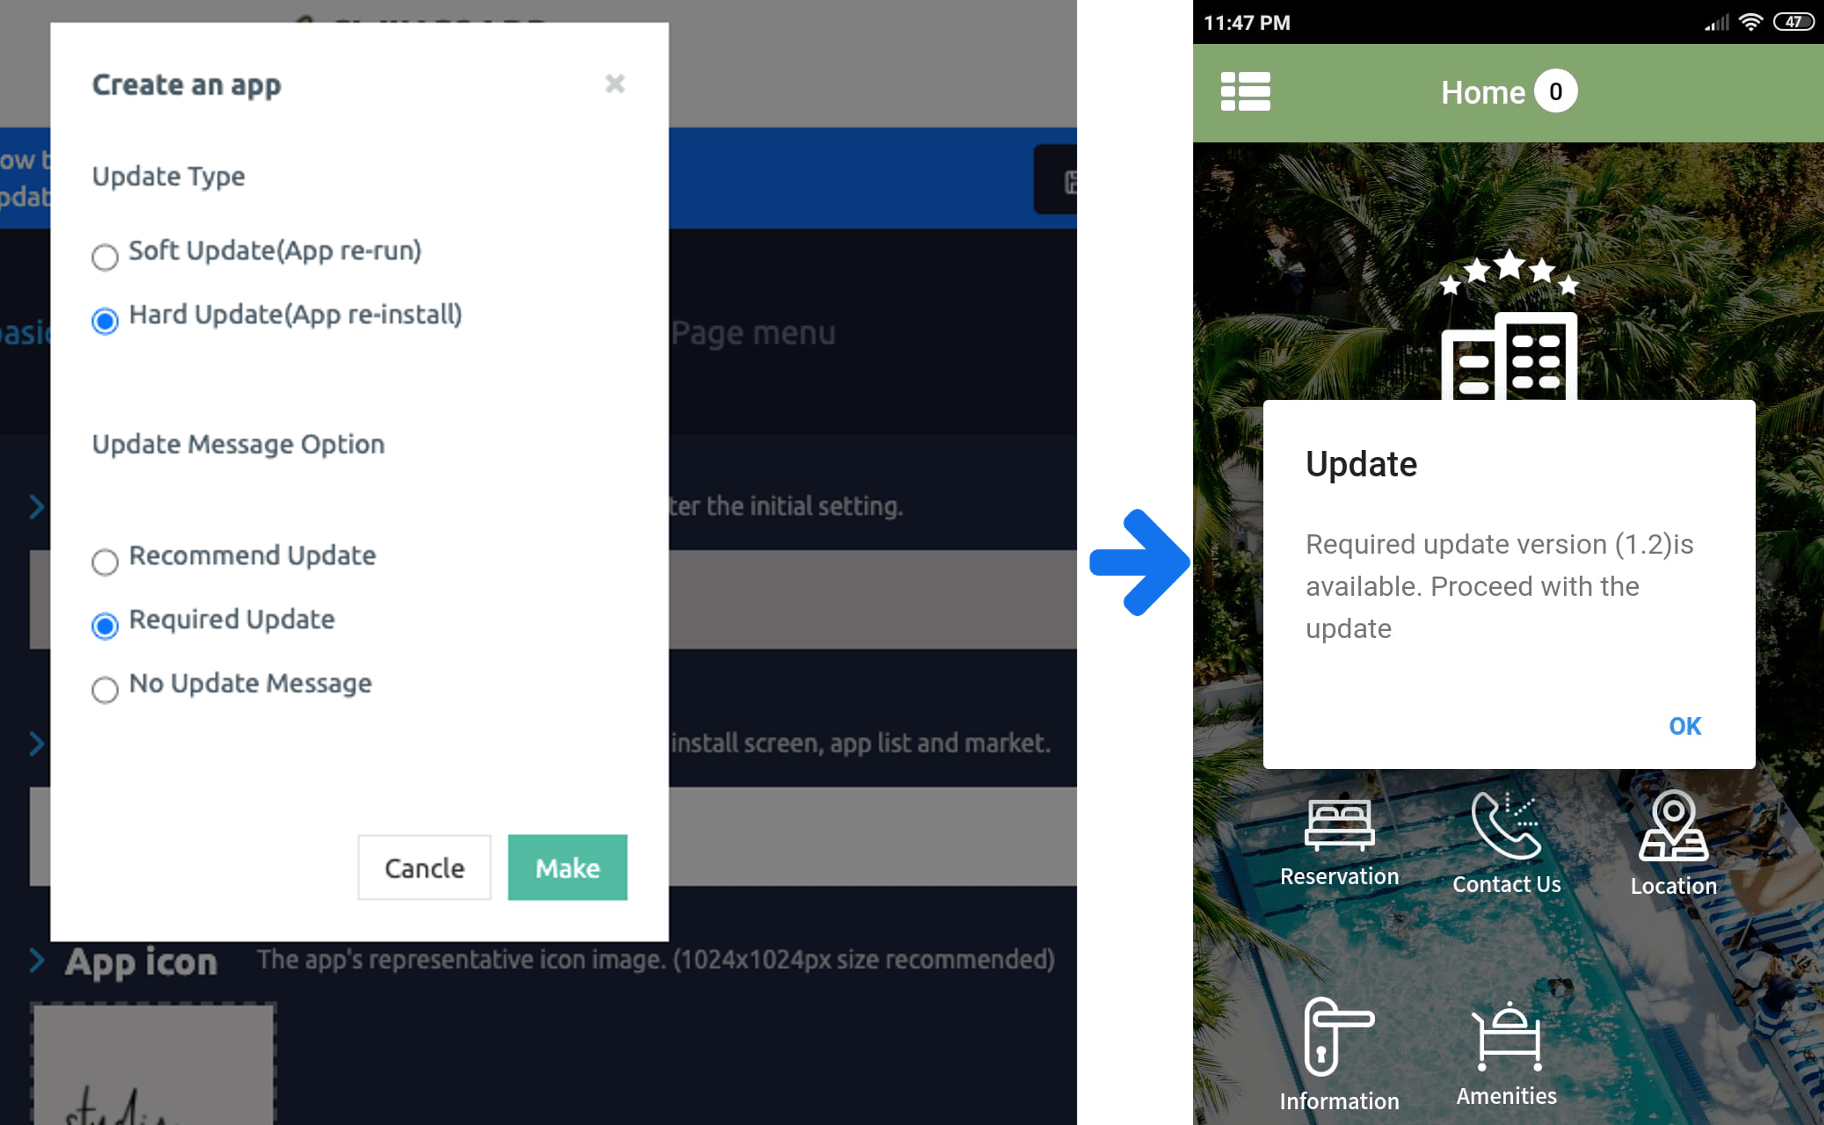
**If you select Hard Update or \[Required], the update will proceed immediately if you click OK.**

**\[Reinstallation progress]**
**Go to your phone device and install the new version of the app again.**
It will install the update of the existing application and install it again by overwriting it with the new version of the app.
**\[Information]**
You can freely edit the app created by Swing-to-App even after making the app.
**Page menu step – Contents such as menu modification and content registration are automatically reflected in the app by pressing \[Save], so there is no need to update separately.**
**Also, simply apply the various functions provided by the app operation and it will be reflected in the app immediately.**
**\*App basic information-App name, icon, standby screen image modification, design theme-prototype, skin color modification require an app update.**
Therefore, press the \[App Creation Request] button to re-create the app as a new version.
When you update to the newly produced version, the modified contents are reflected.
**\*Important\* Soft update is not an update method provided by Apple and Google.**
**Therefore, it is recommended that users who have launched the app on the Play Store or App Store do not use soft updates → proceed to hard updates and then update and use the newly created version of the app in the store.**
When making a soft update, you can receive sanctions such as the deletion of apps according to the rules of the Play Store and App Store.
Swing-to-App does not take responsibility for this option, so be sure to check the contents before proceeding.